Fully Automatic Coffee Machine OPERATION MANUAL. Item No
|
|
|
- Charity Freeman
- 5 years ago
- Views:
Transcription
1 Fully Automatic Coffee Machine OPERATION MANUAL Item No

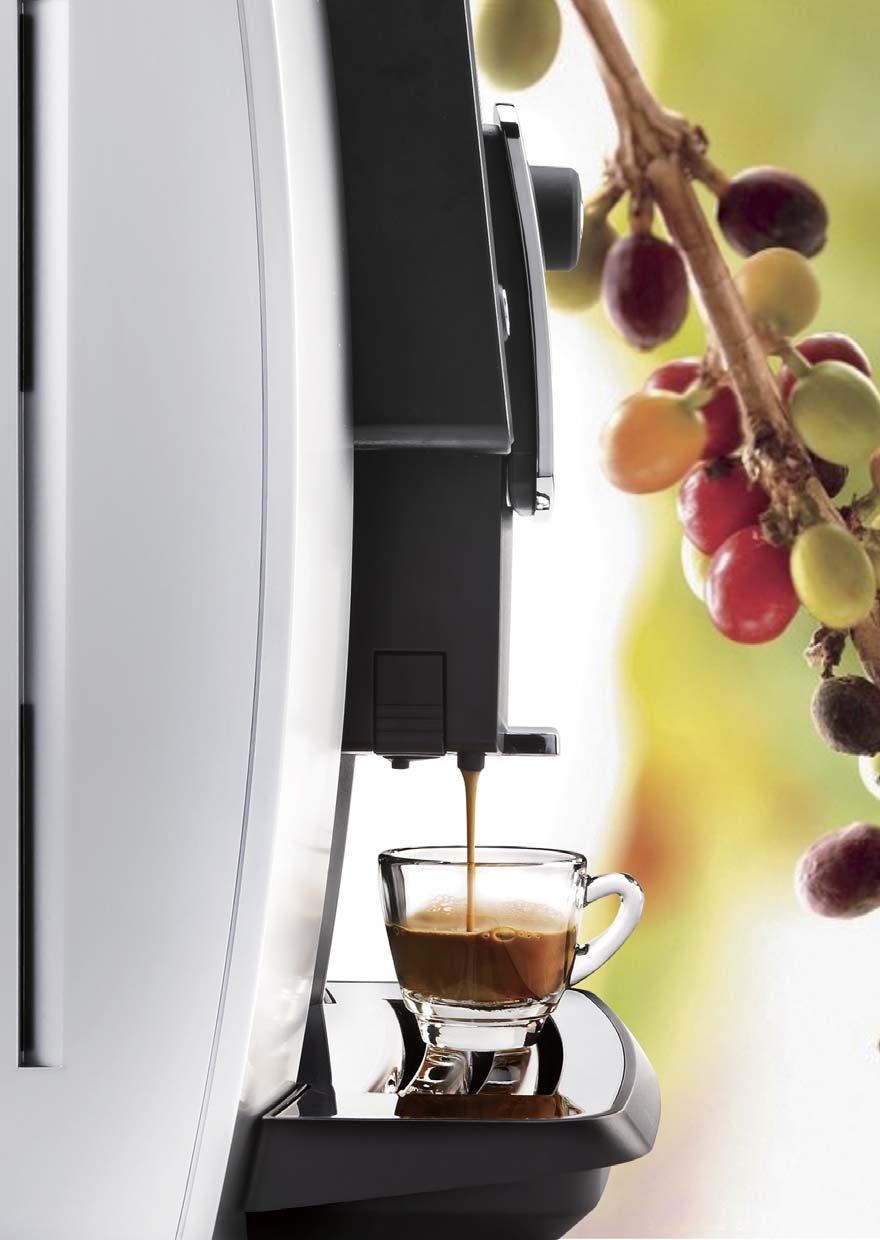
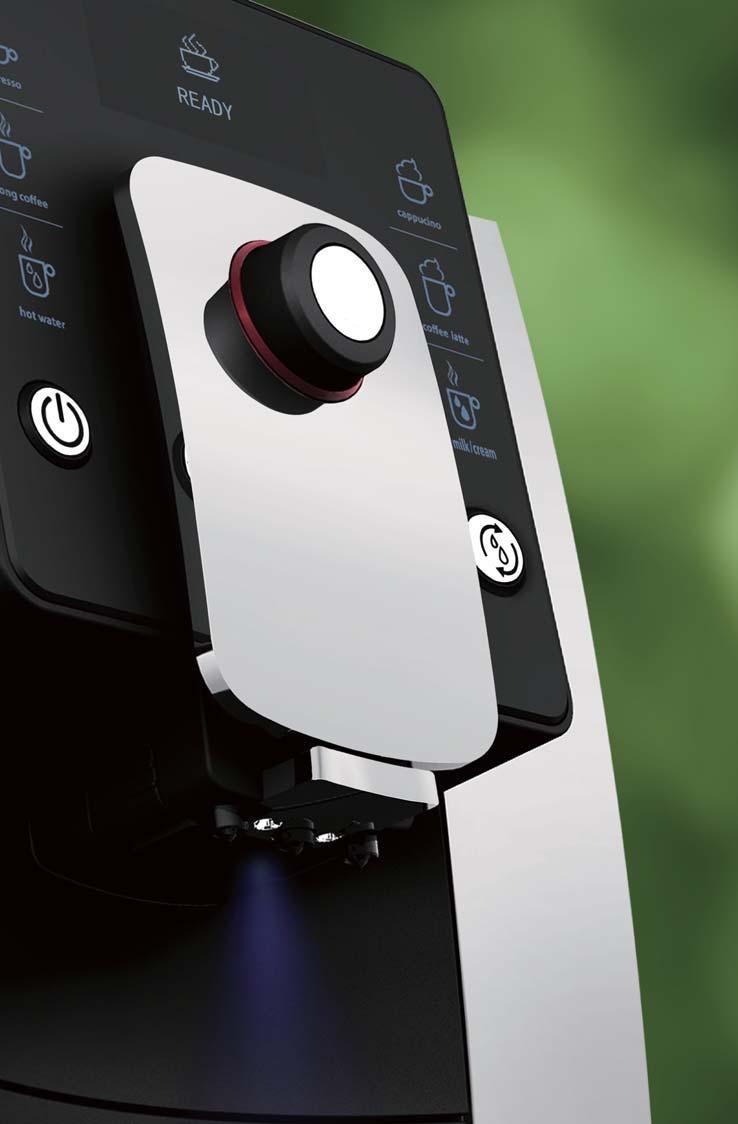
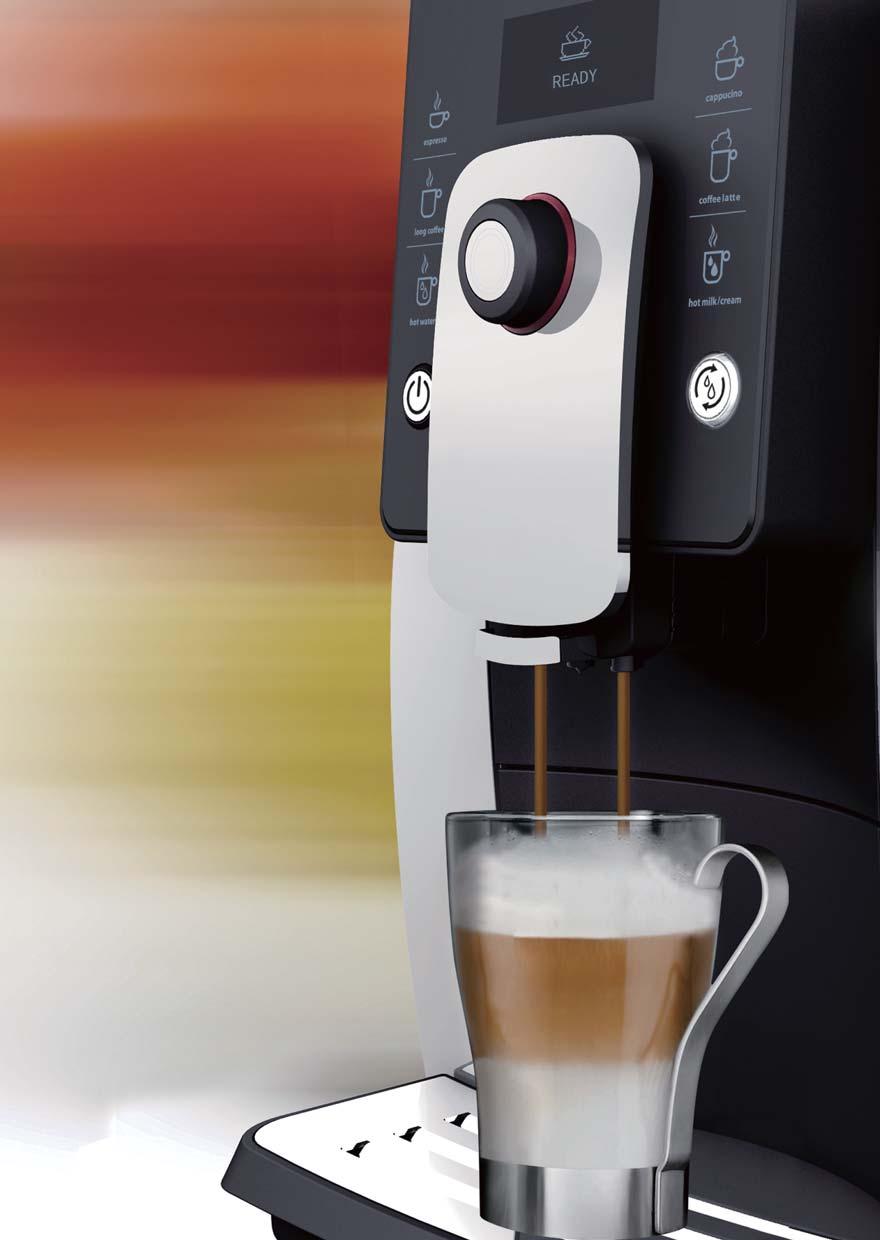
2 Italian fashion designs Once more excellent explanation of minimalist, abandon any worthless elements. With brief outlines, shows the most graceful fascination. Not just coffee machine, what s more, it is the actor of fashion. Intelligent one touch control As science and technology combines fashion, everything becomes simple and perfect. The humanized intelligent touch-screen, make everything simple. With just one touch, enjoy the aroma of coffee in a moment. Full-automatic technology Intelligent pre-brewing system makes coffee more aroma. Intelligent temperature control system makes quality more stable. Intelligent reminding system makes operation simpler. Intelligent cleaning system makes maintenance more convenient Grinding fresh coffee at anytime, anywhere In the office tea room, hotel s business center. In the airport departure lobby, lounge of conference hall, private kitchen, and so on. Wherever you are, it means more professional and convenient. In a few seconds, traditional fresh ground coffee is enjoyed freely. The most advanced milk foam system Makes milk foam more delicate and soft, to create the ultimate silky taste for you. No matter Cappuccino or Coffee latte, Just as if it s made by the gold medal barista.


3 Instructions of coffee machine parts Bean container cover 9 Bean container 2 Water tank lid 10 Coffee spout 3 Water tank 11 Handle 4 Coffee grounds container 12 Milk pipe 5 Drip tray 13 Milk frother 6 Drip tray grid 14 Hot water spout 7 Powder container cover 15 Milk and cream spout 8 Grinding wheel 16 Power cord
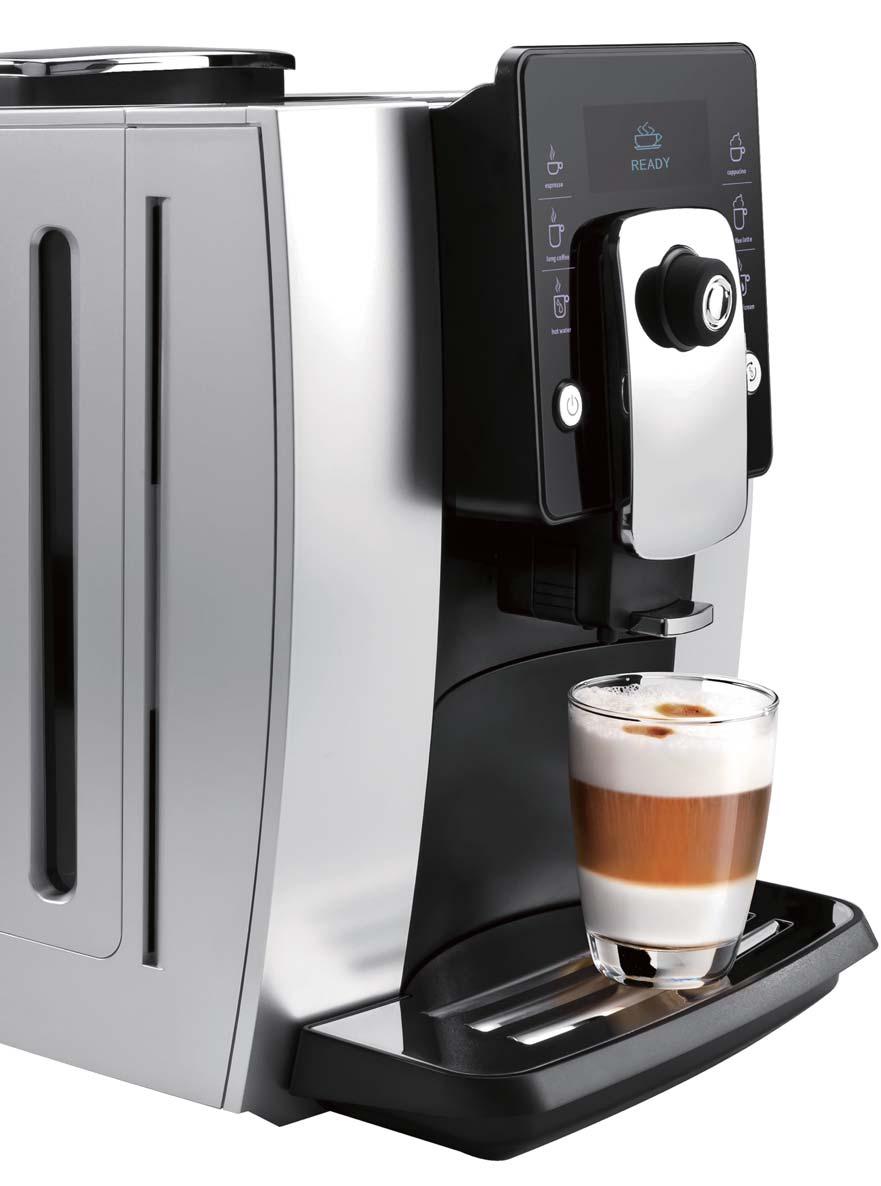
4 Coffee machine operation interface instructions. 5 1 READY Espresso icon 6 Cappuccino icon 2 Long coffee icon 7 Coffee Latte icon 3 Hot water icon 8 Hot milk/cream icon 4 Power switch 9 Cleaning button 5 Screen 10 Rotary button
5 Fully Automatic Coffee Machine OPERATION MANUAL
6
7 Safety Instructions Please see specification label on the bottom of coffee machine or specification parameters indicated in instruction manual(p53). Precautions Please do not contact with heat parts of coffee machine to avoid scalding. To avoid operator s injury caused by burn, electric shock or other unexpected reasons, please do not contact the power cord, plug, and main body with water. Children shall operate the machine under the supervision of adults. Please keep various packages, cartons, plastic bags and Styrofoam away from children s reach. Unplug from outlet when stop using and before cleaning. Allow to cool before disassembling and cleaning the coffee machine. Stop using the machine once power cord or plug is damaged. Take the machine to authorized after-sale service center for testing and repairing. Use of parts that are not explicitly recommended would result in a fire of coffee machine, electric shock, or injury to persons. Please do not use the machine outdoor. Please do not hang up the power cord to the edges of the table, for it might be abased to an electric leakage, and cause injury to operators. Please place the machine in a fixed and stable workbench, and keep far away from high temperature (e.g. gas stoves, electric cookers, induction cookers, etc). Power off the machine, until the cleaning program finished and no indication on screen, and then unplug the power. When using espresso, long coffee and hot water, liquid in high temperature will flow from coffee spout and hot water spout. Please do not touch it to avoid scalding. When using cappuccino, coffee latte, hot milk/cream, please confirm that the milk pipe has been connected from the milk frother to milk before making cappuccino, coffee latte, and hot milk/cream. Otherwise, high temperature steam may cause personal injury. 3 Warnings Never disassemble and repair the machine without authorization. If there is any errors, please sent it to authorized service center for repairing. Prohibitions Except cleaning and daily maintenance for coffee machine, if it failures, please send it to authorized after-sale service center for repairing, or contact with customer service for after-sale services. Never immerse the machine into water, and do not put the machine near the water tap or water tank. Never disassemble coffee machine without authorization, for any maintenance, please return it to Service Centre or contact after-sales service center. Never use an unmatched voltage to the electric specification of the machine; otherwise, the machine would be burnt. Only purified water in room temperature is allowed to be filled into the water tank. Never put warm water, hot water, milk or other liquid into it. Never carry or move the coffee machine while working. For moving or carrying the coffee machine, please switch it off and unplug the power cord first. The machine may release heat. Therefore, when placing the machine in the workbench, at least 3cm must be left against its surface, sides and wall side; at least 15cm must be left against its top. Prohibit placing the machine into a narrow space. As for dimension of the machine, please look up the Technical Data of User Manual (Page 53).
8 Safety Instructions Never use non-family usage detergent to wipe the machine, otherwise it may cause corrosion of coffee machine, and result in a risk of electric shock. Never use wet rag to wipe coffee machine, may result in a risk of electric shock. Never use hard edged tool or rough rag to clean the stain on the machine, it will damage the machine. To wipe the coffee machine with a rag provided is recommended. Never put instant coffee powder or cocoa powder and other mixture into the bean container or powder container. It would cause coffee machine damaged. Never fill specially treated coffee bean (e.g. cocoa, sugar coated) into the bean container, it would cause coffee machine damaged. Only roasted coffee bean is allowed to put into the bean container. Rice, soybean, chocolate bean, nut, sugar, spice etc are prohibited. Otherwise it would cause coffee machine damaged. Never wash bean container or powder container with water, it will damage the machine. Never use coffee machine in the environment temperature below 0 C. Water inside the machine will freeze and cause the coffee machine damaged. Never expose the machine in rainy, snowy, frosty environment. It would cause coffee machine damaged. If the coffee machine is damaged because of the situation that has been warned above, it is not covered in the warranty! 4 Proper operation To guarantee the coffee taste, make sure that temperature of the water filled into the water tank is at 25 or so. Coffee machine can only be used for preparing coffee, hot milk, milk foam, and hot water. Do not use it for any other intended use. We will not in charge of any responsibility for the consequences of improper use. Please carefully read all the contents of this manual, so that you can know the coffee machine sufficiently. Please keep this manual properly for looking up at any time. Safety Tips Please notice the following tips to avoid personal injury from electric shock. Do not operate the coffee machine if the appliance or the power cord is damaged. When encountering breakdowns of the machine (if any burning smell or smoke), unplug the power cord immediately and contact with service center. If the power cord coffee machine is damaged, please contact with service center. Place the coffee machine and the power cord far away from heat sources. Please don't contact power cord with sharp tools. Do not repair the coffee machine without authorization or operate it in the way that was not mentioned in this manual, to avoid personal injury. Place the coffee machine out of the reach of children. When Coffee machine is unused for long periods, unplug the power cord and put it away, so that not to trip up people or damage to the power cord. Please don't use unoriginal parts, otherwise, it may cause the machine damaged.
9 Instructions for use Reading this manual will help you familiar with the coffee machine, and use it properly. Instruction for first-time use " introduces the operation process of coffee machine step-by-step, for first-time use. Know coffee machine" will help you familiar with the coffee machine, and enjoy using it. Coffee menu " will guide you how to prepare all kinds of coffee. Encounter problem" will provide information when encountering problems. Coffee machine model This Manual is only applicable to the coffee machine of QUARZA series and the model Symbol description Non-compliance with the operation, may cause electric shock, and threat to life. Non-compliance with the operation may cause Coffee machine damaged, or personal injury. Non-compliance with the operation, may cause scalded or burn injury. This symbol, if prompted, please carefully read it. 5 This symbol, if prompted, represents recycle.
10 Catalogue 6 Safety Instructions Proper usage Instructions for use Coffee machine model 5 Symbol description 5 Instructions for first time use 8 Standard configuration 8 Power connection 8 Testing and setting water hardness 8 Fill water tank 9 Installing water filter 9 Fill beans 10 Grinding wheel 10 First-time use 10 Power on 11 Power off 12 Recognizing your Coffee machine 14 Preparing coffee by touch icon 14 Single time setting of coffee parameters 15 Setting beverage parameters and scopes 16 Coffee menu 18 Making beverages 21 Espresso 21 Long coffee 22 Hot water 22 Cappuccino 23 Coffee Latte 24 Hot milk 25 Hot cream 26 Preparing coffee with coffee powder 26 Program setting 29 Maintenance setting 29 Beverage setting 29 Water filter 34 Adjusting the water hardness setting 35 Energy-saving setting 35 Automatic power off 36 Reset 37 Information 37 Language 38 Exit 39 Cleaning and maintenance 41 Cleaning the coffee machine before operation 41 Cleaning brewing unit 41 Descaling the coffee machine 42 Cleaning coffee grounds container and drip tray 44 Cleaning water tank 45 Cleaning bean container
11 Catalogue Dismantling and cleaning the milk frother Cleaning coffee machine Display information Failures handling Transport and recycle Technical data

12 Instructions for first-time use This chapter will help you to know the basic operations and settings for your first time use Standard configuration Full-automatic coffee machine Accessory bag User manual Warranty card Wiping cloth 1 Water hardness test paper 1 Descaling powder 1 Coffee powder spoon 1 Milk pipe 2 Packing box Styrofoam packing materials Plastic PE bag Do not discard all the boxes of the coffee machine, in case to use them again to prevent the coffee machine damaging during transportation. Power conection 8 Place the coffee machine on a stable workbench that is not close to water. Keep the coffee machine far away from high temperature heat source. Be sure to use power supply that is in accord with regulation. Put the power cable at a suitable place to avoid people tripping over. Plug the power cord in the patch board. Testing and setting water hardness The harder the water is, the higher frequency the coffee machine need descaling. You need to re-test the hardness of water once you change the water resource. If the water hardness setting on the coffee machine does not match the actual water hardness, it will not give a good taste of coffee, or even damage the machine. 1: Take out the water hardness test paper from the accessory bag. 2: Put the testing part in the water for 5 seconds. 3: Take out the paper from water, and observe the color. Then set the water hardness number according to the contrast card. Please refer to P37 for water hardness setting. Water hardness test 5 sec sec. Water hardness contrast card Reaction time 10 S mg/l


13 Fill water tank First-time use Only purified water at room temperature is allowed to fill in the water tank, never fill any other liquid (e.g. warm water, hot water, milk). It will damage coffee machine. In order to ensure the taste of coffee, it is recommended to use water at 25 or so. Low temperature water will not make a good taste. To ensure healthy and the taste of coffee, please change the water in the tank every day. The amount of water in the water tank cannot exceed the height of the MAX mark. 1. Open the water tank lid. 2. Take out the water tank. 3. Fill the water tank with purified water at room temperature, and insert the tank back to the machine. 4. Cover the water tank lid Insert the water filter 9 Do not stop water filter cleaning process, thus ensuring the water filter is well cleaned and pre-brewing, and reaching the best effect of filtering. After 2 months use, the water filter will lose efficacy. There is a month indicator on the water filter. Please adjust the rotary button to the month when you insert the water filter. Please use the original model of water filters. If you need to buy one, please contact the authorized service center. Water filters can effectively filter impurities in the water and reduce the degree of water hardness. If you use a water filter, your appliance needs no descaling. 1. Adjust the date rotary button at the top of water filter to the current month. 2. Insert the water filter into the water tank


14 First-time use Fill beans Never put the coffee beans that have been specially treated (e.g. sugar, cocoa) into the bean container. Only roasted coffee beans can be put into the bean container, never put others like rice, soybeans, chocolate beans, nuts, sugar, and spices. Never put hard objects into the bean container, otherwise it will damage the grinder. The bean container cover playing a role as seal. It keeps the aroma of coffee bean maximally. Please do not lose the cover. The maximum capacity of bean container is 250g 1. Take off the bean container cover. 2. Add beans to the bean container. 3. Put on the bean container cover. Grinding wheel 10 Please adjust the fineness of coffee bean powder according to the coffee beans. Please adjust the grinding wheel when the grinder is running, or the grinder will be damaged. If your coffee beans are in dark color, it is recommended to set to rough mode. If your coffee beans are in light color, it is recommended to set to the fine mode. During making coffee, if the coffee outflows very slow or completely does not outflow, please set it to the rough mode. If the coffee outflows very quickly and the color of crema on the top is very light, please set it to the fine mode. Fine Medium Rough The fineness adjustment will come into effect after making at least 2 cups of coffee. First-time use As the machine has been tested at factory, there may be a little coffee powder left over. We promise the machine is brand new. The coffee machine will start self-testing and cleaning at the first-time use, this helps the coffee machine to achieve the best working condition, and this process cannot be skiped. During the cleaning process, some hot water will outflow from the coffee spout into the drip tray. Please pay attention to avoid contacting with the spilling hot water, not to be scalded. Please ensure the power is connected, and then press the power button.
15 First-time use Welcomes WELCOME Self-testing of the coffee machine SELF TESTING HEATING The coffee machine begins to heat up. Heating system will automatically stop when it reaches the proper temperature to make coffee or steam. CLEANING Coffee machine automatically cleans the brewing unit and both coffee spouts after heating (Automatic-clean process is to make coffee fresh enough). The coffee machine is ready to make coffee after cleaning. READY 11 Power on Every time powering on the coffee machine, it will automatically complete heating and cleaning for one time, and the process cannot be stopped. The coffee machine can only be used after finished the above cycle process. During the cleaning process, some hot water may flow out of the coffee spout into the drip tray. Please avoid contacting the spilling hot water. Please ensure the power is connected before pressing power button. WELCOME HEATING The coffee machine begins to heat up. Heating system will automatically stop when it reaches the proper temperature to make coffee or making steam.
16 First-time use CLEANING Coffee machine automatically cleans the brewing unit and both coffee spouts. (Automatic-clean process is to make the coffee fresh enough). The machine is ready. Please begin to make coffee READY Power off Every time when powering off the coffee machine, it will automatically complete cleaning process for one time, and the process cannot be stopped. This operation is to clean up the coffee pipelines and remove the coffee grounds. READY During the cleaning process, some hot water will flow out of the coffee spout into the drip tray. Avoid touching spilt hot water, so as not to be burned. When you press power button, the machine will be power off after auto cleaning. 12 Cleaning coffee machine CLEANING GOODBYE When goodbye is displayed, it means cleaning process has been completed, and the coffee machine is being switched off.

17
18 Recognizing your coffee machine Owning the coffee machine, you need just one touch to get a cup of perfect coffee instantly. Moreover, you can also set the fineness of coffee, the volume of coffee, the volume of milk, the volume of milk foam, the temperature and the volume of hot water according to your preference. Making coffee by touch icon Single time setting of coffee parameters Default parameters of beverage can be set Press the rotary button to stop making of beverage. Preparing coffee by touch icon You can make any kinds of coffee by touch icons, when the screen shows READY READY Take espresso and cappuccino for example to explain how to make coffee by touch icons. 14 Touch espresso icon, when the screen indicates as the left picture. READY Press the rotary button, when the screen indicates as the left picture. ESPRESSO ESPRESSO CAPPUCCINO When screen indicates "espresso", touch the cappuccino icon. The screen will change to the content of picture on the left. READY When screen shows "cappuccino", touch the cappuccino icon again. It will display the content of picture on the left. READY READY No operation in 10 seconds after touching any beverage icon, the screen will change to the content of picture on left.
19 Single time setting of coffee parameters Recognizing your coffee machine 8 items as bellow can be set at single time. Set the amount of coffee beans during grinding process. Set the volume of coffee when making coffee Set the making time of milk foam when making cappuccino Set the making time of milk when making latte Set the temperature of hot water before making hot water Set the hot water volume when making hot water Set the making time of hot milk when making hot milk Set the making time of hot cream when making hot cream Detail instructions You can set the fineness of coffee and the volume of beverage before or during making the beverage at single time, the setting will not be saved. Change default setting, please refers to the parameter settings(p31) STRONG When grinding the coffee beans, you can rotate the rotary button to adjust the amount of coffee beans, to left is mild, and to right is strong. The default value is normal. VOLUME 40ML When making cappuccino, milk foam making time can be adjusted by rotating the rotary button while milk foam outflows. For example the current time is 20SEC,2 cells to left to reduce to 19SEC, and 2 cells to right to increase to 21SEC. CREAM 30S When making cappuccino, milk foam making time can be adjusted by rotating the rotary button while milk foam outflows. For example the current time is 20SEC,2 cells to left to reduce to 19SEC, and 2 cells to right to increase to 21SEC. 15 MILK 30S When making coffee latte, milk making time can be adjusted by rotating the rotary button. For example, the current value of milk making time is 20SEC, 2 cells to left to reduce to 19SEC, and 2 cells to right to increase to 21SEC. VOLUME NORMAL 60ML Before making hot water, the temperature can be adjusted by rotating the rotary button. To left is low, to right is high. The default temperature is normal. When making hot water, the hot water volume can be adjusted by rotating the rotary button. For example, the current volume is 150ML, 2 cells to left to reduce to 145ML, and 2 cells to right to increase to 155ML. MILK 20S When making hot milk, hot milk making time can be adjusted by rotating the rotary button. For example, the current time is 20SEC, 2 cells to left to reduce to 19SEC, and 2 cells to right to increase to 21SEC. CREAM 20S When making milk foam, milk foam making time can be adjusted by rotating the rotary button. For example, the current time is 20SEC,2 cells to left to reduce to 19SEC, and 2 cells to right to increase to 21SEC.
20 Recognizing your coffee machine Setting up beverage parameters and range The parameters as strength, volume, temperature and time can be set for the beverages bellow. The strength and volume of espresso can be set The strength and volume of long coffee can be set The strength and volume of coffee part in cappuccino can be set. Milk foam making time can be set The strength and volume of coffee part in latte can be set. Milk and milk foam making time can be set The temperature and the volume of hot water can be set Hot milk making time can be set Hot cream making out can be set Please read the following table for the detail setting parameters and adjustment range Drinks espresso long coffee Temperature Strength Volume Around 80 Mild: Normal: Strong: Volume: ML Volume: ML cappuccino coffee Latte Around 60 Mild: Normal: Strong: Volume: ML Milk time: 3-120SEC Cream tiem: 3-120SEC hot water Low: around 60 Normal: around 70 High: around 80 Volume: ML 16 hot milk Around 40 Milk time: 3-120SEC hot cream Around 50 Cream time: 3-120SEC If you want to change the default parameters for detailed method, please refer to the parameter settings in program settings. (Page 31)
21


22 Coffee menu This chapter will help you to make kinds of milk coffee with Quarza coffee machine. Espresso Coffee bean: Cup temperature: Amount of ground powder: Brewing temperature: Volume of coffee: Moderate roasting 55 Strong 93 50ML Long Coffee 18 Coffee bean: Cup temperature: Amount of ground powder: Brewing temperature: Volume of coffee: Moderate roasting 55 Normal ML Suggest filling 100ML more hot water into the cup. Hot water High temperature: Normal temperature: Low temperature: To make black tea/green tea To drink directly To make juice or milk powder.


23 Coffee menu Cappuccino Coffee bean: Cup temperature: Amount of ground powder: Milk temperature: Milk time: Volume of coffee: Moderate roasting 55 Mild 10 15S 100ML Coffee Latte Coffee bean: Cup temperature: Amount of ground powder: Milk temperature: Milk time: Cream time: Volume of coffee: Moderate roasting 55 Mild 10 15S 15S 100ML 19 Hot milk The milk can be heated up to the perfect temperature for drinking without destroying the nutrition.

24 22 PHOTO

25 Making beverages This chapter instructs you making various kinds of coffee, hot water, hot milk and milk foam by this coffee machine. Please read the following instructions carefully to help you make high-quality beverages. The temperature of the hot water is high, please do not touch it to avoid being scalded. Before we make all kinds of coffee, please ensure READY is indicated on the display. READY Never use dark roasted coffee beans. The coffee beans should be put at dry place and avoid sunlight. Only purified water at normal temperature can be used. To make the coffee taste better, it is recommended to use water around 25. To ensure the quality of coffee, please change the water in water tank every day. Please warm the coffee cup before making coffee for better taste. Please adjust the height of the coffee spout according to the height of the cup in order to avoid coffee splashing. Adjustable height of coffee spout: mm Espresso 21 The volume of espresso is suggested between 30 to 50ml. Because of the small volume of espresso, please warm the coffee cup before making coffee. Touch the espresso icon for espresso function. ESPRESSO STRONG Press the rotary button, the grinder will begin to grind. At this time, you can adjust the amount of coffee beans by rotating the rotary button. Default amount of coffee beans for espresso: VOLUME 40ML During making coffee, you can adjust the volume of coffee by rotating the rotary button. Default volume of espresso: 50ML ENJOY! When the screen shows as the left picture, it means the espresso is ready, please enjoy it.

26 Making beverages Long coffee The taste of long coffee is much lighter than espresso. Touch the long coffee icon for long coffee function. LONG COFFEE READY STRONG Press the rotary button, the grinder will begin to grind. At this time, you can adjust the amount of beans by rotating the rotary button. Default amount of coffee beans for long coffee: VOLUME 140ML During making coffee, you can adjust the volume of coffee by rotating the rotary button. Default volume of long coffee: 150ML ENJOY! When the screen indicates as the left picture, it means the long coffee is ready, please enjoy it. 22 Hot water Hot water can be adjusted to three temperature level, which are high temperature, medium temperature and low temperature. NORMAL Touch the hot water icon for hot water function. Default temperature level of the hot water: normal temperature. HIGH When the hot water is at the medium grade, you can adjust the hot water to high temperature by rotating the rotary button to the right side. LOW When the hot water is at the normal level, you can adjust the hot water to low temperature by rotating the rotary button to the left side. VOLUME 60ML During making hot water, you can adjust the volume of hot water by rotating the rotary button. Default volume of hot water: 200ML
27 Cappuccino Making beverages When making cappuccino, steam will erupt from the spout, please be careful to avoid being scalded. When making cappuccino, coffee latte, hot milk and milk foam, please ensure the milk frother has been set up in the machine and connected to the milk pipe; please insert the milk pipe into the milk before making. It will achieve the best foam quality if the milk temperature is below 10. One electric rapid heater controls the steam separately, and it needs to be heated under energy saving mode, and this process cannot be skipped. Touch the cappuccino icon for cappuccino function. CAPPUCCINO Produce the temperature is not high enough to produce steam, the electric rapid heater will begin to heat. 1 HEATING CAPPUCCINO READY When the screen indicates as the left picture, it means the heating process is completed. MILK 23 STRONG Press the rotary button, the grinder will begin to grind. At this time, you can adjust the amount of coffee beans by rotating the rotary button. Default amount of coffee beans for cappuccino: 2 When the screen indicates as the left picture, it begins to make cream. CREAM 20S MILK CREAM 30S During making cream, you can adjust the volume of cream by rotating the rotary button. Default time for making cream: 20s 3 When the screen indicates as the left picture, it begins to make coffee. VOLUME 110ML VOLUME 140ML During making coffee, you can adjust the volume of coffee by rotating the rotary button. Default volume of coffee: 100ML MILK


28 When the screen indicates as the left picture, it means the cappuccino is ready, please enjoy it. 4 ENJOY! coffee Latte Please use a bigger cup to make coffee latte. When making coffee latte, steam will erupt from the spout, please be careful to avoid being scalded. Touch the coffee latte icon for coffee latte function. COFFEE LATTE 24 If the temperature is not high enough to make steam, the electric rapid heater begins to heat. HEATING 1 When the screen indicates as the left picture, it means the heating of coffee latte is completed. LATTE READY STRONG Press the rotary button, the grinder will begin to grind. At this time, you can adjust the amount of coffee beans by rotating the rotary button. Default amount of coffee beans for coffee latte: When the screen indicates as the left picture, it begins to make hot milk. 2 MILK MILK 10S MILK 10S During making hot milk, you can adjust the volume of hot milk by rotating the rotary button. Default time for making hot milk: 15S MILK When the screen indicates as the left picture, it begins to make cream. CREAM 20S

29 Making beverages CREAM 20S During making cream, you can adjust the making time of cream by rotating the rotary button. Default time for making cream: 15S 3 When the screen indicates as the left picture, it begins to make coffee. MILK VOLUME 110ML VOLUME 110ML During making coffee, you can adjust the volume of coffee by rotating the rotary button. Default volume of coffee: 100ML 4 When the screen indicates as the left picture, it means the cappuccino is ready, please enjoy it. ENJOY! Hot milk When making hot milk, steam will erupt from the spout, please be careful to avoid being scalded. 25 Touch the Hot milk/cream icon, and rotate the rotary button for hot milk function. HOT MILK HEATING Press the rotary button to start If the temperature is not high enough to make steam, the electric rapid heater begins to heat. HOT MILK READY When the screen indicates as the left picture, it means the heating of hot milk is completed. MILK 30S During making hot milk, you can adjust the making time of hot milk by rotating the rotary button. Default time for making hot milk: 20SEC ENJOY! When the screen indicates as the left picture, it means the hot milk is ready, please enjoy it.
30 Making beverages Hot cream Touch the Hot milk/cream icon, and rotate the rotary button for cream function. CREAM HEATING Press the rotary button to start; if the temperature is not high enough to make steam, the electric rapid heater begins to heat. When the screen indicates as the left picture, it means the heating of cream is completed. CREAM READY CREAM 30S During making cream, you can adjust the making time of cream by rotating the rotary button. Default time for making cream: 20S 26 ENJOY! When the screen indicates as the left picture, it means the cream is ready, please enjoy it. Preparing coffee with coffee powder You can choose this function if you want to make coffee with coffee bean powder. Prohibit filling other mixtures such as instant coffee powder or cocoa powder in the powder container. Otherwise it will damage the machine. Please use the coffee powder spoon provided to get coffee bean powder, and you can only fill one spoon of the powder each time. Please put the coffee powder spoon into the accessory bag after using to avoid missing. Do not fill the coffee bean powder into the coffee bean container, otherwise, it will damage the machine. 1 MAX Do not rinse the powder container with water, or it will result in operator s injury by electric shock. Please use proper grounded coffee powder for espresso. The process of using coffee bean powder to make coffee only skips the process of grinding coffee beans, other operations are the same as making espresso, long coffee, cappuccino, and coffee latte. This chapter illustrates with espresso.


31 USE POWDER Open the coffee bean powder lid Making beverages Fill POWDER USE POWDER Fill 1 spoon of coffee bean powder in the powder container, and close the lid. CLOSE COVER SELECT COFFEE ROTARY TO CANCEL When the screen indicates as the left picture, please choose one of the four coffee drinks. Take espresso for example, to make espresso with coffee bean powder. SELECT COFFEE 请选择咖啡 ROTARY TO CANCEL When the screen indicates as the left picture, press the rotary button to make espresso. 按中间按钮开始 ESPRESSO VOLUME 40ML During making coffee, you can adjust the volume of coffee by rotating the rotary button. Default volume of espresso: 50ML 意式浓缩咖啡 ESPRESSO When the screen indicates as the left picture, it means the espresso is ready, please enjoy it. 27 ENJOY! CANCEL If you want to cancel making coffee after fill in coffee bean powder, please continue making coffee first, and then press the rotary button to stop during making coffee.

32
33 Program setting This chapter will give instructions on program setting. When ensuring the coffee machine shows READY, press the rotary button for two seconds, then you can enter into the program setting menu. Maintenance setting Please read the detailed instructions about rinsing the brewing unit and decalcifying on Page 43. Beverage setting This chapter will instruct you how to set beverages. The setting parameters include coffee taste strength, amount of coffee, temperature of hot water, amount of hot water, time of making hot milk, time of making hot cream. The range of beverage settings is instructed on Page 23. The parameters accomplished by beverage setting will be the default values for each beverage. 1. Epresso setting 2. Long coffee setting 3. Hot water setting 4. Cappuccino setting 5. Coffee latte setting 6. Hot milk setting 7. Hot cream setting 29 Espresso setting BEVERAGE SETTING CHOOSE BEVERAGE ROTARY TO RETRUN After entering the program setting, turn the rotary button until BEVERAGE SETTING option appears, and then press the rotary button. When the screen shows as the right picture (six beverage icons flickering at the same time), it indicates that the machine has entered into the beverage setting program. CHOOSE BEVERAGE ROTARY TO RETRUN Touch the espresso icon, and press the rotary button to start to set espresso. ESPRESSO
34 Program setting STRENGTH When the screen shows as the left picture, start to set up the grinding amount of coffee bean. By turning the rotary button, you can adjust the amount of coffee beans. ESPRESSO VOLUME 40ML When the screen shows as the left picture, start to set up the volume of coffee. By turning the rotary button, you can adjust the amount of coffee. CONFIRMED Press the center rotary button to confirm setting. When the screen appears as the left picture, it indicates espresso setting is completedd. Long coffee setting The procedure of setting Long coffee is the same as Espresso. We will not instruct it in this section any more. 30 Hot water setting BEVERAGE SETTING After entering the program setting, turn the rotary button until the BEVERAGE SETTING option appears, and then press the rotary button. CHOOSE BEVERAGE ROTARY TO RETRUN When the screen shows as the left picture, it indicates that the machine has entered into the beverage setting program. HOT WATER Touch the hot water icon, and press the rotary button to start setting hot water. HOT WATER NORMAL VOLUME 60ML When the screen shows as the left picture, start to set up the temperature of hot water. By turning the rotary button, you can adjust the temperature of hot water. After the adjustment, press the rotary button to confirm setting. When the screen shows as the left picture, start to set up the volume of hot water. By turning the rotary button, you can adjust the volume of hot water. NORMAL

35 Program setting Press the rotary button to confirm setting, when the screen shows as the left picture, it indicates hot water setting is completedd. CONFIRMED Cappuccino setting After entering the program setting, turn the rotary button to BEVERAGE SETTING option, then press the rotary button. BEVERAGE SETTING CAPPUCCINO CHOOSE BEVERAGE When the screen shows as the left picture, it indicates that the machine has been into the beverage setting program. ROTARY TO RETRUN Touch the cappuccino icon. Press the rotary button to start to set cappuccino. CAPPUCCINO STRENGTH STRENGTH VOLUME 40ML When the screen shows as the left picture, start to set the grinding amount of coffee beans. By turning the rotary button, you can adjust the amount of coffee bean powder. After confirmation, press the rotary button to finish setting. When the screen shows as the left picture, start to set the volume of coffee for cappuccino. By turning the rotary button, you can adjust the volume of coffee. 31 CREAM TIME 30S When the screen shows as the left picture, start to set the cream making time by turning the rotary button, you can adjust the cream making time. VOLUME 40ML When the screen shows as the left picture, it indicates cappuccino setting is completed. CONFIRMED Coffee latte setting BEVERAGE SETTING After entering the program setting, turn the rotary button to BEVERAGE SETTING option, then press the rotary button.
36 Program setting CHOOSE BEVERAGE ROTARY TO RETRUN When the screen shows as the left picture, it indicates that the machine is in the beverage setting program. COFFEE LATTE Touch the coffee latte icon, press the rotary button, and start to set coffee latte. COFFEE LATTE STRENGTH When the screen shows as the left picture, start to set the amount of grinding coffee beans. By turning the rotary button, you can adjust the amount of coffee beans. After the adjustment, press the rotary button to confirm. STRENGTH VOLUME 40ML When the screen shows as the left picture, start to set the volume of coffee. By turning the rotary button, you can adjust the volume of coffee. MILK TIME 30S When the screen shows as the left picture, start to set the time of coffee latte. By turning the rotary button, you can adjust the milk making time. VOLUME 40ML 32 CREAM TIME 30S When the screen shows as the left picture, start to set the milk foam making time. By turning the rotary button, you can adjust the milk foam making time. When the screen shows as the left picture, it indicates coffee latte setting is completed. CONFIRMED Hot milk setting After entering the program setting, turn the rotary button to BEVERAGE SETTING option, then press the rotary button. MILK BEVERAGE SETTING CHOOSE BEVERAGE ROTARY TO RETRUN When the screen shows as the left picture, it indicates that the machine has been into the beverage setting program.
37 Program setting Touch the hot milk icon, turn the rotary button, choose the hot milk setting, press the rotary button. And start to set hot milk. HOT MILK MILK TIME 30S MILK TIME 30S When the screen shows as the left picture, it starts to set the hot milk making time. By turning the rotary button, you can adjust the hot milk making time. CONFIRMED Press the rotary button to confirm the setting. When the screen shows as the left picture, it indicates hot milk setting is completed. Cream setting After entering the program setting, turn the rotary button to BEVERAGE SETTING option, then press the rotary button. BEVERAGE SETTING CREAM 33 CHOOSE BEVERAGE When the screen shows as the left picture, it indicates that the machine has been into the beverage setting program. ROTARY TO RETRUN CREAM Touch the hot cream icon, turn the rotary button, and choose the cream setting. Then press the rotary button to start to set cream. CREAM TIME 30S When the screen shows as the left picture, it starts to set the cream making time. By turning the rotary button, you can adjust the cream making time. CREAM TIME 30S CONFIRMED Press the rotary button to confirm. When the screen shows as the left picture, it indicates cream setting is completed.
38 Program setting Water filter This chapter will instruct you how to change and install the water filter. Please use authorised specifying water filter. If you need to buy one, please contact with service center. 1 Installing the water filter FILTER After entering the program setting, turn the rotary button to WATER FILTER option, then press the rotary button. INSTALL FILTER Turn the rotary button until the INSTALLING THE WATER FILTER appears. Press the rotary button. 2 INSERT FILTER Take out the water filter, and set the month information on the water filter to current month, and insert it into water tank. 34 PRESS RINSE After installing the water filter, press the rinsing button, then it starts to rinse the water filter. It needs about 500ML water to rinse the water filter. 3 CLEANTING WATER FILTER When the water filter rinsing process is completed, the coffee machine menu will be back to WATER FILTER option. replace water filter WATER FILTER After entering the program setting, turn the rotary button to WATER FILTER option. Then press the rotary button. REPLACE FILTER Turn the rotary button to REPLACE FILTER option, and press the rotary button.
39 INSERT FILTER Remove the water filter from water tank. Adjust the month information on the new water filter to the current month, and insert it into water tank. Program setting PRESS RINSE After changing the water filter, press the rinsing button. It starts to rinse the water filter. It needs about 500ML water to rinse the water filter. CLEANTING WATER FILTER When the water filter rinsing process is completed, the coffee machine will return to WATER FILTER option. Adjusting the water hardness setting Please refer to Page 10 for how to test the water hardness, and please adjust the water hardness setting according to the test result by the water hardness test paper. The factory default setting: WATER HARDNESS After entering the program setting, please turn the rotary button to the WATER HARDNESS option, and then press the rotary button. 35 HARDNESS By turning the rotary button, you can adjust water hardness parameters to: By pressing the rotary button to confirm the selection, the setting is completed. CONFIRMED WATER HARDNESS After completing the setting, the machine will return to the WATER HARDNESS option. Energy-saving setting In the energy-saving mode, the machine needs 30 seconds to warm up and then to make Cappuccino, Coffee Latte, Hot milk and Cream. While for normal mode, making above beverages without waiting heat up. The normal mode is more energy consumption than the energy-saving mode. The factory default setting of the machine is normal mode.
40 Program setting After entering the program setting, please turn the rotary button to ECO SETTING option, then press the rotary button. ECO SETTING ECO MODE Press the rotary button after turning the rotary button to ECO MODE option. NORMAL MODE Press the rotary button after turning the rotary button to the NORMAL MODE option After pressing the rotary button to confirm the selection, the setting is completed. CONFIRMED After completing the setting, the machine menu will return to the ECO SETTING option ECO SETTING 36 Automatic switch-off By setting the machine to automatically switch off, it can save energy. The machine s default switch off time is 2 hours, which means the machine will automatically switches off after power on 2 hours. The setting range of automatic switch-off is from 15 minutes to 15 hours. AUTO OFF After entering the program setting, please turn the rotary button to the Auto-off option. Then press the rotary button. 1 HOUR Turning the rotary button to adjust the automatically switch off time. By pressing the rotary button to confirm the selection, the setting is completed. CONFIRMED After completing the setting, the machine menu will return to the Auto-off option. AUTO-OFF
41 Reset Program setting This function will reset all the menu setting and default beverage parameters to the factory settings (except the language options). In addition, the information options will not be reset. RESET After entering the program setting, please turn the rotary button to RESET option then press the rotary button. YES NO ARE YOU SURE By turning the rotary button to confirm reset then setting is completed. After completing the setting, the machine menu will return to the RESET option. RESET Information In this program you can view the information on numbers of produced each drinks, total drinks numbers, and maintenance times. 1. Total numbers on produced drinks 2. Numbers of produced espresso 3. Numbers of produced long coffee 4. Numbers of produced hot water 5. Numbers of produced cappuccino 6. Numbers of produced coffee Latte 7. Numbers of produced coffee by coffee powder 8. Numbers of produced hot milk 9. Numbers of produced cream 10. Numbers of rinsing operations 11. Numbers of rinsing brewing unit operations 12. Numbers of decalcifying operations 13. Numbers of installing and changing the water filter 37 At the first-time use, there is already a number of produced beverages because each coffee machine has been tested before out factory. INFORMATION After entering the program setting, turn the rotary button to INFORMATION option then press the rotary button. VERSION HMI:V9.19 CONTROL:V10.11 You can view the program version number by turning the rotary button.
42 Program setting NUMBER OF USE You can view the number statistics by turning the rotary button, and view the total numbers of produced beverages and the times of maintenance programs performed by pressing the rotary button. TOTAL AMOUNT The total numbers of produced beverages appears first on the screen. 502 AMOUNT OF ESPRESSO 100 By turning the rotary button, the number of produced espresso shows on the screen, then turn the rotary button continuously, you can view the number of other produced beverages. You can return to the previous menu by pressing the rotary button. 语言 INFORMATION After turning the rotary button to return option, press the rotary button to return to INFORMATION option. 38 Language You can set the language of coffee machine to following languages: 1. Chinese 2. English The default language of the coffee machine is Chinese. CHOOSE LANGUAGE After entering the program setting, turn the rotary button to CHOOSE LANGUAGE option, then press the rotary button. 中文 EN Confirm the selection by pressing the rotary button to set it to Chinese. 中文 EN Confirm the selection by pressing the rotary button to set it to English. 设置完成 When pressing the rotary button to select Chinese, the machine s screen is Chinese interface.
43 CONFIRMED When pressing the rotary button to select English, the machine s screen is English interface. Program setting CHOOSE LANGUAGE After setting to English interface, the machine menu will return to the CHOOSE LANGUAGE option. EXIT If you want to exit program setting, please select this program item to return to main menu. 退出 EXIT After entering the program setting, please turn the rotary button to the EXIT option. Then press the rotary button. After completing setting, the machine will return to READY. READY 39
44
45 Cleaning and maintenance This chapter will instruct you how to clean and maintain the coffee machine. Paying attention to daily maintenance of coffee machine, not only ensure the taste of each cup of coffee, but also extend the life of the coffee machine. Cleaning the coffee machine before operation This chapter will instrut you how to clean and maintain the coffee machine. When making coffee, press the cleaning button before the cleaning light is lit. It will pre-heat the brewing unit and inner pipeline, to improve the taste of the coffee next time. Cleaning function must start in the READY state. READY When the coffee machine is in READY status and the cleaning indicator light is not lit, press the cleaning button to start cleaning the brewing unit and coffee spout. READY 41 CLEANING The process of cleaning coffee machine cannot be interrupted, and it will automatically return to READY status after cleaning. Cleaning the brewing unit After a long-term use, there will be some coffee bean powder left on the brewing unit. Remove the left powder by clean the brewing unit. The process of cleaning brewing unit takes about 3 minutes. MAINTENANCE After entering the program settings, turn the rotary button to the "MAINTENANCE" option, and press the rotary button.

46 Cleaning and maintenance CLEAN When the screen shows the picture as left, it indicates cleaning brewing unit program has been selected. Press the cleaning button to start cleaning the brewing unit. Brewing unit is cleaning. CLEANING After cleaning, coffee machine enters READY status. READY Descaling the coffee machine 42 The daily usage will cause calcareous deposited in coffee machine. The depositing rate vary with the local water hardness. Decalcifiercontains acidic substances that would stimulate your eyes and skin, so you must strictly comply with the security warnings noted by manufacturer on the packaging. If you have contacted it with your eyes or skin by accident, please wash it with clean water immediately. Only the original decalcifier can be used, use of other decalcifier may cause damage to your coffee machine. When descaling and cleaning, please take out the filter from the water tank first, so as not to damage the water filter. Dissolve the decalcifier in clean water, and then lead the mixed liquid into the water tank. Fully dissolve the decalcifier can descale the coffee machine more thoroughly. 1 The whole descaling process takes about 30 minutes. The termination during the descaling process will damage the coffee machine. So once you start the descaling process, please do not terminate it midway. If the decalcifieris used up, you can contact the maintenance center for consultation and purchase. NEED DESCALE PRESS RINSE After a long-time use, if it reaches the degree of descaling, NEEDS DESCALE"and" PRESS RINSE " will automatically prompt on the display alternately. Now, press the cleaning button to enter the descaling program. 2

47 Turn the rotary button to maintenance setting option, press rotary button to enter. 3 Cleaning and maintenance MAINTENANCE Turn the rotary button to descaling option, press rotary button to enter. DESCALE 30 MINS PRESS RINSE After entering the descaling program, press cleaning button to start the descaling program; it will take 30 minutes. 4 Preparation for descaling and cleaning. First of all, empty the drip tray, because it would drain some waste water intodrip tray. EMPTY TRAY SOLVENT IN TANK Take a bag of decalcifier and sufficiently dissolves it in clean water, then lead this mixed liquid to the water tank, and reinstall the water tank to coffee machine After adding decalcifier, press cleaning button to start descaling and cleaning. PRESS RINSE DECALCIFYING To start descaling and cleaning for the first time, put a container, of which the capacity is more than 1L, under the coffee spout. 6 FILL WATER TANK After descaling and cleaning for the first time, take the water tank out, empty the rest water and clean it. Add purified water again, and reinstall it to the coffee machine PRESS RINSE Press cleaning button to enter descaling and cleaning for the second time. To clean the residual decalcifierin water in pipes at this time.put a container, of which the capacity is more than 1L, under the coffee spout. 7 After the second time descaling and cleaning, coffee machine begins to heat up. HEATING


48 Cleaning and maintenance After heating up, prepare for the third time descaling and cleaning. 8 CLEANING COFFEE READY When the screen shows READY, it indicates the descaling is completed; Now, you can continue to make coffee. Cleaning the coffee grounds container and the drip tray Do not use chemical solvents and erosive cleaner or alcohol to clean the coffee grounds container and drip tray. The drip tray and coffee grounds container cannot be cleaned in dishwasher. Do not use metal objects to clean dirt or coffee precipitate to avoid scraping the drip tray and coffee grounds container. When prompted to clean the coffee grounds, coffee grounds must be cleaned up, or it will cause the machine damaged. When it cumulates to 15 cups, it will automatically indicate EMPTY GROUNDS EMPTY GROUNDS INSTALL TRAY READY When it shows INSTALL TRAY, please remove coffee grounds of the drip tray and coffee grounds container. This will take more than3 seconds. Reinstall the water drip tray to the machine, it returns to READY status. You can continue using the machine. 2 EMPTY TRAY READY If the drip tray is full, the machine will automatically prompt "EMPTY TRAY". Take out the water drip tray and pour the waste water. After clearing the waste water, reinstall the drip tray to the coffee machine, it returns to READY status. You can continue using the machine. 3


49 Cleaning and maintenance Every time when cleaning coffee grounds and waste water in the drip tray, please clean the drip tray and coffee grounds container. After cleaning drip tray, please wipe dry the 2 pieces of sheetmetals at the end of the drip tray, and then reinstall the drip tray to the coffee machine. Cleaning the water tank Suggested that, each time adding water, clean the tank thoroughly with running water first. 1 Cleaning water tank regularly about 1 time per month, or every time when changing the water filter, it would be better to use wet rag and some mild cleaning fluid. Because the water tank is made from food-grade and environmental materials, it might be friable to crack. Please be gently to pick it up and put it down, and never let it fall down. If the water tank damaged, please contact with customer sevice center Cleaning the bean container Please do not use water to wash the beans container, it would cause the grinder damaged. Please use a dry rag or a paper towel to clean the residuary grease in the bean container. Because the bean container cover is made from food-grade and environmental materials, it might be friable to crack. Please be gently to pick it up and put it down, and never let it fall down. If the beans container lid damaged, please contact with customer sevice center.


50 Cleaning and maintenance Disassembling and cleaning the milk frother In order to guarantee the fine and smooth milk foam, please clean the milk frother every day. 1. Carefully take off the milk frother. 2. Disassemble each part of the milk frother thoroughly. 3. Please clean away residues inside the holes. 4. Wash the parts with running water. 5. Reassemble the milk frother, and install it to the coffee machine. Then the milk frother cleaning is completed Cleaning the coffee machine Before cleaning the interior of the coffee machine, power it off, and pull out plug. Never immerse the coffee machine in water. There will be a risk of electric shock. Regularly check the coffee machine whether there is excessive coffee bean powder precipitate inside the machine. You can use a brush to remove the coffee precipitate. Use a dry and soft rag to wipe the touch panel of the machine. As the touch panel is made of glass, please do not hit it to avoid the risk of electric shock once the glass broken. Use a dry and soft rag to wipe the surface of the machine, and never use hard objects to clean coffee leftover on the surface, otherwise it would cause the surface damaged.
51
Fully Automatic Coffee Machine OPERATION MANUAL
 Fully Automatic Coffee Machine OPERATION MANUAL Instructions of coffee machine parts 7 8 1 9 2 10 12 13 14 15 3 16 11 4 5 6 1 Bean container cover 9 Bean container 2 Water tank lid 10 Coffee spout 3 Water
1. IMPORTANT SAFEGUARDS When using electrical appliances, basic safety precautions should always be followed to reduce the risk of fire, electric
 1. IMPORTANT SAFEGUARDS When using electrical appliances, basic safety precautions should always be followed to reduce the risk of fire, electric shock, and/pr injury to persons including the following:
CafeRomatica NICR7.. Fully automatic coffee centre Operating Instructions and Useful Tips. A passion for coffee.
 CafeRomatica Fully automatic coffee centre Operating Instructions and Useful Tips NICR7.. GB A passion for coffee. 1 G F A M J / K A B C D E Display screen Left rotary knob Right rotary knob Bean symbol
Get Started. Better Everyday ECAM23260
 Better Everyday Get Started This short guide is not intended to explain all the functions of the appliance. Please read all the owner s instruction booklet before use. Video available on www.youtube.com/delonghiusa
G F I M J K L B C D E S O T H Q P U N R D 4
 1 2 3 4 G F I A M J K L 5 6 7 B C D E 8 9 10 S O T H Q P U N R 11 12 D 4 Equipment GB A B C D E Text display (main menu) Rotary control knob Button > Button exit Height-adjustable coffee spout CafeRomatica
IMPORTANT SAFEGUARDS. 3. To protect against fire, electric shock and injury to persons do not immerse cord, plug or unit in water or other liquid.
 IMPORTANT SAFEGUARDS When using electrical appliances, basic precautions should always be followed, including the following: 1. Read all instructions. 2. Make sure that your outlet voltage corresponds
MODEL: POD BREWER AURORA SAF 68 HOMEMAKER ESPRESSO MAKER WITH COFFEE POD
 INSTRUCTION MANUAL Please read this Instruction Manual and the safety instructions before operating the appliance! MODEL: POD BREWER AURORA SAF 68 HOMEMAKER ESPRESSO MAKER WITH COFFEE POD Congratulation
Quick Reference Guide
 Impressa Z5 Quick Reference Guide This Guide does not replace the Operating Instructions. For details and cautions you must read all instructions. Watch the DVD instructions! Traces of Coffee Grounds in
IMPORTANT INSTRUCTIONS MODE D EMPLOI IMPORTANT INSTRUCIONES IMPORTANTES ISTRUZIONI IMPORTANTI
 MOKA 22-04-2003 10:10 Pagina 1 IMPORTANT INSTRUCTIONS SAVE THESE INSTRUCTIONS MODE D EMPLOI IMPORTANT CONSERVEZ LES PRESENTES INSTRUCTIONS INSTRUCIONES IMPORTANTES GUARDE ESTAS INSTRUCCIONES ISTRUZIONI
QUALITY MILK FROTHER INSTRUCTION MANUAL MODEL NO. MMF005
 QUALITY MILK FROTHER INSTRUCTION MANUAL MODEL NO. MMF005 MILK FROTHER INSTRUCTION MANUAL Model No.: MMF005 READ ALL INSTRUCTIONS BEFORE USING THE FROTHER. KEEP THESE INSTRUCTIONS FOR FUTURE REFERENCE.
User Manual. Stainless Steel Coffee Urns. Models: 177CU55ETL, 177CU110ETL 10/2016. Please read and keep these instructions. Indoor use only.
 Intertek Stainless Steel Coffee Urns Models: 177CU55ETL, 177CU110ETL 10/2016 Please read and keep these instructions. Indoor use only. www.avantcoequipment.com 1 NOTE: Save these instructions for future
COFFEE MAKER INSTRUCTION MANUAL CM4682-V
 COFFEE MAKER INSTRUCTION MANUAL CM4682-V IMPORTANT SAFEGUARDS Before using the electrical appliance, the following basic precautions should always be followed including the following: 1. Read all instructions.
Get Started. Better Everyday ECAM26455
 Better Everyday Get Started This short guide is not intended to explain all the functions of the appliance. Please read all the owner s instruction booklet before use. ECAM26455 WELCOME Introducing the
5KEK1322 W A_v08.indd 1 5/13/16 2:25 PM
 5KEK1322 W10878653A_v08.indd 1 PARTS AND FEATURES PARTS AND ACCESSORIES Tea steeper lid (center section of lid with handle) Kettle lid (outer section) Stainless steel lime scale filter Removable stainless
User Manual. Stainless Steel Coffee Urns. Models: 177CU30, 177CU55, 177CU110 04/2018. Please read and keep these instructions. Indoor use only.
 Stainless Steel Coffee Urns Models: 177CU30, 177CU55, 177CU110 04/2018 Please read and keep these instructions. Indoor use only. www.avantcoequipment.com 1 NOTE: Save these instructions for future reference.
Automatic Coffee Machine Instruction Manual
 Instruction Manual Page 1 of 17 8212-0 Automatic Coffee Machine Instruction Manual Instruction Manual Page 2 of 17 IMPORTANT INFORMATION For safety purposes please read these instructions carefully before
User Manual. Stainless Steel Coffee Urn. Models: 177CU30 11/2018. Please read and keep these instructions. Indoor use only.
 Stainless Steel Coffee Urn Models: 177CU30 11/2018 Please read and keep these instructions. Indoor use only. www.avantcoequipment.com 1 NOTE: Save these instructions for future reference. Index Important
STAINLESS STEEL MILK FROTHER. Model: PKFMR11BK
 STAINLESS STEEL MILK FROTHER Model: PKFMR11BK WARNING! To reduce the risk of fire, electrical shock or injury to persons or property: Carefully read all instructions before operating your new product for
Coffee Burr Grinder. Model #559. Instructions. Warranty
 Coffee Burr Grinder Model #559 Instructions Warranty IMPORTANT SAFEGUARDS When using electrical appliances, basic safety precautions should always be followed, including the following: 1. Read all instructions.
Type HD8753 USER MANUAL
 Register your product and get support at www.philips.com/welcome 02 English Type HD8753 USER MANUAL 02 EN PLEASE READ THIS USER MANUAL CAREFULLY BEFORE USING THE MACHINE. IMPORTANT SAFEGUARDS When using
USER MANUAL Type HD8965
 02 English USER MANUAL Type HD8965 Read carefully before using the machine. 02 EN Register your product and get support at www.philips.com/welcome IMPORTANT SAFEGUARDS When using electrical appliances,
HD8847 HD8848 USER MANUAL. Super automatic espresso coffee machine 4000 series. Read carefully before using the machine.
 Super automatic espresso coffee machine 4000 series 02 USER MANUAL Read carefully before using the machine. HD8847 HD8848 02 English EN Register your product and get support at www.philips.com/welcome
Z6 Instructions for Use
 Z6 Instructions for Use Table of contents Your Z6 Control elements 4 Important information 6 Proper use...6 For your safety...6 1 Preparing and using for the first time 10 JURA on the Internet...10 Setting
USER MANUAL Type HD8966
 02 English USER MANUAL Type HD8966 Read carefully before using the machine. 02 EN Register your product and get support at www.philips.com/welcome IMPORTANT SAFEGUARDS When using electrical appliances,
 Register your product and get support at www.saeco.com/welcome 02 English Type HD8642 / HD8643 USER MANUAL 02 EN PLEASE READ THIS USER MANUAL CAREFULLY BEFORE USING THE MACHINE. IMPORTANT SAFEGUARDS When
USER MANUAL TECHNICAL DATA
 USER MANUAL TECHNICAL DATA Model: Easy Touch Operating Voltage: 240V AC Frequency: 50 Hz Power con, MAX : 1500W Water tank cap.: 700ml (0.7L) Weight: 5.0 kg Size: L 350 * W 155 * H 245 mm This appliance
Type HD8858 / HD8859 USER MANUAL
 Register your product and get support at www.saeco.com/welcome 02 English Type HD8858 / HD8859 USER MANUAL 02 EN PLEASE READ THIS USER MANUAL CAREFULLY BEFORE USING THE MACHINE. IMPORTANT SAFEGUARDS When
左边 :SAFTY NOTES 右边 : Please follow the safety precautions to avoid any harm to yourself and cause any damages Never Always Warning Attention
 封面 Multi-functional Soymilk Maker Instruction Manual Please read all instruction carefully before operating the machine 第一页 Contents Safety notes 2 Usage notes 3 Product description and specification 4
MODELS 1315 & 1315-S La Pavoni CLUB COMBO
 IMPORTANT WARNINGS MODELS 1315 & 1315-S La Pavoni CLUB COMBO DUET Never operate your espresso machine without water in the tank. This may cause premature pump failure. Do not allow the power cord to come
Type HD8754 USER MANUAL
 Register your product and get support at www.philips.com/welcome 02 English Type HD8754 USER MANUAL 02 EN PLEASE READ THIS USER MANUAL CAREFULLY BEFORE USING THE MACHINE. IMPORTANT SAFEGUARDS When using
MODEL# GCM4500 COFFEE MAKER WITH GRINDER. PHOTO OF PRODUCT
 MODEL# GCM4500 COFFEE MAKER WITH GRINDER www.gourmia.com PHOTO OF PRODUCT 2016 Gourmia www.gourmia.com The Steelstone Group Brooklyn, NY Welcome to Delicious and Aromatic world of Coffee Makers from Gourmia!
AUTOMATIC BEAN TO CUP COFFEE MACHINE
 AUTOMATIC BEAN TO CUP COFFEE MACHINE EB60 model USER GUIDE NZ AU GB IE CONTENTS Appliance parts 2 Safety and warnings 4 First use 9 Menu settings 13 Making coffee 17 Making cappuccinos and milk-based
Type HD8852 USER MANUAL
 Register your product and get support at www.philips.com/welcome 02 English Type HD8852 USER MANUAL 02 EN PLEASE READ THIS USER MANUAL CAREFULLY BEFORE USING THE MACHINE. IMPORTANT SAFEGUARDS When using
This appliance can be used by children aged from 8 years and above and persons with
 IMPORTANT SAFEGUARDS Symbols used in these instructions Important warnings are identified by these symbols. It is vital to respect these warnings. Failure to observe the warning could result in life threatening
5KEK1522 W A_01_EN.indd 1 11/16/12 1:22 PM
 5KEK1522 Water Kettle INSTRUCTIONS Table of Contents water KEttle SAFETY Important safeguards...6 Electrical requirements...7 Electrical equipment waste disposal...7 PARTS AND FEATURES Parts and accessories...8
IMPRESSA Z9 One Touch TFT Instructions for Use
 IMPRSSA Z9 One Touch TFT Instructions for Use The Instructions for Use has been awarded the seal of approval by the independent German Technical Inspection Agency, TÜV SÜD, due to its easy-to-understand
IMPRESSA Z9 One Touch TFT Instructions for Use. For your safety: read and understand manual before use.
 IMPRSSA Z9 One Touch TFT Instructions for Use K For your safety: read and understand manual before use. Table of contents Your IMPRSSA Z9 One Touch TFT IMPORTANT SAFGUARDS 4 Control elements 8 1 Preparing
EN Electric Coffee Grinder
 SCG 5050BK EN Electric Coffee Grinder - 1 - EN Electric Coffee Grinder Important safety instructions READ CAREFULLY AND STORE FOR FUTURE USE. This appliance may be used by persons with physical or mental
SAFETY INSTRUCTIONS FOR USE
 INTRODUCTION Thank you for choosing this De Longhi Coffee machine. We hope you enjoy your new appliance. Please take a few minutes to read these instructions. This is the only way to ensure optimum results
J6 Instructions for Use
 J6 Instructions for Use K For your safety: read and understand manual before use. Table of contents Your J6 IMPORTANT SAFGUARDS 4 Control elements 8 1 Preparing and using for the first time 10 JURA on
IMPRESSA F8 Instructions for Use
 IMPRSSA F8 Instructions for Use K For your safety: read and understand manual before use. Table of contents Your IMPRSSA F8 IMPORTANT SAFGUARDS 4 Control elements 8 1 Preparing and using for the first
Electric Two-Speed Drink Mixer
 Electric Two-Speed Drink Mixer MS2090 Series Before use, please read this manual thoroughly and save for future reference. ovente.com Electric Two-Speed Drink Mixer MS2090 Series 2 ovente.com ELECTRIC
Wi-Fi Coffee Maker. Model# GCMW-4750 USER MANUAL
 Wi-Fi Coffee Maker Model# GCMW-4750 USER MANUAL Read this manual thoroughly before using and save it for future reference Model: GCMW-4750 2018 Gourmia www.gourmia.com The Steelstone Group Brooklyn, NY
IMPRESSA XJ9 Professional Instructions for Use. Original instructions for use Before using the machine read the instructions for use.
 IMPRSSA XJ9 Professional Instructions for Use K Original instructions for use Before using the machine read the instructions for use. JURA Type 683 Table of contents Your IMPRSSA XJ9 Professional Control
E8/E80 Instructions for Use
 8/80 Instructions for Use Table of contents Your 8/80 Control elements 4 Important information 6 Proper use...6 For your safety...6 1 Preparing and using for the first time 10 JURA on the Internet...10
GIGA 5 Instructions for Use
 GIGA 5 Instructions for Use The Instructions for Use has been awarded the seal of approval by the independent German Technical Inspection Agency, TÜV SÜD, due to its easy-to-understand style, its thoroughness
HD8828 HD8834 USER MANUAL. Super automatic espresso coffee machine 3100 series. Read carefully before using the machine.
 Super automatic espresso coffee machine 3100 series 02 USER MANUAL Read carefully before using the machine. HD8828 HD8834 English 02 EN Register your product and get support at www.philips.com/welcome
PLEASE READ THIS MANUAL BEFORE USE. SAVE FOR FUTURE REFERENCE.
 8-CUP STAINLESS STEEL CARAFE Coffee Brewer Model: BV1900TS HOUSEHOLD USE ONLY Customer Service Line: 1-855-664-1252 2-year limited warranty bonavitaworld.com Simple to operate Optional pre-infusion cycle
Z6 Instructions for Use
 Z6 Instructions for Use K For your safety: read and understand manual before use. Table of contents Your Z6 IMPORTANT SAFGUARDS 4 Control elements 8 1 Preparing and using for the first time 10 JURA on
MODEL# GCG165 COFFEE GRINDER. PHOTO OF PRODUCT
 MODEL# GCG165 COFFEE GRINDER www.gourmia.com PHOTO OF PRODUCT 2016 Gourmia www.gourmia.com The Steelstone Group Brooklyn, NY Welcome to Delicious world of Coffee Grinders from Gourmia! All rights reserved.
E6/E60 Instructions for Use
 6/60 Instructions for Use Table of contents Your 6/60 Control elements 4 Important information 6 Proper use...6 For your safety...6 1 Preparing and using for the first time 10 JURA on the Internet...10
EP3559, EP3558 EP3551, EP3550
 Super automatic espresso machine 3100 series EP3559, EP3558 EP3551, EP3550 EN USER MANUAL DE BENUTZERHANDBUCH ES MANUAL DEL USUARIO FR MODE D EMPLOI IT MANUALE UTENTE NL GEBRUIKSAANWIJZING 1 EP3558, EP3550
OPERATING INSTRUCTIONS FOR YOUR SAFETY CAREFULLY READ THE OPERATING INSTRUCTIONS. FOR HOUSEHOLD USE ONLY
 OPERATING INSTRUCTIONS FOR YOUR SAFETY CAREFULLY READ THE OPERATING INSTRUCTIONS. FOR HOUSEHOLD USE ONLY 2 Opening Congratulations on choosing this high quality espresso machine and thank you for your
E6 Instructions for Use
 6 Instructions for Use K For your safety: read and understand manual before use. Table of contents Your 6 IMPORTANT SAFGUARDS 4 Control elements 8 1 Preparing and using for the first time 10 JURA on the
S8 Instructions for Use Type 744
 S8 Instructions for Use Type 744 Table of contents Your S8 Control elements 4 Important information 6 Proper use...6 For your safety...6 1 Preparing and using for the first time 10 JURA on the Internet...10
Programmable Conical Burr Mill CBM-18
 Programmable Conical Burr Mill CBM-18 IMPORTANT SAFEGUARDS When using electrical appliances, basic safety precautions should always be followed, including the following: 1. Read all instructions. 2. To
AUTOMATIC BEAN TO CUP COFFEE MACHINE
 AUTOMATIC BEAN TO CUP COFFEE MACHINE EB60 model USER GUIDE NZ AU GB IE CONTENTS Appliance parts 2 Safety and warnings 4 First use 9 Menu settings 13 Making coffee 17 Making cappuccinos and milk-based
Z8 Instructions for Use
 Z8 Instructions for Use Table of contents Your Z8 Control elements 4 Important information 6 Proper use...6 For your safety...6 1 Preparing and using for the first time 10 JURA on the Internet...10 Operation
JURA J90/J95 Instructions for Use
 JURA J90/J95 Instructions for Use K For your safety: read and understand manual before use. Table of contents Your JURA J90/J95 IMPORTANT SAFGUARDS 4 Control elements 8 1 Preparing and using for the first
TOASTER OVEN USER MANUAL MODEL: PKMFT039
 TOASTER OVEN USER MANUAL MODEL: PKMFT039 IMPORTANT SAFETY INSTRUCTION When using electrical appliances, basic safety precautions should always be followed, including the followings: 1 Don t touch hot surfaces
Coffeemaker User's manual
 Coffeemaker User's manual EN Prior to using this appliance, please read the user's manual thoroughly, even in cases where you have previously familiarised yourself with the operation of similar types of
AS450, AS600, G1, SG630
 Grill Range Operating Manual Grill Range AS450, AS600, G, SG60 Product Range Also Includes: Induction Hobs / Combination Ovens / Pizza Ovens / Mixers Salamander Grills / Contact Grills / Pie Warmers /
Figure: Your machine may look different to the one shown. D6 Instructions for Use. For your safety: read and understand manual before use.
 Figure: Your machine may look different to the one shown. D6 Instructions for Use K E For your safety: read and understand manual before use. Table of contents Your D6 IMPORTANT SAFEGUARDS 4 Control elements
WE CAN HELP. Smart Coffee Maker User Manual. Can t connect? Need help? DO NOT RETURN THIS PRODUCT TO THE STORE
 Can t connect? Need help? Wi-Fi Date Code: 01/19 Smart Coffee Maker User Manual WE CAN HELP DO NOT RETURN THIS PRODUCT TO THE STORE Call 1-800-757-1440 Mon-Fri 9:00-5:00 EST (US) or email info@atomiusa.com
Always here to help you
 Always here to help you Register your product and get support at www.saeco.com/welcome HD8758/57 HD8758-57_4219_460_3151_1_COVER_BOOKLET_A5_bl.indd 1 14/10/15 10:07 English 5 ESPRESSO 1 5 2 6 3 7 8 4
PORTABLE ESPRESSO MACHINE. Compatible Ground Coffee only. Designed by
 GR PORTABLE ESPRESSO MACHINE Compatible Ground Coffee only Designed by Dear Customer, Thank you for having chosen our product and for your confidence in our company. We have devoted all our knowledge,
COFFEE GRINDER. Owner s Manual
 COFFEE GRINDER Owner s Manual 4 4 FEATURES Bean Hopper Lid Bean Hopper Grinder Start/Stop Button Bean Hopper Holder Bean Hopper Release Button Grinding Timer Dial Coffee Powder Outlet 0 Grind Thickness
Type HD8953 / HD8954 USER MANUAL
 Register your product and get support at www.philips.com/welcome 02 English Type HD8953 / HD8954 MANUAL 02 EN PLEASE READ THIS MANUAL CAREFULLY BEFORE USING THE MACHINE. IMPORTANT SAFEGUARDS When using
E8/E80 Instructions for Use
 8/80 Instructions for Use Table of contents Your 8/80 Control elements 4 Important information 6 Proper use...6 For your safety...6 1 Preparing and using for the first time 10 JURA on the Internet...10
12 CUP COFFEE MAKER User Guide
 BRAND 12 CUP COFFEE MAKER User Guide Item: 740553 Ginnys.com 800-544-1590 Facebook.com/GinnysBrand Pinterest.com/GinnysBrand Ginnys.com/Blog Welcome to the world of full-flavored coffee with the Ginny
Shotmeister Owner s Manual. The Sleekest Design, Pouring the Coldest Shots
 Shotmeister Owner s Manual The Sleekest Design, Pouring the Coldest Shots Thank you for purchasing a Jägermeister Shotmeister! REGISTRATION INFORMATION Register your Jägermeister Shotmeister Online: at
SG120 Model # Cup Stainless Steel Coffee Maker. Operating Instructions Product Registration Warranty
 SG120 Model #494 12-Cup Stainless Steel Coffee Maker Operating Instructions Product Registration Warranty IMPORTANT SAFEGUARDS When using electrical appliances, basic safety precautions should always be
Aroma Fresh. Instructions for use Includes recipes. Model BCM120
 Aroma Fresh Instructions for use Includes recipes Model BCM120 Contents Page Breville recommends safety first 4 Know your Breville Aroma Fresh Coffee Maker 5 Operating your Breville Aroma Fresh Coffee
Type HD8851 USER MANUAL
 Register your product and get support at www.philips.com/welcome 02 English Type HD8851 USER MANUAL 02 EN PLEASE READ THIS USER MANUAL CAREFULLY BEFORE USING THE MACHINE. IMPORTANT SAFEGUARDS When using
Booklet_TCG-357_ENG.qxd 9/8/08 11:19 AM Page 1 COFFEE/SPICE GRINDER. Instruction Booklet. Model: TCG-357
 Booklet_TCG-357_ENG.qxd 9/8/08 11:19 AM Page 1 COFFEE/SPICE GRINDER Instruction Booklet Model: TCG-357 Booklet_TCG-357_ENG.qxd 9/8/08 11:19 AM Page 2 IMPORTANT SAFEGUARDS When using electrical appliances,
Type HD8836 / HD8837 SUP 037DR OPERATING INSTRUCTIONS
 Register your product and get support at www.philips.com/welcome 02 English Type HD8836 / HD8837 SUP 037DR OPERATING INSTRUCTIONS 02 EN READ THESE OPERATING INSTRUCTIONS CAREFULLY BEFORE USING THE MACHINE.
INSTRUCTION MANUAL. Coffee Maker CMCM-100
 INSTRUCTION MANUAL Coffee Maker CMCM-100 CONTENTS Cusimax recommends safety first....1-2 Know your Cusimax product...3 Operating your Cusimax product 4 Care & cleaning 5 Cusimax Recommends Safety First
Lusso / Espresso Si' Models:PL-16 PAB-16. Made In Italy
 Lusso / Espresso Si' Models:PL-16 PAB-16 Made In Italy la pavoni - PL-16 & PAB-16 We recommend using freshly roasted espresso beans ground medium to fine. Fresh coffee will produce better tasting espresso.
CHOCOLINO CAFÉLINO USER MANUAL UM_EN. Part No.: _01
 CHOCOLINO CAFÉLINO USER MANUAL UM_EN Part No.: 1764133_01 CONTENT CONTENT...2 GENERAL...4 Introduction...4 Warnings...4 Precautions...4 Intended use...4 Facts & weight...5 OVERVIEW OF COMPONENTS...6 CHOCOLINO/CAFÉLINO...6
instructions COFFEE GRINDER KG 79/89
 instructions COFFEE GRINDER KG 79/89 DESCRIPTION OF APPLIANCE The following terms are used throughout the instruction manual Coffee-bean hopper lid Removable upper burr Coffee-bean hopper ON/OFF switch
USER MANUAL Type HD HD8885
 02 English USER MANUAL Type HD8768 - HD8885 Read carefully before using the machine. 02 EN Register your product and get support at www.saeco.com/welcome IMPORTANT SAFEGUARDS When using electrical appliances,
USER MANUAL. Fully-automatic Coffee Machine
 KGN IMPORTANT SAFEGUARDS When using electrical appliances, basic safety precautions should always be followed, including the following: 1. Read all Instructions.. Do not touch hot surfaces. Use handles
Burr Grinder. Automatic burr grinder with 17-position grind selector. Instruction Booklet EM0430
 Burr Grinder Automatic burr grinder with 17-position grind selector Instruction Booklet EM0430 Please read these instructions carefully and retain for future reference. Contents Sunbeam s Safety Precautions
GIGA 5 Instructions for Use
 GIGA 5 Instructions for Use The Instructions for Use has been awarded the seal of approval by the independent German Technical Inspection Agency, TÜV SÜD, due to its easy-to-understand style, its thoroughness
CITIZ&MILK MY MACHINE. 9579_UM_CITIZ&MILK_FACELIFT_C_BREVILLE.indb :22
 CITIZ&MILK MY MACHINE 9579_UM_CITIZ&MILK_FACELIFT_C_BREVILLE.indb 1 30.03.16 15:22 EN CITIZ&MILK Nespresso, an exclusive system creating the perfect Espresso, time after time. All machines are equipped
Instruction Manual Coffee Grinder. Kaffeemühle / Coffee grinder CM 70 Serie
 Instruction Manual Coffee Grinder Kaffeemühle / Coffee grinder CM 70 Serie Table of content Safety Instructions... 3 Before the first use... 4 Unpacking... 5 Requirements for the installation location...
coffee for one Instructions Doc. Size: 5 W x 4.75 H Output at 100% Prints 1/0 Black _INS_coffeemaker
 coffee for one B E T T E R B Y B R O O K S T O N E W E C R E A T E P R O D U C T S T O M A K E L I F E B E T T E R. T H R O U G H I N N O V A T I V E D E S I G N, B E S T - I N - C L A S S P R O D U C
USER MANUAL Type HD HD8767
 02 English USER MANUAL Type HD8766 - HD8767 Read carefully before using the machine. 02 EN Register your product and get support at www.philips.com/welcome IMPORTANT SAFEGUARDS When using electrical appliances,
IMPRESSA XJ5 Professional Instructions for Use. Original instructions for use Before using the machine read the instructions for use.
 IMPRESSA XJ5 Professional Instructions for Use KE Original instructions for use Before using the machine read the instructions for use. JURA Type 684 Table of contents Your IMPRESSA XJ5 Professional Control
coffee wakes up the world User Manual Coffee machine English V0.16
 coffee wakes up the world User Manual Coffee machine English V0.16 Valid for all WMF 900 models Series 900 Order number 33 2624 2010 Edition 05.2014 Congratulations on the purchase of your WMF coffee machine.
PICOBARISTO HD8924 EN DE ES FR IT NL USER MANUAL BENUTZERHANDBUCH MANUAL DEL USUARIO MODE D EMPLOI MANUALE UTENTE GEBRUIKSAANWIJZING
 PICOBARISTO HD8924 EN DE ES FR IT NL USER MANUAL BENUTZERHANDBUCH MANUAL DEL USUARIO MODE D EMPLOI MANUALE UTENTE GEBRUIKSAANWIJZING 4219.460.3607.1 HD8924 SAECO_PICOBARISTO AMF_WE_COVER_A5_FC.indd 1 01-09-16
X8 Instructions for Use
 X8 Instructions for Use K Original instructions for use Before using the machine read the instructions for use. JURA Type 739 Table of contents Your X8 Control elements 4 Important information 6 Proper
1.5 L Slow Cooker 7644 Instructions for Use
 PARTS PLEASE SAVE THESE INSTRUCTIONS FOR FUTURE REFERENCE. Lid Cooking pot Base Power indicator Control knob TECHNICAL DETAILS: POWER DETAILS: 230V A.C. POWER FREQUENCY: 50Hz WATTAGE: 120W SAFETY INSTRUCTIONS:
Stainless Steel Milk Frother N3 User Manual
 Stainless Steel Milk Frother N3 User Manual Voltage: 110V~60Hz Power: 500W READ AND SAVE THESE INSTRUCTIONS IMPORTANT Read and follow the instructions in this user manual even if you feel you are familiar
X8 Instructions for Use. For your safety: read and understand manual before use. JURA Type 739
 X8 Instructions for Use K For your safety: read and understand manual before use. JURA Type 739 Table of contents Your X8 IMPORTANT SAFGUARDS 4 Control elements 8 1 Preparing and using for the first time
Rev.02 del The manufacturer reserves the right to change the features of the product without prior notice.
 02 Rev.02 del 15-07-12 02 EN The manufacturer reserves the right to change the features of the product without prior notice. www.philips.com/saeco Register your product and get support at www.philips.com/welcome
Coffee Grinder Instruction Manual
 Coffee Grinder Instruction Manual CoffeeGrinder Manual-English Only.indd 1 07/01/2016 14:14:39 Savisto Home Coffee Grinder Voltage Supply: 220-240V~ 50/60Hz Power Consumption: 150W Eng Please read through
MACHINE DISPOSAL.
 02 MACHINE DISPOSAL - The packing materials can be recycled. - Appliance: Unplug the appliance and cut the power cord. - Deliver the appliance and power cord to a service center or public waste disposal
AUTOMATIC BURR COFFEE GRINDER
 AUTOMATIC BURR COFFEE GRINDER MODEL:SCG-903B USER MANUAL www.thesecura.com Welcome Congratulations on purchasing our Secura Automatic Burr Coffee Grinder. Each unit is manufactured to ensure safety and
GIGA X3c Professional Instructions for Use
 GIGA X3c Professional Instructions for Use K Original instructions for use Before using the machine read the instructions for use. Instructions for use has been awarded the seal of approval by the independent