Recommended with NESCAFÉ GOLD. Experience the full range today.*
|
|
|
- Sheila Nelson
- 5 years ago
- Views:
Transcription

1 US E R M AN UAL

2 Recommended with NESCAFÉ GOLD. Experience the full range today.* NESCAFÉ GOLD BLEND A premium blend of Arabica beans that are golden roasted to perfection. Delivers a smooth cup with juicy aromas. We recommend using NESCAFÉ GOLD coffee which is suited and tested for the NESCAFÉ GOLD BLEND Barista system. Fine powdered coffee (for example NESCAFÉ Red Cup) is not recommended to be used in the NESCAFÉ GOLD BLEND Barista system as it will result in blockage issues. *All NESCAFÉ GOLD products are suitable for use and have been tested for the NESCAFÉ GOLD BLEND Barista system.
3 TABLE OF CONTENTS SAFETY PRECAUTIONS...-3 MACHINE OVERVIEW FIRST TIME USE & INITIAL RINSING... 6 REFILLING WITH COFFEE...7 PREPARING BEVERAGES INDIVIDUAL ADJUSTMENTS TO YOUR PERSONAL TASTE...0 CLEANING - OVERVIEW OF THE PARTS... RECOMMENDED WEEKLY CLEANING... CLEANING DRAWER & MIXING CHAMBER CLEANING DRIP TRAY, TANKS & DOSING UNIT DESCALING GREEN & ORANGE LIGHT SIGNALS...9 RED LIGHT SIGNALS TROUBLESHOOTING FREQUENTLY ASKED QUESTIONS... 5 SPARE PARTS...6
4 SAFETY PRECAUTIONS / When using electrical appliances, basic safety precautions should always be observed, including the following: These instructions are to ensure you use this Advised usage: electric product safely and prevent you and Mains voltage used must be the same as the other users from the risk of damage or hazard. Please read and follow carefully all indicated Warnings and instructions. details on the rating plate. Insert the plug in a socket which is properly wired. When using an extension cable, do not put many loads in one outlet. It can result in fire caused by Warnings : failure to follow these warnings abnormal heat. In the event that the plug may result in death or severe injury. and cable get hot, stop using the machine immediately (do not use the machine abroad). Warnings: The manufacturer is not liable for damage In case of an emergency remove plug from caused by improper use of the machine or power socket immediately. failure to comply with the instructions of this Do not place hands underneath the hot water manual. Such damages are also not covered jet or outlet during the preparation of the by the warranty. beverage (danger of burning). Never leave Children should be supervised to ensure that the appliance while making a beverage. they do not play with the appliance. Ensure electrical plugs are clean and free of This appliance is not intended for use by dust. It can cause an electric shock, short persons (including children) with reduced circuit or fire. physical, sensory or mental capabilities, Never touch cable or plug with wet hands. or lack of experience and knowledge, Do not unplug by pulling the cable. In case of damage, do not use the appliance. In order to avoid danger, arrange repairs and/or unless they have been given supervision or instruction concerning use of the appliance by a person responsible for their safety. replacement of power cable by our Hotline This appliance is intended to be used in only. household and similar applications such as: Do not damage, destroy, remodel, bend, pull or twist the plug forcedly. The plug can be - Staff kitchen areas in shops, offices and other working environments; damaged and cause fire or electric shock by - Farm houses; placing heavy objects on it, taking it apart or - By clients in hotels, motels and other modifying it. residential type environments; Always put a cup underneath the outlets - Bed and breakfast type environments. when rinsing the machine. Always use the appliance on a flat, stable, heat resistant surface away from sources of heat or water splashes. Do not place cable close to heat, sharp edges, etc. Do not allow cable to dangle (risk of tripping up). of 6
5 SAFETY PRECAUTIONS / Do not use the machine near fire or place it on hot surfaces (e.g. on top of electric hot plate). It can cause a fire. Do not put a load on the machine. When in use do not squeeze the machine in between two shelves nor place it in a cabinet. This could lead to damage. Do not use the machine if it is not operating perfectly or if there is evidence of damage. In such cases inform our Hotline. Unplug the cable when the machine is not in use to avoid the risk of injury, burn, electric shock, electric leak or fire caused by dielectric degradation. Do not insert any foreign object in the mixing chamber. Do not put anything (hot water, milk, alcohol, etc) other than potable water in the water tank. It can block or clog the inside of the machine and cause failure. We recommend the usage of soft water. Do not put too much water in the water tank as it will spill over the power connection to the machine. The water tank must be filled when detached from the machine. Do not leave water in the water tank when the machine is not used over a long period of time. The water can become contaminated. Use fresh water every time you use the machine. Clean machine periodically according to instructions in chapter CLEANING. When cleaning the machine, unplug the machine and let it cool down. Do not clean the machine while it is still hot. You can burn yourself. Do not wash the plug or the cable with water nor leave them in liquid, such as cleanser. It can cause a failure. 3 of 6 The appliance must not be immersed in water. The machine s cover is equipped with a permanent magnet. Avoid placing appliances and objects that can be damaged by magnetism close to cover, e. g. credit cards, USB drives and other data devices, video tapes, television and computer monitors with picture tubes, mechanical clocks, hearing aids and loud speakers. Patients with pacemakers or defibrillators: Do not approach the cover directly over the pacemaker or defibrillator. Further instructions: Drawer can only be inserted when the mixing chamber is inserted and locked. In some situations the machine requires a rinsing cycle. Before operating again, put a cup underneath the outlets. We recommend using NESCAFÉ GOLD coffee which is suited and tested for the NESCAFÉ GOLD BLEND Barista system. Agglomerated soluble spray dried coffee powder (for instance NESCAFÉ Red Cup), roast and ground coffee, are not designed for use in this coffee machine. Upon use of those coffee types, the system will be blocked or damaged.


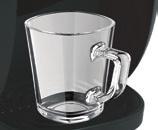
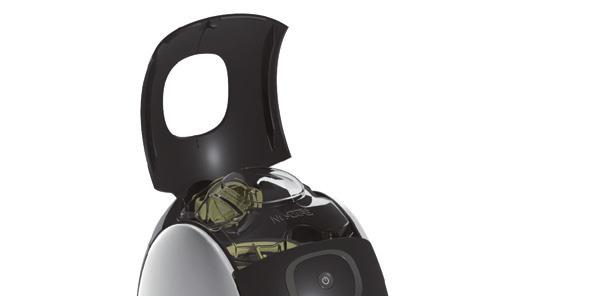
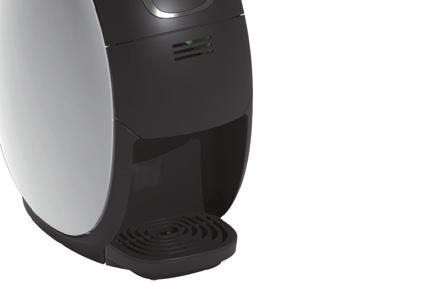
6 MACHINE OVERVIEW / Water tank Top cover Water tank connection part (Do not touch!) Drip tray Use drip tray to place your cups for coffee preparation. Remove drip tray when using a big mug. Milk measuring cup 0-40 V Hz 500 W max. 5 bar L 4 of 6


7 MACHINE OVERVIEW / Coffee box User interface NESCAFÉ container No water indicator light Power button (ON/OFF) Cap Cleaning light Menu icons see page 8 Dosing unit Rinsing light Drawer & Inner parts High velocity hot water jet Drawer For cleaning pull down on the lock handle and remove mixing chamber 0-40 V Hz 500 W ~3.4 kg see page 3 max. 5 bar 5 C - 35 C 5 of 6 L B C A A = 78 mm B = 39 mm C = 85 mm


8 FIRST TIME USE AND INITIAL RINSING 6i Before using the machine for the first time: Initial rinse must be done. Perform a rinse with water tank filled to maximum level (approx. L). Preferably use soft water. 6 6 Plug the machine only into mains voltage of 0-40 V / Hz. Remove the water tank. Put drinking water in the tank. Never put any liquid other than drinking water in the tank! 3 6 ON Re-attach the water tank to the main body. Place a container with a capacity of at least 50 ml under the coffee outlet. ~5 sec Switch machine on. Power button starts blinking green while machine is heating up for approx. 5 seconds Rinsing starts. Wait until it stops. After rinsing is completed, all icons will turn steady green. Machine is now ready for use. Power button and Espresso icon light steady green. Touch Espresso icon. 6i 6 of 6 For light cleaning or if machine is left unused for more than days, please Empty, rinse, and replenish the water tank Touch and hold the Lungo icon THEN the power button simultaneously for 5 seconds Go to for initial rinse.


9 REFILLING WITH COFFEE Press the top cover and open it. Remove coffee box. Place coffee box as shown and remove cap Fill coffee box with suitable coffee (see indication below). Re-attach coffee box cap. 7i 7 Insert coffee box back to machine. The logo faces forwards. If you have difficulty to insert back coffee box, please refer to section TROUBLESHOOTING on page 4. We recommend using NESCAFÉ GOLD coffee which is suited and tested for the NESCAFÉ GOLD BLEND Barista system. Alternatively, other freeze-dried coffee options can also be used. Maximum filling volume for coffee tank: 50 g Fine powdered coffee is not recommended to be used in the NESCAFÉ GOLD BLEND Barista system as it will result in blockage issues. Close top cover. Coffee powder is adversely affected by high temperatures and humidity. Please store it in a sealed container in a cool and dry location. Also, the coffee powder in the coffee tank should be used in good time, preferably within one month. 7 of 6


10 PREPARING BEVERAGES / Menu icons Latte Macchiato Suggested cup size: 300 ml Power button (ON/OFF) Espresso Suggested cup size: 00 ml Lungo Suggested cup size: 00 ml Cappuccino Suggested cup size: 300 ml Hot water function for cup preheating Americano Suggested cup size: 50 ml Black coffee options Espresso Lungo Americano 8 8 Place a cup. Remove drip tray when using a big mug. Touch the desired menu icon i The selected menu icon flashes. The extraction starts and stops automatically. To stop the extraction partway through, touch selected menu icon again and wait until light stops flashing. Nevertheless some coffee will continue to flow as long as the icon is flashing. When selected menu icon stops flashing your coffee is ready. All lights are steady green. Enjoy your coffee. CAUTION! Your coffee will be hot! To heat up the cup before preparing coffee touch Cappuccino and Americano icon simultaneously. CAUTION! Hot water will flow out! Afterwards throw away water and continue with step. 8 of 6


11 PREPARING BEVERAGES / Milk coffee options Latte Macchiato 9 LK MI Cappuccino 9 Pour milk* into the supplied measuring cup: - Latte Macchiato: 60 ml - Cappuccino: 50 ml Pour milk into the cup Place a cup. Remove drip tray when using a Latte Macchiato glass. Touch the desired menu icon. The selected menu icon starts flashing i Hot water/coffee extraction starts and stops automatically. To stop the extraction partway through, touch selected menu icon again and wait until light stops flashing. Nevertheless some coffee will continue to flow as long as the icon is flashing. When selected menu icon stops flashing your coffee is ready. All lights are steady green. Enjoy your coffee. CAUTION! Your coffee will be hot! To heat up the cup before preparing coffee touch Cappuccino and Americano icon simultaneously. CAUTION! Hot water will flow out! Afterwards throw away water and continue with step. 9 of 6 * NESCAFÉ recommends to use milk with at least 3 % fat.


. Resetting initial beverage recipes Connect the power plug.")
12 INDIVIDUAL ADJUSTMENTS TO YOUR PERSONAL TASTE You can adjust the strength of the coffee by changing the amount of hot water: To adjust volume, please follow procedure below: Espresso type coffee Lungo type coffee Minimum Standard Maximum ~40 ml ~70 ml ~60 ml ~40 ml ~0 ml ~0 ml Note: For Latte Macchiato & Cappuccino, cup parameter can not be adjusted manually. Latte Macchiato Cappuccino Americano type coffee ~00 ml ~00 ml ~300 ml 5 sec Put a cup in place. Touch and hold the menu icon for the beverage you wish to adjust for 5 seconds. The power button light changes to orange. The selected menu icon lights green. Coffee extraction starts. When the selected menu icon starts flashing green you can adjust the amount of hot water. 04 +/ When the beverage reaches the desired amount touch the menu icon to stop. If you do not touch machine will stop at the maximum water level! 0i After changing the setting, the new setting remains the same until you modify it again (even if the machine is unplugged). When a small cup is used, the coffee may overflow the cup if you set the amount of hot water too high. To adjust to a new amount of hot water, repeat the above procedure (the current setting will be overwritten). Resetting initial beverage recipes Connect the power plug. Check that the power is OFF. 3 Touch and hold the Cappuccino icon THEN the power button simultaneously. 4 Release the icons when all the icon lights start flashing fast in green. 5 Machine is now back to factory settings. 6 Initial rinsing must be performed (see page 6). 0 of 6


 Mixing chamber Do")
 on the bottom of the water tank.")


13 CLEANING - OVERVIEW OF THE PARTS Cleaning is to be performed when refilling coffee (see page ). Regular maintenance of the machine ensures a better in-cup quality and a longer machine lifetime. Rinsing OK - recommended every week Water tank Do not rinse! Coffee box cap CAUTION! Slider cover (green) Mixing chamber Do not touch the protrusion (connection part) on the bottom of the water tank. If you touch the protrusion on the bottom of tank when it has water in it, the water may spill from the tank. Water tank connection part Mixing chamber mesh Coffee box Dosing unit housing No. 3 Rinsing OK - recommended every week Drawer Lower disk No. Drip grid Drip tray Upper disk No. of 6


14 RECOMMENDED WEEKLY CLEANING CAUTION! Do not put any of the parts into the dishwasher! 3 Check if coffee box is empty: If empty, please complete cleaning procedure on pages 5-6 for deep cleaning of dosing unit and coffee box. If not go ahead with recommended weekly cleaning procedure. Push on the top cover and open it. Remove coffee box Lower disk No. Turn over coffee box. Turn lower disk No. in the direction of the OPEN arrow until you hear a Click. Remove lower disk No., clean it with hot water and dry it completely Clean both openings of the dosing unit housing with a dry cloth. Before reassembling make sure that all parts are completely dry. Place lower disk No. back on dosing unit housing. Turn it in the direction of the CLOSE arrow until you hear a Click. Insert coffee box back to machine. logo faces forwards. The of 6
")


15 CLEANING DRAWER & MIXING CHAMBER / (Weekly cleaning recommended) CAUTION! Do not put any of the parts into the dishwasher! OFF! Switch machine off. Disconnect plug from socket. Pull out the drawer. Press down the blue lock handle Check that the lock handle is down. Remove the mixing chamber. Press the slider cover inwards from the both sides and pull it out. Sometimes the residue hardens, making it a little bit difficult to remove. Release the lock under the mixing chamber min. minutes Rinse drawer and slider cover under hot water. Wipe with a soft damp cloth. Soak mixing chamber in hot water for at least minutes. If coffee is still adhered, scrape it off gently. 3 of 6 Dry away moisture.


16 CLEANING DRAWER & MIXING CHAMBER / (Weekly cleaning recommended) CAUTION! Do not put any of the parts into the dishwasher! Check inside! Top Bottom Check the holes inside the mixing chamber: If the holes are blocked with coffee, rinse again with hot water. Push down lever until you hear a Click. In case mesh has been removed: Check orientation of the mesh (the mesh has a top and a bottom side) Push mesh into original position. Ensure it is fully inserted. Align arrows on slider cover and main body. Press the slider cover in until you hear a Click. Make sure that step has been correctly followed. Push mixing chamber into the main body. Ensure it is fully inserted Pull up blue handle to lock mixing chamber. Slide drawer in until you feel the Click. 4 of 6
")


17 CLEANING DRIP TRAY, TANKS & DOSING UNIT / (At least monthly cleaning recommended) CAUTION! Do not put any of the parts into the dishwasher! OFF! Switch machine off. Disconnect plug from socket. Rinse drip tray with hot water and clean it with a brush. Rinse and clean water tank. Afterwards refill with fresh, potable water and insert it to machine. No No. Make sure that coffee box is empty. Turn the dosing unit clockwise and remove it from the coffee box. Turn over the dosing unit and remove the upper disk No.. Using the thumbs turn in the direction of the OPEN arrow until you hear a Click. Lower disk No Dosing unit housing No Upper disk No. Put your fingers into the openings and remove lower disk No.. Check whether all three parts are there. 5 of 6 Wipe away the dirt with a soft damp cloth. Soak disk No. and disk No. in hot water.
")


18 CLEANING DRIP TRAY, TANKS & DOSING UNIT / (At least monthly cleaning recommended) CAUTION! Do not put any of the parts into the dishwasher! i 6 Remove coffee box cap. Clean cap with a soft damp cloth. Do not clean the coffee box with flowing water! Rinse and dry parts carefully before reassembling! Ideally let it dry for one night. Do not use a hair dryer deformation may result! No. No No No.3 No. 3 Align marks No. 3 with No. and fit together. The label No. 3 gets visible. Using the thumbs of both hands turn the lower disk No. in the direction of the CLOSE arrow until you hear a Click Put coffee box back on dosing unit. With the dosing unit held steady at the bottom, close by turning the coffee box clockwise until it stops. 6 of 6 Turn over the dosing unit housing and align the triangular portions on the dosing unit housing No. 3 and upper disk No..
. Water hardness Hard water Medium Soft Descaling after.")


19 DESCALING / If you don t descale your machine according to the following recommendations issues and even break down could happen. We recommend to descale your machine depending on water hardness and consumption but at least twice a year (see table below). Water hardness Hard water Medium Soft Descaling after... cups 300 ppm 50 cups 80 ppm 500 cups 80 ppm 750 cups Read instructions and safety information on packaging of descaling agent. Do not wash surface of machine using descaling agent. 5 ml 7 7 min. 500 ml Dissolve 5 ml of descaling agent* per Remove drip tray. Place a container with a capacity of at least 500 ml under the 500 ml of cold water. coffee outlet. Take water tank out. Do not use hot water! 3 7 Pour descaling solution into water tank. Insert water tank to machine. *Durgol recommended to use for descaling agent 7 sec To enter the descaling mode, start with machine off, then press on Espresso icon & power button for 7 seconds. All menu icons start flashing. Release the icons. Espresso icon and power button lights up steady green. Touch Espresso icon to start descaling process (icon starts flashing green). Descaling solution is discharged: First from high velocity hot water jet, then from coffee outlet. Throw away water from container. 7 of 6
.")


.")

. Fill up water tank with drinking water.")
20 DESCALING / min 5 min Wait 5 minutes to let the descaling solution work. Touch Espresso icon to start again descaling process (icon starts flashing green). Descaling solution is discharged: First from high velocity hot water jet, then from coffee outlet. Wait another 5 minutes to let descaling solution work. Throw away water from container. Carefully rinse water tank Place a container with a capacity of at least 500 ml under the coffee outlet. Put drinking water in the tank. Insert water tank to machine. Touch Espresso icon to start rinsing process (icon starts flashing green). Water is first discharged from the high velocity hot water jet and then from the coffee outlet. Throw away water from container When Espresso icon stops flashing, touch Espresso icon again to start second rinsing cycle (icon starts flashing green). Water is first discharged from the high velocity hot water jet and then from the coffee outlet. Throw away water from container. Carefully rinse water tank. Fill up water tank with drinking water. Insert water tank back to machine. min. 500 ml i To quit the descaling mode, turn off the machine. 8 of 6

. Access this mode by touching Cappuccino and Americano icon simultaneously during 5 seconds.")
21 GREEN & ORANGE LIGHT SIGNALS ~5 sec Heating up mode Power button: flashing green All menu icons: OFF Initial rinse mode Power button: steady green Espresso icon: steady green (see page 6) Operation mode Power button: steady green All menu icons: steady green +/ +/ Preparation mode Power button: steady green Selected menu icon: flashing green ECO mode (After 5 minutes power turns OFF automatically) Power button: OFF All menu icons: OFF Cup warming adjustment mode Power button: steady orange Cappuccino & Americano icon: flashing green In this mode you can adjust the amount of water dispensed when preheating the cup (see page 8+9). Access this mode by touching Cappuccino and Americano icon simultaneously during 5 seconds. When the desired amount of water is reached touch the Cappuccino and Americano icon simultaneously to stop. If you do not touch machine will stop at the maximum level! Coffee amount adjustment mode Power button: steady orange Selected menu icon: flashing green at the beginning, then steady green when adjustment possible (see page 0) 9 of 6

22 RED LIGHT SIGNALS /3 Signal lights LIGHT SIGNAL: PROCEDURE TO SOLVE THE PROBLEM: Drawer not correctly inserted Cleaning light Mixing chamber rinsing light No water indicator light Americano icon: flashing green Power button: steady red Coffee box not correctly inserted Insert drawer correctly. Push firmly inside. Espresso icon: flashing green Power button: steady red Remove coffee box and insert it correctly. Close top cover. If you have difficulty to insert back coffee box, please refer to section TROUBLESHOOTING, page 4. Error has occurred ON OFF 0 min All menu icons: OFF Power button: fast flashing red 0 of 6 Switch machine off and wait 0 minutes. Afterwards switch machine on. If power button still flashes red contact support desk.


.")
23 RED LIGHT SIGNALS /3 LIGHT SIGNAL: PROCEDURE TO SOLVE THE PROBLEM: Water tank empty / descaling required No water indicator light: flashing red Power button: steady green If water tank is EMPTY: If water tank is NOT EMPTY: Refill water tank and insert it back to machine correctly. Press green icon to finish beverage preparation. Descale the machine according to descaling procedure on page 7-8. Rinsing mixing chamber required Mixing chamber rinsing light: flashing red Espresso icon: steady green Power button: steady red Coffee dust in machine, cleaning required/recommended Cleaning light: flashing / steady red All menu icons: steady green Power button: steady green / red Remove coffee cup and place container with a capacity of 00 ml under the coffee outlet. Cleaning light: FLASHING RED Cleaning is recommended Touch Espresso icon. Rinsing process starts. Cleaning light: STEADY RED Cleaning is required Clean dosing unit (see page 5-6). Put coffee box in place and make a rinse. Additionally clean mixing chamber, slider cover and drawer (see page 3-4). of 6


.")

24 RED LIGHT SIGNALS 3/3 LIGHT SIGNAL: PROCEDURE TO SOLVE THE PROBLEM: Machine is blocked, cleaning required Cleaning light: steady red All menu icons: OFF Power button: steady red Clean and dry coffee box and dosing unit (see page 5-6). 3 Put coffee box without dosing unit back to machine. 4 Place a container with a capacity of at least 00 ml under the coffee outlet. Touch Espresso icon to start the rinsing process. Afterwards throw away water from container. 5 Remove coffee box out of machine. Reassemble coffee box on dosing unit (see page 6). 6 Fill coffee box with suitable coffee. of 6 Insert coffee box back to machine. The logo faces forwards.


25 TROUBLESHOOTING / CAUSE OF TROUBLE: PROCEDURE TO SOLVE THE PROBLEM: 3 3 All menu icons: OFF Power button: OFF Machine cannot be switched on. Check if the plug is connected correctly into a power socket. If yes, check your electricity supply. If machine still can not be switched on, contact support desk through the information found on the back page. When calling support desk, have the machine next to you and provide the machine number which you can find on the base of the machine. 3 3 Coffee is not being dispensed properly from the coffee outlet. Stop preparation. Clean mixing chamber, slider cover and drawer according to cleaning procedure on page Only hot water is being dispensed. Tap on the top cover and open it. Remove coffee box and refill it according to procedure on page 7. 3 of 6


.")


26 TROUBLESHOOTING / CAUSE OF TROUBLE: PROCEDURE TO SOLVE THE PROBLEM: 4 Coffee box cannot be inserted anymore. Power button: steady red Espresso icon: flashing green 4 Remove the coffee box from the machine. Make sure that coffee box is empty. Disassemble the dosing unit from the coffee box. Clean dosing unit and its parts (see page 6). Remove coffee cup and place a container with a capacity of at least 00 ml under the coffee outlet Insert the coffee box without dosing unit inside the machine. Machine will request a rinsing operation. Touch Espresso icon to start the rinsing process. Afterwards throw away water from container Take coffee box out and reassemble dosing unit (see page 6). 4 of 6 Fill coffee box with suitable coffee and insert it back to machine (see page 7). Close top cover. Machine is ready for use.
27 FREQUENTLY ASKED QUESTIONS COFFEE PREPARATION How is the coffee extracted from the machine? After selecting the desired beverage, the right amount of coffee is dispensed automatically from the coffee box to the mixing chamber. Mixed together with water, the coffee is brewed creating a coffee cyclone that brings out all of the rich flavour, aroma and creates a fine golden crema on black cups. Can I adjust the Coffee pre-settings? You can customise the coffee settings to your taste according to pre-defined menu settings. Please refer to the User Manual page 8. While extracting coffee, does any message come up if there is not enough coffee in the coffee box? There is no sensor that indicates that the coffee is running low. Please check before preparation as it is simple to check the remaining coffee amount by looking at the coffee box. How long should coffee stay in the coffee box? It s recommended to consume within a month. Why do I have to use NESCAFÉ GOLD coffee and not NESCAFÉ Original or Brasero? The NESCAFÉ GOLD BLEND Barista System machine has been designed to deliver the best of NESCAFÉ GOLD coffees and Nestlé recommends to use NESCAFÉ GOLD. Other products will obstruct the dosing system and block the machine. Can I just stop in the middle of extraction as the cup prepared is too long for my taste? In case you do not have other choice (took a small cup), you can stop the coffee preparation. However the system might require afterwards a rinse (red icon) in order to empty the remaining coffee from the system. In that case, please place a cup on the drip tray, and press the corresponding flashing button. To fully enjoy the experience, we recommend you to adjust your preparation parameter to your taste, this is possible on all black cups. Please refer to the User Manual page 8. MILK PREPARATION How is the milk / coffee creamer transformed into frothed milk? Our system uses a unique technology that froths the milk without contact with the machine by dissolving the creamer powder / by heating up the milk with a high velocity water jet, thus creating a delicious beverage with ease. We recommend you to use full fat milk for a longer lasting milk froth. I pressed the Cappuccino button, and milk does not come out. You need to separately buy milk or creamer which you have to place in your cup (please use measuring cup for fresh milk) in order to have Cappuccino and Latte Macchiato. How can I make my coffee more creamy / milky? Please use full fat milk to make it more creamy / milky. Can I put milk into the water tank? No, only water can be put into the water tank. Milk should be poured directly into the cup. 5 of 6 MACHINE OPERATION What is the machine warranty? Nestlé provide a year warranty from the day of purchase. Please ensure you keep the proof of purchase for returns/exchanges. Where does the machine come from? The machines is designed & engineered in Switzerland, assembled in China. Is it possible to use the machine abroad? The NESCAFÉ GOLD BLEND Barista System machine has specific voltage (see on the bottom, under the machine or in the user manual) and should not be used otherwise. Why does paper cup keep moving on the drip tray during beverage preparation? The machine works with pressure pump and it creates some vibrations. We strongly recommend not to use paper cups, preferably porcelain cups. Why do I need to descale the machine and how do I trigger the decaling process? Depending on your water quality or water hardness, and machine usage frequency, limescale will build over time in your machine, to the point it obstruct water pipes. At that stage, the machine can no longer dispense coffee and need to be descaled. Please refer to the relevant chapters in the User Manual page 7. How often should I clean the system? Each time you refill the coffee box, you should do a regular clean up at least the external dosing disks with a soft dry cloth. This will remove the coffee powder, that over time may create some blockage in the system. Does the jet nozzle come off from the machine for wash? No, the jet nozzle does not need to be dismantled. If no water comes through, it might be that there is some scale inside blocking. In that case please refer to the descaling procedure in the User Manual page 7. How do I clean the coffee box? The coffee box (transparent) and the dosing disks (coloured parts) should not be placed in the dishwasher. The transparent part should not be cleaned under water but with a soft cloth to remove coffee dust. The dosing disk can be dismantled and cleaned with a wet cloth but need to be dried for at least a full night before being reassembled. In case there is some remaining humidity in the coffee box after reassembly it will block the system. Please refer to the User Manual pages 5-6 for detailed instructions. Although the water has been filled, the water supply indicator blinks Please empty your water tank and check nothing might be blocking. It might be the case that some scale has built up into the system over time and that the machine needs to be descaled. Please refer to the User Manual page 7.


28 SPARE PARTS The following spare parts can be obtained from the Consumer Service Hotline: Water tank NESCAFÉ Coffee Box and dosing disks 3 Drip tray and drip grid 4 Slide cover (green) 5 NESCAFÉ mixing chamber (incl. mesh) 6 Machine drawer 6 of 6
29 7 of 6
 www.nestle.co.th Post Box No.")
30 Nestlé Consumer Center (Toll free only for landline phone) Post Box No. 9, Hualampong, Bangkok 033
USER MANUAL USER MANUAL
 USER MANUAL USER MANUAL NESCAFÉ Version 0.6 GOLDBLEND BARISTA TPM9636 07.02.2018 Recommended with NESCAFÉ GOLDBLEND Eco&System packs. Experience the full range today.* Refillable products that can be used
1. IMPORTANT SAFEGUARDS When using electrical appliances, basic safety precautions should always be followed to reduce the risk of fire, electric
 1. IMPORTANT SAFEGUARDS When using electrical appliances, basic safety precautions should always be followed to reduce the risk of fire, electric shock, and/pr injury to persons including the following:
MODEL: POD BREWER AURORA SAF 68 HOMEMAKER ESPRESSO MAKER WITH COFFEE POD
 INSTRUCTION MANUAL Please read this Instruction Manual and the safety instructions before operating the appliance! MODEL: POD BREWER AURORA SAF 68 HOMEMAKER ESPRESSO MAKER WITH COFFEE POD Congratulation
IMPORTANT SAFEGUARDS. 3. To protect against fire, electric shock and injury to persons do not immerse cord, plug or unit in water or other liquid.
 IMPORTANT SAFEGUARDS When using electrical appliances, basic precautions should always be followed, including the following: 1. Read all instructions. 2. Make sure that your outlet voltage corresponds
COFFEE MAKER INSTRUCTION MANUAL CM4682-V
 COFFEE MAKER INSTRUCTION MANUAL CM4682-V IMPORTANT SAFEGUARDS Before using the electrical appliance, the following basic precautions should always be followed including the following: 1. Read all instructions.
Get Started. Better Everyday ECAM23260
 Better Everyday Get Started This short guide is not intended to explain all the functions of the appliance. Please read all the owner s instruction booklet before use. Video available on www.youtube.com/delonghiusa
Automatic Coffee Machine Instruction Manual
 Instruction Manual Page 1 of 17 8212-0 Automatic Coffee Machine Instruction Manual Instruction Manual Page 2 of 17 IMPORTANT INFORMATION For safety purposes please read these instructions carefully before
COFFEE GRINDER. Owner s Manual
 COFFEE GRINDER Owner s Manual 4 4 FEATURES Bean Hopper Lid Bean Hopper Grinder Start/Stop Button Bean Hopper Holder Bean Hopper Release Button Grinding Timer Dial Coffee Powder Outlet 0 Grind Thickness
USER MANUAL TECHNICAL DATA
 USER MANUAL TECHNICAL DATA Model: Easy Touch Operating Voltage: 240V AC Frequency: 50 Hz Power con, MAX : 1500W Water tank cap.: 700ml (0.7L) Weight: 5.0 kg Size: L 350 * W 155 * H 245 mm This appliance
TEA CATER USER MANUAL. UM_EN Part No.:
 USER MANUAL UM_EN Part No.: 1730080-02 CONTENT CONTENT... 2 GENERAL... 4 Introduction...4 Warnings...4 Precautions...4 Intended use...4 Facts & weight...5 General functional description...5 OVERVIEW OF
Type HD8754 USER MANUAL
 Register your product and get support at www.philips.com/welcome 02 English Type HD8754 USER MANUAL 02 EN PLEASE READ THIS USER MANUAL CAREFULLY BEFORE USING THE MACHINE. IMPORTANT SAFEGUARDS When using
5KEK1322 W A_v08.indd 1 5/13/16 2:25 PM
 5KEK1322 W10878653A_v08.indd 1 PARTS AND FEATURES PARTS AND ACCESSORIES Tea steeper lid (center section of lid with handle) Kettle lid (outer section) Stainless steel lime scale filter Removable stainless
QUALITY MILK FROTHER INSTRUCTION MANUAL MODEL NO. MMF005
 QUALITY MILK FROTHER INSTRUCTION MANUAL MODEL NO. MMF005 MILK FROTHER INSTRUCTION MANUAL Model No.: MMF005 READ ALL INSTRUCTIONS BEFORE USING THE FROTHER. KEEP THESE INSTRUCTIONS FOR FUTURE REFERENCE.
Type HD8753 USER MANUAL
 Register your product and get support at www.philips.com/welcome 02 English Type HD8753 USER MANUAL 02 EN PLEASE READ THIS USER MANUAL CAREFULLY BEFORE USING THE MACHINE. IMPORTANT SAFEGUARDS When using
Coffee Grinder Instruction Manual
 Coffee Grinder Instruction Manual CoffeeGrinder Manual-English Only.indd 1 07/01/2016 14:14:39 Savisto Home Coffee Grinder Voltage Supply: 220-240V~ 50/60Hz Power Consumption: 150W Eng Please read through
SAFETY INSTRUCTIONS FOR USE
 INTRODUCTION Thank you for choosing this De Longhi Coffee machine. We hope you enjoy your new appliance. Please take a few minutes to read these instructions. This is the only way to ensure optimum results
CAFE BARISTA. User Guide EM5000
 CAFE BARISTA User Guide EM5000 Heading Sub Heading Body copy with not indent applied. Bullet copy Bullet copy Bullet copy Bullet copy Bullet copy Bullet copy Bullet copy Bullet copy 2 Contents Sunbeam
PLEASE READ THIS MANUAL BEFORE USE. SAVE FOR FUTURE REFERENCE.
 8-CUP STAINLESS STEEL CARAFE Coffee Brewer Model: BV1900TS HOUSEHOLD USE ONLY Customer Service Line: 1-855-664-1252 2-year limited warranty bonavitaworld.com Simple to operate Optional pre-infusion cycle
STAINLESS STEEL MILK FROTHER. Model: PKFMR11BK
 STAINLESS STEEL MILK FROTHER Model: PKFMR11BK WARNING! To reduce the risk of fire, electrical shock or injury to persons or property: Carefully read all instructions before operating your new product for
Matic / THa. Operating instructions COFFEE BREWER. Mode d emploi MACHINE À CAFÉ. Gebrauchsanleitung KAFFEEBRÜHMASCHINE
 Operating instructions COFFEE BREWER Mode d emploi MACHINE À CAFÉ Gebrauchsanleitung KAFFEEBRÜHMASCHINE Gebruiksaanwijzing KOFFIEZETAPPARAAT Bruksanvisning KAFFEBRYGGARE Bruksanvisning KAFFEMASKIN GB FR
HD8828 HD8834 USER MANUAL. Super automatic espresso coffee machine 3100 series. Read carefully before using the machine.
 Super automatic espresso coffee machine 3100 series 02 USER MANUAL Read carefully before using the machine. HD8828 HD8834 English 02 EN Register your product and get support at www.philips.com/welcome
EP3559, EP3558 EP3551, EP3550
 Super automatic espresso machine 3100 series EP3559, EP3558 EP3551, EP3550 EN USER MANUAL DE BENUTZERHANDBUCH ES MANUAL DEL USUARIO FR MODE D EMPLOI IT MANUALE UTENTE NL GEBRUIKSAANWIJZING 1 EP3558, EP3550
Type HD8852 USER MANUAL
 Register your product and get support at www.philips.com/welcome 02 English Type HD8852 USER MANUAL 02 EN PLEASE READ THIS USER MANUAL CAREFULLY BEFORE USING THE MACHINE. IMPORTANT SAFEGUARDS When using
HD8847 HD8848 USER MANUAL. Super automatic espresso coffee machine 4000 series. Read carefully before using the machine.
 Super automatic espresso coffee machine 4000 series 02 USER MANUAL Read carefully before using the machine. HD8847 HD8848 02 English EN Register your product and get support at www.philips.com/welcome
Type HD8851 USER MANUAL
 Register your product and get support at www.philips.com/welcome 02 English Type HD8851 USER MANUAL 02 EN PLEASE READ THIS USER MANUAL CAREFULLY BEFORE USING THE MACHINE. IMPORTANT SAFEGUARDS When using
User Manual. Coffee recipes included
 User Manual Coffee recipes included Machine Features On/Off button (machine switches off after 9 minutes of inactivity to conserve energy) Water tank cover Capsule drawer 0.5 ltr water tank Coffee dispensing
Coffee Burr Grinder. Model #559. Instructions. Warranty
 Coffee Burr Grinder Model #559 Instructions Warranty IMPORTANT SAFEGUARDS When using electrical appliances, basic safety precautions should always be followed, including the following: 1. Read all instructions.
CafeRomatica NICR7.. Fully automatic coffee centre Operating Instructions and Useful Tips. A passion for coffee.
 CafeRomatica Fully automatic coffee centre Operating Instructions and Useful Tips NICR7.. GB A passion for coffee. 1 G F A M J / K A B C D E Display screen Left rotary knob Right rotary knob Bean symbol
IMPORTANT INSTRUCTIONS MODE D EMPLOI IMPORTANT INSTRUCIONES IMPORTANTES ISTRUZIONI IMPORTANTI
 MOKA 22-04-2003 10:10 Pagina 1 IMPORTANT INSTRUCTIONS SAVE THESE INSTRUCTIONS MODE D EMPLOI IMPORTANT CONSERVEZ LES PRESENTES INSTRUCTIONS INSTRUCIONES IMPORTANTES GUARDE ESTAS INSTRUCCIONES ISTRUZIONI
MODELS 1315 & 1315-S La Pavoni CLUB COMBO
 IMPORTANT WARNINGS MODELS 1315 & 1315-S La Pavoni CLUB COMBO DUET Never operate your espresso machine without water in the tank. This may cause premature pump failure. Do not allow the power cord to come
Type HD8752 / HD8881 USER MANUAL
 Register your product and get support at www.philips.com/welcome 02 English Type HD8752 / HD8881 USER MANUAL 02 EN PLEASE READ THIS USER MANUAL CAREFULLY BEFORE USING THE MACHINE. IMPORTANT SAFEGUARDS
PICOBARISTO HD8924 EN DE ES FR IT NL USER MANUAL BENUTZERHANDBUCH MANUAL DEL USUARIO MODE D EMPLOI MANUALE UTENTE GEBRUIKSAANWIJZING
 PICOBARISTO HD8924 EN DE ES FR IT NL USER MANUAL BENUTZERHANDBUCH MANUAL DEL USUARIO MODE D EMPLOI MANUALE UTENTE GEBRUIKSAANWIJZING 4219.460.3607.1 HD8924 SAECO_PICOBARISTO AMF_WE_COVER_A5_FC.indd 1 01-09-16
SAVE THESE INSTRUCTIONS THIS PRODUCT IS FOR HOUSEHOLD USE ONLY
 IMPORTANT SAFEGUARDS When using electrical appliances, basic safety precautions should always be followed, including the following: Read all instructions. Do not touch hot surfaces. Use handles and knobs.
Please read the instructions and safety precautions before operating the appliance.
 1 EN INSTRUCTION MANUAL 2 JP 取扱説明書 20 C60C D60C Nespresso, an exclusive system creating the perfect Espresso, time after time. All Nespresso machines are equipped with a patented extraction system that
USER MANUAL Type HD HD8767
 02 English USER MANUAL Type HD8766 - HD8767 Read carefully before using the machine. 02 EN Register your product and get support at www.philips.com/welcome IMPORTANT SAFEGUARDS When using electrical appliances,
PROGRAMMABLE COFFEE MAKER
 PROGRAMMABLE COFFEE MAKER KM 7280 KM 7280 W ENGLISH EN A B C D E F G H I J K L M N O P 3 SAFETY AND SET-UP Please read this instruction manual thoroughly prior to using this appliance! Follow all safety
CHOCOLINO CAFÉLINO USER MANUAL UM_EN. Part No.: _01
 CHOCOLINO CAFÉLINO USER MANUAL UM_EN Part No.: 1764133_01 CONTENT CONTENT...2 GENERAL...4 Introduction...4 Warnings...4 Precautions...4 Intended use...4 Facts & weight...5 OVERVIEW OF COMPONENTS...6 CHOCOLINO/CAFÉLINO...6
My Machine _UM_ARES_C_Krups.indd :03
 My Machine 11065_UM_ARES_C_Krups.indd 1 16.05.17 14:03 Nespresso Vertuo is an exclusive system creating a perfect coffee, from the Espresso to the large Alto, time after time. Nespresso Vertuo machines
Type HD8779 INSTRUCTIONS FOR USE
 Register your product and get support at www.philips.com/welcome 02 English Type HD8779 INSTRUCTIONS FOR USE 02 EN PLEASE READ THIS USER MANUAL CAREFULLY BEFORE USING THE MACHINE. IMPORTANT SAFEGUARDS
Burr Grinder. Automatic burr grinder with 17-position grind selector. Instruction Booklet EM0430
 Burr Grinder Automatic burr grinder with 17-position grind selector Instruction Booklet EM0430 Please read these instructions carefully and retain for future reference. Contents Sunbeam s Safety Precautions
USER MANUAL Type HD8772
 02 English USER MANUAL Type HD8772 Read carefully before using the machine. 02 EN Register your product and get support at www.philips.com/welcome IMPORTANT SAFEGUARDS When using electrical appliances,
The Scoop 2-Way Brewer
 READ BEFORE USE The Scoop 2-Way Brewer Visit www.hamiltonbeach.in for our complete line of products and Use and Care Guides as well as delicious recipes, tips, and other helpful information! Questions?
Type HD8858 / HD8859 USER MANUAL
 Register your product and get support at www.saeco.com/welcome 02 English Type HD8858 / HD8859 USER MANUAL 02 EN PLEASE READ THIS USER MANUAL CAREFULLY BEFORE USING THE MACHINE. IMPORTANT SAFEGUARDS When
Get Started. Better Everyday ECAM26455
 Better Everyday Get Started This short guide is not intended to explain all the functions of the appliance. Please read all the owner s instruction booklet before use. ECAM26455 WELCOME Introducing the
TABLE OF CONTENTS HAND MIXER SAFETY
 5KHM926 2 HAND MIXER INSTRUCTIONS TABLE OF CONTENTS HAND MIXER SAFETY...2 Important Safeguards...3 Electrical Requirements...3 PARTS AND FEATURES...4 ACCESSORY GUIDE...5 SETTING UP YOUR HAND MIXER Attaching
CITIZ&MILK MY MACHINE. 9579_UM_CITIZ&MILK_FACELIFT_C_BREVILLE.indb :22
 CITIZ&MILK MY MACHINE 9579_UM_CITIZ&MILK_FACELIFT_C_BREVILLE.indb 1 30.03.16 15:22 EN CITIZ&MILK Nespresso, an exclusive system creating the perfect Espresso, time after time. All machines are equipped
Triple Brew. Model #352. Coffee & Tea Maker. Instructions Warranty
 Triple Brew Coffee & Tea Maker Model #352 Instructions Warranty IMPORTANT SAFEGUARDS When using electrical appliances, basic safety precautions should always be followed, including: 1. Read all instructions.
Always here to help you
 Always here to help you Register your product and get support at www.saeco.com/welcome HD8758/57 HD8758-57_4219_460_3151_1_COVER_BOOKLET_A5_bl.indd 1 14/10/15 10:07 English 5 ESPRESSO 1 5 2 6 3 7 8 4
This appliance can be used by children aged from 8 years and above and persons with
 IMPORTANT SAFEGUARDS Symbols used in these instructions Important warnings are identified by these symbols. It is vital to respect these warnings. Failure to observe the warning could result in life threatening
USER MANUAL Type HD HD8885
 02 English USER MANUAL Type HD8768 - HD8885 Read carefully before using the machine. 02 EN Register your product and get support at www.saeco.com/welcome IMPORTANT SAFEGUARDS When using electrical appliances,
Sleeve Down: Frothing. Sleeve Up: Steaming
 Sleeve Down: Frothing Sleeve Up: Steaming 3 SPECIAL CORD SET INSTRUCTIONS Regarding your Cord Set: A. A short power-supply cord (or detachable power-supply cord) is to be provided to reduce risks resulting
Type HD8752 USER MANUAL
 Register your product and get support at www.philips.com/welcome 02 English Type HD8752 USER MANUAL 02 EN PLEASE READ THIS USER MANUAL CAREFULLY BEFORE USING THE MACHINE. IMPORTANT SAFEGUARDS When using
5KCG0702 W A_Final.indd 1 8/4/15 8:35 AM
 5KCG0702 PARTS AND FEATURES PARTS AND ACCESSORIES Hopper lid Easy access stainless steel burrs 200 g glass hopper 15 grind settings Die cast metal body Grind control dial Power switch Faceplate assembly
INDEX 1. INTRODUCTION. Dear client:
 INDEX 1. Introduction 2. Important Safeguards 3. Preparation 4. Making Espresso 5. Preparing Cappuccino 6. Making Tea 7. Cleaning the Machine 8. BRIEL Technology (The AQUASTOP System) 9. Troubleshooting
INSTRUCTIONS FOR USE Type HD8762
 02 English INSTRUCTIONS FOR USE Type HD8762 Read carefully before using the machine. 02 EN Register your product and get support at www.philips.com/welcome IMPORTANT SAFEGUARDS When using electrical appliances,
IMPORTANT SAFEGUARDS. ENGLISH Congratulations on your wise choice!
 Congratulations on your wise choice! As the proud owner of the Gaggia machine, you can now experience the taste of a delicious cup of espresso or cappuccino in the comfort of your own home. Espresso coffee,
AUTOMATIC BEAN TO CUP COFFEE MACHINE
 AUTOMATIC BEAN TO CUP COFFEE MACHINE EB60 model USER GUIDE NZ AU GB IE CONTENTS Appliance parts 2 Safety and warnings 4 First use 9 Menu settings 13 Making coffee 17 Making cappuccinos and milk-based
Type HD8953 / HD8954 USER MANUAL
 Register your product and get support at www.philips.com/welcome 02 English Type HD8953 / HD8954 MANUAL 02 EN PLEASE READ THIS MANUAL CAREFULLY BEFORE USING THE MACHINE. IMPORTANT SAFEGUARDS When using
EP5961, EP5960, EP5365 EP5364, EP5363, EP5361 EP5360
 Super automatic espresso machine 5000 series EP5961, EP5960, EP5365 EP5364, EP5363, EP5361 EP5360 EN USER MANUAL DA BRUGERVEJLEDNING DE BENUTZERHANDBUCH ES MANUAL DEL USUARIO FR MODE D EMPLOI IT MANUALE
Custom Grind Deluxe Coffee Grinder
 READ BEFORE USE Visit www.hamiltonbeach.in for our complete line of products and Use and Care Guides as well as delicious recipes, tips, and other useful information! Custom Grind Deluxe Coffee Grinder
12 CUP COFFEE MAKER User Guide
 BRAND 12 CUP COFFEE MAKER User Guide Item: 740553 Ginnys.com 800-544-1590 Facebook.com/GinnysBrand Pinterest.com/GinnysBrand Ginnys.com/Blog Welcome to the world of full-flavored coffee with the Ginny
Type HD8749 GAGGIA NAVIGLIO DELUXE. User manual
 Type HD8749 GAGGIA NAVIGLIO DELUXE User manual IMPORTANT SAFEGUARDS When using electrical appliances, basic safety precautions should always be followed, including the following: 1. Read all instructions.
EP5934, EP5930, EP5346 EP5345, EP5340, EP5335 EP5334, EP5333, EP5331 EP5330, EP5045, EP5040 EP5035, EP5034, EP5030
 Super automatic espresso machine 5000 series EP5934, EP5930, EP5346 EP5345, EP5340, EP5335 EP5334, EP5333, EP5331 EP5330, EP5045, EP5040 EP5035, EP5034, EP5030 EN USER MANUAL DA BRUGERVEJLEDNING DE BENUTZERHANDBUCH
MARQUE REFERENCE CODIC
 MARQUE REFERENCE CODIC : KALORIK : TKG OT 00BCRL : 50 EN ANGLAIS PROVISOIREMENT NOTICE LOGO 00L ELECTRIC OVEN WITH ROTISSERIE & LAMP & CONVECTION INSTRUCTION MANUAL Model No. TY000BCL 0-0V~ 50/60Hz 800W
Single-Serve Coffee Maker
 840251801 Single-Serve Coffee Maker IMPORTANT SAFEGUARDS When using electrical appliances, basic safety precautions should always be followed to reduce the risk of fire, electric shock, and/or injury to
Coffee Burr Grinder. Model #591. Instructions. Warranty. 110W/120Vac/60 Hz. Read this manual thoroughly before using and save it for future reference
 Coffee Burr Grinder Model #591 Instructions Warranty Read this manual thoroughly before using and save it for future reference 110W/120Vac/60 Hz IMPORTANT SAFEGUARDS When using electrical appliances, basic
HD8841 HD8842 USER MANUAL. Super automatic espresso coffee machine 4000 series. Read carefully before using the machine.
 Super automatic espresso coffee machine 4000 series 02 USER MANUAL Read carefully before using the machine. HD8841 HD8842 02 English EN Register your product and get support at www.philips.com/welcome
GENERAL OPERATING RULES
 EN INSTRUCTION MANUAL GENERAL OPERATING RULES Carefully read the instruction manual and warranty limitations The machine must be connected to a grounded power outlet. The machine must be kept clean by
USER MANUAL Type HD8965
 02 English USER MANUAL Type HD8965 Read carefully before using the machine. 02 EN Register your product and get support at www.philips.com/welcome IMPORTANT SAFEGUARDS When using electrical appliances,
Please read all directions before using the product and retain this guide for reference. This product is intended for household use only.
 Wine Gift Set User Guide IVAWINESET05 Thank you for purchasing the Ivation Wine Gift Set. This User Guide is intended to provide you with guidelines to ensure that operation of this product is safe and
TABLE OF CONTENTS. English
 CMD ESPRESSO + SHIFT MACHINE CLICK TO INSTRUCTIONS CHANGE COPY TABLE OF CONTENTS ESPRESSO MACHINE SAFETY Important safeguards... 4 PARTS AND FEATURES Parts and accessories...11 ASSEMBLING THE ESPRESSO
Stainless Steel Milk Frother N3 User Manual
 Stainless Steel Milk Frother N3 User Manual Voltage: 110V~60Hz Power: 500W READ AND SAVE THESE INSTRUCTIONS IMPORTANT Read and follow the instructions in this user manual even if you feel you are familiar
Operating instructions COFFEE BREWER 1/0
 Operating instructions COFF BRWR GB 1 / 0 1/0 Operating instructions nglish 1.1 Introduction We are delighted that you have chosen one of our quality products. The machines have been specifically designed
AUTOMATIC BEAN TO CUP COFFEE MACHINE
 AUTOMATIC BEAN TO CUP COFFEE MACHINE EB60 model USER GUIDE NZ AU GB IE CONTENTS Appliance parts 2 Safety and warnings 4 First use 9 Menu settings 13 Making coffee 17 Making cappuccinos and milk-based
 Register your product and get support at www.saeco.com/welcome 02 English Type HD8642 / HD8643 USER MANUAL 02 EN PLEASE READ THIS USER MANUAL CAREFULLY BEFORE USING THE MACHINE. IMPORTANT SAFEGUARDS When
DE MANUAL BENUTZERHANDBUCH SM7683, SM7680 SM6080/SM6081/SM7080/SM7081 USER MANUAL BENUTZERHANDBUCH BENUTZERHANDBUCH
 SM7686, USER MANUAL SM7685, SM7684 SM7683, SM7680 SM6080/SM6081/SM7080/SM7081 BENUTZERHANDBUCH USER MANUAL MANUAL IT MANUALE DEL USUARIO UTENTE DE MANUAL BENUTZERHANDBUCH DEL USUARIO MODE NL GEBRUIKSAANWIJZING
ORIGINAL LINE A USER MANUAL
 USER MANUAL Machines with automatic water filling UM_EN Part No.: 1764024_01 CONTENT CONTENT... 2 GENERAL... 4 Introduction...4 Warnings...4 Precautions...4 Intended use...4 Facts & weight...5 General
Espresso Maker READ BEFORE USE. Questions? Please call us our friendly associates are ready to help
 Espresso Maker Visit www.hamiltonbeach.in for our complete line of products and Use and Care Guides as well as delicious recipes, tips, and other helpful information! Questions? Please call us our friendly
Instruction Manual Coffee Grinder. Kaffeemühle / Coffee grinder CM 70 Serie
 Instruction Manual Coffee Grinder Kaffeemühle / Coffee grinder CM 70 Serie Table of content Safety Instructions... 3 Before the first use... 4 Unpacking... 5 Requirements for the installation location...
Fully Automatic Coffee Machine OPERATION MANUAL
 Fully Automatic Coffee Machine OPERATION MANUAL Instructions of coffee machine parts 7 8 1 9 2 10 12 13 14 15 3 16 11 4 5 6 1 Bean container cover 9 Bean container 2 Water tank lid 10 Coffee spout 3 Water
Instruction Manual Coffee grinder. CM 90 Serie
 Instruction Manual Coffee grinder CM 90 Serie Table of content Safety Instructions... 3 Before first use... 4 Unpacking... 4 Requirements for the installation location... 5 Operating and speed settings...
LB 951. Istruzioni per l uso Instructions Mode d emploi Bedienungsanleitung Instrucciones de empleo Instruções de utilização Gebruiksaanwijzing
 L ECCELLZA DEL MIGLIOR ESPRESSO FIRMATO LAVAZZA THE EXCELLCE OF THE BEST LAVAZZA ESPRESSO Istruzioni per l uso Instructions Mode d emploi Bedienungsanleitung Instrucciones de empleo Instruções de utilização
Lusso / Espresso Si' Models:PL-16 PAB-16. Made In Italy
 Lusso / Espresso Si' Models:PL-16 PAB-16 Made In Italy la pavoni - PL-16 & PAB-16 We recommend using freshly roasted espresso beans ground medium to fine. Fresh coffee will produce better tasting espresso.
Shotmeister Owner s Manual. The Sleekest Design, Pouring the Coldest Shots
 Shotmeister Owner s Manual The Sleekest Design, Pouring the Coldest Shots Thank you for purchasing a Jägermeister Shotmeister! REGISTRATION INFORMATION Register your Jägermeister Shotmeister Online: at
instructions COFFEE GRINDER KG 79/89
 instructions COFFEE GRINDER KG 79/89 DESCRIPTION OF APPLIANCE The following terms are used throughout the instruction manual Coffee-bean hopper lid Removable upper burr Coffee-bean hopper ON/OFF switch
USER MANUAL Type HD8966
 02 English USER MANUAL Type HD8966 Read carefully before using the machine. 02 EN Register your product and get support at www.philips.com/welcome IMPORTANT SAFEGUARDS When using electrical appliances,
AND SAVE THESE INSTRUCTIONS
 COFFEE MACHINE Owner s instructions READ AND SAVE THESE INSTRUCTIONS CC100 E C B A D F Z2 Z1 Z G H I J Y Q R P S O T N U W V M X K L 3 1 2 3 4 5 6 MAX 6 oz. 7 8 4 9 10 11 12 B A 13 14 5 IMPORTANT SAFEGUARDS
Important Safety Information
 Thank you for purchasing the Knox KN-SMM01 Soy Milk & Soup Maker! Please read the instructions carefully before your first use of this product. Important Safety Information 1. Make sure electricity supply
COLD BREW COFFEE MAKER. Model# GCM-7800 USER MANUAL
 COLD BREW COFFEE MAKER Model# GCM-7800 USER MANUAL Read this manual thoroughly before using and save it for future reference FOR CUSTOMER SERVICE QUESTIONS OR COMMENTS VISIT US @ GOURMIA.COM INFO@GOURMIA.COM
Instruction manual and warranty for Cafissimo Mini
 Instruction manual and warranty for Cafissimo Mini Contents 1 Intended use and location 1 About these instructions 2 Safety warnings 4 At a glance 4 Control panel button functions 5 Initial operation prior
3-in-1 K-Cup Coffee Maker
 3-in-1 K-Cup Coffee Maker Model# GCM-4000 USER MANUAL Read this manual thoroughly before using and save it for future reference Model: GCM-4000 2017 Gourmia www.gourmia.com The Steelstone Group Brooklyn,
Register your product and get support at HD8759/ _460_3143_1_DFU-Simple_A5_v2.indd 1 13/10/15 10:57
 Register your product and get support at www.saeco.com/welcome HD8759/47 4219_460_3143_1_DFU-Simple_A5_v2.indd 1 13/10/15 10:57 English 5 ESPRESSO 1 5 2 6 3 7 8 4 9 10 11 12 13 MILK FROTH 19 14 ESPRESSO
1.1 California Proposition 65
 1. IMPORTANT SAFEGUARDS When using electrical appliances, basic safety precautions should always be followed, including the following: Read all instructions. Do not touch hot surfaces. Use handles and
Speed Pour Owner s Manual. Serving up the Coldest Shots
 Speed Pour Owner s Manual Serving up the Coldest Shots INSTRUCTIONS Unpacking and Start-Up Instructions 1. Start by removing the included boxes of the Stag Pourer & Bottle Neck Extender. 2. Remove foam
SG120 Model # Cup Stainless Steel Coffee Maker. Operating Instructions Product Registration Warranty
 SG120 Model #494 12-Cup Stainless Steel Coffee Maker Operating Instructions Product Registration Warranty IMPORTANT SAFEGUARDS When using electrical appliances, basic safety precautions should always be
Half-Pint Soft Serve Ice Cream Maker
 CAUTION: READ OPERATOR S MANUAL BEFORE USE Visit www.hamiltonbeach-me.com for our complete line of products and Use and Care Guides as well as delicious recipes and tips! Half-Pint Soft Serve Ice Cream
INSTRUCTIONS FOR USE Type HD HD8764
 02 English INSTRUCTIONS FOR USE Type HD8761 - HD8764 Read carefully before using the machine. 02 EN Register your product and get support at www.philips.com/welcome IMPORTANT SAFEGUARDS When using electrical
WE CAN HELP. Smart Coffee Maker User Manual. Can t connect? Need help? DO NOT RETURN THIS PRODUCT TO THE STORE
 Can t connect? Need help? Wi-Fi Date Code: 01/19 Smart Coffee Maker User Manual WE CAN HELP DO NOT RETURN THIS PRODUCT TO THE STORE Call 1-800-757-1440 Mon-Fri 9:00-5:00 EST (US) or email info@atomiusa.com
G F I M J K L B C D E S O T H Q P U N R D 4
 1 2 3 4 G F I A M J K L 5 6 7 B C D E 8 9 10 S O T H Q P U N R 11 12 D 4 Equipment GB A B C D E Text display (main menu) Rotary control knob Button > Button exit Height-adjustable coffee spout CafeRomatica
INSTRUCTION MANUAL. Coffee Maker CMCM-100
 INSTRUCTION MANUAL Coffee Maker CMCM-100 CONTENTS Cusimax recommends safety first....1-2 Know your Cusimax product...3 Operating your Cusimax product 4 Care & cleaning 5 Cusimax Recommends Safety First