|
|
|
- Emerald Nichols
- 5 years ago
- Views:
Transcription


1 Register your product and get support at 02 English Type HD8642 / HD8643 USER MANUAL 02 EN PLEASE READ THIS USER MANUAL CAREFULLY BEFORE USING THE MACHINE.
2 IMPORTANT SAFEGUARDS When using electrical appliances, basic safety precautions should always be followed, including the following: 1. Read all instructions. 2. Do not touch hot surfaces. Use handles or knobs. 3. To protect against fire, electric shock and injury to persons do not immerse cord, plugs, or appliance in water or other liquid. 4. Close supervision is necessary when the appliance is used by or near children. 5. Unplug from outlet when not in use and before cleaning. Allow to cool before putting on or taking off parts, and before cleaning the appliance. 6. Do not operate any appliance with a damaged cord or plug or after the appliance malfunctions, or has been damaged in any manner. Return appliance to the nearest authorized service facility for examination, repair or adjustment. 7. The use of accessory attachments not recommended by the appliance manufacturer may result in fire, electric shock or injury to persons. 8. Do not use outdoors. 9. Do not let cord hang over edge of table or counter, or touch hot surfaces. 10. Do not place on or near a hot gas or electric burner, or in a heated oven. 11. Always attach plug to appliance first, then plug cord into wall outlet. To disconnect, turn any control to off, then remove plug from wall outlet. 12. Do not use appliance for other than intended use. 13. Save these instructions. SAVE THESE INSTRUCTIONS
3 CAUTION This appliance is for household use only. Any servicing, other than cleaning and user maintenance, should be performed by an authorized service center. Do not immerse machine in water. To reduce the risk of fire or electric shock, do not disassemble the machine. There are no parts inside the machine serviceable by the user. Repair should be done by authorized service personnel only. 1. Check voltage to be sure that the voltage indicated on the nameplate corresponds with your voltage. 2. Never use warm or hot water to fill the water tank. Use cold water only. 3. Keep your hands and the cord away from hot parts of the appliance during operation. 4. Never clean with scrubbing powders or harsh cleaners. Simply use a soft cloth dampened with water. 5. For optimal taste of your coffee, use purified or bottled water. Periodic descaling is still recommended every 2-3 months. 6. Do not use caramelized or flavored coffee beans. INSTRUCTIONS FOR THE POWER SUPPLY CORD A. A short power-supply cord (or detachable power-supply cord) is to be provided to reduce risks resulting from becoming entangled in or tripping over a longer cord. B. Longer detachable power-supply cords or extension cords are available and may used if care is exercised in their use. C. If a long detachable power-supply cord or extension cord is used, 1. The marked electrical rating of the detachable power-supply cord or extension cord should be at least as great as the electrical rating of the appliance 2. If the appliance is of the grounded type, the extension cord should be a grounding-type 3-wire cord, and 3. The longer cord should be arranged so that it will not drape over the counter top or table top where it can be pulled on by children or tripped over.
4 2 ENGLISH Congratulations on your purchase of a Saeco Xsmall fully automatic espresso machine! To fully benefit from the support that Philips Saeco offers, please register your product at The machine is suitable for preparing espresso coffee using whole coffee beans. In this user manual you will find all the information you need to install, use, clean and descale your machine.
5 ENGLISH 3 CONTENTS IMPORTANT... 4 Safety Instructions... 4 Warnings... 4 Cautions... 6 Compliance with Standards... 7 INSTALLATION... 8 Product Overview... 8 General Description... 9 PREPARING FOR USE...10 Machine Packaging Preparing for Use USING THE MACHINE FOR THE FIRST TIME...12 Circuit Priming Automatic Rinse/Self-Cleaning Cycle INTENZA+ Water Filter Installation ADJUSTMENTS...16 Saeco Adapting System Adjusting the Ceramic Coffee Grinder Adjusting the Coffee Length BREWING COFFEE...20 CLEANING AND MAINTENANCE...21 Daily Cleaning of the Machine Daily Cleaning of the Water Tank Weekly Cleaning of the Brew Group and of the Coffee Outlet Duct Monthly Lubrication of the Brew Group DESCALING...26 Preparation Descaling Rinsing INTERRUPTION OF THE DESCALING CYCLE...30 UNDERSTANDING THE DIFFERENT LIGHTS...32 Control Panel TROUBLESHOOTING...35 ENERGY SAVING...37 Stand-by Disposal TECHNICAL SPECIFICATIONS...38 WARRANTY AND SERVICE...38 Warranty Service ORDERING MAINTENANCE PRODUCTS...39
6 4 ENGLISH IMPORTANT Safety Instructions This machine is equipped with safety devices. Nevertheless, read and follow the safety instructions carefully and only use the machine properly as described in these instructions to avoid accidental injury or damage due to improper use of the machine. Keep this user manual for future reference. The term WARNING and this icon warn against possible severe injuries, danger to life and/or damage to the machine. The term CAUTIONand this icon warn against slight injuries and/or damage to the machine. Warnings Connect the machine to a wall socket with a voltage matching the technical specifications of the machine. Connect the machine to a earthed wall socket. Do not let the power cord hang over the edge of a table or counter, or touch hot surfaces. Never immerse the machine, the mains plug or power cord in water: Danger of electrical shock! Do not pour liquids on the power cord connector. Do not touch hot surfaces. Use handles and knobs. Remove the mains plug from the wall socket: - if a malfunction occurs; - If the machine will not be used for a long time; - before cleaning the machine.
7 ENGLISH 5 Pull on the mains plug, not on the power cord. Do not touch the mains plug with wet hands. Do not use the machine if the mains plug, the power cord or the machine itself is damaged. Do not make any modifications to the machine or its power cord. Only have repairs carried out by a service centre authorised by Philips to avoid any hazard. The machine should not be used by children younger than 8 years old. The machine can be used by children of 8 years and upwards if they have previously been instructed on the correct use of the machine and made aware of the associated dangers or if they are supervised by an adult. Cleaning and maintenance should not be carried out by children unless they are more than 8 years old and supervised by an adult. Keep the machine and its power cord out of reach of children under 8 years old. The machine may be used by persons with reduced physical, sensory or mental capabilities or lacking sufficient experience and/or skills if they have previously been instructed on the correct use of the machine and made aware of the associated dangers or if they are supervised by an adult. Children should be supervised to ensure that they do not play with the machine. Never insert fingers or other objects into the coffee grinder.
8 6 ENGLISH Cautions The machine is for household use only. It is not intended for use in environments such as canteens, staff kitchens of shops, offices, farms or other work environments. Always put the machine on a flat and stable surface. Do not place the machine on hot surfaces, directly next to a hot oven, heater units or similar sources of heat. Only put roasted coffee beans into the coffee bean hopper. If ground coffee, instant coffee, raw coffee beans or any other substance is put in the coffee bean hopper, it may damage the machine. Let the machine cool down before inserting or removing any parts. Never use warm or hot water to fill the water tank. Use only cold non-sparkling drinking water. Never clean with scrubbing powders or harsh cleaners. Simply use a soft cloth dampened with water. Descale your machine regularly. The machine indicates when descaling is needed. Not doing this will make your appliance stop working properly. In this case repair is not covered under your warranty! Do not keep the machine at temperature below 0 C. Residue water in the heating system may freeze and cause damage. Do not leave water in the water tank if the machine is not used over a long period of time. The water can get contaminated. Use fresh water every time you use the machine.
9 Compliance with Standards ENGLISH 7 The machine complies with art.13 of the Italian Legislative Decree dated 25 July 2005, no. 151 Implementation of the Directives 2005/95/EC, 2002/96/EC and 2003/108/EC on the restriction of the use of certain hazardous substances in electrical and electronic equipment, as well as waste disposal. This machine complies with EU Directive 2002/96/EC. This Philips appliance complies with all the applicable standards and regulations relating to the exposure to electromagnetic fields.
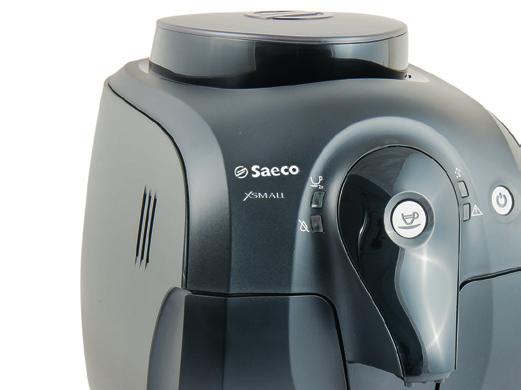


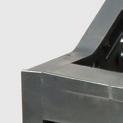
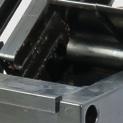
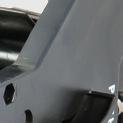
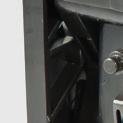
10 8 INSTALLATION 12 Product Overview
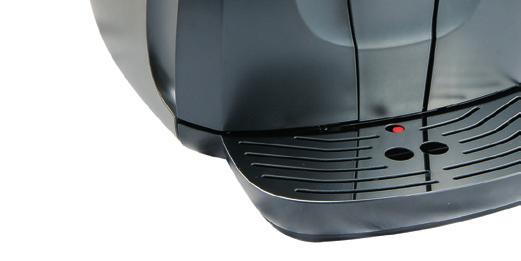
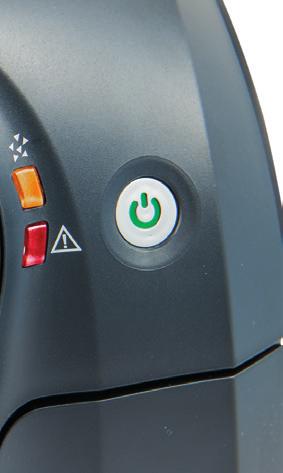
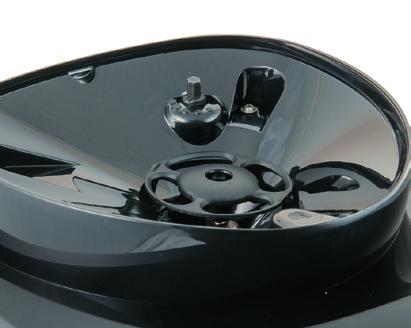
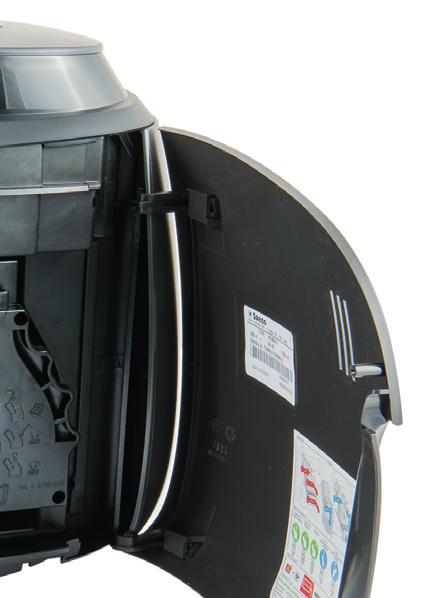
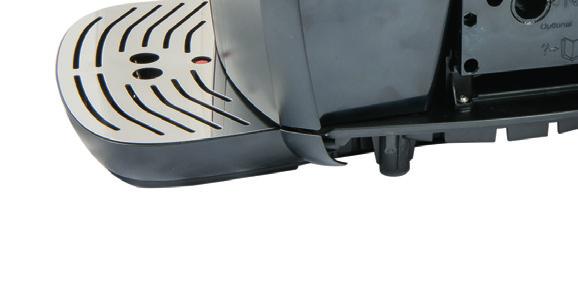
11 ENGLISH 9 General Description 1. Coffee bean hopper lid 2. Coffee bean hopper 3. Coffee dispensing spout 4. Full drip tray indicator 5. Coffee grounds drawer 6. Brew group 7. Service door 8. Control panel 9. Grill 10. Drip tray 11. Water tank 12. Grinder adjustment knob 13. Ceramic coffee grinder 14. Power cord 15. Grinder adjustment key 16. "Double coffee" light 17. Coffee button 18. Descaling light 19. No water light 20. Warning light 21. ON/OFF button with machine ready light


12 10 ENGLISH PREPARING FOR USE Machine Packaging The original packaging has been designed and constructed to protect the machine during transport. We recommend keeping the packaging material for possible future transport. Preparing for Use 1 Remove the coffee bean hopper lid and the drip tray with grill from the packaging. 2 Remove the machine from the packaging. 3 For best use, it is recommended to: Choose a safe, level surface, where there will be no danger of overturning the machine or being injured. Choose a location that is sufficiently well-lit, clean and near an easily reachable socket. Allow for a minimum distance from the sides of the machine as shown in the illustration. 4 Insert the drip tray with grill into the machine. Make sure it is fully inserted. Note: The drip tray collects the water that comes out of the dispensing spout during each rinse/self-cleaning cycle, as well as coffee that might be spilled during coffee preparation. Empty and wash the drip tray daily and each time the full drip tray indicator is raised. Caution: NEVER remove the drip tray when the machine has just been turned on. Wait a couple of minutes for the machine to carry out a rinse/selfcleaning cycle.


13 ENGLISH 11 5 Remove the water tank. MAX 6 Rinse the water tank with fresh water. 7 Fill the water tank with fresh water up to the MAX level and reinsert it into the machine. Make sure it is fully inserted. Caution: Never fill the water tank with warm, hot, sparkling water or any other liquid, as this may cause damage to the water tank and the machine. 8 Slowly pour the coffee beans into the coffee bean hopper. Caution: Only coffee beans must be put into the coffee bean hopper. If ground coffee, instant coffee, raw coffee beans or any other substance is put in the coffee bean hopper, it may damage the machine. 9 Put the lid on the coffee bean hopper. 10 Insert the plug into the socket located on the back of the machine.


 You need to prime the circuit.")

14 12 ENGLISH 11 Insert the plug at the other end of the power cord into a wall socket with suitable power voltage. 12 Press the ON/OFF button to turn the machine on; the light will begin to flash quickly, indicating that the circuit has to be primed. USING THE MACHINE FOR THE FIRST TIME When using the machine for the first time, the following activities need to happen: 1) You need to prime the circuit. 2) The machine will perform an automatic rinse/self-cleaning cycle. Circuit Priming During this process, fresh water flows through the internal circuit of the machine and the machine warms up. This takes a few seconds. 1 Place a container (1L) under the coffee dispensing spout.


15 ENGLISH 13 2 Press the button. The machine dispenses water for a few seconds. The light flashes slowly and the light turns off. 3 When water dispensing stops, the light flashes slowly. The machine is warming up. Automatic Rinse/Self-Cleaning Cycle When warm-up has been completed, the machine automatically performs a rinse/self-cleaning cycle of the internal circuits with fresh water. This takes less than a minute. 1 Place the container under the coffee dispensing spout to catch the small amount of water which will be dispensed. 2 The " " light flashes slowly. 3 Wait for water dispensing to stop. Flashing Note: You can stop dispensing by pressing the " " button.
16 14 ENGLISH 4 The " " light shines steadily. The machine is ready to brew coffee. Notes: The automatic rinse/self-cleaning cycle is initiated when the machine has been in stand-by mode, or turned off, for more than 15 minutes. When you have not used the machine for 2 or more weeks you also have to perform the manual rinsing cycle At the end of the cycle, it is possible to brew a coffee.


 in cold water and")
17 INTENZA+ Water Filter Installation ENGLISH 15 We recommend you to install the INTENZA+ water filter as this prevents limescale build-up in your machine and preserves a more intense aroma of your coffee. The INTENZA+ water filter can be purchased separately. For further details, please refer to the maintenance products page in this manual. Water is a crucial part of every coffee, so it is very important to always have it professionally filtered. Using the INTENZA+ water filter will prevent mineral deposits from building up and improve your water quality. 1 Remove the small white filter from the water tank and store it in a dry place. 2 Remove the INTENZA+ water filter from its packaging, immerse it vertically (with the opening positioned upwards) in cold water and gently press the sides so as to let the air bubbles out. 3 Set the INTENZA+ water filter according to the hardness of the water used: A = Soft water B = Hard water (standard) C = Very hard water
.")


18 16 ENGLISH 4 Put the "INTENZA +" water filter into the empty water tank. Press it down until it cannot move any further. 5 Fill the water tank with fresh water and reinsert it into the machine. 6 Brew a few coffees (see the "Brewing coffee" section). 7 Remove the tank, fill it with fresh water up to the MAX level and place it back into the machine. 8 When the operations described above have been completed, the light shines steadily. Machine is ready to brew coffee. Note: We recommend replacing the "INTENZA +" water filter every 2 months. Steady on ADJUSTMENTS The machine allows for certain adjustments so that you can brew the best tasting coffee possible. Saeco Adapting System Coffee is a natural product and its characteristics may change according to its origin, blend and roast. The machine is equipped with a self-adjusting system that allows the use of all types of coffee beans available on the market except for raw, caramelized and flavoured coffee beans. The machine automatically adjusts itself after brewing a certain number of cups of coffee to optimise the extraction.


19 Adjusting the Ceramic Coffee Grinder ENGLISH 17 Ceramic coffee grinders always guarantee accurate and perfect grinding and coarseness for every coffee speciality. This provides full aroma preservation, delivering a truly Italian taste in every cup. Warning: Do not insert fingers or other objects. Only adjust the ceramic coffee grinder using the grinder adjustment key. The ceramic coffee grinder contains moving parts that may be dangerous. You can adjust the ceramic grinders to set the coffee grinding to your personal taste. Warning: You can only adjust the coffee grinder settings when the machine is grinding coffee beans. 1 Remove the coffee bean hopper lid. 2 Make sure that the green light shines steadily, and that the water tank and the coffee bean hopper are full. Press the " " coffee button; the coffee grinder starts grinding.


 for coarse grind - lighter")
20 18 ENGLISH Note: Use the coffee grinder adjustment key provided with the machine. You will taste the difference after brewing 2-3 cups of coffee. If coffee is watery or is brewed slowly, change the coffee grinder settings. 3 While the coffee grinder is operating, press and turn the grinder adjustment knob inside the coffee bean hopper one notch at a time. Warning: Do not turn the coffee grinder more than one notch at the time to prevent damage. 4 The reference marks inside the coffee bean hopper indicate the grind setting. There are 5 different grind settings to choose, from position 1 ( ) for coarse grind - lighter taste to position 2 ( ) for fine grind - stronger taste When adjusting has been completed, put the lid back on the coffee bean hopper.


21 ENGLISH 19 Adjusting the Coffee Length The machine allows you to adjust the amount of brewed coffee according to your taste and the size of your cups. Each time the coffee button is pressed and released, the machine brews a pre-set amount of coffee. 1 Place a cup under the coffee dispensing spout. 2 Press and hold the button for a few seconds; until the and lights flash slowly. 3 Wait until the desired quantity is reached, then press the button to stop brewing. Flashing Now the button is programmed; each time it is pressed, the machine will brew the same amount of coffee that was just programmed.


22 20 ENGLISH BREWING COFFEE Before brewing coffee, make sure that the green light shines steadily on and that the water tank and coffee bean hopper are full. Steady on 1 Place 1 or 2 cups under the coffee dispensing spout. 2 Press the brew button. 3 To dispense 1 cup of coffee, press the button once. To dispense 2 cups of coffee, press the button twice consecutively. In this operating mode, the machine automatically grinds and doses the correct amount of coffee. Brewing two coffees requires two grinding and brewing cycles, automatically carried out by the machine; during this time, the light is shining steadily. 4 After the prebrewing cycle, coffee begins to pour out of the coffee dispensing spout. 5 Brewing stops automatically when the preset level is reached. You can press the button to stop brewing early.


23 ENGLISH 21 CLEANING AND MAINTENANCE Daily Cleaning of the Machine Caution: Timely cleaning and maintenance of your machine is very important as it prolongs the life of your machine. Your machine is continuously exposed to moisture, coffee and limescale! The activities you need to perform and their frequency are described in detail in this chapter. Not doing this will ultimately make your machine stop working properly. This repair is NOT covered by warranty! Note: Use a soft, dampened cloth to clean the machine. Do not immerse the machine in water. Do not wash any of its parts in the dishwasher. Do not use alcohol, solvents, and/or abrasive objects to clean the machine. Do not dry the machine and/or its parts using a microwave and/or standard oven. 1 Empty and clean the coffee grounds drawer daily with the machine turned on. Other maintenance operations can only be carried out when the machine is turned off and unplugged. 2 Empty and clean the drip tray. Perform this operation also when the full drip tray indicator is raised.


 in its housing by")


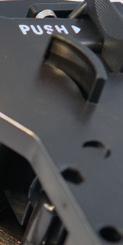
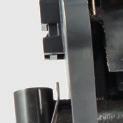
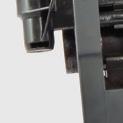
24 22 ENGLISH Daily Cleaning of the Water Tank 1 Remove the small white filter or the "INTENZA+" water filter (if installed) from the water tank and wash it with fresh water. 2 Put the small white filter back or the "INTENZA+" water filter (if installed) in its housing by gently pressing and turning it at the same time. 3 Fill the water tank with fresh water. Weekly Cleaning of the Brew Group and of the Coffee Outlet Duct The brew group should be cleaned every time the coffee bean hopper is filled or at least once a week. 1 Turn off the machine by pressing the "ON/OFF" button and unplug the power cord. 2 Remove the coffee grounds drawer. Open the service door. 3 To remove the brew group, press the «PUSH» button and pull it by the handle. Pull it out horizontally without turning it by pulling it by the handle.


.")
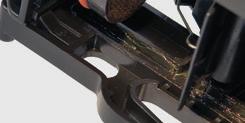
25 ENGLISH 23 4 Clean the coffee outlet duct thoroughly with a spoon handle or with another round-tipped kitchen utensil. 5 Thoroughly wash the brew group with fresh, lukewarm water and carefully clean the upper filter. Caution: do not use detergent or soap to clean the brew group. 6 Let the brew group air-dry thoroughly. 7 Thoroughly clean the inside of the machine using a soft, dampened cloth. 8 Make sure the brew group is in the off position; the two reference signs must match. If they do no match, proceed as described in step (9). 9 Gently pull down the lever on the back of the group until it is in contact with the brew group base and the two reference signs on the side of the brew group match.


26 24 ENGLISH 10 Press the PUSH button firmly. 11 Make sure that the hook which locks the brew group is in the correct position. If it is still in the downward position push it upward until it locks correctly into place. 12 Insert the brew group in its seat again until it locks into place WITHOUT pressing the PUSH button. 13 Insert the coffee grounds drawer. Close the service door.


27 Monthly Lubrication of the Brew Group ENGLISH 25 Lubricate the brew group after approximately 500 cups of coffee or once a month. The grease to lubricate the brew group can be purchased separately. For further details, please refer to the maintenance products page in this manual. Caution: Before lubricating the brew group, clean it under fresh water and let it dry, as described in the Brew Group Weekly Cleaning section. 1 Apply the grease evenly on both side guides. 2 Also lubricate the shaft. 3 Insert the brew group in its seat until it locks into place. (see Brew Group Weekly Cleaning section). 4 Insert the coffee grounds drawer and close the service door.


28 26 ENGLISH DESCALING orange light turns on, you need to descale the ma- When the chine. Descaling time: 30 minutes Not doing this will ultimately make your machine stop working properly. In this case, repair is NOT covered by warranty. Warning: Use the Saeco descaling solution only. Its formula has been designed to ensure better machine performance. The use of other products may damage the machine and leave residues in the water. The Saeco descaling solution can be purchased separately. For further details, please refer to the maintenance products page in this manual. Warning: Never drink the descaling solution or any products dispensed until the cycle has been carried out to the end. Never use vinegar as a descaling solution. Do not remove the brew group during the descaling cycle. Preparation 1 Turn off the machine by pressing the ON/OFF button. Note: If you don't turn off machine, you'll be making a coffee instead of activating the descaling cycle!


29 ENGLISH 27 2 Before beginning the descaling cycle, empty the drip tray and reinsert it, remove the "Intenza+" water filter if installed. H 2 O MAX 3 Remove and empty the water tank. Pour in the entire content of the Saeco descaling solution. Fill the water tank with fresh water up to the MAX level. Put the water tank back into the machine. 4 Place a large container under the coffee dispensing spout. Descaling 5 Press the button for about 5 seconds.

30 28 ENGLISH 6 The orange light starts flashing slowly and will continue to do so during the whole descaling cycle. The machine dispenses the descaling solution several times after one-minute intervals from the coffee dispensing spout until the water tank is completely empty. This procedure takes approx. 20 minutes. Note: if you wish to interrupt dispensing the descaling solution (for example to empty the container), press the " " button. Press the " " button again to resume dispensing. 7 When the " " red light turns on, remove and empty the container placed under the coffee dispensing spout and the drip tray, then place them back in position. H 2 O MAX Rinsing 8 Remove the water tank, rinse it and fill it up with fresh water up to the MAX level. If the water tank is not filled up to MAX level, the machine might require more rinse cycles. Put the water tank back into the machine. 9 The orange light flashes double during the whole rinse cycle. The machine starts dispensing water through the coffee dispensing spout.
31 ENGLISH 29 Note: if you wish to interrupt water dispensing (for example to empty the container), press the " " button. Press the " " button again to resume dispensing. 10 When the rinse cycle has been completed, the orange light turns off and the green light flashes. The machine warms up and performs the automatic rinse cycle. Note: If the red light turns on and the orange light is still flashing, the water tank has not been filled to the MAX level for the rinse cycle. Fill the water tank with fresh water. The rinse cycle will resume from point When the green light shines steadily, remove the drip tray, rinse it and place it back. H 2 O MAX 12 Remove and rinse the water tank. Reinstall the "INTENZA+" water filter (if any). Fill the water tank with fresh water up to the MAX level. Put the water tank back into the machine. 13 The machine is ready to brew coffee.
32 30 ENGLISH INTERRUPTION OF THE DESCALING CYCLE Once you have started the descaling cycle, you must complete it till the very end without turning off the machine. In case you get stuck during the descaling procedure, you can exit by unplugging the power cord. If that happens follow the steps below. 1 Empty the drip tray. H 2 O MAX 2 Empty and rinse carefully the water tank, then fill it with fresh water up to the MAX level. 3 Turn on the machine. The machine will start the automatic rinse cycle. 4 Place a container under the dispensing spout. Press the button and dispense 300 ml of coffee.
33 ENGLISH 31 5 Empty the container. The machine is ready for use. Note: If the orange led does not turn off you still have to descale your machine at your earliest convenience.


34 32 ENGLISH UNDERSTANDING THE DIFFERENT LIGHTS Control Panel Light Signals Causes Solutions The machine has reached the right temperature and is ready to brew coffee. Steady on Flashing slowly The machine is warming up to dispense coffee. The machine is performing the rinse/selfcleaning phase. The machine is dispensing. The machine ends the rinse/self-cleaning cycle automatically. You can interrupt the rinse/self-cleaning cycle by pressing the button. The machine needs descaling! Not descaling your machine will ultimately make it stop working properly. This repair is not covered by your warranty. and steady on The machine is in the descaling mode. Descaling first phase with descaling solution. Complete the descaling procedure. flashing slowly


35 ENGLISH 33 Light Signals Causes Solutions The machine is in the descaling mode. Descaling second phase with fresh water. Complete the descaling procedure. flashing twice The machine is in the descaling mode. Rinse the water tank and fill it up to the MAX level. Complete the descaling procedure. flashing slowly and light steady on. The machine is programming the amount of coffee to be brewed. Press the button as soon as the desired amount of coffee is reached. and lights flashing slowly The machine is brewing a double coffee. Steady on and light flashing slowly Low water level. Fill the water tank with fresh water. After putting the filled water tank back, the indicator light turns off. Steady on The coffee bean hopper is empty. Fill the coffee bean hopper with coffee beans and start the procedure again. and steady on

36 34 ENGLISH Light Signals Causes Solutions The coffee grounds drawer is full. With the machine turned on, empty the coffee grounds drawer. If the coffee grounds drawer is emptied when the machine is off, the coffee cycle counter is not reset. Wait until the light starts flashing before putting back the coffee grounds drawer. Steady on The water circuit is empty. Fill the water tank with fresh water and prime the water circuit as described in the Using the Machine for the First Time section. Flashing quickly Brew group is not inserted. The coffee grounds drawer is not inserted. Service door is open. Make sure that all components have been correctly inserted and closed. The flashing light will now turn off. Flashing slowly A fault has occurred in the brew group. Try again to brew another espresso or another coffee. and flashing slowly The machine is out of order. Turn off the machine. Turn it back on after 30 seconds. Try this 2 or 3 times. If the machine does NOT start, contact the Philips Saeco hotline. All lights are flashing simultaneously
37 TROUBLESHOOTING ENGLISH 35 This chapter summarizes the most common problems you could encounter with your machine. If you are unable to solve the problem with the information below, visit for a list of frequently asked questions or contact the Philips Saeco hotline in your country. The contact details can be found in the warranty booklet packed separately or on Problem Possible Cause Solution The machine does not turn on. The machine is not connected to the power source. Connect the machine to the power source. Coffee is not hot enough. The cups are cold. Preheat the cups with hot water. Coffee does not have enough crema (see note). The machine needs too much time to warm up. The brew group cannot be removed. The brew group cannot be inserted. The descaling cycle cannot be finished. The coffee blend is unsuitable, the coffee is not freshly roasted or the grind is too coarse. The machine water circuit is obstructed by limescale build-up. The brew group is out of place. The coffee grounds drawer is inserted. The brew group is not in the off position. The gearbox is not in the correct position. Most probably you have used not enough water for rinsing. Change coffee blend or adjust the ceramic coffee grinder as explained in the Adjusting the Ceramic Coffee Grinder section. Descale the machine. Turn on the machine. Close the service door. The brew group automatically returns to the correct position. Remove the coffee grounds drawer before removing the brew group. Make sure that the brew group in the off position, as described in the Weekly Cleaning of the Brew Group chapter. Insert the drip tray and the coffee grounds drawer. Close the service door. Turn on the machine without inserting the brew group. The gearbox returns to the correct position. Turn off the machine and reinsert the brew group as described in the Weekly Cleaning of the Brew Group chapter Unplug the power cord and follow the instructions described in the sector Interruption of the descaling cycle.
38 36 ENGLISH Problem Possible Cause Solution The machine grinds the coffee beans but no coffee is brewed (see note). The coffee is too weak (see note). Coffee is brewed slowly (see note). The brew group is dirty. This might occur when the machine is automatically adjusting the dose. The coffee dispensing spout is dirty. This might occur when the machine is automatically adjusting the dose. The ceramic coffee grinder is set to a coarse grind. The coffee grind is too fine. Clean the brew group ( Brew Group Cleaning section). Brew a few cups of espresso coffee as described in the Saeco Adapting System section. Clean the coffee dispensing spout. Brew a few cups of espresso coffee as described in the Saeco Adapting System section. Adjust the ceramic coffee grinder to a finer setting (see the Adjusting the Ceramic Coffee Grinder section). Change coffee blend or adjust the grind setting as explained in the Adjusting the Ceramic Coffee Grinder section. The drip tray gets filled although no water is drained. The brew group is dirty. Water is drained automatically by the machine into the drip tray to manage the rinsing of the circuits. Clean the brew group ( Brew Group Cleaning section). This is a standard operating procedure. Note: These problems can be considered normal if the coffee blend has been changed or if the machine has just been installed. In this case, wait until the machine performs a self-adjusting operation as described in the Saeco Adapting System section.
39 ENGLISH 37 ENERGY SAVING Stand-by The machine is designed for energy saving- proven by the Class A energy label. After 30 minutes of inactivity, the machine turns off automatically. Disposal Do not throw away the machine with the normal household waste at the end of its life, but hand it in at an official collection point for recycling. By doing this, you help to preserve the environment. Packaging materials can be recycled. - Machine: unplug the machine and cut the power cord. - Deliver the appliance and power cord to a service centre or public waste disposal facility. This product complies with EU Directive 2002/96/EC. The symbol on the product or on the packaging indicates that this product may not be treated as household waste, instead it shall be handed over to the applicable collection point for the recycling of electrical and electronic equipment. By ensuring this product is disposed of correctly, you will help prevent potential negative consequences for the environment and human health, which could otherwise be caused by inappropriate waste handling of this product. For more detailed information about recycling this product, please contact your local city office, your household waste disposal service or the shop where you purchased the product.
40 38 ENGLISH TECHNICAL SPECIFICATIONS The manufacturer reserves the right to make changes to the technical specifications of the product. Nominal Voltage - Power Rating - Power Supply Housing material See data plate on the inside of the service door ABS - Thermoplastic Size (w x h x d) 295 x 325 x 420 mm x 13 x 16.5 Weight 6.9 kg - 15 lbs Power cord length mm / Control panel Front panel Cup sizes Up to 95mm Water tank 1.0 litres 33 oz. / removable Coffee bean hopper capacity 200 g / 7.0 oz. Coffee grounds drawer capacity 8 Pump pressure 15 bar Boiler Stainless Steel Safety devices Thermal fuse WARRANTY AND SERVICE Warranty For detailed information on your warranty and related conditions, please read the warranty booklet supplied separately. Service We want to ensure that you remain satisfied with your machine. If you have not already done so, please register your purchase at This will enable us to stay in contact with you and send you cleaning and descaling reminders. For service or support, please visit the Philips website at support or contact the Philips Saeco hotline in your country. The contact details can be found in the warranty booklet packed separately or on


41 ORDERING MAINTENANCE PRODUCTS ENGLISH 39 For cleaning and descaling, use Saeco maintenance products only. You can purchase the products at the Philips online shop (if available in your country) at from your local dealer or authorised service centres. If you have any difficulties obtaining maintenance products for your machine, please contact the Philips Saeco hotline in your country. The contact details can be found in the warranty booklet supplied separately or on Overview of maintenance products - INTENZA+ WATER FILTER (CA6702) - GREASE (HD5061) - DESCALING SOLUTION (CA6700) - MAINTENANCE KIT (CA 6706)
42
43
44 02 02 Rev.00 del EN The manufacturer reserves the right to make changes without prior notice.
HD8847 HD8848 USER MANUAL. Super automatic espresso coffee machine 4000 series. Read carefully before using the machine.
 Super automatic espresso coffee machine 4000 series 02 USER MANUAL Read carefully before using the machine. HD8847 HD8848 02 English EN Register your product and get support at www.philips.com/welcome
HD8828 HD8834 USER MANUAL. Super automatic espresso coffee machine 3100 series. Read carefully before using the machine.
 Super automatic espresso coffee machine 3100 series 02 USER MANUAL Read carefully before using the machine. HD8828 HD8834 English 02 EN Register your product and get support at www.philips.com/welcome
USER MANUAL Type HD HD8885
 02 English USER MANUAL Type HD8768 - HD8885 Read carefully before using the machine. 02 EN Register your product and get support at www.saeco.com/welcome IMPORTANT SAFEGUARDS When using electrical appliances,
Type HD8749 GAGGIA NAVIGLIO DELUXE. User manual
 Type HD8749 GAGGIA NAVIGLIO DELUXE User manual IMPORTANT SAFEGUARDS When using electrical appliances, basic safety precautions should always be followed, including the following: 1. Read all instructions.
Type HD8750 USER MANUAL
 Register your product and get support at www.philips.com/welcome 02 English Type HD8750 USER MANUAL 02 EN PLEASE READ THIS USER MANUAL CAREFULLY BEFORE USING THE MACHINE. IMPORTANT SAFEGUARDS When using
Type HD8754 USER MANUAL
 Register your product and get support at www.philips.com/welcome 02 English Type HD8754 USER MANUAL 02 EN PLEASE READ THIS USER MANUAL CAREFULLY BEFORE USING THE MACHINE. IMPORTANT SAFEGUARDS When using
Type HD8752 / HD8881 USER MANUAL
 Register your product and get support at www.philips.com/welcome 02 English Type HD8752 / HD8881 USER MANUAL 02 EN PLEASE READ THIS USER MANUAL CAREFULLY BEFORE USING THE MACHINE. IMPORTANT SAFEGUARDS
HD8841 HD8842 USER MANUAL. Super automatic espresso coffee machine 4000 series. Read carefully before using the machine.
 Super automatic espresso coffee machine 4000 series 02 USER MANUAL Read carefully before using the machine. HD8841 HD8842 02 English EN Register your product and get support at www.philips.com/welcome
USER MANUAL Type HD8772
 02 English USER MANUAL Type HD8772 Read carefully before using the machine. 02 EN Register your product and get support at www.philips.com/welcome IMPORTANT SAFEGUARDS When using electrical appliances,
Type HD8753 USER MANUAL
 Register your product and get support at www.philips.com/welcome 02 English Type HD8753 USER MANUAL 02 EN PLEASE READ THIS USER MANUAL CAREFULLY BEFORE USING THE MACHINE. IMPORTANT SAFEGUARDS When using
USER MANUAL Type HD HD8767
 02 English USER MANUAL Type HD8766 - HD8767 Read carefully before using the machine. 02 EN Register your product and get support at www.philips.com/welcome IMPORTANT SAFEGUARDS When using electrical appliances,
INSTRUCTIONS FOR USE Type HD HD8764
 02 English INSTRUCTIONS FOR USE Type HD8761 - HD8764 Read carefully before using the machine. 02 EN Register your product and get support at www.philips.com/welcome IMPORTANT SAFEGUARDS When using electrical
1. IMPORTANT SAFEGUARDS When using electrical appliances, basic safety precautions should always be followed to reduce the risk of fire, electric
 1. IMPORTANT SAFEGUARDS When using electrical appliances, basic safety precautions should always be followed to reduce the risk of fire, electric shock, and/pr injury to persons including the following:
Always here to help you
 Always here to help you Register your product and get support at www.saeco.com/welcome HD8758/57 HD8758-57_4219_460_3151_1_COVER_BOOKLET_A5_bl.indd 1 14/10/15 10:07 English 5 ESPRESSO 1 5 2 6 3 7 8 4
Type HD8779 INSTRUCTIONS FOR USE
 Register your product and get support at www.philips.com/welcome 02 English Type HD8779 INSTRUCTIONS FOR USE 02 EN PLEASE READ THIS USER MANUAL CAREFULLY BEFORE USING THE MACHINE. IMPORTANT SAFEGUARDS
IMPORTANT SAFEGUARDS. 3. To protect against fire, electric shock and injury to persons do not immerse cord, plug or unit in water or other liquid.
 IMPORTANT SAFEGUARDS When using electrical appliances, basic precautions should always be followed, including the following: 1. Read all instructions. 2. Make sure that your outlet voltage corresponds
Type HD8752 USER MANUAL
 Register your product and get support at www.philips.com/welcome 02 English Type HD8752 USER MANUAL 02 EN PLEASE READ THIS USER MANUAL CAREFULLY BEFORE USING THE MACHINE. IMPORTANT SAFEGUARDS When using
INSTRUCTIONS FOR USE Type HD8762
 02 English INSTRUCTIONS FOR USE Type HD8762 Read carefully before using the machine. 02 EN Register your product and get support at www.philips.com/welcome IMPORTANT SAFEGUARDS When using electrical appliances,
Register your product and get support at HD8759/ _460_3143_1_DFU-Simple_A5_v2.indd 1 13/10/15 10:57
 Register your product and get support at www.saeco.com/welcome HD8759/47 4219_460_3143_1_DFU-Simple_A5_v2.indd 1 13/10/15 10:57 English 5 ESPRESSO 1 5 2 6 3 7 8 4 9 10 11 12 13 MILK FROTH 19 14 ESPRESSO
USER MANUAL Type HD8965
 02 English USER MANUAL Type HD8965 Read carefully before using the machine. 02 EN Register your product and get support at www.philips.com/welcome IMPORTANT SAFEGUARDS When using electrical appliances,
Type HD8852 USER MANUAL
 Register your product and get support at www.philips.com/welcome 02 English Type HD8852 USER MANUAL 02 EN PLEASE READ THIS USER MANUAL CAREFULLY BEFORE USING THE MACHINE. IMPORTANT SAFEGUARDS When using
USER MANUAL Type HD8966
 02 English USER MANUAL Type HD8966 Read carefully before using the machine. 02 EN Register your product and get support at www.philips.com/welcome IMPORTANT SAFEGUARDS When using electrical appliances,
Type HD8858 / HD8859 USER MANUAL
 Register your product and get support at www.saeco.com/welcome 02 English Type HD8858 / HD8859 USER MANUAL 02 EN PLEASE READ THIS USER MANUAL CAREFULLY BEFORE USING THE MACHINE. IMPORTANT SAFEGUARDS When
Type HD8836 / HD8837 SUP 037DR OPERATING INSTRUCTIONS
 Register your product and get support at www.philips.com/welcome 02 English Type HD8836 / HD8837 SUP 037DR OPERATING INSTRUCTIONS 02 EN READ THESE OPERATING INSTRUCTIONS CAREFULLY BEFORE USING THE MACHINE.
5KEK1322 W A_v08.indd 1 5/13/16 2:25 PM
 5KEK1322 W10878653A_v08.indd 1 PARTS AND FEATURES PARTS AND ACCESSORIES Tea steeper lid (center section of lid with handle) Kettle lid (outer section) Stainless steel lime scale filter Removable stainless
Type HD8851 USER MANUAL
 Register your product and get support at www.philips.com/welcome 02 English Type HD8851 USER MANUAL 02 EN PLEASE READ THIS USER MANUAL CAREFULLY BEFORE USING THE MACHINE. IMPORTANT SAFEGUARDS When using
Rev.02 del The manufacturer reserves the right to change the features of the product without prior notice.
 02 Rev.02 del 15-07-12 02 EN The manufacturer reserves the right to change the features of the product without prior notice. www.philips.com/saeco Register your product and get support at www.philips.com/welcome
Get Started. Better Everyday ECAM23260
 Better Everyday Get Started This short guide is not intended to explain all the functions of the appliance. Please read all the owner s instruction booklet before use. Video available on www.youtube.com/delonghiusa
MACHINE DISPOSAL.
 02 MACHINE DISPOSAL - The packing materials can be recycled. - Appliance: Unplug the appliance and cut the power cord. - Deliver the appliance and power cord to a service center or public waste disposal
Type HD8833 SUP 037R OPERATING INSTRUCTIONS
 Register your product and get support at www.philips.com/welcome Type HD8833 SUP 037R OPERATING INSTRUCTIONS EN English READ THESE OPERATING INSTRUCTIONS CAREFULLY BEFORE USING THE MACHINE. IMPORTANT SAFEGUARDS
IMPORTANT INSTRUCTIONS MODE D EMPLOI IMPORTANT INSTRUCIONES IMPORTANTES ISTRUZIONI IMPORTANTI
 MOKA 22-04-2003 10:10 Pagina 1 IMPORTANT INSTRUCTIONS SAVE THESE INSTRUCTIONS MODE D EMPLOI IMPORTANT CONSERVEZ LES PRESENTES INSTRUCTIONS INSTRUCIONES IMPORTANTES GUARDE ESTAS INSTRUCCIONES ISTRUZIONI
EP3559, EP3558 EP3551, EP3550
 Super automatic espresso machine 3100 series EP3559, EP3558 EP3551, EP3550 EN USER MANUAL DE BENUTZERHANDBUCH ES MANUAL DEL USUARIO FR MODE D EMPLOI IT MANUALE UTENTE NL GEBRUIKSAANWIJZING 1 EP3558, EP3550
INSTRUCTION MANUAL. Coffee Maker CMCM-100
 INSTRUCTION MANUAL Coffee Maker CMCM-100 CONTENTS Cusimax recommends safety first....1-2 Know your Cusimax product...3 Operating your Cusimax product 4 Care & cleaning 5 Cusimax Recommends Safety First
DE MANUAL BENUTZERHANDBUCH SM7683, SM7680 SM6080/SM6081/SM7080/SM7081 USER MANUAL BENUTZERHANDBUCH BENUTZERHANDBUCH
 SM7686, USER MANUAL SM7685, SM7684 SM7683, SM7680 SM6080/SM6081/SM7080/SM7081 BENUTZERHANDBUCH USER MANUAL MANUAL IT MANUALE DEL USUARIO UTENTE DE MANUAL BENUTZERHANDBUCH DEL USUARIO MODE NL GEBRUIKSAANWIJZING
Type HD8953 / HD8954 USER MANUAL
 Register your product and get support at www.philips.com/welcome 02 English Type HD8953 / HD8954 MANUAL 02 EN PLEASE READ THIS MANUAL CAREFULLY BEFORE USING THE MACHINE. IMPORTANT SAFEGUARDS When using
Automatic Coffee Machine Instruction Manual
 Instruction Manual Page 1 of 17 8212-0 Automatic Coffee Machine Instruction Manual Instruction Manual Page 2 of 17 IMPORTANT INFORMATION For safety purposes please read these instructions carefully before
PICOBARISTO HD8924 EN DE ES FR IT NL USER MANUAL BENUTZERHANDBUCH MANUAL DEL USUARIO MODE D EMPLOI MANUALE UTENTE GEBRUIKSAANWIJZING
 PICOBARISTO HD8924 EN DE ES FR IT NL USER MANUAL BENUTZERHANDBUCH MANUAL DEL USUARIO MODE D EMPLOI MANUALE UTENTE GEBRUIKSAANWIJZING 4219.460.3607.1 HD8924 SAECO_PICOBARISTO AMF_WE_COVER_A5_FC.indd 1 01-09-16
STAINLESS STEEL MILK FROTHER. Model: PKFMR11BK
 STAINLESS STEEL MILK FROTHER Model: PKFMR11BK WARNING! To reduce the risk of fire, electrical shock or injury to persons or property: Carefully read all instructions before operating your new product for
instructions COFFEE GRINDER KG 79/89
 instructions COFFEE GRINDER KG 79/89 DESCRIPTION OF APPLIANCE The following terms are used throughout the instruction manual Coffee-bean hopper lid Removable upper burr Coffee-bean hopper ON/OFF switch
5KEK1522 W A_01_EN.indd 1 11/16/12 1:22 PM
 5KEK1522 Water Kettle INSTRUCTIONS Table of Contents water KEttle SAFETY Important safeguards...6 Electrical requirements...7 Electrical equipment waste disposal...7 PARTS AND FEATURES Parts and accessories...8
Coffeemaker User's manual
 Coffeemaker User's manual EN Prior to using this appliance, please read the user's manual thoroughly, even in cases where you have previously familiarised yourself with the operation of similar types of
PLEASE READ THIS MANUAL BEFORE USE. SAVE FOR FUTURE REFERENCE.
 8-CUP STAINLESS STEEL CARAFE Coffee Brewer Model: BV1900TS HOUSEHOLD USE ONLY Customer Service Line: 1-855-664-1252 2-year limited warranty bonavitaworld.com Simple to operate Optional pre-infusion cycle
Coffee Burr Grinder. Model #559. Instructions. Warranty
 Coffee Burr Grinder Model #559 Instructions Warranty IMPORTANT SAFEGUARDS When using electrical appliances, basic safety precautions should always be followed, including the following: 1. Read all instructions.
EP5934, EP5930, EP5346 EP5345, EP5340, EP5335 EP5334, EP5333, EP5331 EP5330, EP5045, EP5040 EP5035, EP5034, EP5030
 Super automatic espresso machine 5000 series EP5934, EP5930, EP5346 EP5345, EP5340, EP5335 EP5334, EP5333, EP5331 EP5330, EP5045, EP5040 EP5035, EP5034, EP5030 EN USER MANUAL DA BRUGERVEJLEDNING DE BENUTZERHANDBUCH
USER MANUAL Type HD8967 / HD8968 / HD8969
 02 English USER MANUAL Type HD8967 / HD8968 / HD8969 Read carefully before using the machine. App available on Google Play starting from October 2014 Tablet not included 02 EN 0051 Register your product
WE CAN HELP. Smart Coffee Maker User Manual. Can t connect? Need help? DO NOT RETURN THIS PRODUCT TO THE STORE
 Can t connect? Need help? Wi-Fi Date Code: 01/19 Smart Coffee Maker User Manual WE CAN HELP DO NOT RETURN THIS PRODUCT TO THE STORE Call 1-800-757-1440 Mon-Fri 9:00-5:00 EST (US) or email info@atomiusa.com
COFFEE MAKER INSTRUCTION MANUAL CM4682-V
 COFFEE MAKER INSTRUCTION MANUAL CM4682-V IMPORTANT SAFEGUARDS Before using the electrical appliance, the following basic precautions should always be followed including the following: 1. Read all instructions.
Coffee Grinder Instruction Manual
 Coffee Grinder Instruction Manual CoffeeGrinder Manual-English Only.indd 1 07/01/2016 14:14:39 Savisto Home Coffee Grinder Voltage Supply: 220-240V~ 50/60Hz Power Consumption: 150W Eng Please read through
5KCG0702 W A_Final.indd 1 8/4/15 8:35 AM
 5KCG0702 PARTS AND FEATURES PARTS AND ACCESSORIES Hopper lid Easy access stainless steel burrs 200 g glass hopper 15 grind settings Die cast metal body Grind control dial Power switch Faceplate assembly
The Scoop 2-Way Brewer
 READ BEFORE USE The Scoop 2-Way Brewer Visit www.hamiltonbeach.in for our complete line of products and Use and Care Guides as well as delicious recipes, tips, and other helpful information! Questions?
Operation and maintenance manual. Before using the machine, please read the attached operating instructions. Carefully read the safety rules
 Operation and maintenance manual Before using the machine, please read the attached operating instructions. Carefully read the safety rules 2 IMPORTANT SAFEGUARDS When using electrical appliances, basic
ENGLISH. Type SUP041E. OPERATING INSTRUCTIONS Read these operating instructions carefully before using the machine.
 02 ENGLISH Type SUP041E 02 EN OPERATING INSTRUCTIONS Read these operating instructions carefully before using the machine. 1 1 2 3 7 8 4 5 6 9 10 11 12 13 14 15 16 17 18 19 20 21 22 23 24 25 2 2 3 4 5
MODEL: POD BREWER AURORA SAF 68 HOMEMAKER ESPRESSO MAKER WITH COFFEE POD
 INSTRUCTION MANUAL Please read this Instruction Manual and the safety instructions before operating the appliance! MODEL: POD BREWER AURORA SAF 68 HOMEMAKER ESPRESSO MAKER WITH COFFEE POD Congratulation
COFFEE GRINDER. Owner s Manual
 COFFEE GRINDER Owner s Manual 4 4 FEATURES Bean Hopper Lid Bean Hopper Grinder Start/Stop Button Bean Hopper Holder Bean Hopper Release Button Grinding Timer Dial Coffee Powder Outlet 0 Grind Thickness
MODEL# GCM4500 COFFEE MAKER WITH GRINDER. PHOTO OF PRODUCT
 MODEL# GCM4500 COFFEE MAKER WITH GRINDER www.gourmia.com PHOTO OF PRODUCT 2016 Gourmia www.gourmia.com The Steelstone Group Brooklyn, NY Welcome to Delicious and Aromatic world of Coffee Makers from Gourmia!
Burr Grinder. Automatic burr grinder with 17-position grind selector. Instruction Booklet EM0430
 Burr Grinder Automatic burr grinder with 17-position grind selector Instruction Booklet EM0430 Please read these instructions carefully and retain for future reference. Contents Sunbeam s Safety Precautions
BarAroma Coffee & Spice Grinder
 Breville is a registered trademark of Breville Pty. Ltd. ABN 98 000 092 928 Breville Customer Service Centre Australian Customers Breville Customer Service Centre PO Box 22 Botany NSW 2019 AUSTRALIA Customer
SAFETY INSTRUCTIONS FOR USE
 INTRODUCTION Thank you for choosing this De Longhi Coffee machine. We hope you enjoy your new appliance. Please take a few minutes to read these instructions. This is the only way to ensure optimum results
Electric Two-Speed Drink Mixer
 Electric Two-Speed Drink Mixer MS2090 Series Before use, please read this manual thoroughly and save for future reference. ovente.com Electric Two-Speed Drink Mixer MS2090 Series 2 ovente.com ELECTRIC
EP5961, EP5960, EP5365 EP5364, EP5363, EP5361 EP5360
 Super automatic espresso machine 5000 series EP5961, EP5960, EP5365 EP5364, EP5363, EP5361 EP5360 EN USER MANUAL DA BRUGERVEJLEDNING DE BENUTZERHANDBUCH ES MANUAL DEL USUARIO FR MODE D EMPLOI IT MANUALE
EN Electric Coffee Grinder
 SCG 5050BK EN Electric Coffee Grinder - 1 - EN Electric Coffee Grinder Important safety instructions READ CAREFULLY AND STORE FOR FUTURE USE. This appliance may be used by persons with physical or mental
Get Started. Better Everyday ECAM26455
 Better Everyday Get Started This short guide is not intended to explain all the functions of the appliance. Please read all the owner s instruction booklet before use. ECAM26455 WELCOME Introducing the
Coffee Burr Grinder. Model #591. Instructions. Warranty. 110W/120Vac/60 Hz. Read this manual thoroughly before using and save it for future reference
 Coffee Burr Grinder Model #591 Instructions Warranty Read this manual thoroughly before using and save it for future reference 110W/120Vac/60 Hz IMPORTANT SAFEGUARDS When using electrical appliances, basic
Triple Brew. Model #352. Coffee & Tea Maker. Instructions Warranty
 Triple Brew Coffee & Tea Maker Model #352 Instructions Warranty IMPORTANT SAFEGUARDS When using electrical appliances, basic safety precautions should always be followed, including: 1. Read all instructions.
OPERATING INSTRUCTIONS FOR YOUR SAFETY CAREFULLY READ THE OPERATING INSTRUCTIONS. FOR HOUSEHOLD USE ONLY
 OPERATING INSTRUCTIONS FOR YOUR SAFETY CAREFULLY READ THE OPERATING INSTRUCTIONS. FOR HOUSEHOLD USE ONLY 2 Opening Congratulations on choosing this high quality espresso machine and thank you for your
SES 4010SS. EN Espresso Machine. Copyright 2017, Fast ČR, a.s
 SES 4010SS EN Espresso Machine - 1 - EN Espresso Machine Important safety instructions READ CAREFULLY AND STORE FOR FUTURE USE. This appliance may be used by children 8 years of age and older and by persons
EP5315, EP5314 EP5313, EP5311 EP5310
 Super automatic espresso machine 5000 series EP5315, EP5314 EP5313, EP5311 EP5310 EN USER MANUAL DA BRUGERVEJLEDNING DE BENUTZERHANDBUCH ES MANUAL DEL USUARIO FR MODE D EMPLOI IT MANUALE UTENTE NL GEBRUIKSAANWIJZING
Contact Grill. User's manual
 Contact Grill User's manual EN SBG 2050SS / SBG 2051BK SBG 2052RD / SBG 3050SS SBG 3051BK / SBG 3052RD Prior to using this appliance, please read the user's manual thoroughly, even in cases where you have
Downloaded from Quick Start Guide D512. Smart Decanter
 Quick Start Guide D52 Smart Decanter Contents Safety Precaution Cleaning Technical Data Correct Disposal of This Product Connecting Power Rechargeable Battery Installation Your isommelier 0 04 05 isommelier
SAVE THESE INSTRUCTIONS
 22 IMPORTANT SAFEGUARDS When using electrical appliances, basic safety precautions should always be followed to reduce the risk of fire, electric shock, and/or injury to persons, including the following:
GENERAL OPERATING RULES
 EN INSTRUCTION MANUAL GENERAL OPERATING RULES Carefully read the instruction manual and warranty limitations The machine must be connected to a grounded power outlet. The machine must be kept clean by
User Manual. Stainless Steel Coffee Urns. Models: 177CU55ETL, 177CU110ETL 10/2016. Please read and keep these instructions. Indoor use only.
 Intertek Stainless Steel Coffee Urns Models: 177CU55ETL, 177CU110ETL 10/2016 Please read and keep these instructions. Indoor use only. www.avantcoequipment.com 1 NOTE: Save these instructions for future
Stainless Steel Milk Frother N3 User Manual
 Stainless Steel Milk Frother N3 User Manual Voltage: 110V~60Hz Power: 500W READ AND SAVE THESE INSTRUCTIONS IMPORTANT Read and follow the instructions in this user manual even if you feel you are familiar
MODELS 1315 & 1315-S La Pavoni CLUB COMBO
 IMPORTANT WARNINGS MODELS 1315 & 1315-S La Pavoni CLUB COMBO DUET Never operate your espresso machine without water in the tank. This may cause premature pump failure. Do not allow the power cord to come
QUALITY MILK FROTHER INSTRUCTION MANUAL MODEL NO. MMF005
 QUALITY MILK FROTHER INSTRUCTION MANUAL MODEL NO. MMF005 MILK FROTHER INSTRUCTION MANUAL Model No.: MMF005 READ ALL INSTRUCTIONS BEFORE USING THE FROTHER. KEEP THESE INSTRUCTIONS FOR FUTURE REFERENCE.
USER MANUAL Type HD HD HD HD8978
 02 English USER MANUAL Type HD8969 - HD8975 - HD8977 - HD8978 Read carefully before using the machine. Only for Types HD8969, HD8977 and HD8978 EN 02 Saeco Avanti App Tablet not included Saeco Avanti App
This appliance can be used by children aged from 8 years and above and persons with
 IMPORTANT SAFEGUARDS Symbols used in these instructions Important warnings are identified by these symbols. It is vital to respect these warnings. Failure to observe the warning could result in life threatening
Espresso Maker READ BEFORE USE. Questions? Please call us our friendly associates are ready to help
 Espresso Maker Visit www.hamiltonbeach.in for our complete line of products and Use and Care Guides as well as delicious recipes, tips, and other helpful information! Questions? Please call us our friendly
PROGRAMMABLE COFFEE MAKER
 PROGRAMMABLE COFFEE MAKER KM 7280 KM 7280 W ENGLISH EN A B C D E F G H I J K L M N O P 3 SAFETY AND SET-UP Please read this instruction manual thoroughly prior to using this appliance! Follow all safety
45-Cup Coffee Urn Big Brew Classic. Instruction Manual. Model ACU-045
 45-Cup Coffee Urn Big Brew Classic Instruction Manual Model ACU-045 Congratulations! Your Big Brew Classic will surely become one of the most practical appliances in your home or office. Enjoy fresh brewed
5KCM0512A W A_ENv10.indd 1 10/13/15 12:41 PM
 5KCM0512A PARTS AND FEATURES PARTS AND ACCESSORIES Scale readout display Timer readout display Plunger handle Power button Lid Plunger (stainless steel mesh filter with silicone seal not shown) Timer button
INSTRUCTION MANUAL AND RECIPE BOOK CORN DOG MAKER CDM-1 SMART PLANET PLEASE READ THESE INSTRUCTIONS CAREFULLY AND RETAIN FOR FUTURE REFERENCE.
 INSTRUCTION MANUAL AND RECIPE BOOK CORN DOG MAKER CDM-1 SMART PLANET PLEASE READ THESE INSTRUCTIONS CAREFULLY AND RETAIN FOR FUTURE REFERENCE. IMPORTANT SAFEGUARDS Read all instructions before using the
LB 951. Istruzioni per l uso Instructions Mode d emploi Bedienungsanleitung Instrucciones de empleo Instruções de utilização Gebruiksaanwijzing
 L ECCELLZA DEL MIGLIOR ESPRESSO FIRMATO LAVAZZA THE EXCELLCE OF THE BEST LAVAZZA ESPRESSO Istruzioni per l uso Instructions Mode d emploi Bedienungsanleitung Instrucciones de empleo Instruções de utilização
Burr Grinder. Model #551. Instructions. Warranty
 Burr Grinder Model #551 Instructions Warranty IMPORTANT SAFEGUARDS When using electrical appliances, basic safety precautions should always be followed, including the following: 1. Read all instructions.
FOR HOUSEHOLD USE ONLY
 Operation and maintenance manual Before using the machine, please read the attached operating instructions. Carefully read the safety rules. FOR HOUSEHOLD USE ONLY IV IMPORTANT SAFEGUARDS When using electrical
Lusso / Espresso Si' Models:PL-16 PAB-16. Made In Italy
 Lusso / Espresso Si' Models:PL-16 PAB-16 Made In Italy la pavoni - PL-16 & PAB-16 We recommend using freshly roasted espresso beans ground medium to fine. Fresh coffee will produce better tasting espresso.
Register your product and get support at Registrieren Sie Ihr Produkt und erhalten Sie den entsprechenden Support unter
 ENGLISH DEUTSCH Type HD8927 Instruction manual Read carefully before using the machine. Bedienungsanleitung Lesen Sie diese Bedienungsanleitung vor dem Gebrauch des Geräts aufmerksam durch. Register your
User Manual. Stainless Steel Coffee Urns. Models: 177CU30, 177CU55, 177CU110 04/2018. Please read and keep these instructions. Indoor use only.
 Stainless Steel Coffee Urns Models: 177CU30, 177CU55, 177CU110 04/2018 Please read and keep these instructions. Indoor use only. www.avantcoequipment.com 1 NOTE: Save these instructions for future reference.
Booklet_TCG-357_ENG.qxd 9/8/08 11:19 AM Page 1 COFFEE/SPICE GRINDER. Instruction Booklet. Model: TCG-357
 Booklet_TCG-357_ENG.qxd 9/8/08 11:19 AM Page 1 COFFEE/SPICE GRINDER Instruction Booklet Model: TCG-357 Booklet_TCG-357_ENG.qxd 9/8/08 11:19 AM Page 2 IMPORTANT SAFEGUARDS When using electrical appliances,
SAVE THESE INSTRUCTIONS THIS PRODUCT IS FOR HOUSEHOLD USE ONLY
 IMPORTANT SAFEGUARDS When using electrical appliances, basic safety precautions should always be followed, including the following: Read all instructions. Do not touch hot surfaces. Use handles and knobs.
A N F I M Srl. Caimano On Demand. Super Caimano COFFEE GRINDER C O D Y S C O D Y - II. Model
 ANFIM A N F I M Srl Via B. Verro, 33/5-20141 - Tel. (+39) 02/8465054 e-mail: info@anfim.it MILANO ITALY - Fax.(+39) 02/8464401 website: www.anfim.it INSTRUCTION MANUAL Model Caimano On Demand Super Caimano
User Manual. Stainless Steel Coffee Urn. Models: 177CU30 11/2018. Please read and keep these instructions. Indoor use only.
 Stainless Steel Coffee Urn Models: 177CU30 11/2018 Please read and keep these instructions. Indoor use only. www.avantcoequipment.com 1 NOTE: Save these instructions for future reference. Index Important
Half-Pint Soft Serve Ice Cream Maker
 CAUTION: READ OPERATOR S MANUAL BEFORE USE Visit www.hamiltonbeach-me.com for our complete line of products and Use and Care Guides as well as delicious recipes and tips! Half-Pint Soft Serve Ice Cream
Aroma Fresh. Instructions for use Includes recipes. Model BCM120
 Aroma Fresh Instructions for use Includes recipes Model BCM120 Contents Page Breville recommends safety first 4 Know your Breville Aroma Fresh Coffee Maker 5 Operating your Breville Aroma Fresh Coffee
MODEL# GCG165 COFFEE GRINDER. PHOTO OF PRODUCT
 MODEL# GCG165 COFFEE GRINDER www.gourmia.com PHOTO OF PRODUCT 2016 Gourmia www.gourmia.com The Steelstone Group Brooklyn, NY Welcome to Delicious world of Coffee Grinders from Gourmia! All rights reserved.
MARQUE REFERENCE CODIC
 MARQUE REFERENCE CODIC : KALORIK : TKG OT 00BCRL : 50 EN ANGLAIS PROVISOIREMENT NOTICE LOGO 00L ELECTRIC OVEN WITH ROTISSERIE & LAMP & CONVECTION INSTRUCTION MANUAL Model No. TY000BCL 0-0V~ 50/60Hz 800W
Wi-Fi Coffee Maker. Model# GCMW-4750 USER MANUAL
 Wi-Fi Coffee Maker Model# GCMW-4750 USER MANUAL Read this manual thoroughly before using and save it for future reference Model: GCMW-4750 2018 Gourmia www.gourmia.com The Steelstone Group Brooklyn, NY
TABLE OF CONTENTS. English
 CMD ESPRESSO + SHIFT MACHINE CLICK TO INSTRUCTIONS CHANGE COPY TABLE OF CONTENTS ESPRESSO MACHINE SAFETY Important safeguards... 4 PARTS AND FEATURES Parts and accessories...11 ASSEMBLING THE ESPRESSO
IF THERE IS ANY QUESTION ABOUT A CONDITION BEING SAFE OR UNSAFE, DO NOT OPERATE THIS PRODUCT!
 RO18BT 18 Quart Roaster Oven Operating Instructions READ ALL INSTRUCTIONS AND WARNINGS BEFORE USING THIS PRODUCT. This manual provides important information on proper operation & maintenance. Every effort
Thank you for your purchase!
 CM4200S Thank you for your purchase! www.prodprotect.com/blackanddecker Should you have any questions or concerns with your new product, please call our Customer Service Line at 1-800-465-6070 (US and