Troop 318 Camp Cookbook. Dutch Oven Camp Stove Grilling Cooking with Fire Backpack Meals
|
|
|
- Brittany Paul
- 5 years ago
- Views:
Transcription


1 Troop 318 Camp Cookbook Dutch Oven Camp Stove Grilling Cooking with Fire Backpack Meals Last update: October, 2011


2
 Dutch Oven Cooking Introduction to Dutch Oven")


3 SECTIONS Introduction Meal Planning Patrol Box & Gear Camp Cooking Tips Food Preparation (Proper Handling) Dutch Oven Cooking Introduction to Dutch Oven Cooking Dutch Oven Care and Maintenance How to Cook with a Dutch Oven Dutch Oven Recipes Camp Stove Cooking Using a Propane Camp Stove Camp Stove Recipes Grilling Cooking with the Grill Direct & Indirect Cooking Marinades and Rubs Grilling Recipes Cooking with Fire About Cooking on an Open Campfire - Rotisserie - Skewers - Cooking on a Rock - Cooking on Coals (Foil) - Food inside of Food / Wrapped in Leaves - Cooking in a Paper Bag - Cooking with a Can - Grilling Grate over the Fire Cooking with Fire Recipes About Pie Irons Pie Iron Recipes Backpack Stove Cooking About backpack stoves Backpack Recipes No-Cook Trail Meals Recipe Indexes Breakfast Main Meal Side Dishes Breads/Biscuits - Desserts Appendix A: Easy Meal Ideas Appendix B: Measurements & Conversions Appendix C: Camp Coffee Sources
4 Philmont Grace For Food, For Raiment, For Friendship and Fellowship We thank thee, O Lord "Cooks are not found wandering in the woods. Nor do Scouts fry an egg on the first try. Guide them, teach them, but don't do everything for them." Ed Bailey, Denver Area Council, Centennial District Red meat is not bad for you. Now blue-green meat, that s bad for you! Tommy Smothers Hunger finds no fault with the cooking. Proverb I feel a recipe is only a theme, which an intelligent cook can play each time with a variation. Madam Benoit "As for butter versus margarine, I trust cows more than chemists." Joan Gussow Nothing would be more tiresome than eating and drinking if God had not made them a pleasure as well as a necessity. Voltaire Do vegetarians eat animal crackers? Author Unknown
5 Introduction This book has been and continues to be written by and for the Boy Scouts and Adult Scout Leaders of Troop 318, Orland Park, IL. It will be updated as needed with additional recipes and adjustments to the current recipes. We encourage all cooks to expand their skills and try new flavors and cooking techniques. Please send in any recipes that you have tried and liked, or any recipes that you come across and think would be a good addition to our cookbook. Cook, experiment, learn, share Meal Planning Camp cooking will be much less of a chore if you have planned well, planned thoroughly, and if you come prepared. Start planning the campout meals as soon as you know how many Scouts or Adult Leaders will be on the campout. In fact, you can start preparing even before that, by looking through this book, as well as other resources for ideas for new meal plans. Keep in mind the following items when planning a meal: Nutrition: Plan healthful, well balanced meals yes this means include vegetables! Servings: Be sure that there will be enough food for everyone to get their fair share Allergies: Be aware of any allergies that anyone in your group has, and plan accordingly Variety: Change things up! Don t keep making the same meals on every campout Equipment: Will the all the equipment that you need for cooking be available for you? (Dutch ovens, grill, campfire, stove space, pots & pans, utensils, etc.) Will you need to bring any gear? Storage: Will you be able to bring all the food you need? How will you store it safely until you need it? Preparation: What can (and maybe even has to be) prepared in advance of the campout? When are you going to prepare it? Be sure you have scheduled the time to take care of preparations. Shopping: Where will you purchase the food? Who will help? When will you make the purchases? Where will you store the food before the campout? Budget: How much can you spend per Scout/Adult? What is the total you can spend? How will you stay under or within budget? Plan carefully. A Scout is Thrifty. Duty Roster: Be sure to complete a duty roster for every campout, include everyone, and stick to it. Menu Approval: All campout menus must be approved by the Scoutmaster or the Camping Coordinator before the campout.
6 Caring for Your Patrol Box and Cooking Gear Each patrol has its own patrol box with a propane stove and cooking gear. It is the responsibility of the patrol to: Keep the patrol box supplied o This means that you have all of the pots & pans, cooking utensils (spatula, spoons, etc.) hot pads, lighters, bowls and any other gear that your patrol needs to prepare meals on campouts o You also need to replenish consumables such as cooking oil, sugar, salt & pepper, seasonings, dish soap, etc. o Always have clean towels to dry dishes before putting the patrol box away. o The troop will supply the propane and the stove Keep the patrol box and all of the gear CLEAN! o The cooking utensils, pots and pans, etc. must always be thoroughly cleaned and dried before being stowed away in the patrol box. o As soon as you have a burner available, start heating water for cleaning dishes o You must use the 3 pan method for cleaning dishes, pots & pans and utensils: Pan 1 has hot, soapy water Pan 2 has hot, clean water for rinsing Pan 3 has water with just a few drops of bleach for sanitizing o DO NOT SKIP THIS STEP! Be sure to DRY the dishes as well NEVER put wet dishes away in the patrol box. o CLEAN THE STOVE! The stove must be cleaned thoroughly, all food and spills removed o Clean the patrol box so there is no food on it (check for spilled liquids, sugar, etc.) Wipe down the entire patrol box with clean soapy water or with a sanitary wipe. Rinse and dry as well. o The dirty dishtowels must be brought home, washed, and brought back for the next campout Propane Stove o Keep your stove clean o If you smell an odd odor (propane) - tell an adult IMMEDIATELY. o If you are having trouble lighting the stove, STOP. There may be a build-up of propane that can ignite. Let an adult leader know that you are having trouble lighting your stove. o An adult leader will connect your stove to the propane tank. Dutch Ovens are maintained by the troop and are available to the patrols. Check with the quartermaster and Scoutmaster to reserve what you need in advance of a campout to be sure that it is available (and not already being used by another patrol). The grill can be used by any patrol, but should be reserved in advance. If you are planning to cook a meal at the fire, check with the Scoutmaster in advance of the campout.
7 Camp Cooking Tips Start food preparation in advance (at home) to make things go more smoothly at the campout. Pre-chop ingredients such as onion, peppers etc at home. Pack in zip-lock bags. Pre-cook select meats and freeze for quick meal preparation. Pre-measure as much as you can and pack in a zip-loc instead of the box it came in (pancake mix for example) Block ice will last longer than cubed ice in your cooler freeze your own (use a milk jug and you will have drinking water after it melts). All items in a cooler should be packed in water tight bags Pre-heat pans/griddles before you start cooking on them (but do not OVERHEAT). Spread oil evenly in pan. Heat a pot of hot water on the stove as soon as you are done cooking and you will be ready for clean up when everyone is finished eating. Pita bread packs better and stays in better shape when camping than regular bread Bring energy boosting snacks such as GORP trail mix, granola bars, dried fruit, beef jerky etc. for in between meals. These are good for backpacking. To cook hamburgers more evenly throughout, put a hole in the middle of your hamburger about the size of your finger, during grilling the hole will disappear but the center will be cooked the same as the edges. Disposable water bottles make great dispensers for salad dressings, oils and sauces (especially the smaller sizes). To easily remove burned on food from your skillet or pan, simply add a drop or two of dish soap and enough water to cover bottom of pan and bring to a boil. Use a leather/suede work glove as an oven mitt. Put a rope through the paper towel tube. Tie ends together. Loop over slat in picnic table or from a low limb Frozen food should be packed in small, separate packages. A 5lb bag of frozen hamburger will a long time to thaw! Have everything that you will need ready before you start cooking (food already cut up, utensils, oil, seasoning, etc.)

8 Proper Handling of Food - Wash your hands - Keep cold foods cold (<40 ) - Keep warm foods warn (>140 ) Food Preparation - Keep raw meats & eggs away from other foods - ANYTHING that comes in contact with raw meat or eggs must be washed before touching anything else (utensils, cutting boards, hands, etc.) - Store all food in sealed containers - Use a Food Thermometer (see below) - Dispose of food waste properly Use a Food Thermometer If you are cooking meat or poultry on a portable stove or over a fire, you'll need a way to determine when it is done and safe to eat. Color is not a reliable indicator of doneness, and it can be especially tricky to tell the color of a food if you are cooking in a wooded area in the evening. It is critical to use a food thermometer when cooking hamburgers. Ground beef may be contaminated with E. coli O157:H7, a particularly dangerous strain of bacteria. Illnesses have occurred even when ground beef patties were cooked until there was no visible pink. The only way to insure that ground beef patties are safely cooked is to use a food thermometer, and cook the patty until it reaches 160 F. Cook all meat and poultry to safe minimum internal temperatures: - Cook all raw beef, pork, lamb and veal steaks, chops, and roasts to a minimum internal temperature of 145 F as measured with a food thermometer before removing meat from the heat source. For safety and quality, allow meat to rest for at least three minutes before carving or consuming. For reasons of personal preference, consumers may choose to cook meat to higher temperatures. - Cook all raw ground beef, pork, lamb, and veal to an internal temperature of 160 F as measured with a food thermometer. - Cook all poultry to a safe minimum internal temperature of 165 F as measured with a food thermometer. Heat hot dogs to steaming hot, and reheat any leftover food to 165 F as measured with a food thermometer. Be sure to clean the thermometer between uses


9 Dutch Oven Cooking


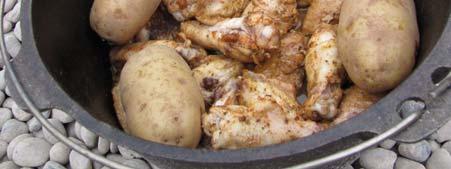
10 DUTCH OVEN COOKING Cooking techniques such as roasting, baking simmering, stewing, frying, boiling, steaming, and many others are easily done on the campfire with only a single utensil, the Dutch oven. Think of the possibilities, delicious fresh baked bread that will rise up and lift the lid, cobblers made from berries picked fresh at the campsite, incredible deep-dish pizzas, stews, quiches that melt in your mouth, Cornish game hens roasted to perfection, and imagine a chocolate cake a foot in diameter. These and many, many more are very possible and sometimes easier than they are at home. With very few exceptions, one will be able to duplicate home recipes on the campfire using the Dutch oven. All recipes use one of two Dutch oven techniques, cooking with your Dutch oven or cooking in it. The first is when the food is placed directly in the bottom of the Dutch oven. In the second method, food is placed in a second dish and this dish is then placed onto a trivet in the bottom of the Dutch oven. The reason for the trivet is to elevate the dish above the bottom of the oven to prevent burning.
11 Dutch Oven Care and Maintenance First, let s start with what you should NEVER do with a Dutch oven. 1. Never, and I repeat, NEVER allow cast iron to sit in water or allow water to stand in it. It will rust despite a good coating. 2. Never use soap on cast iron. The soap will get into the pores of the metal and won't come out very easily, but will return to taint your next meal. If soap is used accidentally, the oven should be re-seasoned, including removal of the present coating. 3. Do not place an empty cast iron pan or oven over a hot fire. Aluminum and many other metals can tolerate it better but cast iron will crack or warp, ruining the metal. 4. Do not get in a hurry to heat cast iron, you will end up with burnt food or a damaged oven or pan. 5. Never put cold liquid into a very hot cast iron pan or oven. They will crack on the spot! It is assumed here that the Dutch oven is already properly seasoned. If not, then refer to the appendix for how to season cast iron cookware. Dutch oven care starts with the seasoning of the metal, but the second step is to make sure you clean your ovens properly after each use. More often than not, cleaning cast iron Dutch ovens is much easier than scrubbing pots and pans. For cast iron, the cleaning process is in two steps. First, food is removed and second, maintenance of the protective coating. To remove stuck on food, place some warm clean water into the oven and heat until almost boiling. Using a plastic mesh scrubber or coarse sponge and No Soap, gently break loose the food and wipe away. After all traces have been removed, rinse with clean warm water. Soap is not recommended because it will break down the protective covering and will get into the pores of the metal to taint the flavor of your next meal. After cleaning and rinsing, allow the oven to air dry. Then heat it over the fire just until it is hot to the touch. Apply a thin coating of oil to both the inside and outside of the oven and the top and underside of the lid. Allow the oven to cool completely. If you do not oil the outside of the oven, then with use, the protective barrier will break down and the oven will start to rust. As a suggestion, it is a good idea to keep a scrubber for cast iron and never use it with soap. It is important when storing your Dutch ovens to keep the lid cracked so that air can circulate into it. This can be accomplished by laying a paper wick, made from a napkin or paper towel folded accordion style, across the rim of the oven leaving a small amount outside, and then setting the lid down on top of it. The wick also acts to draw any moisture out of the oven. If air cannot circulate into the Dutch oven, the oil used to protect it will turn rancid and will permeate the pores of the metal with a sour odor. DO NOT cook anything in a rancid oven, you will not be able to stomach the food! A rancid oven must be stripped of its protective coating and then be re-seasoned again.
12 How to cook with a Dutch Oven Cooking Utensils Make sure to have some wooden utensils on hand for stirring your food. Avoid using metal utensils in your ovens as they can scratch off the protective coating. Heavy plastic utensils can also be used, but remember, they are plastic and will melt if left resting against a hot oven for any period of time. Plastic is also hard to clean off the oven once it has been baked on. A good pair of leather gloves will prove invaluable around a hot fire. A pair of work style gloves will do, but I recommend using either camp or welders gloves. Although these typically cost more, they offer thicker leather and an inner insulated lining. The camp gloves pictured to the left are manufactured by Lodge. A charcoal starter or "chimney" offers a fast way of lighting briquettes without using lighter fluid. Simply place your charcoal in the chimney, then wrinkle up 3-4 pieces of newspaper and place under the chimney. Light the paper with a match stuck through the vent holes in the side. That's it, in minutes your charcoal is hot and ready for use. Charcoal starters can be purchased at most outdoors sporting goods stores. Long handled metal tongs work well for moving and placing briquettes. The long handle keeps your hands away from the flame and heat. If you are using coals from a fire, you can use a standard garden or fireplace shovel. Another item that will prove useful is some sort of lid lifter or hook. A large pair of pliers will also do the job. I prefer to use Mair lifters, pictured at left, because they allow you to control the lid easily and securely. A lid stand offers a nice place to rest your lid and keep it out of the dirt while you are stirring your ovens. They can be made easily, a #2 ½ aluminum can will work, or there are a number of them available on the market. The lid stands pictured at left are manufactured by Lodge. A whisk broom does a good job removing ashes from the top of your lids before serving your food. This will help keep ashes from falling into your tasty dishes. In a pinch a pair of channel locks can be useful for lifting the lids.
13 How Do You Want to Use Your Dutch Oven? ROASTING: The heat source should come from the top and bottom equally. Coals should be placed under the oven and on the lid in a 1-to-1 ratio. BAKING: Usually done with more heat from the top than from the bottom. Coals should be placed under the oven and on the lid at a 1-to-3 ratio, having more on the lid. FRYING / BOILING: All of the heat is placed on the bottom of the oven. STEWING / SIMMERING: Almost all heat will be from the bottom. Place the coals on the oven in a 4-to-1 ratio, with more underneath than on the lid. BAKING TEMPERATURES: Regular cookbooks sometimes refer to Slow, Moderate, Hot or Very Hot ovens. These terms normally reflect the following temperatures: Slow- 250 to 350, Moderate- 350 to 400, Hot- 400 to 450, Very Hot 450 to 500. FOR FOOD YOU WISH TO SIMMER: such as soups, stews and chili s - place 1/3 of the total briquettes on the lid and 2/3 under the oven. FOR FOOD YOU WISH TO BAKE: such as breads, rolls, biscuits, cakes, pies and cobblers place 2/3 of the total briquettes on the lid and ½ underneath the oven. FOR FOOD YOU WISH TO ROAST: such as meats, poultry, casseroles, quiche and vegetables use an even distribution of briquettes on the lid an under the oven. THE RULE OF DUTCH OVEN COOKING IS GO EASY WITH THE HEAT If the oven isn t hot enough, you can always add more briquettes, but once food is burned it s burned.
14 Regulating Cooking Temperature A Dutch oven is heated by the use of charcoals, placed according to the cooks needs. The oven can be used as a frying pan by placing all of the coals underneath. This is how a number of recipes begin. Most often however, it will be used as an oven, and coals are placed underneath (which is why the oven has legs) and on the lid (which is why the lid has a lip on it). Beginners frequently over-start their charcoal. They tend to leave it in the starter too long before they use it. It should take only 10 to 15 minutes to start charcoal in a chimney starter, and anything longer than that is a waste. It may not look lit in the starter, but if it has flames coming out the top and no smoke, it is ready. Dump out the coals and use the fully lit ones first. Charcoal that has been started for 30 minutes before it is put on a pot will be half burned away, and will not produce as much heat per briquette. It will also not provide heat long enough to finish some recipes. Always start more charcoal than you need, so you can add the extra later to maintain heat if necessary, especially if it is windy. All recipes assume that you use fresh, properly lit charcoal. A few lit coals in a starter will start charcoal put on top There are 2 common methods for regulating the cooking temperature of a Dutch oven. One is by counting the number of coals placed on top and underneath the oven. The second is known as the Ring Method. The Coal Counting Method of Temperature Control The general rule of thumb to produce about a 350 heat is to take the size of the Dutch oven in inches, double the number, and use that many total briquettes. So, for a 12" oven you would use 24 briquettes, for a 14" oven you would use 28 briquettes, etc.. Remember this is just a rule of thumb and there are conditions that vary this rule. The chart below shows how many coals to use to obtain the specified oven temperatures. The first number is how many coals are to be placed underneath the oven and the second number is how many are to be placed on the lid. Oven 325 degrees 350 degrees 375 degrees 400 degrees 425 degrees 450 degrees 10" 13/6 14/7 16/7 17/8 18/9 19/10 12" 16/7 17/8 18/9 19/10 21/10 21/11 When baking, the oven is rotated every 15 minutes to avoid hot spots. In order to rotate both top and bottom, the following method is used: Rotate the oven ¼ turn counterclockwise, then rotate the lid ¼ turn clockwise.
15 The Dinwiddie Ring Method of Temperature Control With the ring method, you can use any brand of charcoal on the market. You can even mix brands of charcoal with out any problems. You can also use any size of charcoal without having to compensate for the size differences between brands. Here are the basics: 1 Ring: If you make a circle of hot charcoal with all of the briquettes lying flat and touching each other, with spaces left out for the legs on the bottom rings, that is "one ring". The outside edge of the ring is lined up with the outside edge of the pot, top or bottom. Note from Dutch Oven Madness: For the record, I still use the coal counting method for the bottom heat. I take the size of the oven, subtract 2 and that is the number of bottom coals I use. I've found that if I use a full ring on the bottom I tend to burn my food. 1/2 Ring: A "half ring" is the same size circle but with every other briquette missing. 2 Rings: is simply a second ring just inside the first, with the rings touching. Full spread: Means to put all the briquettes you can (one layer deep, lying flat) either under or on top of the pot. The ring method is self correcting for the size of the briquettes used. If your charcoal has been burning a while, the pieces will be smaller and will put out less heat. But it will take more of them to make a ring, so you still get about the same temperature. As the briquettes burn down, you simply add more to fill in the spaces and keep the temperature constant. Charcoal radiates heat in all directions. Those that are under the outside edge of the pot will radiate heat not only up towards the pot, but in towards the center under the pot. ALL of the coals around the edge will add to the temperature under the center of the pot. If you also have charcoal under the center of the pot, as in a checkerboard pattern, the center will be much hotter than the outside edge, and the center of baked foods will frequently burn. You can cook almost everything there is with just four temperatures--slow, medium, hot and very hot. For a 12" Dutch oven, slow will have 1 ring on top and one ring on the bottom and be 300* (+/- 25*). Medium is 1 ring under and 1 1/2 rings on top and is 350* (+/-25*). A hot oven is 1 ring under and 2 rings on top and is 400* (+/-25*). A very hot oven is 1 ring under and 2 1/2 rings on top and is 450* to 500*(+/-25*). Oven Size Slow Oven (300 ) Med Oven (350 ) Hot Oven (400 ) Very Hot Oven (450 ) 8 ½ Ring ¾ Ring 1 ¼ Rings 1 ½ Rings 10 ¾ Ring 1 Ring 1 ½ Rings 2 Rings 12 1 Ring 1 ½ Rings 2 Rings 2 ½ Rings 14 1 ½ Rings 2 Rings 2 ½ Rings 3 Rings 16 2 Rings 2 ½ Rings 3 Rings 3 ½ Rings For all sizes, place 1-ring under the oven. This chart lists tops rings only. As charcoal burns, add more to maintain the ring.


16 Sizes And Capacities Of Lodge Dutch Ovens Oven Size Oven Capacity Depth Weight Types Of Dishes 8" 2 Quarts 3" 11 lbs. 10" 4 Quarts 3 ½" 15 lbs. 12" 6 Quarts 3 ¾" 20 lbs. 12" D 8 Quarts 5" 23 lbs. 14" 8 Quarts 3 ¾" 26 lbs. 14" D 10 Quarts 4 ½" 28 lbs. 16" 12 Quarts 3 ¾" 32 lbs. Side dishes, vegetables, desserts, and sauces. Ideal when cooking for 2 or 3 people. Side dishes, vegetables, beans, small roasts, desserts, and sauces. SERVINGS Main dishes 6-8, Side dishes up to 16. Roasts, poultry, fish, stews, potatoes, beans, rolls, breads, and desserts. SERVINGS - Main Dishes 12-14, Sides: up to about 25. Standing rib roasts, hams, whole chickens, stews, potatoes, beans, rolls, and breads. SERVINGS Main dishes Larger roasts, poultry, stews, potatoes, rolls, breads, and desserts. SERVINGS Main dishes Standing rib roasts, hams, hens, stews, potatoes, rolls, and breads. SERVINGS Main dishes Large quantities of meat, stews, potatoes, rolls, breads, and desserts. SERVINGS Main dishes Some Other Estimates (all ovens 4" deep) o o o o o 8" 2 qt 2-6 servings main course 8-10 side dish servings 10" 4 qt 2-12 servings main course side dish servings 12" 6 qt 6-18 servings main course to 30 side dish servings 14" 8 qt 8-25 servings main course to 40 side dish servings 16" 12qt servings main course to 60 side dish servings 14 Dutch oven can make 30 biscuits


17 Dutch Oven Recipes
18 .
19 Byron s Mountain Man Breakfast BREAKFAST 1 lb bacon 2 med yellow onions diced 1 ½ C fresh mushrooms sliced 1 Green Bell pepper diced 3 cloves garlic minced med potatoes diced 12 eggs beaten Salt & pepper to taste 3 C grated cheddar cheese Picante sauce Directions Heat a 12" Dutch oven using briquettes bottom until hot. Cut bacon into 1 inch slices. Add to Dutch oven and fry until brown. Add onion, mushrooms, bell pepper and sauté until onions are translucent. Add potatoes and season with salt and pepper. Cover and bake using 8 briquettes bottom and briquettes top for 30 minutes. Season eggs with salt and pepper then pour eggs over top of potatoes. Cover and bake another 20 minutes. Stir gently every 5 minutes. When eggs are done, cover top with cheese and replace lid. Let stand until cheese is melted. Serve topped with picante sauce. Serves: Mountain Man Breakfast 2 1 lb. mild pork sausage 1 bag frozen, shredded hash brown potatoes 12 eggs 1 onion, chopped 1/2 red pepper, chopped 1/2 green pepper, chopped 1 clove garlic, minced 1 lb. Cheddar cheese, shredded Directions In a 12" Dutch oven, oven med-high heat, sauté sausage with garlic, onion and peppers until done. Whisk eggs in mixing bowl while sausage is cooking. Add pepper to sausage mixture and stir. Add hash brown potatoes to sausage mixture. Stir mixture slightly and allow to cook for about 15 minutes, stirring occasionally. Pour beaten eggs over the top, allowing them to sink into the potatoes. Add coals to top and bottom (6-9 on the bottom and on top) and bake until eggs are firm. Top with Cheddar cheese and continue cooking for approx. 30 minutes more. Mountain Man Breakfast (another variation)
20 1 lb bacon pieces 1 dozen eggs 1 bag frozen hash browns (the kind with cut up peppers and onions in it) 1 large onion cut into small pieces 1 lb shredded cheese 1 or 2 cups salsa depending on taste Instructions Fry the bacon in the Dutch oven. When it's done, set in off to the side (putting it in the lid works great). Then fry the hash browns and the onion in the bacon grease. Once they're about down put the bacon back in the dutch oven. Add the eggs and the cheese and mix it all up into a big goey mess. Once the eggs are done top with salsa. Variations/Hints: You can make a bigger or smaller batch but if you're using this for winter camping this will feed about four or five cold and hungry campers. Keep in mind I tend to have teenage boys with and they eat a lot. Mountain Man Breakfast 12 Dutch oven 1 pound bacon or sausage 1 (2 pound) pkg frozen hash browns 12 eggs, beaten with a whisk 2 medium yellow onions, diced 3 cups grated sharp cheddar cheese Salt and pepper *optional 1 Jalapeño or sml can green Chilies* Fresh salsa to serve* Green Peppers diced* Mushrooms - sliced Directions Heat a 12" Dutch oven using briquettes under oven until hot. Cut bacon into 1 inch slices or if using sausage cut into 1 inch pieces. Add to Dutch oven and fry until brown. Add onions and saute until onions are translucent. Add potatoes and jalapeno pepper or green chilis and season with salt and pepper. Cover and bake using 8 briquettes bottom and briquettes top for 30 minutes. Season eggs with salt and pepper then pour eggs over top of potatoes. Cover and bake another 20 minutes. Stir gently every 5 minutes. When eggs are done, cover top with cheese and replace lid. Let stand until cheese is melted. Serve topped with fresh salsa if desired. Serves: 8-10
21 Pita Pocket Breakfast 1 lb sausage (pork, turkey or ground beef) 1 bell pepper, diced 1 medium onion, minced 12 eggs, beaten 6 Pita breads, medium 1 jar salsa 1 clove garlic Pre-heat DO (@12 coals on the bottom). Brown sausage drain fat, saving 2 TBS. Stir in onion, garlic, pepper, sauté with sausage. Add eggs, sausage fat and cook together until eggs are scrambled. Spoon into Pita Pockets top with salsa to taste. (Hints: Brown sausage and sauté garlic onions and peppers in advance, refrigerate or freeze in Ziplock bags. Add 2 TBS of Olive Oil when cooking in camp in lieu of sausage fat. This will save time and reduce the sausage fat that will need to dispose of). Serves 6 Quick & Easy Breakfast Casserole 8 slices of bread 1 qt. Milk 2 pounds of sausage 1-1/2 tsp. Dry mustard 16 oz grated cheddar cheese 1 tsp salt 12 eggs Line a 12" Dutch Oven with heavy-duty foil. Lightly grease the foil with butter. Break up bread into the oven. Crumble cooked sausage meat over bread and cover with cheese. In a separate bowl, mix eggs (lightly beaten), milk, dry mustard, and 1 tsp. salt (to taste). Pour the egg mixture over the layered bread/sausage/cheese in the oven, cover, and bake for minutes, checking occasionally. The cheese rises to the top, melting into a golden brown crust over a fluffy layer of eggs, making a super filling camp breakfast for a crowd! Serves 6 Biscuits & Gravy 1/2 lb ground sausage 3 Tbs chopped onion 2 Tbs flour 2 c hot milk Black pepper to taste Prepare Biscuits in a separate Dutch oven. Brown sausage and onion together. Pour off excess grease. Stir in flour. Slowly add milk while stirring. Cook until thickened. Serve biscuits split with gravy on top
22 Breakfast Pizza Biscuit dough (pre-made, store-bought) Eggs Ham Cooked Bacon Sausage (all, any or none) Shredded Cheese First stretch the biscuit dough thin and spread it over the bottom of the Dutch oven so none of the oven can be seen. Then pour a small layer of scrambled eggs over the dough. Add your preference of ham, bacon or sausage or all on top of the eggs. If you use bacon pre-cook it. Spread the cheese over that and cook for 10 to 15 minutes. Pecan Caramel Rolls 1 tube of refrigerator biscuits (10 count) Generous amount of chopped pecans 1/2 cup brown sugar Cinnamon 1 stick butter or margarine Raisins (optional, but good) Melt butter, brown sugar, cinnamon, and a tablespoon of water in the cover of a chef kit. (large frying pan) Stir well until sugar/butter becomes a caramel. Add pecans and raisins to the caramel mixture. Cut the biscuits into quarters. Stir into the caramel mixture, coating each part with caramel. Place the pan in the Dutch Oven using the "three stone method" (to raise the pan off of the bottom of the DO) bake the biscuits until they are golden brown. About 15 minutes. Orange Caramel Easy Ring 1 tablespoon butter l/2 teaspoon cinnamon l/2 cup orange marmalade 2 cans biscuits 2 tablespoons chopped nuts l/2 cup butter melted 1 cup brown sugar This recipe will make 2 pans of rolls. Be sure to do twice (or use 2 Dutch ovens). Grease the bottom of a cake pan with the 1 Tbs. butter. Place 1/2 of the orange marmalade in the bottom of the cake pan. Sprinkle with l/2 of the nuts. In a Ziploc bag combine the brown sugar and cinnamon. Mix, well and set aside. Separate biscuits. Dip biscuits in melted, butter then-intosugar mixture. Lay biscuits in bottom of cake pan on top of the marmalade and nuts. Space evenly. Sprinkle with a little more of the sugar mixture and add a little, more butter- Bake in a 350 Dutch oven for minutes or until brown. Take can out of oven and let set for 5 minutes. Invert onto serving plate.
23 Breakfast Tacos 1 dozen eggs 1 lb Jimmy Dean sausage Package of flour tortillas Equipment Large frying pan Spatula serving spoon Skillet or D.O. to cook eggs Instructions Cook sausage in frying pan or D.O., breaking into hamburger size pieces. Drain off excess fat, leave sausage in pan. Crack eggs into bowl and beat. Add eggs to sausage in pan (or D.O.), and cook, stirring often. When done, spoon onto tortilla shells and enjoy. This is enough for 6 boys to have two each. Comment Minimum equipment and little cleanup. Little Smokies Egg Bake Half a loaf of bread twelve eggs two packages of little smokkies two packages of mexican cheese Equipment Dutch oven Instructions Crack the eggs cut the Little Smokies in half and tear the bread into pieces and put it into the Dutch oven along with the cheese and mix together. Then cook for 1/2 an hour. Serves 6-8
24 Easy Camp Breakfast Sausage or Bacon Eggs Onions or Peppers Milk Spices to taste Soft Tortilla shells Equipment Dutch Oven, Spatula or spoon Instructions Cook up your bacon or sausage & set aside. Sauté the onions & peppers and add the eggs scrambled with milk & spices. Cook the eggs till firm. Place the tortillas on the inverted oven top to warm, fill with eggs & meat. Fold up & eat hearty! No dishes except for the cook pot & your mugs for drinks! My Scouts like it with hot sauce as well. Impossible Breakfast Pie 1 pound diced ham or bulk pork sausage ¼ c chopped onion 2½ cup frozen loose-pack hash browns 1 cup shredded Cheddar cheese (4 oz) 1¾ cup milk 4 eggs 1 cup baking mix (Bisquick or Jiffy) ¼ tsp salt 1/8 tsp pepper ¼ cup shredded Cheddar cheese (1 oz) Equipment Dutch Oven Charcoal Large pot Instructions - In a Dutch oven, brown the meat and onion, stirring occasionally. Drain. Mix meat, potatoes, and 1 cup Cheddar cheese. - Combine remaining ingredients except 1/4 cup Cheddar cheese with fork until smooth. Pour into Dutch oven. - Bake at about 400 degrees for 40 minutes or until knife inserted in center comes out clean. Sprinkle with 1/4 cup cheddar cheese. Bake about 2 minutes longer or until cheese melts. Cool 5 minutes. 6 to 8 servings.

25 STRATA White sandwich bread (crusts removed) Filling* Swiss cheese 16 Eggs American (or cheddar) cheese 3 cups milk *Filling: Diced ham, smoked sausage, diced tomatos, green peppers, onions, etc. Equipment Dutch oven Instructions Spray 12' Dutch oven with Pam. Layer bread, cheese, filling, bread, cheese, filling. Beat the eggs and milk together and pour over the top. Bake approx 1 hour. This should feed 14 people easy. Comment You can serve this with salsa, hot sauce, etc. Camp Guyasuta Breakfast Pizza 1 lb uncooked breakfast sausage 1 (8oz) container refrigerated crescent roll dough 1 Med Bell Pepper diced 1 C sharp Cheddar cheese shredded 1 Green Onion chopped 1 C plain, shredded, frozen hash brown potatoes thawed 3 Eggs 3 Tbsp Milk ½ tsp Salt 1 tsp ground black pepper 3 Tbsp parmesan cheese grated 1. Brown sausage in Dutch oven then drain grease. Crumble sausage and set aside 2. Line bottom of oven with heavy duty aluminum foil 3. Unroll crescent roll dough and flatten evenly across top of foil 4. Spread sausage, bell pepper, cheddar cheese, green onion and hash browns over dough 5. Whisk eggs, milk salt and black pepper in a medium sized bowl 6. Pour egg blend over the ingredient mix in the bottom of the oven 7. Pour parmesan cheese over the top of the egg blend 8. Using 10 coals under the oven and 12 on the lid, bake for approximately 25 minutes, or until eggs are firm 9. Holding the foil, lift pizza from the oven, slice into wedge and serve
26 Beaver Patrol Saturday Breakfast 12 Dutch oven 1 lb uncooked pork sausage 1 C chopped green onions 1 4oz can mushrooms drained & chopped 2 med tomatoes chopped 2 C Colby or Mozzarella cheese shredded 1 C pancake mix 1 dozen large eggs 1 C milk 1 tsp ground oregano ½ tsp salt ½ tsp black pepper 1. Brown sausage in Dutch oven, drain grease and crumble sausage 2. Mix sausage, onions, mushrooms and tomatoes in greased oven 3. Gently blend cheese throughout the mixture 4. In a large size bowl, whisk together the pancake mix, eggs, milk, oregano, salt and black pepper, then pour the batter over the sausage mixture in the oven 5. Heat using 8 coals under the oven and 17 coals on the lid. Bake for 35 minutes or until the top of the breakfast mix is firm and lightly browned. Brat Bake The Scout s Outdoor Cookbook Christine & Tim Conners (Recipe: June Eakin, Silver Spring, MD) 2 lbs fresh bratwurst 2 lbs potatoes, peeled & thinly sliced 2 lbs unpeeled baking apples*, cored & sliced into thin wedges 2 med onions, peeled & thickly sliced into quarters 2 tsp salt ½ tsp ground black pepper 1 tsp thyme *Baking apples that work well: Granny Smith, Golden Delicious, McIntosh, Rome, Cortland 1. Brown bratwurst in 12 Dutch oven over 25 coals. Stir occassionally. 2. Add remainder of ingredients and stir 3. Relocate 17 coals to the lid of the oven, keeping 8 briquettes underneath. Bake for 45 to 60 minutes, or until the potatoes become tender. Refresh coals as required.
27 Peachy Dutch Oven French Toast The Scout s Outdoor Cookbook Christine & Tim Conners (Recipe: Ken Vetrovec, Racine, WI) 14 Dutch oven This recipe took 2 nd place in the entrées category of Scouting magazine s 2001 Greate Tastes in Camp Cooking recipe contest. With the carmelized topping, you won t need syrup on this French toast. 12 eggs 2 C milk ½ tsp vanilla extract 1 Tbsp ground cinnamon 1 loaf of French or Italian bread, sliced ½ lb (2 sticks) butter 2 ½ C brown sugar, tightly packed 3 (16 oz) cans of peaches, drained & quartered 1. Preheat oven for 15 mins using 21 coals on top and 11 underneath the oven 2. While the oven is warming, beat eggs, milk, vanilla and cinnamon in a medium bowl 3. Place bread slices into egg mixture to soak 4. Move oven away from bottom coals and remove lid 5. Melt butter in the heated oven. Blend brown sugar into the melted butter. 6. Once sugar-butter turns light brown, place drained peaches into the caramel 7. Spread egg-soaked bread on top of the peaches 8. Return lid to oven and place oven back on the coals 9. Bake for mins, refreshing coals if required. Occassionally check the bread mixture to ensure that the edges don t burn.
28 .
29 MAIN COURSE Chicken Recipes Prairie chicken - Cut-up, bone in Chicken pieces - Oil for browning - Seasoning Using the correct number of coals under the oven, brown both sides of enough clean, uncoated chicken pieces to cover the bottom in a hot Dutch oven with a bubbling 1/4 inch of oil. When the chicken is browned to your liking, remove the excess oil from the oven and discard. Season the chicken generously with the following pre-mixed coating: Seasoning option: - 2 Tablespoons each, parsley flakes & thyme - 1 Tablespoon each, marjoram, oregano, celery salt, & rosemary - 1 teaspoon each, garlic salt, onion salt, ginger, ground black pepper, sage, & paprika Put lid on oven, arrange coals as noted earlier (top and bottom) and cook for 45 minutes to one hour. Chicken & Dumplings 1 LB Boneless Chicken Tenders 1/2 Bag Carrots 1 Large Onion 6 Stalks of Celery 6 Medium Sized Potatoes 1 TSP oil 2 Cans Cream of Chicken Soup 1 Can Biscuits or Mix up 2 cups of Bisquik Mix Equipment Dutch Oven Spoon for Stirring & Serving Knife Instructions Cut up Chicken, Carrots, Onions, Celery. Place Dutch oven on coals, add oil then Chicken. Cook until slightly browned. Add Onion, Celery, Carrots and Potatoes and cup of water. Cover and simmer 15 minutes. Add 2 cans of Cream of Chicken Soup and water to the consistency of gravy. Cover and simmer an additional 15 minutes or until vegetables are tender. Add biscuits to top of mixture, cook covered minutes. Bisquik dropped by spoonfuls can be used in place of biscuits. Comment: Good stick to your ribs dinner and fairly simple do make.
30 Chicken Pot Pie 4 boneless, skinless chicken breast halves; diced 3Tbs. bacon grease or olive oil 4 cloves garlic; minced 1 yellow onion; diced 4 medium potatoes; diced 1 (16 oz.) bag frozen mixed vegetables; thawed ½ cup evaporated milk 2 (10.5 oz.) cans cream of chicken soup 1½ tsp. poultry seasoning 1 Tbs. Worcestershire salt and black pepper to taste 1 can refrigerated crescent rolls Heat a 12" Dutch oven using briquettes bottom until hot. To hot oven add bacon grease, chicken and garlic; season with salt and black pepper to taste. Cook chicken stirring frequently until chicken is no longer pink. Add onions and potatoes and continue cooking until onions are translucent but still firm. Stir in mixed vegetables, soup, evaporated milk, poultry seasoning and Worcestershire; season with salt and pepper. Let mixture come to a low boil. Unroll the crescent rolls and create a top crust by layering flat rolls across the top of ingredients. Reduce the heat on bottom to 8-10 briquettes and add briquettes to the lid. Bake for minutes until the rolls are golden brown and flaky. Check to make sure potatoes are cooked through. If not, then remove all briquettes from the lid and continue to cook maintaining bottom heat to keep pie bubbling an additional 15 minutes until potatoes are cooked through. Parmesan Chicken One skinless, boneless chicken breast for each person 2-26oz cans spaghetti sauce or large jar. 1lb Grated mozzarella Country Pasta Egg Noodles (available in the dry pasta section of the store) Parmesan Cheese Equipment 12" or 14" Dutch oven Pot & strainer for cooking noodles Instructions Heat Dutch oven with coals on top and bottom. Place chicken in oven. Cook for a few minutes on each side (meat will begin to turn white). Pour sauce over chicken. Cook for 30 to 45 minutes stirring frequently. While chicken cooks, put noodles on to boil. Cook according to directions or until soft. Take oven off bottom heat. Take cheese and cover top of meat and sauce. Replace lid and allow cheese to melt. Place noodles on plate and cover with chicken, sauce, and parmesan cheese. Season to taste.
31 Dutch Oven Chicken 1 large pack of frozen skinless, boneless chicken breast, 2 cans cream of mushroom soup, large box of instant rice, 1 pound of bacon and 2 bags of shredded cheddar cheese. Equipment 1 med. to large cooking pot, 1 large Dutch oven, tongs, a knife and a serving spoon, water, salt and pepper, 1 stick butter.. Instructions Boil chicken breast until done. Remove chicken and allow to cool. Add rice to water and add butter. Preheat Dutch oven. Cut bacon into small pieces. Dice chicken into small pieces. Layer ingredients as follows: Bacon on bottom, rice next, soup then cheese. Continue this until oven is full or you run out of items. Cook about 20 minutes or until done. Comment A little goes a long way. This is very filling. The chicken can be pre-boiled and cut ahead of time. Just freeze it when you are done for less prep time at your sight. Oven-Fried Chicken Chicken pieces Bisquick cooking oil salt, pepper, paprika Equipment Dutch oven charcoal pot lifters tongs Brown paper bag(grocery type) Instructions Heat oil in hot oven. Combine Bisquick, salt, pepper and paprika in brown paper bag and coat chicken pieces by shaking them in the bag. When oil is hot arrange chicken in oven and cook 'til done, turning once to brown evenly. Comment: Any chicken parts will do, my gang favors boneless chicken breasts.
32 Rattlesnake and Wild Rice (Tastes Just Like Chicken) 4 LB Skinless Rattlesnake Fillet cut into 1" chunks - or - 10 Boneless Skinless Chicken Breast Halves cut into 4 Pieces each 4 TB Butter 1/2 Cp. Honey 2 Bx Uncle Bens Long Grain and Wild Rice Mix Directions Preheat and oil a 12" Dutch oven with coals on the bottom for frying. Melt the butter and add a little oil to prevent the butter from burning and fry the meat until it is lightly browned. Pour the honey over the browned meat and continue frying until the meat is glazed. Using the quantity of water specified in the rice mix instructions less 3/4 cup, add some of the water to the oven to deglaze the bottom of the Dutch oven. Then add the remainder of the water and bring it to a boil. Festive Chicken Bake ¼ c flour 2/3 c light molasses 1 tsp salt ¼ tsp pepper 2 ½ - 3 lb fryer chicken 1 Tbsp prepared mustard 2 Tbsp oil 1 Tbsp cider vinegar 1 can (8 oz) Sliced pineapple 1 can (16 oz) sweet potatoes, drained Combine flour, salt and pepper. Coat chicken pieces in flour mixture. Brown in hot oil. Drain pineapple, reserving juice. Combine juice, molasses, mustard, and vinegar, mix well. Place chicken in Dutch oven, arrange potatoes around chicken. Brush with half of the sauce. Cover and bake at 350 for 30 minutes. Top with pineapple, brush with remaining sauce, cook 30 min more. Baked Chicken with Cheese 8 chicken breasts, deboned 2 tbs thyme 2 tbs lemon juice 6 tbs peanut oil Salt, pepper 8 slices of boiled ham 8 slices of cheese 8 slices of tomato Cut foil into 12" squares, place chicken in center. Combine oil, lemon juice, thyme and mix well. Spoon over breasts. Seal foil well and place in 350 Dutch oven. Bake 30 min. Open foil and place one slice ham, cheese and tomato over each breast. Bake open for 3 to 5 min. Remove from foil and place on serving platter.
33 Turkey Breast 12-Inch Dutch oven 1 Turkey Breast with bone in approximately 4 lbs. (We have used Jenny O brand, however any will do) 1 Onion peeled and diced 2 Cans chicken broth 12 oz Poultry seasoning 1 Pkg Turkey gravy mix 6 slices of bacon, Begin by cutting the Turkey Breast in half along the breastbone. What you are doing is making the breast fit into a regular 12 inch oven. Remove some of the fat around the neck area and discard. Place the two half s in the oven with the breast meat up. You can put the breasts on a round cake cooing rack, or grid that will fit inside of the oven. This keeps the meat from sticking to the bottom. Season with the poultry seasoning. Add Black pepper to taste if you like. There is usually enough salt in the broth. Place 3 strips of Bacon on each breast half. Add the 2 cans of broth to the Dutch oven. Sprinkle the onion over the breast and along the sides. Place the covered oven over the coals using 9 coals on the bottom and 15 on top. (Or use whatever mix you prefer) Cook for 2 to 3 hours. Change the coals after one hour and check inside. If needed, add a small amount of water. You do not want the moisture to steam out of the oven and become dry. When the meat begins to fall from the bone, it is done. Remove the meat and set aside. It will slice easier if you allow it to cool somewhat. Strain onions from the broth and add a package of Turkey gravy mix. Mix with water before adding to the broth to prevent lumping. Place oven over new charcoal and make the gravy. Thicken with Cornstarch or flour as needed. (Some Turkey breasts come with a gravy packet). We have also cooked the Turkey breast in the house oven when it wasn t convenient to use coals outside. 350 Deg for the same amount of time is about right. Shirley also likes to use her fancy enameled Dutch ovens for this. Once you try this, it will become a real favorite. It s the only way we cook Turkey anymore. It s just so juicy and flavorful.
 jar spaghetti sauce 1 (8 oz) can tomato sauce 1 small can sliced")

34 Chicken Spaghetti Bake 1 (16 oz.) pkg. of your favorite pasta, cooked and drained (I used garden rotini) 2 Tbs. olive oil 1/2 cup chopped onion 1/2 cup chopped green pepper 1 medium zucchini, thinly sliced 2 cloves garlic, minced 1 (26 oz) jar spaghetti sauce 1 (8 oz) can tomato sauce 1 small can sliced olives, drained 3 cups chopped, cooked chicken 1/3 cup cream of mushroom soup 2 cups shredded cheese (I used mozzarella) In a Dutch oven over a full spread of coals, saute the onions, green peppers, zucchini and garlic in oil until crisp tender. Stir in the spaghetti sauce, tomato sauce and olives. Bring to a boil. Move about 1/4 of the coals to the lid and allow the sauce to simmer for 20 minutes. Stir in the chicken and soup and heat through. Remove the sauce to a large bowl and keep warm. Place half of the pasta in the bottom of the same pot the sauce was cooked in. Pour half of the spaghetti sauce over the pasta and top with half of the cheese. Repeat the layers. Bake at 350 for minutes. Use 1 1/2 rings on top and 1 ring on the bottom. Let stand 10 minutes before serving. 12" Dutch oven Serves
 1/2 sweet red pepper cut into strips 1/2 sweet green pepper cut into strips 8 large mushrooms, sliced 2 green onions, sliced 2-3 cups whipping cream 1/2 tsp.")
35 Cajun Chicken Pasta 12" dutch oven 4 boneless, skinless chicken breasts cut into thin strips 4 tsp. Cajun seasoning 4 Tbs. butter or margarine (sub olive oil) 1/2 sweet red pepper cut into strips 1/2 sweet green pepper cut into strips 8 large mushrooms, sliced 2 green onions, sliced 2-3 cups whipping cream 1/2 tsp. dried basil 1/2 tsp. lemon pepper 1/2 tsp. salt 1/4 tsp. garlic powder 1/4 tsp. pepper 12 oz. linguine, cooked and drained Grated Parmesan cheese Place the chicken and Cajun seasoning in a re-sealable plastic bag and toss to coat. In a Dutch oven, over a full spread of coals, sauté the chicken in butter until almost cooked. Add the peppers, mushrooms and onion. Cook and stir for about 5 minutes. Remove about 1/4 of the coals. Add the cream and seasonings and heat through. Add the linguine and heat through. Sprinkle with Parmesan cheese. Serves 4-6. The Review I wasn't sure how this was going to taste, but it was delish! My 5 older kids loved it, and the 2 youngest hardly eat anything anyway, so they don't really count. (Ha Ha!) It isn't super spicy, but it leaves a nice little burn in the back of your throat. You can adjust the heat by using more or less Cajun seasoning, so if you like it mild its not a problem. My only complaint is that the cream sauce was too thin. Next time I'll use a little of the roux I keep in the back of the fridge to thicken it up just a little. Overall, it was yummy! Grade A-.

36 Chicken Parmesan 12" Dutch oven 2 Tbs. oil 1 (29 oz.) jar pasta sauce 4 chicken breasts pounded flat or cut into large pieces 2-3 cup dry bread crumbs 1 cup grated Parmesan cheese, divided 3 tsp. Italian seasoning ½ tsp. salt ¼ tsp. pepper 1 egg, beaten 1 Tbs. milk ½ cup flour Mozzarella cheese (shredded) Hot cooked pasta (I used linguine) In a shallow bowl combine the bread crumbs, 1/2 cup Parmesan cheese, Italian seasoning, salt and pepper. In another shallow bowl, combine the egg and milk. Put the flour in another shallow bowl. Coat each piece of chicken in flour, then in the egg, and finally in the crumb mixture. Heat the oil in a Dutch oven over a full spread of coals. Add the chicken to the pot and brown on both sides until almost cooked through. Remove from the pot and keep warm. Wipe out the pot with paper towels to remove any excess oil. Pour pasta sauce in the bottom of the pot and then place the chicken in the sauce. Sprinkle with cheeses. Cover and bake at 350 for about 30 minutes, or until the sauce is bubbly and the cheese is melted. Use 1 ½ rings on top and 1 ring on the bottom. Serve over hot cooked pasta. Serves 4-6.
37 Enchilada Lasagna 10" dutch oven 8-12 corn tortillas 3 shredded chicken breasts 1 tsp. cumin dash cayenne 3/4 cup black beans 1/2 red bell pepper, chopped 1 Tbs. olive oil 1/2 onion, chopped 1 (10 oz.) can enchilada sauce 2 cups shredded cheese (I don't usually measure cheese, as long as its gooey, its good) Sauté the onions and peppers in olive oil over a full spread of coals. Add the chicken, cumin, cayenne, black beans, 1 cup of cheese and half of the enchilada sauce. Heat until it is hot and the cheese is melted. Remove from the pot and set aside. In the same pot, layer 2 or 3 tortillas in the bottom. Top with the chicken mixture and top with part of the filling. Repeat layers until the tortillas and chicken mixture are gone. Top with remaining cheese and enchilada sauce. Bake at 350 for minutes or until it is hot and bubbly. Use 1 ring on top and 1 ring on the bottom. Serves 4-6. The Review This was good, but there are a few things that I would change about it. First, I would probably add some corn to it, just because I like corn. Second, I won't mix the cheese in with the chicken mixture. I'll just sprinkle it over every layer for added gooeyness. Finally, the whole dish was a little dry, so next time I'll mix some chicken broth in with the enchilada sauce to make it go farther. I know that sounds like a lot of changes, but like I said, I was making this up as I went along. This would be a great camping meal too. It was a really easy one pot meal. Grade B. Chicken Tortilla Casserole This would actually be a good camping recipe. If you cooked your chicken ahead of time. it would be a snap to put together. Add some salsa and chips and your done. It is also a great recipe for busy days. 12" Dutch oven 2-3 cups diced cooked chicken corn tortillas 1 can cream of chicken soup 1 can diced green chilies 1 14 oz. can green enchilada sauce ½ cup diced onion 1 cup sour cream 4 cups shredded cheddar cheese, divided Tear tortillas into chunks. Put the torn tortillas and the remaining ingredients, except 2 cups of cheese, in a DO. Mix until the chicken and tortillas are well distributed. Bake at 350* for minutes or until hot and bubbly. I used 10 coals on the bottom and 14 on top. Sprinkle with remaining 2 cups of cheese during the last 5 minutes of cooking. Serve with salsa and corn chips. Serves 8-10.
38 Creamy Green Chile Chicken Enchiladas 10" dutch oven Filling 1-2 chicken breasts (boiled and shredded) 2 (4 oz.) cans of green chiles (lightly drained) 1 package (8 oz.) cream cheese (softened and cubed) 1 can white or black beans (rinsed and drained) Sauce 2 tablespoons butter 1/2 yellow onion (chopped) 2 tablespoons flour Other 8 ounces Monterrey jack cheese (shredded) 8-10 medium flour tortillas Handful of chopped fresh cilantro 1/3 cup chicken broth ¼ cup milk ¼ teaspoon salt ¼ teaspoon pepper 1 can (10 ounce) green chile enchilada sauce ½ cup sour cream In a medium bowl, combine the softened cream cheese and green chiles. Mix well. Add the chicken and black beans. Mix to combine. Set aside. In a 10" dutch oven over a full spread of coals, melt the butter. Add the onion and cook, stirring occasionally, until the onion softens and starts to turn translucent. Sprinkle the flour over the onions and stir well. Cook for 1 minute, stirring. Slowly whisk in the chicken broth and milk. Whisk until the mixture becomes smooth. Cook over medium heat until the mixture is bubbling and has thickened. Remove the dutch oven from the heat and stir in the enchilada sauce and sour cream. Remove all the sauce except for a very thin layer on the bottom of the oven. Fill each tortilla with a scant ½ cup of the chicken/cream cheese filling. Top with a small handful of shredded cheese, a couple tablespoonfuls for each enchilada. Save at least 1/2 cup cheese for the top of the enchiladas. Roll the tortillas up and place seam side down in the dutch oven. Continue filling enchiladas until you use all the filling. This should make 8-10 enchiladas. Pour the white sauce over the top of the enchiladas. Top with remaining cheese. Bake at 375 for minutes until the enchiladas are bubbling, hot and lightly browned. Use 1 1/2 rings on top and 1 ring on the bottom. Sprinkle fresh cilantro over the top and serve. Serves 8. The Review This is a hard one for me to grade since all enchiladas are compared to our favorite recipe. I'll try to be as objective as possible. First, this was really easy. Easy enough to make while camping. I loved that it had black beans. I also liked that the cream sauce is really light and has a nice flavor. The whole family thought these were really good. I'll be making these again, though not often. Not because we didn't like them, but because we have a favorite enchilada recipe that the kids request over and over. If you like creamy enchiladas but don't like to use canned soups then this is the recipe for you. Its not at all spicy, it just has a great green chili flavor. We give this one a B.
39 Chicken Enchiladas I got this recipe from a friend who got it from a little old lady who immigrated from Mexico many years ago. There is no canned sauce in this recipe. It is all made from scratch, and is easier than you would think. 12" dutch oven corn tortillas 2 cups cooked, cubed chicken 1 lg. onion, chopped 3-4 cups shredded cheddar or Monterrey Jack cheese 1 can sliced olives For the sauce: 1 cup butter 1 1/2 cups flour 3/4 cup chili powder (Don't be scared, it isn't spicy!) 1 tsp. cumin 1 tsp. cayenne or to taste 4 quarts chicken stock or broth For the sauce, melt the butter in a large stock pot. Add the flour and cook slowly for about 5 minutes. Gradually add the stock. Add the seasonings. Bring to a boil and cook until it starts to thicken up. Reduce heat and simmer for 45 minutes. Assembly: Dip each tortilla in the sauce. Place in the DO and add cheese, a few pieces of chicken, onions and 2-3 olive slices. Roll up and place in pan seam side down in a single layer. Repeat for the remaining tortillas. It is a bit messy. When the pan starts to get full, just put the dipped tortilla on top of the rolled up enchiladas to put in the filling ingredients. When the DO is filled, pour some sauce over the top, and top with remaining chicken, onions, olives and cheese. Bake at 350* for minutes or until bubbly and the cheese is melted. I used 10 coals on the bottom and 14 on top. Serves **This makes a lot of sauce! It makes enough for about 3-9 x 13 pans or 12" DOs full. The sauce freezes well, just thaw in the refrigerator and bring to a boil until it is smooth to use it.** during assembly The Review This is our favorite meal. I absolutely love the sauce! While its simmering, I sneak spoonfuls of it! It is very easy to make. I make the sauce ahead of time, let it cool and freeze it in 3 freezer bags so I always have it ready. I've used it in soups and other recipes calling for enchilada sauce. My kids love this too! Don't worry about all the chili powder, it doesn't make it spicy, it just adds great flavor and beautiful color. If you like super spicy, kick up the cayenne pepper. The tortillas are so tender that they never come out whole. We just scoop out a big spoonful and eat it with

40 No Fuss Chicken 12" dutch oven 2/3 cup flour 1 tsp. rubbed sage 1 tsp. basil 1 tsp. season salt 6 boneless skinless chicken breasts 1/4 cup butter 2 cups chicken broth In a bowl, combine flour, sage, basil and seasoned salt; coat chicken. Reserve remaining flour mixture. In you DO, melt the butter and brown the chicken on all sides. I used 25 coals for this. When chicken is browned, remove from the DO. Add 1/4 cup of reserved flour mixture to the DO and stir for 1 minute. Stir in the chicken broth and bring to a boil; boil for 1 minute. Return chicken to the DO and coat with sauce. Cover and cook at 350 for minutes or until chicken is cooked through. I used 8 coals on the bottom and 16 on top. The Review This was great. The gravy is to die for and we like it so much I always double the gravy. My kids said it was even better in the DO than in the oven or crock pot. There was nothing left over. This is in my "tried and true" file and is delicious! Grade A
41 Dutch Oven Roasted Chicken Method 1 10 Dutch oven Roasting rack (or in this case, a cast iron trivet). Prepare chicken for roasting (oil and apply dry rub) Heat: 8 coals underneath and a double ring just around the bottom edge so the sides get really HOT. With a trivet, you will not burn the bottom. Use about a ring+ of coals on the lid. You should also use a windscreen around the oven so all of the bottom and side heat really radiates upwards and heats the sides of the oven. A rather large roasting chicken will cook to a moist doneness in about 1 hour to 1 hour and 15 minutes. While cooking, you should really be able to hear it sizzling in the oven and frying well. If the top of the bird starts to get too brown, take the coals off of the lid and put them around the sides. In a 12 deep oven you won t really get a brown bird. It will cook fine, but with a pale and not crispy skin. A smaller oven and more heat provide the desired browning. Check the bird at 30 minutes to make sure it's cooking evenly and rotate the oven every 15 minutes or so. Check it again at 50 minutes or so to make sure the top is not getting too brown. When done, let sit for a few minutes, take a knife and run around the edges to loosen the stuck on chicken skin, remove and serve.
42 Beef Cowboy Cornbread 2 lbs. top sirloin (Chopped into ½" cubes) Green Bell Pepper Red Bell Pepper 6 shallots 2 cans chopped tomatoes (drain ONE can) Can Enchilada Sauce Can Black Beans (drained) 16 Oz Frozen Corn Small Can Mild Roasted Chilies 1 Can Marie Callendar's Cornbread Mix Start with a 12" Dutch oven, preferably a 12" deep one. Chop bell peppers and shallots coarsely, sauté in bottom of Dutch oven in 1/4 cup water. Add chilies and top sirloin. Stir in Tomatoes and simmer to reduce liquid in recipe. Toss in black beans, frozen corn. Add Enchilada sauce and continue to simmer. Combine 1-1/2 cups of water with cornbread mix; stir until almost smooth. Ladle carefully onto stew mixture. Pull most of the coals from the bottom of the Dutch oven and add them to the top. You should have about coals on top now. Check every 15 minutes, turn lid 90 degrees to the left each time, rotate bottom 90 degrees to the right each time. Remove lid and serve when cornbread is golden brown. Garbage 1lb. Ground beef 4 cans vegetables (all mixed vegetables) 4 cans Franco American Spaghetti ¼ C catsup Salt and pepper to taste ¼ onion Equipment Dutch oven, can opener, spoon, salt and pepper Instructions Brown ground beef with onion, add can goods and catsup, salt and pepper to taste. This will feed approximately six Scouts. Comment: Never had a scout not like it!
43 Easy Cheesy Meat And Potatoes Dinner 2 lbs lean ground beef 1 lrg yellow onion 7 cloves garlic (minced) Salt & pepper to taste 2 bags frozen tater tots 4 C Colby jack cheese Sauce oz cans Cream of Mushroom soup oz can Cream of Chicken soup 1 ½ C Sour cream Salt & pepper to taste 2 Tbs Worcestershire sauce 1 Tbs Soy sauce 1 ½ tsp Thyme 1 ½ tsp Marjoram Salt & pepper to taste Heat a 14" Dutch oven using briquettes bottom until oven is hot. Add ground beef, onions, and garlic to hot oven, season with salt and pepper, and fry until beef is brown and onions are translucent. Remove the ground beef and onion mixture from the oven and place in a large bowl. To the bowl add all the sauce ingredients and stir to mix. Layer 1 bag of tator tots in bottom of oven. Spoon one half of the ground beef sauce mixture over the the tater tots. Sprinkle one half of the cheese over the sauce. Layer again with the second bag of tater tots, the rest of the remaining sauce, and the remaining cheese. Cover and cook 90 minutes using briquettes bottom and briquettes top heat rotating oven and lid every minutes. Serves: GOOP 1 pound ground meat, beef turkey, venison, or whatever you have on hand 1 large onion, chopped 1 can cream of mushroom soup 1 can tomato soup 2 cups cooked macaroni Sharp cheddar cheese, shredded Equipment Dutch oven Instructions Cook ground meat & onion in Dutch oven. Add the soups and macaroni. Stir and bring to a simmer. Cook about 10 minutes and then sprinkle with cheese. Cover and cook til cheese is melted. Serves 6
44 Chuck Wagon Casserole Recipe 1 pound lean ground beef 1 can(15 1/2oz)mild chili beans in sauce 1 can(11oz) Mexican style corn(drained) 3/4 cup barbecue sauce 1 package(8 1/2oz) corn muffin mix 1/2 cup of chopped onion 1/2 cup chopped green bell pepper 1/2 teaspoon salt Equipment Dutch Oven Instructions 1. Preheat Dutch oven over hot coals until a drop of water sizzles. 2. Brown ground beef along with onions and bell peppers in Dutch oven. 3. Stir in chili beans, barbecue sauce, and salt. Bring to a boil. 4. Prepare corn muffin mix per package directions then stir in corn. Spoon mixture over boiling meat mixture. 5. Put Dutch oven lid on. Make sure you have 8-10 charcoal briquettes on the top and 8-10 on under the bottom. Bake for minutes until corn muffin mix is golden brown ( knife comes out clean ) 6. Dish out and enjoy - will feed a patrol of 6. Spanish Rice w/beef 2 lbs lean ground beef 2 medium onions-chopped 2 medium green pepper-chopped 4 (16 oz) cans stewed tomatoes-undrained 2 c uncooked long-grain white rice 2 c water 3 tsps chili powder 1½ tsp dried oregano 1 tsp salt ½ tsp red pepper ¼ tsp garlic powder Equipment 12 qt Dutch Oven and oven utensils, large spoon Instructions Cook ground beef, onion, and green pepper in Dutch oven until meat is browned. Drain off fat. (If you use lean ground beef you will not need to drain off fat.) Add remaining ingredients, cook minutes or until rice is tender, stirring occasionally. Serves Comment: You can easily halve this recipe. I served this at a pack campout and there wasn't a morsel left. Easy cleanup too!!!
45 Dutch Oven Enchiladas FOR A PATROL OF 8..2 apiece 1 1/2# ground beef 1 small onion, chopped(optional) 1-18 pack soft taco size flour tortillas 2 large cans Macayo mild enchilada sauce 1 can Cream of Mushroom soup 1/2 can milk 1 can chopped green chilis 1 to 1 1/2# grated cheddar cheese OPTIONAL 1 small can sliced black olives, drained 8 ounces Sour cream Equipment #12 dutch oven can opener large spoon pot holder metal spatula rubber spatula teaspoon cheese grater French knife paring knife cutting board charcoal briquettes matches Instructions Start charcoal briquettes, let get grayish. Place 20 under Dutch oven, let get good and hot. Add hamburger and onions and fry until hamburger is browned. Add enchilada sauce, mushroom soup, milk and chilies. Bring to a boil, stirring until soup is dissolved. In the meantime, grate cheese and wrap about 2 tbsps in each tortilla (you can add the black olives, too). Layer the filled tortillas in the boiling enchilada mixture, making sure to cover each enchilada in the sauce. Cover, add about 10 hot briquettes to Dutch oven lid and boil about 20 minutes, or until cheese is melted. Remove from oven, scoop up some of the sauce and hamburger and spread on top of your enchilada, add sour cream and enjoy! Comment This is my Troop's favorite outdoor meal. It is very rich and filling. It looks more involved than it is. You can grate the cheese before going and store it in a zip lock bag. This recipe has won the patrol competition in specialty cooking. You can also prepare this in a large frying pan on a camp stove, if the weather doesn't permit Dutch oven cooking.
46 Shepherd s Pie 3 Lbs. Hamburger 1 Bag Mixed Frozen Vegetables (20 oz) 10 Servings Instant Mashed Potatoes* 12 Oz Sliced or Grated Cheddar Cheese 4 TB Butter Directions Preheat a 12" Dutch oven with coals on the bottom. Fry the hamburger. Make sure the hamburger is broken up and drain off the excess grease. While the beef is browning, mix up the mashed potatoes (make Bavarian Garlic Mash* for a treat). Once the beef is cooked and drained, layer the ingredients as follows: Meat, vegetables, cheese, mashed potatoes. Dot the mashed potatoes with butter. Cover and cook for one hour. Adjust the coals to 12 above and below servings. * To make Bavarian Garlic Mashed Potatoes, reduce the amount of water used by ½ cup and add an equal amount of sour cream plus 2 teaspoons of crushed garlic and ½ teaspoon of white pepper. Onion Swiss Steak 3 lb round steak, 3/4" thick 2 pkg onion soup mix 1-1/2 tsp salt 2 cans (10 oz) tomatoes 1/4 tsp pepper Cut steak into serving pieces, season with salt and pepper and place into Dutch oven. Sprinkle onion soup mix over top and pour tomatoes over all. Cover and cook over slow fire for 2 to 3 hours or until meet is done and tender. Steak & Mushrooms 1 lb mushrooms sliced 1/2 tsp salt 1 c onions, diced 1/2 tsp pepper 1/4 lb butter 1 round steak 8 oz can tomato sauce flour 1 tbs Worcestershire sauce Cut meat into strips and coat with flour. Sauté in melted butter for 5 min. Add onion and mushrooms, cook another 5 min or until onion turn clear. Add remaining ingredients and stir well. Simmer 1 to 1-1/2 hours. Serve over rice.
47 Flank Steak Teriyaki 4-6 flank steaks 4-6 pineapple slices 1 tbs salad oil 1/2 c soy sauce 1/4 c sugar 2 tbs sherry (optional) 1 tsp ginger 1 clove garlic, crushed 1/2 tsp MSG To form marinade, combine all except steaks and pineapple. Mix well and pour over steaks. Let marinate 1 to 1-1/2 hours. Fry steaks in very hot oven or skillet brushing once with marinade. Add pineapple during last few minutes, brush with marinade and cover. Cook 3-5 min. Serve over rice. Beef Goulash 3 lb beef, cubed 1 tsp salt 2 tbs Cooking oil 1 can mushroom soup Brown the beef in cooking oil. Add salt and soup. Cover and simmer about 1 hour. Hungarian Goulash 2lb beef tips, 2" cubes 2 tsp paprika 1 small onion 1 ½ tsp salt 3 Tbsp Wesson oil ¼ tsp pepper 1 can whole tomatoes 1 C sour cream 4 oz whole mushrooms 2 Tbsp flour Brown beef tips and onion in oil, add whole tomatoes, mushrooms and seasonings. Cover and simmer. Stir occasionally until meat is tender, about 1-1/2 hours. Blend flour and sour cream. Gradually stir into meat mixture. Heat to serving temperature. Beef Stew 2 lb stew meat, 1" cubes 1 large onion, sliced 3 tbs oil 1 can (1lb 12oz) tomatoes 1/2 c flour 1 clove garlic, minced 2 tsp salt 1/3 c water 1/2 tsp pepper 1 bay leaf 6 carrots, cut into 1" pieces 3 medium potatoes, peeled, cubed Coat beef cubes with a mixture of flour, salt and pepper. Brown in hot oil in bottom of oven. While oven is still hot, pour water in and scrape brown bits from bottom. Place remaining ingredients into oven and cover. Simmer 1 to 2 hours or until meat is tender and potatoes are done.
 2 eggs 3/4 cup water (I used milk) 1/3 cup ketchup 6 bacon strips BBQ sauce or ketchup cheddar cheese caramelized onions (french fried would work")
48 Bacon Cheeseburger Meatloaf 12" dutch oven 1 envelope Lipton Onion Soup Mix 2 lbs. ground beef 3/4 cup dry bread crumbs (I used oatmeal) 2 eggs 3/4 cup water (I used milk) 1/3 cup ketchup 6 bacon strips BBQ sauce or ketchup cheddar cheese caramelized onions (french fried would work too) In a large bowl, combine the soup mix, beef, bread crumbs, eggs, water and 1/3 cup ketchup. Mix well. Form into a loaf and put inside your Dutch oven. Top with bacon strips. Bake at 350* for 45 minutes. Top meatloaf with BBQ sauce or ketchup, cheese and onions and bake 10 minutes more or until meat is cooked through. Serves 8. The Finished Product The Review What is it about bacon that makes everything better? This is the first time I've put bacon on meatloaf, and it won't be the last! I've tried a lot of meatloaf recipes, and with the exception of the spinach stuffed one I did a while back, this is my favorite. Even my kids liked it, and thats saying something. This was a huge loaf, and even though there wasn't a bite left, the kids were still asking for more. I think this will have to be my go to recipe for meatloaf. Grade A-. Round Steak Hawaiian ¼ C cooking oil 1 can sliced water chestnuts, drained 1 ½ lb round steak 1 jar homestyle beef gravy 1 bell pepper cut into strips Chow mein noodles 1 lb mushrooms, sliced ½ tsp salt Cut steak into 1/4" strips. Heat oil over medium-high heat. Add steak, onion, green pepper, mushrooms and salt. Cook until meat is brown, stirring constantly. Drain and add water chestnuts and gravy. Cover and simmer 1-1/2 to 2 hours, stirring occasionally. Serve over rice and sprinkle with chow mein noodles.

49 Carne Guisada I got this recipe from Omar Alvarez. He made this for the "taste of dutch" at the IDOS Spring Convention. I got to cook next to him, so I got to watch him make it. He said this recipe is one of the oldest Tex-Mex recipes. It is made for weddings, parties and special occasions. My 7 year old daughter brought some of this home from a birthday party she went to for one of her friends who is Hispanic. It was made with goat, and it was fantastic. This recipe uses beef, and it can be served with tortillas, rice, or (per Omar's recommendation) mashed potatoes. 10" dutch oven 1 lb. beef cubes (sirloin steak or even stew meat) chopped onion cumin, to taste salt and pepper to taste 2 (8 oz) cans tomato sauce garlic powder to taste 1 can Ro-Tel Brown the meat in a small amount of oil, add the onions and spices, and let the onions cook down. Add the tomato sauce and simmer over medium heat until the meat is tender (I cooked mine for 2 hours). You can add flour or cornstarch to the sauce it you want it thicker. I did all this over 15 coals, and I replenished about half the coals half way through cooking. You want enough coals to keep it at a simmer, not a hard boil, so watch it for the first few minutes. Serves 3. The Review This is another recipe that would be in my top 10 for the year. This was amazing. The meat was so tender it melted in my mouth. I was skeptical about having it over mashed potatoes, but I have to say, it worked. I had it with tortillas at Spring Convention, but it was better with potatoes. They don't seem like they would go together, but they really did. Other than the long cooking time, the prep time is minutes. I was amazed at how long my coals lasted. After an hour of cooking it was still just simmering away and I only had to replace half the coals. This will make a regular appearance at our table. This gets a capitol A!
50 PIG Recipes Ham & Potatoes Au Gratin 1 ½ C Cooked Ham, Diced ½ C Grated Cheese 2 C Milk 1 onion, minced 3 C Potatoes, Diced 2 Tbs Fine bread crumbs Seasoned Salt and Pepper 3 Tbs Flour 4 Tbs Margarine Melt margarine and sauté' onion. Blend in flour to make a light rue. Gradually add milk and cook; stirring until thickened. Add pepper and seasoned salt. Pour over ham and potatoes in Dutch oven. Sprinkle cheese and bread crumbs over top. Bake at 400 for 20 min. Au Gratin Ham & Potatoes 4 Tbsp butter or margarine 1 minced onion 3 Tbsp flour 2 cups milk Seasoned salt and pepper 1-1/2 cups cooked ham - diced 3 cups diced potatoes 1/2 cup grated cheese 2 Tbsp fine bread crumbs Preheat Dutch oven to 325 degrees. Melt butter and sauté onion until translucent. Blend in flour. Gradually add milk, stirring constantly until thickened. Add pepper and seasoned salt. Mix in ham and potatoes to coat well. Sprinkle cheese and bread crumbs on top. Cover and bake at 400 degrees for 20 minutes. Serves 4

51 Honey Baked Ham 12" or 14" deep Dutch oven 1 cooked half ham, bone in (presliced) 1 cup sugar 1/4 t ground cinnamon 1/4 t ground nutmeg 1/4 t ground cloves 1/4 t paprika 1 dash ground ginger 1 dash ground allspice Mix everything but the ham together in a small bowl. Spread waxed paper on your workspace and place the ham on it. Spread the sugar mixture over the ham with your hands and roll it in the sugar until it is well coated on all sided except the flat side. You won't use all the sugar. Place ham on a plate with flat/cut end down. Use a blow-torch or créme brulée torch with a medium-sized flame to caramelize sugar on the outer surface of the ham. Wave the torch over the sugar with rapid movements, so that the sugar bubbles and browns, but does not burn. Spin the plate so you can torch the entire surface of the ham. Place the ham inside the dutch oven and cook according to package directions. If you don't have a torch you can add water to the sugar to form a paste and coat the ham during the last 30 minutes of cooking. The Finished Product This ham was so tender it was falling off the bone. I almost couldn't get it out of the pot! The Review Sadly, this didn't taste like a Honeybaked Ham. That being said, it was absolutely delicious and I'll make it again. It was fun to watch the sugar caramelize. All my kids gathered around to watch and point out the spots I'd missed. As long as you keep the torch moving you don't have to worry about burning it. I was really surprised at how easy it was to do. Grade A.
52 Miscellaneous Blue-Ribbon Kielbasa 2 lb. Kielbasa or smoked sausage 2 lg. onions 3 lg. bell peppers 1 med can pineapple chunks in pineapple juice 2 tbsp cooking oil Equipment 12" Dutch Oven Instructions Cut onions and peppers into 3/4" wide strips. Sauté until onions start to become clear. Cut Kielbasa in 1" chunks and add to onions and peppers. Add pineapple, including juice. Place lid on Dutch Oven. Cook at around 350 deg. for 35 min. Comment: This has won several blue ribbon at camporees. Kielbasa is traditionally made of pork, but is very often found here made of beef. Dutch Oven Stromboli 1/3 pound bread dough 4 slices of cooked sandwich ham 4 slices salami 1/3 pound mozzarella cheese shredded olive oil Hot peppers if desired Equipment Dutch oven Small round cake rack Round metal tray slightly smaller than Dutch oven Rolling pin Instructions Roll dough out just smaller than Dutch oven. Oil dough and place ham, salami, cheese and hot peppers on dough. Fold dough over to close. Poke fork holes in dough. Place on round metal pan. Place in Dutch oven. Place aprox. 7 to 8 coals on bottom of oven, 10 to 12 coals on top. Bake to a golden brown. Baking time: approx 15 to 20 min. Comment Our scout troop has tried this dish quite a few times. It has always gone over very well.
53 Potato Casserole 2lbs link sausage Can corn Can green beans 1 cup water 1 cup sour cream 2 cups instant potatoes 1 cup + grated cheese Salt / pepper to taste Equipment Dutch oven Instructions Slice sausage and brown in the Dutch oven. Add the cans of corn and green beans (don't drain) and water. Bring to a simmer. Stir in potatoes, sour cream and cheese. Bake for minutes. Add salt and pepper to taste. Comment: Vegetables can be swapped around for a different taste or add some salsa when serving Jerry's Jambalaya Boneless - Skinless Chicken Breasts 1 lb 1/2 lb Smoked Bacon (Smokier the better) 1 each Yellow, Red and Green Pepper 1 medium yellow onion 1 lb smoked sausage or bratwurst (again heavy smoke flavor is best) 8 oz (approximate) Small Salad Shrimp 1 regular can of Cream of Mushroom Soup 2 cups of minute rice Cajun or Jambalaya Seasoning to taste 1 cup water Equipment Cast Iron / Aluminum Dutch Oven Some type of heat to 350 degrees Instructions Cut all ingredients into bite size pieces. Brown the bacon first - do not drain. Season the chicken before cooking. Cook the chicken completely, then add the vegetables and cook until the onion is somewhat clear. Add the smoked sausage, shrimp, the cream of mushroom soup and the water. Simmer until bubbly, then remove from the heat (either fire, charcoal or oven) Stir in the rice and let sit COVERED for 5 to 10 minutes. Grab the seasoning and some hot sauce if desired and enjoy big time! Comment Usually this will feed about 15 people. You may want to add more rice and soup to stretch for very hungry scouts. They never seem to get enough. You will also need some bread and butter to go with it!
54 Genuine Australian Camel Stew NOTE: Recipe requires a quite large Dutch Oven, Recommended for entertaining V.I.P's in Camp. 3 Medium sized Camels 1 ton salt 500 bushels Potatoes 1 ton pepper 200 bushels carrots 3000 sprigs parsley 2 small rabbits 1000 gallons of brown gravy. Cut camels into bite sized pieces, cube vegetables. Place meat into pan and cover with 1000 gallons of brown gravy. Simmer slowly for 4 weeks. Garnish with Parsley, Should serve 3800 people. If more are expected add 2 rabbits. Mr. McGregor's note: I haven't tried this recipe as I have been having trouble obtaining the camels but you may have better luck. Jim McGregor, Australian Scouter Sausage Balls 1 lb Sausage (Mild or hot) 1 Egg 6 oz Grated Cheddar Cheese 3 C Bisquik Mix all ingredients together. Mixes best with your hands. Pinch off small pieces and form into balls. Cook min at 350 in Dutch oven. Makes 6 dozen.
 can diced green chiles, drained 4 green onions, chopped 1 tsp.")
55 Baked Southwestern Egg Rolls 14" Dutch oven 2 cups frozen corn, thawed 1 (15oz) can black beans, rinsed and drained 1 (10oz) pkg frozen chopped spinach, thawed 2 cups shredded Mexican cheese blend 1 (4oz) can diced green chiles, drained 4 green onions, chopped 1 tsp. ground cumin 1/2 tsp chili powder 1 tsp salt 1/2 tsp pepper 1/4 tsp cayenne pepper 1 package egg roll wrappers (about 24 total) In a large bowl, combine everything but the egg roll wrappers. Mix well to blend. Lay an egg roll wrapper out on a work surface so that one of the corners is pointing toward you and place 1/4 cup of the filling in the center. Fold the tip closest to you up over the filling, roll a bit, then take the points pointing outward and fold them in toward the center. Continue rolling into an egg roll shape until a small part of the remaining point is still free. Dip a finger in water and lightly brush on the edges of the free corner. Finish rolling and press to seal closed. Repeat with the remaining wrappers and filling. Lightly grease your dutch oven with shortening. Place the sealed egg rolls on the baking sheet seam side down and spray the tops of the egg rolls with cooking spray (I brushed them with olive oil). Bake at 425 for about 15 minutes, or until lightly brown, turning halfway through baking. Use 2 rings on top and 1 ring on the bottom. Serve warm with salsa. The Review These were awesome! They were really easy to make too! I was skeptical about baking them, but they turned out great. Mine suffered from operator error. started baking them at the wrong temperature and then I had to wait for more coals to be ready, so they don't look as good as they should, but they tasted great. My kids loved them. I'll be making these again! Grade A. I
56 Sausage Turnovers Servings: 8 Bake Time: min 8 Frozen Dinner Rolls dough, thawed ½ pound ground sausage 1 small onion, chopped 2 cups fresh mushrooms ½ teaspoon sage 2 teaspoon parsley 3 ounces cream cheese Salt and Pepper to taste Instructions Thaw rolls until warm and bubbly. Brown sausage in bottom of Dutch oven and drain off fat. Add mushrooms and onions to sausage and cook until tender. Remove from heat. Salt and pepper to taste. Add parsley, sage and cream cheese. With hands flatten each roll into 5 inch circle. Place 2 generous tablespoons filling into each roll. Fold over and seal edges by pinching or crimping with a fork. Line a clean Dutch oven with foil and spray with non-stick cooking spray. Bake immediately in fire for minutes or until lightly browned. Texas Benders Servings: 6 Bake Time: min 6 Frozen Dinner Roll Dough, thawed ¾ C ham or pepperoni ¾ C sliced olives 6 Tbsp (a generous ¼ cup) mushrooms (sliced) 6 tsp green onion and/or green pepper, chopped ½ C cheese, grated Instructions Thaw rolls until soft. Using a little flour, flatten each roll into a 7 inch circle. Fill each circle with meat, olives, mushrooms, green onions, green peppers, and cheese. Seal edges by crimping with fork. Bake in Dutch oven for minutes at 350 F. Dip in heated pizza sauce.
57 Chicken Rolls Servings: 6 Bake Time: min 12 Frozen Dinner Rolls dough, thawed ½ pound boneless, skinless chicken (about 1-1/3 cup cooked) 1 tablespoon butter 3 ounces cream cheese 1 egg, beaten Herb bread stuffing, crushed Salt and Pepper Instructions Thaw rolls until soft. Sauté sliced chicken in butter. Chop cooled chicken into cubes. Mix chicken and cream cheese; add salt and pepper to taste. Crush herb breadcrumbs with a rolling pin. Pat rolls out into 3-inch circles and divide filling among 12 rolls. Seal edges. Dip tops in beaten egg and then in crushed breadcrumbs. Place crumb-side-up on the bottom of the Dutch oven. Bake at 350 F for minutes, or lightly browned. Serve warm. TIP: Ideal for appetizers of picnics. May be frozen; thaw completely and warm in 350 oven for minutes to serve.
58 Soups, Stews & Chili Texas Chili 2 lb lean chuck roast 1 large onion Bacon grease 6 cloves garlic, minced 6 jalapeno peppers, seeded & chopped 2 tsp salt 4 tbs chili powder 1 tbs cumin 1 tbs oregano 1 (20 oz) can tomatoes, chopped Brown meat, garlic and onions in bacon grease. Add jalapeno peppers and mix well. Add remaining ingredients, cover and cook 1 hour Camp Chili Coarsely chopping your own steak makes a heartier chili; you can always substitute hamburger meat. 7 to 8 pounds round steak, cut into 1-inch pieces 1 pound thick-sliced bacon, chopped 4 cups diced onions ¼ cup flour 2 tablespoons kosher or sea salt 1 tablespoon freshly ground black pepper 8 cloves garlic, crushed 4 large tomatoes, chopped 2 tablespoons ground cumin 2 tablespoons paprika 8 poblano peppers, roasted, peeled and chopped 4 cups beef stock Preparation Directions 1. Brown bacon in large cast iron dutch oven over medium heat. Add onions before bacon is done and continue browning until onions are soft. Dip bacon and onions out. 2. Dredge meat in flour, salt and pepper. Place in Dutch oven, stirring continuously until beef is browned. Return cooked bacon and onions to pan; add garlic. Stir and brown 2 to 3 minutes. 3. Add ground cumin, paprika, peppers, tomatoes, beef stock and enough water to cover completely. Bring to a boil. Cover and simmer from 2 ½ hours or until tender, stirring occasionally, adding a little water as needed.

59 Corn Chowder 4 slices bacon, cut up 3 c. potatoes, peeled & cubed 1 c. celery, chopped 1 c. carrots, chopped (fine) 3 c. chicken broth, divided 3 c. cream-style corn 1/2 tsp. Salt 1/2 tsp. Pepper 3 c. milk Parsley, chopped 1/2 c. onion, chopped 2 tbsp. Flour 1 tbsp. Cornstarch 1/8 c. cooking oil Cook bacon in a Dutch oven until crisp; drain and set aside. Cook onion in bacon drippings and oil until tender. Add potatoes, 2 cups chicken broth, carrots, salt and pepper and bring to a boil. Reduce heat and add cream corn and celery. Cover and simmer for 20 minutes until tender. In a bowl, combine 1 cup chicken broth, flour and cornstarch; add to pot and cook until thickened. Stir in milk. Heat but do not boil. In serving bowls top with bacon and parsley. Serves 8 to 10. Chicken Enchilada Soup 12"Dutch oven 1 Tbs. oil 1 lb. diced chicken 1/2 c. chopped onion 2 cloves minced garlic 4 c. chicken broth (I used bouillon cubes) 1 c. Masa corn flour (available in the baking aisle) 3 c. water 1 10 oz. can red enchilada sauce (I like medium) 1 lb. Velveeta, cubed 1 tsp. salt 1/2 tsp. cumin 1 tsp. chili powder Cook chicken, onion and garlic in the oil in a 12" Dutch oven. I used about 18 coals with bottom heat only. Be sure to preheat your oil in the Dutch oven before putting chicken in. When chicken is cooked through, add broth, flour and water. Whisk until smooth. Stir in all remaining ingredients except the chicken. Bring to a boil, stirring often. Add the chicken, reduce heat and simmer 30 minutes, stirring occasionally. At this point I used 10 coals on the bottom and 14 on top and just "baked" the soup. Spoon into bowl and garnish with olives, salsa, guacamole, cheese and corn chips. The Review We love this soup. It is hot and filling and my kids love being able to add all their favorite toppings. This is one meal where I never get any complaints about what's for dinner. This also makes a great dip. Just cut the water in half so it gets really thick.

60 Hearty Corn Chowder 12" dutch oven (can double & will still fit in 12 DO) 1/2 lb. sliced bacon 1 cup chopped celery 1/2 cup chopped onion 2 cups diced peeled potatoes 1 cup water 2 cups corn 1 can cream style corn 1 12 oz. can evaporated milk 6 oz. smoked sausage links, cut into 1/4" slices 1 tsp. dill weed In your DO, cook the bacon until crisp. Remove to paper towels; crumble and set aside. Drain all but 2 Tbs. of the drippings. Saute the celery and onions in drippings until onions are lightly browned. Add the potatoes and water. Cover and cook 10 minutes. Stir in corn, milk, sausage, dill and bacon. Cook until the potatoes are tender, about 30 minutes. The Finished Product What I Learned That bacon cooked in a DO is Fabulous!!! The Review This is in my top 10 list of soups. It is amazing. The bacon and sausage give it just the right flavor, and the DO makes it even better. Tomorrows leftovers will be even better! This soup gets an easy A. **Just a note--i doubled this recipe for my family and it fit great into a 12" oven. So this will probably fit in a 10" oven if it is not doubled.**
61 Pizza / Calzones Campfire Dutch Oven Pizza 1 ½ lbs lean ground beef 2 tsp Italian seasoning 1 tsp garlic powder Salt & pepper to taste 2 Tbs olive oil 1 can crescent rolls 1 jar of pizza sauce ½ med onion (diced) 3 Tbs diced green pepper 3 Tbs red pepper 1 8oz can mushroom stems & pieces (drained) 12 black olives (sliced) 8 oz shredded Cheddar cheese 8 oz shredded Mozzarella cheese Heat a 12" Dutch oven using briquettes bottom until hot. In a medium bowl add ground beef, italian seasoning, garlic powder, salt and pepper; mix together with your hands. Drop ground beef by small pieces into the hot Dutch oven and fry until brown. Remove browned beef from Dutch oven and wipe oven down with a paper towel. Pour olive oil into Dutch oven and spread evenly over bottom of oven. Unroll the can of crescent rolls and line the bottom of the oven with a layer of flattened rolls. Spoon pizza sauce evenly over crescent rolls. Sprinkle evenly with seasoned ground beef, red onion, bell peppers, mushrooms, olives, and top with Cheddar and Mozarella cheeses. Cover and bake using 8-10 briquettes bottom and briquettes top for minutes until crust is browned on edges and cheese is bubbly. Serves: 6-8
62 Dutch Oven Pizza 2 boxes pizza mix w/ sauce 1 lb mozzarella cheese 1 lb pepperoni (or your favorite topping) Equipment Large Dutch Oven Heavy Duty Aluminum Foil Instructions Prepare coals Line Dutch Oven with heavy duty foil Mix pizza dough per instructions on box Spread dough evenly in bottom of Dutch oven. Layer with sauce, pepperoni & cheese. Cover Dutch oven, place on coals, put several coals on top. Cook for minutes. Better than take out! Comment Do not use too many coals or you can easily burn the crust.

63 Pizza Calzone (easy to modify for Dutch Oven cooking) Tuck favorite pizza fillings between layers of tender crust, and save the pizza sauce for dipping. It's so easy with Pillsbury refrigerated pizza crust! Prep Time: 20 Min Total Time: 55 Min Makes: 8 servings 2 cans (13.8 oz each) Pillsbury refrigerated classic pizza crust 3 oz small pepperoni slices (42 slices) 1 jar (4.5 oz) Green Giant sliced mushrooms, well drained ½ cup sliced pimiento-stuffed green olives 8 oz thinly sliced provolone cheese 1 tablespoon grated Parmesan cheese 1 jar (14 oz) pizza sauce, heated Directions 1. Heat oven to 375 F. Lightly grease 12-inch pizza pan (Dutch oven). Unroll 1 can of dough; placing in greased pan (Dutch oven). Starting at center, press out dough with hands to edge of pan (DO). Layer pepperoni, mushrooms, olives and provolone cheese over dough. 2. Unroll remaining can of dough. Press out dough on work surface to form 12-inch round. Fold dough in half; place over provolone cheese and unfold. Press outside edges to seal. Cut several slits in top crust for steam to escape. Sprinkle with Parmesan cheese. 3. Bake 30 to 35 minutes or until crust is deep golden brown. Cut pizza into wedges; serve with warm pizza sauce. Vary the calzone filling with your favorite pizza ingredients. Try an allveggie version with chopped broccoli, bell peppers and onion with shredded mozzarella and Parmesan cheeses.
64 Vegetarian Quesadilla Pie Mexican casserole dinner for 14 people 2 and 3/4 doz Corn tortillas 105 oz Refried beans 47 oz Whole green chilies 2 and 1/4 lb grated mild cheddar cheese 2 and 1/4 lb grated Jack cheese 1 and 3/4 lb grated Jalapeno Jack cheese 28 oz Salsa (medium) 11 oz Black olives (whole) 14 oz Sour Cream Place a few corn tortillas on the bottom of the Dutch oven and layer the ingredients in the Dutch oven. Refried beans, green chilies, jack/cheddar cheeses, salsa, corn tortillas, and repeat. Stop layering at least one inch from top of Dutch oven. Finish with the salsa, grated jalapeno cheese, and whole black olives. Bake for 30 to 45 minutes or until cheese is melted and entire pie is heated through. Serve with sour cream, chips and salsa. Note: This recipe probably needs two Dutch ovens to serve fourteen people. Cut ingredients in half if using only one Dutch oven. If you cannot find grated cheese you can grate your own or, thinly slice the cheese in the casserole and only grate the jalapeno cheese on top. If you like it spicy, use hot salsa and fresh jalapeno peppers, layered in the casserole. Pre-cooked/drained taco meat can also be added. Meatless Spaghetti Sauce ½ cup chopped onion ¼ cup chopped celery ½ cup sliced mushroom, fresh or canned ¼ cup olive or salid oil 1 6oz can tomato paste 2 cups hot water 2 Tbs chopped parsley 1 Tbs sweet basil, chopped 1 tsp salt dash of pepper 1 lb spaghetti, cooked and drained Parmesan cheese Equipment Dutch oven Instructions Cook onion, celery & mushrooms in oil until lightly browned. Mix tomato paste, water, & seasonings. Add to vegetables. Simmer covered 30 to 40 minutes. Uncover and simmer until thickened as you like it. Serve over cooked spaghetti, or whatever you want to serve it on. Sprinkle with Parmesan cheese. Makes about 4 servings. Comment: Have been making this sauce since I use it at home even now.
65 Green Bean Casserole 2 EA 10 oz Cans, Cream of Mushroom Soup 1 Cp. Milk 2 tsp. Soy Sauce 1/4 tsp. Black Pepper 20 Oz bags of Frozen Cut Green Beans 2 Pkg French Fried Onions (About 1 1/3 Cups each) Directions Preheat and oil a 12" Dutch oven with coals on the bottom. Mix the soup, milk, soy sauce, pepper, green beans and one package of french fried onions in the Dutch oven. Cover and bake for 30m minutes with coals on top. Stir and sprinkle the remaining package of onions over the top. Cover and bake for another 10 minutes. Serves 12
66 .
67 VEGETABLES Italian Zucchini Zucchini or Summer Squash (1 per person) ½ C Olive oil ½ C Lemon juice Romano Cheese Salt & Pepper Coat and marinate zucchini or summer squash (one per person) for 30 minutes in a mixture of the olive oil and lemon juice (a half cup of each will coat enough zucchini for 20 people). Place one layer of the marinated vegetables in the bottom of the Dutch oven. A 10-inch oven works great for up to 15 people. Sprinkle salt, pepper, and a good coating of grated Romano cheese over the layer, then repeat the process, layer upon layer, until all the zucchini is used or until the oven is almost full. Sprinkle extra Romano cheese on the top layer. Place the lid on the oven and cook as noted earlier with the proper number and placement of coals. Cook for 30 to 35 minutes. This is a marvelous tart and tasty vegetable treat, guaranteed
68 Macaroni and Cheese Recipes SIDE DISHES Old Fashioned Macaroni and Cheese 8 oz macaroni 1 small onion, chopped 8 oz sour cream Salt & pepper 2 C cottage cheese 8 oz sharp cheddar cheese 8 oz cream cheese Prepare macaroni according to package instructions. Mix all ingredients together and place in pan. Put pan in 350 Dutch oven for 30 min or until cheese is melted and bubbly.
69 Potato Dishes Garlic Potatoes 6 medium sized potatoes Garlic salt 1/2 pint of cream Peel potatoes and cut into thin slices. Place the potatoes in the oven in layers, sprinkling some garlic salt on top of each layer. Pour cream over the lot, and cook for an hour or so until the potatoes are cooked through. Shark Patrol French Fries 1 Bag of Frozen French Fries (of your choice) Cooking Oil Salt or Seasoned Salt Keep fries as chilled as possible before cooking. Preheat Dutch oven (between 400 & 425). Set 20 coals on top and 10 on the bottom. Oil a 12 Dutch oven, coating evenly with a paper towel. Spread fries evenly in the oven. Season with salt or your favorite seasoned salt (try adding garlic powder). Cover and bake for the amount of time specified for your fries. Check occasionally and reposition so the fries on the bottom do not burn. They may be done sooner since the fries may have thawed somewhat.

70 Dutch Oven Potatoes 12" dutch oven 1/2 lb. bacon (I used a whole pound and it was perfect!) 1 onion, chopped 1 bell pepper, chopped 1 jalapeno, finely chopped (I didn't have one) 1/2 Tbs. McCormick Creole Seasoning 1/2 tsp. black pepper 6-8 large russet potatoes, peeled and sliced 2 cans cream of mushroom soup 1/4 lb. shredded cheddar cheese Brown the bacon in your DO. Remove from the pan and drain all but a few Tbs. of the grease. Saute onions, peppers and spices until veggies are soft. Add the bacon and potatoes; mix well. Add the soup and mix well. Let them bake for about 40 minutes. I used 8 coals on the bottom and 16 on top. During the last 5 minutes of cooking remove the pot from the bottom heat and add the cheese. Cook until it melts! What I Learned I started out with 10 coals on the bottom and 14 on top, but about 15 minutes in I went to stir them and I could tell there was too much heat. I just moved a couple of coals from the bottom to the top. I am seeing that in a lot of cases the problem with too much heat isn't the actual temperature of the oven, rather the distribution of the coals. So I've learned not to be afraid of moving the coals around. Parmesan Baked Potato Halves 12" dutch oven 6 small potatoes, scrubbed and cut in half 1/4 cup butter grated Parmesan cheese (Lots) Garlic powder Melt butter in your 12" dutch oven. Generously sprinkle Parmesan cheese and lightly sprinkle other seasonings all over the butter. Place potato halves face down on the butter and seasonings. Bake at 400* for minutes or until potatoes are tender. I used 2 rings on top and 1 ring on the bottom. Cool for 5 minutes before removing from pan. Serves The Review Seasonings (I used Schilling's Salad Supreme, kosher salt, and pepper, but use what you like best!) Be sure to use plenty of Parmesan cheese. You want it to get nice and crispy and thick on the potatoes. I didn't use quite enough on mine so they weren't as flavorful as they could have been, but we still loved them. Be sure to let them sit for at least 5 minutes before you serve them, it helps the cheese to stay on the potatoes instead of the bottom of your pot.
71 Beans Cowboy Beans & Texas Toast Ground Meat: one or all (turkey/beef/venison/pork/mutton/chevon) Your favorite Pork-n-Beans, onion, mustard, ketchup, brown sugar, garlic powder, salt, pepper, Bar-B-Que sauce, bread, and butter. Equipment Pot or Skillet or Dutch Oven Instructions Brown the meat with chopped onion in your pot, skillet, or oven. Drain off excess. Add your favorite Pork-n-Beans, garlic powder, ketchup, mustard, Bar-B-Que sauce, brown sugar, salt, and pepper to taste. Bring to a boil, stirring occasionally. Butter the bread, sprinkle with garlic powder and toast over a flame. Comment The juice in the bottom of the bowl is best when you use your Texas toast to wipe out your bowl Trailside Beans ½ lb Bacon, sliced in small pieces ½ l Ground Beef ½ Diced Onion 1 Diced Red Bell Pepper 1 Diced Green Bell Pepper Two 33-oz. cans of Pork and Beans ½ C Brown Sugar ¼ C Worcestershire sauce 2 Tablespoons of white vinegar Cook bacon and ground beef well in a 12-inch Dutch oven. Use 24 coals all on the bottom to start, then separate and place the coals as noted earlier during the baking stage. Before removing excess oil, sauté diced onion, diced red bell pepper, and diced green bell pepper with the meats until the onions and peppers are soft. Drain off excess oil. Add pork and beans, brown sugar, Worcestershire sauce, and white vinegar. Stir well, place lid on oven, and cook with repositioned coals for 90 to 120 minutes. Check for moisture content every 15 to 20 minutes. (Some ovens allow too much moisture to escape.) If there is not a soupy layer of liquid covering the beans, add water, a little at a time, and stir to maintain the moisture content. Eat this with hot biscuits and jam, and you ll understand why cowboys always looked so happy on those long, hard, dusty cattle drives.
72 Dutch Oven Stuffing 1 lb. pork sausage 2 Tbs. dry sage leaves 1/2 cup butter 1 Tbs. dry thyme 2 red onions; diced 1 Tbs. tarragon leaves 6 stalks celery; diced 2 Tbs. dry parsley 2 cups fresh mushrooms; sliced 4 eggs; beaten 6 cloves garlic; minced 2 cups chicken broth 3/4 cup pinenuts 2 tsp. salt 9 cups dried bread cubes 1 1/2 tsp. black pepper Brown sausage in a 12" Dutch oven using briquettes bottom. Add butter, onions, celery, mushrooms, garlic, and pine nuts. Sauté until vegetables are tender. In a large bowl combine remaining ingredients and mix until bread cubes have absorbed all the broth. Add bread stuffing mixture to the sauteed vegetables in the Dutch oven and stir until well mixed. Cover Dutch oven and bake using briquettes bottom and briquettes top for 60 minutes. Serves: 12-15

73 BREAD Good Dutch oven breads seem to be a rarity. However, marvelous corn breads, biscuits, rolls, and sourdough loaves are surprisingly easy to perfect in the old black pot. The larger the oven the better when it comes to cooking breads. A 14-inch oven serves nicely to produce three loaves of bread or up to three dozen rolls or biscuits. To successfully brown breads, however, you must alter the cooking process for the last five to eight minutes of the traditional minute, 350 baking time. First, put a light coat of oil on the interior of a cool oven (including the lid), and let the rolls or bread complete their final rise in the oven prior to applying the coals. Second, place the oven on the coals with the proper number of coals on top as noted earlier. (Remember: no coals directly under the center of the oven.) Third, when there are five to eight minutes left in the cooking time, lift the lid, lightly brush the tops of the breads with butter, replace the lid, then take all the coals from under the oven and distribute them evenly on the top. With all the heat now on the lid, check the bread every couple of minutes until you think it looks perfect. After brushing the coals and ashes from the lid, remove it, tilt the oven over a bread board, and your perfect bread will gently fall out. Camper's All Purpose Baking Mix This baking mix is easy to make, affordable, and very versatile. You can use it for just about any kind of bread, biscuits, cinnamon rolls, pizza dough, pancakes, and more! The recipe below will make a large batch that can be stored in a zipper-lock bag or other container, and you can take just the amount you are going to need. 8 Cups All Purpose Flour ½ Cup Powdered Milk 5 TBS. Baking Powder 4 tsp. Salt Instructions Mix well, and store until needed. Before your camping or backpacking trip, just measure out what you'll need into smaller containers.

74 Yeast Breads Baking Breads Cooking in a Dutch oven definitely includes baking. Breads have a common tendency to burn on the bottom, but that is usually caused by folks putting too many coals under and not enough on top. When cooking breads, rolls, and biscuits, almost all the head should be coming from the top - place 3/4 of the coals on top of your oven. If you've tried bread or rolls and run into this problem, you should try a different way that will help prevent burning. Place 4 or 5 small pebbles in the bottom of your oven. Mix up your bread recipe and put it in an aluminum pie tin. Balance this tin on the pebbles and then cook as normal. Having the pan raised on the pebbles allows air flow under and around the bread, creating more even heat all around and minimizing burning. It really works great! Use this to cook bread, rolls, pastry, or anything you want. I only use it for dough foods since it kinda seems like cheating to me. :-) Pillsbury Crusty French Loaf Baking time: minutes 10-inch Dutch oven 12 briquettes on the lid 8 briquettes on the bottom Pre-packaged refrigerated Pillsbury crusty French Loaf Butter or margarine INSTRUCTIONS Place refrigerated dough in a circle in the Dutch oven pinching ends together. Cut 5 or 6 deep cuts with knife on top of dough. Cool before slicing. Note: We usually bake French bread on top of another oven and then we have hot bread with our meal.

75 Bread Bowls 14" Dutch oven 1 1/2 Tbs. yeast 2 1/2 cups warm water 2 tsp. salt 2 Tbs. vegetable oil 7 cups flour 1 Tbs. corn meal 1 egg white 1 Tbs. water Dissolve the yeast in warm water. Let stand for about 10 minutes. Add the salt, oil and 4 cups of flour and mix well. Add the remaining flour, 1/2 cup at a time, beating well after each addition, until a soft but not sticky dough is formed. (I didn't use all the flour.) Turn out onto a lightly floured surface and knead for about 5 minutes, or until the dough is smooth and elastic. Place dough in an oiled bowl and turn to oil the top. Cover and rise until doubled. Punch the dough down and divide into 8 equal portions. Shape into a ball and place in a lightly greased dutch oven that has been sprinkled with cornmeal. Cover and allow to rise until doubled. In a small bowl, combine water and egg whites. Carefully spread the egg combination over the top of the bread bowls. Bake at 400 for 15 minutes. Brush each bread bowl with egg again and bake another minutes or until golden brown. Serves 8. Bloomin' Onion Bread 10" Dutch oven 1 unsliced loaf (round is preferable) sourdough bread. 1 pound Monterrey Jack cheese, thinly sliced 1/2 cup butter, melted 1/2 cup finely diced green onion, with tops 2-3 tsp poppy seeds Cut the bread lengthwise and width wise - without cutting through the bottom crust. Insert cheese between cuts. Combine butter, onion, and poppy seeds. Drizzle over bread. Wrap in foil and place in your Dutch oven. Bake at 350 degrees for 15 minutes, using 1 1/2 rings on top and 1 ring on the bottom. Unwrap. Bake 10 more minutes, or until cheese is melted. The Review Talk about neat presentation! Thisbread looks cool! It also tastes great! Grade A.
76 Sweet Breads Spiced Pear Bread 10" dutch oven 3 (15 oz) cans sliced pears, drained and mashed 1 cup sugar ¼ cup unsweetened applesauce ¼ cup vegetable oil 3 eggs 3 ¼ cups flour 3 tsp. cinnamon 1 tsp. baking soda 1 tsp. baking powder 1 tsp. ground cloves ½ tsp. salt In a large bowl, combine the first 5 ingredients. Combine the flour, cinnamon, baking soda, baking powder, cloves and salt; gradually add to the pear mixture and mix well. Pour into a well greased dutch oven and bake at 350 for minutes or until a toothpick comes out clean. Use 1 1/2 rings on top and 1 ring on the bottom. Cool 15 minutes before removing to cool on a wire rack. Coffee Cake Use a mixing bowl to prepare this batter, before pouring it into either an oiled baking pan or a cool 12 Dutch Oven lined with Extra Heavy Duty aluminum foil and oiled. Oil the pan by coating it with cooking oil, shortening or butter. Mix together the dry ingredients first, then stir in the liquids until the batter is smooth. 2 1/4 cups flour ½ Teaspoon Salt 1 Tablespoon Cinnamon 1 cup brown sugar 3/4 cup sugar 1 Teaspoon baking powder ½ cup cooking oil 1 egg, beaten 1 cup milk Bake minutes with ~14 coals on top and 6 coals underneath the Dutch Oven. Test for doneness with a fork or toothpick that sticks in and comes out cleanly.
77 Banana Coffee Cake Equipment: Dutch oven, pie tin, mixing bowl 1 box yellow butter cake mix 2 ripe bananas 3/4 cup brown sugar 1 teaspoon flour 1/2 teaspoon cinnamon 1 teaspoon melted butter Put pie tin in Dutch oven, resting on 3 or 4 stones or wads of aluminum foil. Prepare cake mix according to the box and pour into pie tin. Mash the 2 bananas and pour into pie tin. Melt the butter and add the cinnamon, flour, and brown sugar and mix together. Sprinkle cinnamon-flour mixture on the mashed bananas. Cover and bake for about 25 minutes at 350 degrees. Insert a butter knife through the center and if it comes back clean it is ready. Serves 6 to 8. Sunrise Surprise Coffee Cake 2¼ C All-Purpose Flour ½ tsp Salt 1 Tbsp ground Cinnamon 1 C Brown Sugar ¾ C granulated Sugar ¾ C vegetable Oil 1 tsp Baking Soda 1 tsp Baking Powder 1 egg beaten 1 C Buttermilk Optional: 1 C nuts of your choice 12 Dutch oven Heavy Duty Aluminum Foil - Medium size mixing bowl 1. Line sides and bottom of the Dutch oven with greased, heavy duty aluminum foil. 2. Preheat oven using 8 coals on the bottom and 17 on the lid 3. In a medium-sized bowl, mix all ingredients except the nuts 4. Remove oven from heat and pour batter into the oven and spread evenly 5. Sprinkle nuts over the top of the batter 6. Return oven to coals and bake for approximately 30 minutes. A toothpick should pull out clean from the center. Serves 6-8
78 Biscuits & Rolls Canned Biscuits Method 1 Buy a cardboard tube of refrigerated biscuit dough. Wipe oil in the pot and then arrange the biscuits to cover the bottom. Cook at 375 to 400 degrees with most of the heat on top for 20 minutes. Check the biscuits - if they're golden brown, they're done. Method 2 Get the cheap tube biscuits (generic Pillsbury) and load a Dutch oven full of them by laying them on their side in concentric circles and stack them on top of each other if needed. You can get about 60 in a 12" oven. Brush the tops with butter and cook them up at about 350deg. It comes out like a large loaf of bread that separates into dinner rolls. Warm rolls and stew...mmmmm. Set your camping stove to medium heat, and preheat your Dutch oven lid. Grease your Dutch oven with butter. Open canned biscuits, and place them in your Dutch oven. The biscuits should be touching, but not misshapen. Generally, eight biscuits will fit in a 10-inch Dutch oven and 30 biscuits will fit in a 14-inch Dutch oven. Use a hot-pad to place the hot lid on your Dutch oven, and put the Dutch oven on your camping stove. Bake for 15 minutes, using hot pads to turn your Dutch oven a quarter-turn every five minutes to ensure even
79 Biscuits Supreme 2 C - All-purpose flour 2 t - sugar 4 t - Baking powder ½ C - Shortening ½ t - Cream of Tarter 2/3 C - Milk Sift together the dry ingredients. Blend in the shortening until mixture resembles coarse crumbs. Add milk. Mix until dough follows fork around the bowl. Turn out onto lightly floured surface. Knead gently 1/2 minute. Pat or roll 1/2 inch thick. Cut 16 circles with a biscuit cutter. Place fairly close together on the bottom of an un-greased Dutch oven. Bake for 8 minutes with top and bottom heat. Remove from bottom heat and bake for another 4 minutes with top heat only. When done remove from oven and serve warm. Helpful Hint: If you are going camping, place all dry ingredients in a large zip-lock plastic bag. When ready to make biscuits, add shortening to bag and seal. Mix dough by hand through the bag. Add milk and finish mixing. Remember to bring some extra flour in another bag to use when rolling out the biscuits. Quick Biscuits While you are preheating the Dutch oven (10 charcoal briquettes underneath), make rolled (or drop, if you're camping) biscuits, using the recipe off a Bisquick box. Powdered milk just fine. Put the biscuits into the Dutch oven and cover. Let sit for 5-7 minutes (this browns them on the bottom). Lift the Dutch oven off the bottom coals, and put 25 coals on top. Cook another 8-10 minutes (check at 5 minutes to make sure they aren't burning). Key--oven needs to be HOT. Monkey Bread (Quick and easy) 4 cans Biscuits 1 c Sugar 1 c Brown sugar 4 Tbsp Cinnamon 1 stick oleo Optional: Add chopped nuts Cut biscuits into quarters. Mix sugar and cinnamon in plastic bag. Drop quarters into bag and coat well. Place in Dutch oven. Melt oleo in lid and pour over quarters. Bake 350 for 35 min.
80 Dutch Oven Bacon Cheese Pull-Aparts 14 Rhodes dinner rolls, thawed but still cold 1/4 cup butter, melted 2 cups grated Cheddar cheese 8 pieces cooked bacon, broken into small pieces Cut each roll in half. Pour butter into a 12-inch Dutch oven. Roll cut rolls in butter until coated and arrange in Dutch oven. Sprinkle with cheese and bacon. Cover with a lid and let rise until double. Bake at 350 degrees for minutes. Dutch Oven Temperature Control using Briquets: Heat to 350 degrees in a 12-inch Dutch oven, oven top 16 or oven bottom 8. Notes: Sprinkled with melted cheese, these buttery warm rolls are a delicious way to begin an adventurous new day. Number of Servings: 12 Dutch Oven Cheese Nibbles 20 Dinner Rolls, thawed 2 cups cheddar cheese, grated 1 package dried onion soup mix ¼ cup butter, melted Instructions Thaw rolls until soft but still cold. Melt butter in Dutch oven. Cut each thawed roll into 3 or 4 pieces and roll in melted butter and leave in Dutch oven. Sprinkle rolls with dried onion soup mix. Top with grated cheese. Cover with lid and let rise until double. Bake at 350 F. for minutes.
81 Miscellaneous Camp-o-ree Cornbread Jiffy Corn Bread Mix and Yellow Cake Mix Equipment Dutch oven, measuring cups, large wooden spoon and aluminum foil (optional) Instructions Line dutch oven with aluminum foil, empty corn bread and cake mix into dutch oven, add the ingredients listed on mix box (water, eggs, etc.). Cook for approx. 40 minutes, test with fork or press down on top of bread to see if done. Lift the bread out of oven and cut up. This corn bread goes great with chili! Comment: Experiment and try adding cream corn. Contagious Corn Bread This corn bread is so good that everyone will catch corn bread fever! You will definitely want to try this one on your next campout. 1/2 Cup Camper's All Purpose Baking Mix or other Bisquick type mix ½ Cup Corn Meal ½ Cup Powdered Milk 2 Tbsp. Sugar ½ Cup Water A splash of lemon juice (roughly 2 tsp.) 3 Tbsp. Butter Equipment Dutch Oven Measuring cups Measuring spoons Mixing bowl Lrg spoon Instructions Mix everything except the water, lemon juice, and butter. Melt the butter in a warmed Dutch oven making sure the sides get greased as well. Combine the dry mixture with the water and lemon juice, and then pour it into the Dutch oven. Bake for 10 to 15 minutes. A toothpick stuck into the center should come out clean. Serves 4 6
82 Buttery Corn Bread 12" Dutch oven 2/3 cup butter or margarine, softened (use butter, trust me) 1 cup sugar 3 eggs 1 2/3 cup milk 2 1/3 cups flour 2 1/3 cups corn meal 4 1/2 tsp. baking powder 1 tsp. salt In a mixing bowl, cream butter and sugar. Combine the eggs and milk. Combine flour, cornmeal, baking powder and salt; add to creamed mixture alternately with egg mixture. Pour in to your oiled DO. Bake at 400* for minutes or until a toothpick inserted near the center comes out clean. I used 19 coals on top and 10 on the bottom. I took it off the bottom coals about 20 minutes into cooking and just used the top heat to finish cooking servings. Dutch Oven Bread 2 Cups Camper's All Purpose Baking Mix (see recipe in this book) or other Bisquick type mix ½ Cup Powdered Milk ¾ Cup Water 1 Whole Egg 3 Tbs. Butter Instructions Melt the butter in a medium sized (10 inch) Dutch oven. Make sure the sides get coated with the butter as well. Combine the remaining ingredients and mix well. Pour the batter into the bottom of the oven. Put the lid on and bake for roughly 15 minutes. When the bread is browned on top, it is done. Serves 4-6 Comments: For a little extra flavor sprinkle the bottom of the greased oven with: - Salt, Garlic Powder, and Onion Powder, OR... - Garlic Pepper, and Parmesan Cheese, OR... - Cayenne Pepper, and Dried Onion Flakes, OR... - Any other combinations you can come up with
83 Italian Pull Apart Bread 10" Dutch oven 1 can Pillsbury grands biscuits 3 Tbs. butter 2 cloves minced garlic 1 tsp. Italian seasoning 3 Tbs. Parmesan cheese Melt the butter in a 10" dutch oven over a full spread of coals. Add the Parmesan, garlic and Italian seasoning. Quarter the biscuits with kitchen shears. Add the cut biscuits to the pot and stir well to coat. Bake at 375 for 25 minutes. Use 1 1/2 rings plus 2 coals on top and 1 ring on the bottom. Serves 4-6.
84 Appetizers & Dips Mexican Pizza Layer in the following order: 2 (16 oz.) cans refried beans mixed with 1 bag taco seasoning 1 avocado, mashed 1 (6 oz.) can chopped black olives 2 cans chopped green chiles 1 or 2 bunches chopped scallions 1 (16 oz.) container sour cream 1 lg. jar mild salsa *Layer first 6 ingredients in order written. Bake until bubbly at 350 degrees about 1/2 hour. Sprinkle with shredded cheese and bake until melted. Add 2-3 bags of cheese, make a nice thick layer. Makes a great dip for tortilla chips, etc. Nachos Dip in Bread 1 (15 oz.) loaf round sour dough 1 (15 oz.) can refried beans or * lb. hamburger Taco seasoning for meat 1/2 sm. bottle taco sauce 1 c. grated cheese (any kind) 1 sm. carton sour cream 1 avocado dip (dairy case) 1 sm. can olives Slice top off bread. Scoop out most of inside. Layer into bread loaf: beans/hamburger, taco sauce and cheese. Replace top of bread. Wrap in foil. Bake at 350 degrees for 1 hour and 45 minutes. Unwrap to check if cheese is melted if not return to oven without lid of bread. After it is cooked layer guacamole, sour cream and olives. Serve with remaining bread crumbs (toasted) and tortilla chips. Bean Dip 1 lb. lean ground beef 1 lg. onion, chopped 1 tsp. Lawry's seasoned salt 2 cans refried beans (1 lb. size) 1 pkg. Lawry's taco seasoning mix 2 c. grated Monterey Jack cheese 1 c. grated Cheddar cheese 1 bag Nacho chips 3/4 c. Rosarita chunky salsa dip Garnish with olives Green onions Chopped tomatoes Sour cream Guacamole Brown meat and onion. Drain well and add seasoned salt. Combine beans, taco seasoning mix and Monterey Jack cheese; mix well and spread in shallow baking dish. Cover with meat mixture. Pour salsa over meat. Sprinkle top with Cheddar cheese. Bake uncovered in 400 degree oven for minutes or until thoroughly heated. Make 6 main dish servings or about 15 appetizer servings.
85 Bean Dip 1 (1 lb.) can refried beans 2 1/2 tbsp. onion 1 c. grated Monterey Jack cheese 3 chicken breasts, sautéed and diced 1/2 c. taco sauce 1/2 c. grated cheddar cheese Tortilla chips Sour cream Chopped green onions (garnish) Sliced ripe olives (garnish) In medium bowl combine beans, onions and Jack cheese. Spread in bottom of 8x8x2 glass pan. Combine sautéed diced chicken and taco sauce and put over beans. Top with cheddar cheese. Bake uncovered at 400 degrees for 20 minutes. Tuck chips around edge and add sour cream, onions and olives to garnish. Bean Dip 1 (8 oz.) soft cream cheese 1 (8 oz.) real sour cream 1 can vegetarian refried beans 1 lb. pkg. of cheddar cheese, shredded, reserve 1 cup for topping 2 chili seasoning Mix all ingredients together. Cook in Pyrex dish on 275 degrees until bubbly, 30 minutes or more. Put cheddar cheese, reserved on top. South of the Border Dip 2 cans refried beans 1 pkg. taco seasoning mix 1 (16 oz.) carton sour cream Shredded sharp Cheddar cheese Thoroughly mix refried beans and taco seasoning. Spread in 1 1/2 quart casserole. Cover with sour cream, sprinkle shredded Cheddar cheese over top. Bake at 350 degrees 30 minutes. Serve hot with tortilla flavored chips. Holiday Mexican Dip 1 can Cheddar or Nacho cheese soup 1 lb. Velveeta cheese 1 lb. hamburger, browned & drained 1 lg. can refried beans 1 jar picante sauce (mild, med. or hot) 1 pkg. taco seasoning Tortilla chips Brown hamburger with taco seasoning, drain grease. Cut up Velveeta cheese into medium size pieces. In large crock pot, mix all ingredients together and set on low. Let cheese melt (about 1/2 hour) stirring a few times. Dip with your favorite tortilla chips.
86 .
87 DESSERTS Cobblers Black Forest Cobbler Recipe 1 Chocolate cake mix 1 Cherry pie filling 1-2 Hershey bars(you can never have too much chocolate.) chopped walnuts if your crew likes 'um Equipment Dutch Oven Instructions Put the cherry pie filling in the Dutch oven first, then add the cake mix (if your cake mix calls for eggs and or milk by all means add it for a richer texture. It will still work with out it though.) Mix only if you add eggs and milk. Add the walnuts if the crew will let you. Break up the Hershey bar on top so it will melt. Cooking Time: approx 45 min. Comment: Best when eaten in the dark Quickie Cherry Cobbler (2) 16 oz. can Cherry Pie Filling (2) Packages Cinnamon Rolls Equipment #12 Dutch Oven Can Opener Aluminum Foil Large Serving Spoon Instructions 1. Line Dutch oven with foil. 2. Dump cherry pie filling into Dutch oven. 3. Place over fire until filling bubbles. 4. Place Cinnamon Rolls on top of filling. 5. Cover and bake as per instruction on cinnamon rolls adding 2 min. to time Comments: This dish can be prepared in a reflector oven as well

88 Queenie s Peach Cobbler Cast Iron Required: 10.25" Cast Iron Skillet : 1 stick butter 1 cup of sugar 1 cup of flour 1/4 teaspoon of salt 2 teaspoons of baking powder 1 cup whole milk 1 can of sliced peaches, don't drain Directions: Melt a stick of butter in a cast iron skillet. Mix a cup of sugar, a cup of flour, 1/4 teaspoon salt, two teaspoons of baking powder, 1 cup whole milk. Pour in 10.25" cast iron skillet and add one large can of sliced peaches (don t drain). Bake at minutes
89 Dump Cakes Dump Cake (Cherry/Pineapple) 2 Betty Cocker Yellow Pudding Cake mixes, 4 Pats butter, 1 Large Can Cherry Pie filing, 1 large can Pineapple pieces, 1/2 cup water Equipment #14 Dutch oven 1 Large Spoon Instructions Start charcoal, line Dutch oven with heavy duty aluminum foil (twice), place Dutch oven over about coals, pour in both cans of fruit, dump in both cake mixes, spread lightly. Add 4 pats butter cover and cook for about 30 min. or till golden. Feed about 8 boys. after done lift out foil, wipe, re-oil, reheat and your done Comment: Can be made with any combination of fruits, or cake mixes, just try a few. Easy Camp Cobbler (Dump Cake) large can of peaches in heavy syrup stick of butter yellow or white cake mix cinnamon Equipment Dutch oven charcoal Instructions Pour the can of peaches in bottom of the Dutch oven. Cover the peaches with cake mix. Cut the butter into pats and place evenly over cake mix. Sprinkle the top with cinnamon. Cover the oven, set on coals and put some coals on top of oven. Cook for ~45 min. Comment: Canned baked apples may be used also. You can also add a can of crushed pineapple. Silly Rabbit Cobbler Into a cool 12 Dutch Oven, lined with Extra Heavy Duty aluminum foil, dump a can of pineapple tidbits in water. Dump in one box of lemon cake mix. Dump in one can of Mandarin oranges in light syrup. Cut up ½ cube of margarine or butter and sprinkle on top. Cook with 6 coals under the oven and 14 coals on top until cake starts to form. Check and turn every 15 minutes. May take longer than 30 minutes. Tastes a little like Trix, silly rabbit.
90 Dutch Apple Cobbler 1/2 CP Butter or margarine 6 EA Large Cooking Apples, peeled and cored 1/2 CP Brown Sugar, firmly packed 1 CP Raisins 1/4 tsp. Ground Nutmeg 1/2 tsp. Ground Cinnamon Spice Cake Mix Directions Preheat Dutch oven to 375 degrees (18 coals on top/9-10 on the bottom). Prepare the cake mix per the directions on the box. Combine the first 6 ingredients in the Dutch oven and heat it until it starts to bubble. Pour about 1/3 of the spice cake batter into the apple-raisin mixture and stir it around. Thin pour the remainder of the batter over the top. Put the lid back on the oven and cook for at least the time specified on the cake mix. Bake at 375 degrees until top is golden brown and filling is bubbling (about 50 minutes). Cakes Chocolate Cherry To Die For Cake 2 Regular size cans cherry pie filling 1 Chocolate cake mix, not the pudding kind.the cheap store brand kind Water,Eggs,Butter, Cinnamon a good dash Equipment Dutch Oven (we use #12) Foil to line oven Charcoal, tongs, etc. Instructions Line the oven with foil, Put the pie filling on the bottom, and add about 1/2 can of water, some dots of butter, and cinnamon. Mix the cake mix according to the box directions, and put on top. Bake about 30 to 35 min. Check after 20 min. It is done when the top is no longer wet..serve with ice cream or whipped cream in a can.
91 Chocolate Pineapple Upside-Down Cake 12 oz pineapple rings 1 box chocolate cake mix ingredients on cake mix as needed(eggs, oil, water, etc) 1 jar maraschino cherries 1/4 cup brown sugar 4 TBLS butter Equipment Dutch oven 12" aluminum foil 1 gal zip-lock freezer bag Metal trivet (optional) Instructions Place 24 bricks of charcoal in pile or in starter and ignite. Line Dutch oven with foil and place pineapple rings in a layer on the bottom. Place cherries in the holes and between the rings as desired, then sprinkle brown sugar over the fruit, and place butter in small pieces all over. Add all cake ingredients in the zip-lock bag, remove all of the air, and seal the bag. Knead the ingredients in the bag until well mixed. Pour cake mix over the fruit. Spread 10 bricks of charcoal under the Dutch oven and put the remainder on the top, spaced evenly. Check in 10 minutes with a knife or clean stick. If the cake sticks, cover for 5 min and repeat check as necessary. Comment This one did not win at the Camp-o-ree, but it was the first one eaten! A metal trivet placed in the bottom before the foil allows a little water to be added to keep the bottom from scorching. Applesauce Gingerbread Cake 1 14 oz. can of applesauce 1 package of gingerbread cake mix Instructions Pour applesauce in bottom of Dutch oven or cast iron skillet. Pour dry cake mix over applesauce. Cover and cook until moisture from applesauce has steamed the cake. Let cool approx mins. Serve warm.
92 Pineapple Upside-down Cake 1 can pineapple rings (drained, retain juice), 2 cans crushed pineapple (drained, retain juice), 1 jar maraschino cherries, 1 box spice or pineapple cake mix and associated ingredients (according to box's instructions, cinnamon, 1/2 stick butter or margarine, approx. 1-1/2 cups brown sugar) Equipment large Dutch Oven, mixing bowl, and spoon Instructions Melt the butter in the bottom of the oven over medium heat. Add brown sugar and continue heating until sugar melts and forms thin paste with butter. Line the bottom of the oven with pineapple rings in the sugar glaze. Place a cherry in the center of each ring. Add the crushed pineapple on top of the rings, press it down with the back of a spoon, but DO NOT STIR. Mix the cake mix according to directions on the box. Pour the cake mix evenly over the pineapple mixture. Place the Dutch oven on top of briquettes, and add to the top of the oven. Bake until a knife inserted into the center of the cake is pulled out clean. Let cool for 5-10 minutes, then use a knife to release the edges of the cake from the oven. GENTLY turn the oven upside-down over a large plate or serving platter. The cake should drop out, leaving the pineapples on top! Stray garnish can be replaced with a spatula. Comment: Too much heat on the bottom will dry out the pineapple glaze and garnish, so be careful how much heat is under the oven. Check it after about 30 minutes, then every 5-10 minutes after that for doneness. Apple Spice Cake 8 Lrg Granny Smith apples peeled/cored/sliced/qrtrd ½ C Dried Currants or Raisins ½ C Chopped Walnuts ½ C Packed Brown Sugar 2 Tbsp Flour 1 tsp Ground Cinnamon 1 tsp Ground Nutmeg 1 Box Spice Cake Mix (prepared as directed) In a 12" Dutch oven add apples, currants, walnuts, brown sugar, flour, cinnamon, and nutmeg and stir until well mixed and apples are well coated. Pour cake batter over top of apples and spread evenly. Bake using briquettes top and 8-10 briquettes bottom for 60 minutes or until top center of cake springs back when touched. Serve with whipped cream. Serves: 16
93 Miscellaneous Dutch oven Candy Apples Cored apples(not sliced), pineapple, cherries, raisins, pineapple juice(from can), Equipment Dutch oven, tin foil, bowls, fork Instructions cover the inside of the Dutch oven with tin foil and put whole cored apples into Dutch oven so it fills it up(which is about 5 or 6 apples depending on the size of the Dutch oven), and put raisins where the cores of the apples were. when you finish with that, put a slice of pineapple on each apple and put a cherry in the middle of each pineapple. Pour a little bit of pineapple juice over everything. When this is done, cover the oven and let it sit under hot coals for 30 minutes. then take out and put in bowls and eat up! Comment Taste test it a bit before serving, if the apples are still really hard, then let it sit longer. when you serve it, it should be a tad bit hard(that s the way I like em!) Try topping with caramels (or caramel sauce), mini-marshmallows, chocolate, peanut butter only add these for last 5 minutes or so. Pudding Delight Tea biscuits or wafers Any flavor pudding mix (as per directions on container) Whipped cream (as per directions on container if not pre-whipped) Equipment Mixing bowl Cake pan or larger pot Spoon Cooler or small fridge Instructions Spread one layer of biscuits at bottom of pan or pot. Cover with pudding. Add a second row of biscuits. Cover with whipped cream. Super easy and delicious. Comment: This is a great way to use up left over milk on last day of camp.
94 Bread Pudding This recipe is for a 12" Dutch oven. This is an old fashioned desert that is a makes a fine finish to a Dutch oven dining experience. Eggs 4 Cups Milk 2 tsp. Vanilla 1 tsp. Nutmeg 1 Cup Brown Sugar 1 Cup Raisins 2 Cooking Apples (Peeled, Cored and chopped) 24 Slices White Bread (1 Loaf) Directions Preheat and oil a 12" Dutch oven with 8-9 coals on the bottom. Mix the first five ingredients together. Cut the bread into cubes and place into the Dutch oven. Add the raisins and apples and toss together to mix the fruit through the bread. Sprinkle a little cinnamon in as you toss if you like for an apple pie kind of effect. Fresh raspberries also add a nice touch. Then pour the egg custard mixture over the bread and fruit mixture. All the bread needs to be moistened. If you run out of egg mixture, make more as necessary at a rate of 1 egg to ½ cup milk and 2 TBS sugar. Bake for 60 minutes at 325?F (E.g. 8-9 coals on the bottom and coals on top.) until the pudding has risen, lightly browned on top and is not liquid in the center


95 Camp Stove Cooking If only it were true
96 Checking for Leaks Using a Propane Camp Stove Create a mixture using 1 tablespoon of dishwashing detergent to 1 cup of water and lightly pour on the outside of the canister and any connections to determine if there are any leaks. The mixture will lightly bubble with escaping gas if there is a leak. Care should be taken when attaching and detaching from the camping stove. Making sure that the nozzle is tight and that there are no leaks. The canister should be stored in a cool dry location away from heat and additional flame. Stove Ventilation Make sure that the stove is in a properly ventilated area outdoors. Never use a propane stove in a camper, tent or a garage. Propane gives off carbon monoxide. Make sure that the propane cylinder that attaches to the stove is not rusted or broken anyway. Also, make sure that the knobs that connect the stove to the cylinder are not stripped and have a secure and tight fit. Propane gas in the atmosphere warns bystanders of its presence with a distinctive smell resembling that of rotten eggs. Lighting 1. Open the valve on the propane tank that allows the propane gas through to the stove unit if it is not already open. 2. Strike a match or lighter, and hold the flame near the valves on the burner. Some propane stoves have electronic ignition switches. If your stove is one of them, push the ignition button at this time instead of lighting a match. If you are lighting a pilot light, hold the match near the pilot while you slowly open the valve. 3. Slowly open the burner valve to let some gas through. At this point the gas will meet up with the flame and will light the stove. 4. Use the burner valve to adjust the flame accordingly. 5. If it does not light, wait 1 minute before trying again so the gas can clear away. Usage Campers should keep a propane stove clear of any flammable materials and give the unit a reasonable amount of ventilation space, seating it on level ground or a stove base. Control settings should always be turned off before the stove is attached to the propane fuel cylinder. Campers should then watch the stove during operation, and switch the stove off and remove the propane cylinder before attempting to move or store it.
97 BREAKFAST Breakfast Ideas for Camp Stove - Pancakes or French toast on stoves, sausage in a Dutch oven, fresh fruit cut up - Basic Breakfast: Scrambled eggs on stoves, sausage and potatoes in Dutch oven, bagels, fresh fruit - Breakfast Burritos,: eggs, sausage, cheese, peppers, mushrooms, tortillas salsa - Huevos Rancheros: eggs, refried beans, cheese, green chilies, tortillas, salsa (refried beans heated in Dutch oven) - Bacon & Egg Muffins: eggs, bacon, cheese, muffins, salsa - Breakfast Tacos: eggs, sausage, tortillas - Skillet Breakfast: bacon/sausage, eggs, potatoes, cheese - Instant hot cereal: oatmeal, cream of wheat - Bagels toasted in a skillet Skillet Breakfast ½ pound sliced bacon 4 cups potatoes, peeled and cubed 1/2 onion, chopped (optional) 6 eggs, beaten 1 cup shredded Cheddar cheese Seasoning (salt, pepper, season salt, etc.) Optional: Green peppers, mushrooms Directions Cook bacon to desired doneness in a cast iron skillet (can also be done in a Dutch oven). Remove bacon from the skillet and set aside. Stir the potatoes and onion into the hot bacon fat and season. Cover, and cook until the potatoes are soft, about 10 to 12 minutes. Crumble the bacon into the potatoes. Stir in the eggs, cover, and cook until set through, about 2 minutes. Sprinkle with the cheese, and allow to melt before serving. Quick N Easy Breakfast 1 egg per person 1 rasher of bacon per person 1 slice of bread per person Salt & pepper Butter Equipment Frying pan, egg flipper, knife Instructions Butter both sides of bread and cut a round hole about 10 cm in diameter out of the middle of the bread. put the bread into the frying pan and crack the egg into the hole. chop up the bacon and sprinkle over the egg. After about 2 minutes, flip egg over and do other side for about a minute then enjoy!
98 SAUSAGE GRAVY 1-pound package pork sausage Flour About 1 quart of 2-percent milk Salt and pepper In a large skillet, brown sausage over medium heat. Add flour enough to coat the sausage. Stir until it absorbs the grease from the sausage. Add milk (1 quart or more, as needed), salt and pepper. Stir until thickened. If too thick, add more milk. 5 TIPS FOR MAKING SAUSAGE GRAVY 1. Season as you go. Begin adding salt and pepper from the time you re browning the sausage until the gravy is thickened. You need a lot of pepper for gravy. 2. Don t bother with measuring the flour. Just add enough to coat the sausage. For 1 pound of sausage, that s about two big spoonfuls or ¼ to ½ cup. 3. It may look like you re using a lot of milk, but the flour, sausage and grease will absorb it. It takes awhile, but it will eventually thicken. 4. Keep stirring. You might be tempted to walk away, but stir, stir, stir until you have gravy. 5. When the gravy starts bubbling, it s done. Turn off the heat. It will thicken just a bit as you get the biscuits ready, and it s better to have gravy that s a touch on the thin side than a glob of goo. Bob Evans Sausage Gravy Prep time: 5 minutes Cook time: 15 minutes Serves: Makes 4 servings INGREDIENTS 1 pound Bob Evans Original Recipe Sausage Roll 1/4 cup all-purpose flour 2 cups milk Salt & black pepper to taste 8 prepared biscuits DIRECTIONS Crumble and cook sausage in large skillet over medium heat until browned. Stir in flour until dissolved. Gradually stir in milk. Cook gravy until thick and bubbly. Season with salt and pepper. Serve hot over biscuits. For camping, evaporated milk is a good option
99 Breakfast Egg & Bacon Muffins 1 doz. Eggs 1 lb. bacon 1 pkg. of sliced cheese 1 pkg. of plain or sourdough muffins Condiments of mayonnaise &/or ketchup &/or salsa are optional Equipment Skillet, spatula, large spoon Instructions Cook bacon (save grease for cooking fried eggs); fry eggs in bacon grease (those who prefer scrambled eggs must wait until all fried eggs are done or cook them in another pan). Split muffins in two, put condiments on muffins, place slice of cheese on muffin, place bacon on cheese and line up for fried eggs hot from the pan. Sausage can be used as a substitute for the bacon. Bagels or bread can be used instead of muffins Breakfast Tacos 1 dozen eggs 1 lb Jimmy Dean sausage Package of flour tortillas Equipment Large frying pan Spatula serving spoon Skillet or D.O. to cook eggs Instructions Cook sausage in frying pan or D.O., breaking into hamburger size pieces. Drain off excess fat, leave sausage in pan. Crack eggs into bowl and beat. Add eggs to sausage in pan (or D.O.), and cook, stirring often. When done, spoon onto tortilla shells and enjoy. This is enough for 6 boys to have two each. Comment Minimum equipment and little cleanup.

100 Egg-Cheese-Bread Rye Bread Block of Cheddar Cheese Eggs (1-2 Dozen) Equipment Stove Large Frying Pan Knife Cutting Board Spatula Tin Foil Instructions 1. Cut crust off rye bread. Then cut slices into pieces no bigger than 1 x 1. Place pieces flat and cover entire bottom of the frying pan. Pieces can be stacked to max of two pieces high. 2. Slice cheddar cheese block into ¼ thick strips. Then cut strips into 3 or 4 pieces. 3. Layer on top of rye bread one piece of cheese high. 4. Beat eggs in a bowl, then pour into pan filling all space between the bread and cheese, with a thin coating over the cheese. 5. Cover frying pan with tin foil and place on stove to cook. When the egg in the bottom of the pan has cooked, flip over and cook the other side. 6. Remove from pan and serve once the cheese has melted and egg is cooked on the other side. California Egg Crackle Eggs, Bacon, Cheese Nips Equipment Skillet, cooking utensils Instructions Crumble Cheese nips into small pieces. Cook bacon until crisp, remove from pan, cool and crumble, set aside. Drain off some of the bacon fat. Scramble eggs and cook just before eggs set add bacon and cheese nips cook eggs until set. Serve warm.


101 P A N C A K E S! How to Make the Very Best Pancakes Pancakes are easy and almost foolproof. But there are some tricks to making them perfect. We d like to share those tips: 1. Use a low gluten flour. We like to use unbleached pastry flour in our recipes that s what our mixes are made with but all-purpose flour will do. Bread flour makes for a pancake that it too tough and chewy. 2. Don t over mix. Mixing develops the gluten in the batter. Mix the dry ingredients together to dispense the leavening throughout the flour. Mix the recipe s wet ingredients together in another bowl. Pour the wet ingredients into the bowl with the dry ingredients and mix until just moistened. There will still be lumps. That s okay they ll cook out. 3. Get the batter the right consistency. The batter should be runny enough that it will spread on the griddle. If it is too runny, the pancakes will be crepe-like. As you progress through the batch, the batter will tend to become thicker as the leavenings work. Add a little more water or milk as needed but remember to stir minimally. 4. Prepare the griddle. Very lightly grease the griddle with a little shortening or with an aerosol can of vegetable oil. 5. Get the griddle hot enough. Set the griddle on high or medium-high heat. When the griddle is hot enough, water droplets will dance on the surface. After putting batter on the griddle, turn the heat to medium. 6. Cook uniform-sized pancakes. Use a 1/3-cup measure for medium-sized pancakes and a ½- cup measure for larger pancakes. A pancake dispenser helps. 7. Cook it right. You can tell when it s time to turn the pancake by watching the bubbles form and watching the edges of the pancakes. The bubbles tend to cook into little craters and the edges will be dry-looking when the pancake is ready to turn. A little practice makes perfect. 8. Keep your pancakes hot. Pancakes are best if steaming hot. As you take the pancakes off the grill, cover them lightly with aluminum foil. If it s going to be more than a few minutes before they are eaten, stick the loosely covered plate in an oven heated to 275 degrees. For a special touch, heat the empty plates in the oven before serving. 9. Keep that leftover batter. If your batter was made with baking powder, store it for up to several days in the refrigerator. (The next article will help you understand what batter can be saved in the refrigerator and how to do it.) 10. Freeze extra pancakes. Place them on a baking sheet and freeze them without stacking. Once frozen, place them in plastic bags, secure the tops, and keep them for up to six weeks.


102 Make Your Own Buttermilk Pancake Mix Here s how to make your own buttermilk pancake mix. With this, you can make a mix so that you can have great from scratch pancakes when you are in a hurry. It's storable and since it has everything included but eggs, it's a great mix to take camping. You can make this mix as large or as small as you like. For easier measurement, remember that one tablespoon equals three teaspoons. Combine all the ingredients and whisk together to distribute evenly. Store in a sealed container in a cool place. You can buy buttermilk powder in your grocery store in the section with dry milk. Most brands will last six months or longer. If you would like a longer lasting, high quality product, we will sell you packages from our stock. If you would like to keep the mix longer, store it in the freezer. Better yet--place the mix in plastic bags, press the air from the bag, and seal. Then place your sealed mix in used Mylar bags and seal those. The Mylar is a much better oxygen barrier than plastic. To use your mix: 1. Measure the desired mix into a large bowl. 2. In a smaller bowl, whisk one egg for everyone to 1 1/2 cups of mix. 3. Add 1 1/2 tablespoons melted butter or oil to the egg for every one cup of mix. 4. Add 2/3 cup water to the egg mixture for every one cup of mix. Add the liquid mixture to the mix and stir until just combined. The batter will probably be too dry, so add more water to reach the desired consistency.
103 Make Your Own Whole Wheat Pancake Mix So you like the idea of making your own pancake mix? It s economical, you know what s in it, and it s better than what you buy in the store. But you would like to have a really healthy pancake mix, one that is 100% whole wheat. Here s the recipe that you re looking for: 100% Whole Wheat Pancake Mix Recipe Here s the 100% whole wheat pancake mix that you have been looking for. Because it is made with whole wheat, it won t keep as long as a mix sold in the store but it s better for you with no preservatives and more buttermilk. Keep the mix in a cool dark place, in an airtight canister, and use it within six months. For longer storage, keep it in the refrigerator or freezer. : 2 ½ cups whole wheat flour ½ cup buttermilk powder 3 tablespoons granulated sugar 1 tablespoons baking powder 2 teaspoons baking soda To use your mix: 1. Measure the desired mix into a large bowl. 2. In a smaller bowl, whisk one egg for every 1 to 1 ½ cups of mix. 3. Add 1 ½ tablespoons melted butter or oil to the egg for every one cup of mix. Add 2/3 cup water to the egg mixture for every one cup of mix. Add the liquid mixture to the mix and stir until just combined. The batter will probably be too dry so add more water to reach the desired consistency. Extra Light and Fluffy Pancakes What makes these pancakes so light and fluffy? It s the whipped egg whites. Beat the egg whites just as you would for meringue and gently fold them into the batter. 1 cup sifted all purpose, pastry, or cake flour 1/8 teaspoon salt ½ tablespoon baking powder 2 egg yolks ¾ cups milk, more or less 4 tablespoons butter, melted 2 egg whites 1 tablespoon sugar Directions 1. Sift the dry ingredients together. 2. In another bowl, mix the yolks, most of the milk, and the melted butter together until smooth. 3. Make a well in the middle of the dry ingredients and add the mixed wet ingredients all at once. Stir until just combined. (Over-mixing will make for a tough pancake.) 4. Beat the egg whites until light and fluffy and soft peaks appear as for meringue. Add the sugar toward the end of the beating. Fold the egg whites gently into the batter with a spatula. Add milk as necessary to get the right consistency. 5. Cook as you would other pancakes.
104 Pancake Mix 2 Cups flour 1 tsp. baking powder ½ tsp. baking soda 1 tsp. salt 2 tsp. sugar Instructions At Home Mix all ingredients together. Store in a zipper lock bag or a storage container with a lid. This mix will last around 3 months. At Camp 4 Tbs. Butter 2 Eggs 2 Cups Buttermilk Fruit, Nuts, or Chocolate Chips (optional) Melt the butter and combine it with the Eggs and buttermilk (regular milk will do in a pinch, but buttermilk is by far the best for this breakfast recipe). Whisk this mixture very well, and then add this to the Pancake mix from above. Whisk well if you don't like lumpy pancakes. If you like the lumps, then whisk just well enough to form a lumpy batter (this is the way we like it). Pre-heat the pan or griddle. You will know the pan is ready when a couple of drops of water "skittle over the griddle." Grease the pan or griddle lightly with butter. Spoon or pour the batter onto the hot pan or griddle. Add fruit, nuts, or chocolate chips if you want to. Do NOT try to flip them until bubbles are formed around the edges. When you see the bubbles, then flip them gently and cook for 2 more minutes or so. Serve warm with maple syrup. Makes around 12 Pancakes. Flap Johns (Pioneer pancakes from scratch) 2 Large eggs, 2 cups milk, ¼ cup vegetable oil, 2 cups all purpose flour, 2 Tbsp sugar, 4 tsp baking powder, 1 tsp salt, 2 Tbsp vanilla, syrup. Equipment Large bowl, griddle, large spoon, spatula Instructions Mix all the ingredients together, stir and add more milk as needed to meet the consistency you like. Place one large spoonful of batter per pan cake on hot griddle. Comment These pan cakes formerly known as flap johns can be cooked over an open fire or on a camp stove. This is the same basic recipe used by the pioneers and emigrants on the wagon trains. They are much better than boxed pan cakes
105 Pumpkin Pancakes You can make these pumpkin pancakes with a mix or with your favorite recipe. We used our Buttermilk Pancake mix so we had pumpkin buttermilk pancakes. The recipe that follows makes six large pancakes. If you are cooking for a family, double or triple the recipe. 1 ½ cups pancake mix 1 teaspoon cinnamon ¼ teaspoon nutmeg 1 large egg 1 tablespoon brown sugar, packed 1 tablespoon vegetable oil ¾ cup canned or pureed pumpkin 1 cup water, more or less Directions 1. In a medium bowl, mix the pancake mix and spices together. 2. In another bowl, whisk the egg and the brown sugar together. Stir in the oil, the pumpkin, and most of the water. 3. Add the liquid ingredients to the dry ingredients. Stir with a spatula until just combined adding more water to obtain the right consistency. 4. Serve hot with maple syrup. Apple Walnut Carmel Syrup 2 or 3 medium cooking apples 4 tablespoons butter 1 teaspoon cinnamon 1/4 teaspoon nutmeg 1/8 teaspoon ground cloves 1 tablespoon 2/3 cup brown sugar 1 cup water 1/3 cup walnut pieces Peel, core, and thinly slice the apples. Set aside. In a large saucepan, melt the butter over low heat. Stir in the spices, cornstarch and brown sugar all at once. Immediately add the water and stir until the sugar is dissolved. Add the apples and cook over medium heat, stirring frequently, until the apples are nearly tender and the syrup is bubbly. While the apples are cooking, mix the pancakes.
106 French Toast (Serves approx 6) 7 Eggs 2 Cups Milk Bread (Texas Toast is best) about 4 Tbsp Sugar 1 tsp Cinnamon slices Vegetable oil ½ tsp Nutmeg 1 tsp Vanilla Syrup Equipment Stove, Skillet or Griddle, spatula, whisk or fork Mixing bowl, wide dish for dipping bread in egg batter Directions Bring skillet to medium heat. Beat eggs, milk, sugar and spices. Lightly oil skillet (cast iron is best), or use non-stick pan. Soak bread briefly on each side (3-4 seconds / side), set soaked bread in pan and cook each side until nicely browned. Be careful not to burn. Comments: Excellent with fresh or canned fruit. Can be served with sausage or bacon. Multiply as necessary to feed the entire patrol Idaho Potato Pancakes In Idaho, potatoes have been added to nearly everything. Potato pancakes are certainly not unique to Idaho but these are worthwhile. With lots of grated potatoes, these are almost like hash browns. And we think they make great camping fare, served hot on a cold morning with either sour cream or ketchup. Some recipes should be approximations and this is one of those. Use the following measurements as a rough guideline but the recipe is forgiving. 4 cups coarsely shredded potatoes 1 medium onion, shredded 3 eggs 1/4 teaspoon salt Dash pepper 1/2 cup milk 1/2 tablespoon baking powder 3/4 cup all purpose flour Directions 1. Mix the shredded potatoes and onions together. 2. In another bowl, mix the eggs, salt, pepper, milk, and baking powder together. Add it to the potato mixture and stir together. 3. Add enough flour to thicken, about 3/4 cups, and stir. 4. Put some vegetable oil in a frying pan and heat until hot. 5. Spoon the potato batter into the hot pan and spread into a round shape about 3/8 inch thick. 6. Once browned, turn over and cook the second side. Serve immediately or keep warm in an oven set to 175 degrees.
107 Skillet Breakfast Hash Browns (shredded or diced potatoes) Chopped Onion Sausages (Pork or Turkey) pre-cooked Eggs Seasoning (salt, pepper, season salt, cayenne pepper, garlic pwdr, onion pwdr, etc.) Oil Shredded Cheese (I like Cheddar) Optional: Garlic AMOUNTS: For a 12 skillet, you can use 2 pkgs (? Oz.) of hash browns, or about x medium potatoes, a sml-med onion, a box of 10 cooked sausages, and 8 eggs. This should feed 4-5 scouts. Equipment Camp Stove Cast iron skillet with lid Knife non-metallic spatula Hot pads Platter Instructions Potatoes preparation: You can purchase uncooked, pre-packaged hash-browns (with or without onions) or you can prepare yourself. To prepare yourself (in advance of campout), shred or dice raw potatoes (using the skins). You can partially cook the potatoes (a microwave works fine, or you can boil them) but only partially, otherwise they will be mush. Cool and store them in a zip-loc bag. You can also dry them first instead, with towel, squeezing out the water. - Pre-heat skillet with medium heat. - First cook the sausage. Place some water in the pan, about a ¼ inch, and place the sausage in the water. The water helps cook the sausage through, and when it is gone, the sausages are done. Set the sausages aside on the platter & cover (they should be slices into bite size pieces). - Oil the pan well, a little bit more than just covering the bottom of the pan. - Start w/ med-high heat, then dropt to med heat once cooking. After the oil is hot, add the onions and potatoes (and garlic, if using it), spreading evenly in the pan, and gently patting down, leaving a little room on the edge. Season well. Cover immediately with lid. Cook until they are slightly translucent on top, and nicely browned on the bottom. Divide in the middle to turn over, one half at a time. Season again. The second half will cook faster since they are already hot, so watch it carefully. Shredded potatoes will cook faster, so they should not be piled on too thick. Usually about 7-8 minutes on the first side, and 5-6 minutes on the second side. - While the hash browns are cooking, you can scramble the eggs. However, you don t have to scramble them. You can just add them whole right to the pan. - Add the eggs to the pan, and stir. Add the cheese. Mix everything in the pan occasionally. Once the eggs are cooked and the cheese is melted, you can serve.
108 Pita Pocket Breakfast 1 lb sausage (pork, turkey or ground beef) 1 bell pepper, diced 1 medium onion, minced 12 eggs, beaten 6 Pita breads, medium 1 jar salsa 1 clove garlic Pre-heat DO (@12 coals on the bottom) or heat skillet on stove. Brown sausage drain fat, saving 2 TBS. Stir in onion, garlic, pepper, sauté with sausage. Add eggs, sausage fat and cook together until eggs are scrambled. Spoon into Pita Pockets top with salsa to taste. (Hints: Brown sausage and sauté garlic onions and peppers in advance, refrigerate or freeze in Ziplock bags. Add 2 TBS of Olive Oil when cooking in camp in lieu of sausage fat. This will save time and reduce the sausage fat that will need to dispose of). Scout Breakfast Sandwich The Scout s Outdoor Cookbook Christine & Tim Conners (Recipe: Eric Simonsen, Brooklyn, NY) 6 eggs ½ tsp vanilla extract 1 C milk 12 slices bread 1 C peanut butter 3 Tbsp butter Syrup 1. In a medium-sized bowl, whisk eggs, vanilla extract and milk 2. Make 6 traditional sandwiches using bread and peanut butter 3. Dip each sandwich in the egg mixture 4. Melt butter in large skillet and fry both sides of each sandwich until brown 5. Serve with syrup Serves 6
109 Crunchy French Toast The Scout s Outdoor Cookbook Christine & Tim Conners (Recipe: Eric Simonsen, Brooklyn, NY) 1 (12oz) box cornflakes cereal 6 eggs ½ tsp vanilla extract 1 C milk 3 Tbsp butter 12 slices bread Syrup 1. Crush cornflakes in a large bowl 2. In a separate, medium-sized bowl, whisk eggs, vanilla and milk 3. Melt butter in heated skillet 4. Dip each slice of bread in the egg batter, then quickly place in the bowl of cornflakes, covering both sides with crushed flakes. 5. Fry both sides of each slice until brown 6. Serve with syrup Wagon Wheels The Scout s Outdoor Cookbook Christine & Tim Conners (Recipe: Michael A. Shively, Anderson, IN) 2 tsp prepared mustard 1 tsp garlic powder ¼ tsp Tabasco sauce 1 Tbsp vegetable oil 1 (15 oz) can corned beef hash ½ onion, diced ½ ball pepper, diced 1 C shredded cheddar cheese 1 English muffins, each sliced in half and toasted Butter to taste Options: Use ketchup instead of mustard, or top with scrambled eggs instead of onions and peppers. 1. In a small cup or bowl, mix mustard, garlic powder and Tabasco sauce. Set aside. 2. Heat oil in a large-size skillet over medium heat. 3. Remove hash whole by opening both ends of the can and running knife around the sides if necessary. Slice has into four rounds and place in hot oil 4. Cook hash on one side for 5 minutes. Carefully flip rounds. Spread mustard mixture equally over each. 5. Top each hash round with onions and peppers. Place lid over skillet and cook for 3-5 more minutes. Add cheese to top of pepper-onion mix on each round. 6. Remove rounds from heat and place each on a buttered English muffin half. Serves 4 Tip: English muffins can be toasted over the lid of the skillet during cooking or in the pan prior to cooking the rounds.
110 Misty Morning Stuffed Toast The Scout s Outdoor Cookbook Christine & Tim Conners (Recipe: Michael Christine Conners, Statesboro, GA) 12 eggs 1 tsp vanilla extract ½ C milk 2 (8 oz) pkgs cream cheese, softened 1 (21 oz) can fruit filling your choice 2 (1 lb) loaves French bread, sliced ½ thick Butter for frying the stuffed toast Syrup 1. In a medium-sized bowl, whisk eggs, vanilla extract & milk 2. In a second medium sized bowl, combine cream cheese and fruit filling 3. With slices arranged in pairs as if making sandwiches, smear fruit filling-cream cheese mixture on one side of bread slice. Cover with a plain slice of bread. Repeat until all bread slices have been used to make stuffed sandwiches. 4. Dip each sandwich into the egg batter, coating both sides 5. In melted butter (amount to taste) cook each side over low heat. Cover pan while frying. 6. Toast is ready once filling is hot. Serve with maple syrup. Serves Corn Bread in an Orange Servings 4 4 med oranges 1 (8 ½ oz) box jiffy corn muffin mix 1 egg ½ C milk 1. Cut Oranges in half and remove pulp, being careful not to tear the skin. The pulp isn t required for this recipe 2. In a medium-sized bowl, combine corn muffin mix with the egg, sugar and milk 3. Fill each of the orange halves with the corn muffin mixture, dividing it equally among the eight pieces 4. Realign orange halves into four spheres, then wrap each sphere in heavy-duty aluminum foil 5. Place foil spheres directly on hot coals. Heat for 8-10 minutes or until corn muffin mix has fully cooked. 6. Serve. The skins provide natural bowls for the baked muffins and impart an orange flavor to the corn cake.
111 Jacob s Tastee Egg and Bacon Breakfast Recipe quantity is per person 1 tsp butter 1 slice Canadian bacon 1 egg 1 slice cheese 1 Pilsbury Grands Homestyle refrigerated biscuit dough round (a pre-cooked sausage patty can be substituted for the bacon) 1. Place butter in the bottom of a small, clean tin can. Lay bacon on top of butter 2. Crack egg over top of bacon. Cover with slice of cheese. Place biscuit dough on cheese slice 3. Wrap can with heavy-duty aluminum foil, leaving room for the biscuit to puff up while heating. 4. Cook over hot coals for about 20 minutes or until the biscuit has browned. Serve straight from the can.
112 .
113 MAIN MEAL Don t forget your vegetables! How about a salad! Chicken Italian Chicken Couscous Here is a satisfying chicken recipe that adds a little pasta to the mix. It really is quite easy to make. 2 Boneless, skinless chicken breasts 1 Cup Italian Dressing 1 Cup Couscous Pasta 1 Chicken Bouillon Cube 1 Tbsp Butter 1 tsp Italian seasoning 1 Cup Veggies Equipment Zip-loc bag Frying pan Pot Measuring cups Large spoon Knife Instructions Place Chicken Breasts in a zip-lock bag. Cover with Italian Dressing, and let marinate for 45 minutes to an hour in the cooler. Backpackers can use Canned Chicken or the new Chicken in a Pouch (no refrigeration required until opened). Fry the marinated chicken in a frying pan with oil or butter or you can grill the chicken breasts, too. Add the veggies (if using freeze-dried vegetables be sure to rehydrate them first) of your choice, the butter, the Italian seasoning, and the bouillon cube to 1.5 Cups of water. Bring to a boil and then add the Couscous. Bring back to a boil, and remove from heat. Cut the Chicken Breasts into cubes and serve over the Couscous. Enjoy. Serves 2 4
114 Mr. Smith s Fiesta Fajitas Boneless Chicken Breast or Steak Onion Garlic Grated Cheese Marinade* Soft Tortillas Seasoning* 1-2 tsp Cooking Oil Optional: Sweet peppers, tomatoes, salsa The amounts will vary depending on how many you are feeding. One chicken breast, or an equivalent amount of steak is a reasonable amount per person, but you may want more for hungry campers. 2-3 Tortillas per person. Onions and garlic quantities are a matter of taste. *Marinade & Seasoning: The marinade can be as simple as Italian Dressing, or a marinade that you make yourself. The seasoning should be salt and pepper and another seasoning mix that you like. Lowery s season salt, Witt s Bar-B-que seasoning, Emeril s Cajun mix, a favorite dry rub, etc. Equipment Camp Stove Cast Iron Skillet Hot Pads! Plastic Spatula (never use metal on cast iron) Slotted Spoon Zip-loc type bags med pot with lid Instructions At home: Prepare the meat & vegetables. Slice chicken or steak lengthwise into strip no more that ¼ thick. Cut each strip to about 2-3. Dice onions and cut peppers (optional) into about 1 squares. Place meat, onions, peppers and chopped garlic into a large zip-loc back. Add the marinade to the bag. Remove air and seal the bag. Refrigerate. At camp site: Heat skillet. After it is hot, add the oil. Use slotted spoon to remove the meat and vegetables from the bag, leaving the marinade behind. Place the meat and vegetables in the skillet. Season to taste. Stir occasionally, cooking until done. This takes less than 10 minutes. Remove the cooked meat and vegetables, place in a pot and cover to keep warm. Place tortillas, one at a time, in the skillet to warm (20-30 seconds per side). Each person assembles their own fajita, adding shredded cheese and tomatoes. Be sure to immediately wipe the skillet clean with paper towels while still warm, being very careful not to burn yourself. Use the hot pads!
115 Turkey Joes Serves 8 ½ Tbsp vegetable oil 1 med onion, finely dices 1 lb ground turkey 1 cup chili sauce 1 cup applesauce 2 tsp Worcestershire sauce 8 hamburger buns 1. Fry diced onion and turkey in lightly oiled skillet, stirring well to break up any clumps of meat. Cook until turkey is no longer pink. 2. Blend chili sauce, applesauce, mustard, and Worcestershire sauce into the ground turkey. 3. Simmer until liquid thickens (about 15 minutes) 4. Serve on buns Jenny Jump Sandwiches Serves 4 8 slices of bread (your choice) 1 (8 oz) package cream cheese 4 Tbsp butter 1. Using the eight slices of bread, make for sandwiches with the cream cheese 2. Butter outside of each slice of bread 3. Fry each cream cheese sandwich until golden brown on both sides Goes great with soup. Mexican Grilled Cheese Sandwiches Serves 8 16 slices of bread 1 (1¼ oz) packet taco seasoning mix 1 (16 oz) package Velveeta Mexican cheese product 4 Tbsp (½ standard stick) butter 1 (16 oz) jar black bean and corn salsa 1. For each sandwich, sprinkle a little taco seasoning mix on one slice of bread 2. Spread one-eighth of Velveeta cheese block on top of seasoning mix 3. Close the sandwich with another slice of bread. Melt ½ Tbsp butter in frying pan. Cook on medium-low heat until side is lightly browned. Flip and repeat on other side 4. With cheese slightly melted, remove sandwich from pan, open, and add 2 Tbsp of black bean and corn salsa. This can also be prepared used a pie iron.
116 Chicken Gumbo 2 lb chicken breasts, 1" cubes 2 lb fresh okra, sliced 1/4" slices 2 medium onions, chopped 2 medium bell peppers, chopped ½ C celery, chopped 4 Tbsp cooking oil 3 Tbsp flour 3 medium tomatoes, cut up 2 cloves garlic, minced Salt & pepper to taste Prepare a rue with cooking oil and flour. Cook until brown, stirring often. Add onion, bell pepper, and garlic. Slowly stir in 1 quart of water. Add salt and pepper to taste. Add cut-up tomatoes, okra and celery. Cover and cook about 30 min, until vegetables are done. Add chicken and simmer an additional 6 min.
117 Beef Chili Dogs 8 hotdogs 8 hotdog buns 1 onion 1/4 lb. mild Cheddar cheese Chilidog Sauce: 1 pound ground beef 1 6 oz. can tomato paste 1 cup water 1 tbsp yellow mustard 1 tsp Worcestershire sauce 1 tbsp dried onion 1 tbsp sugar 2 tsp chili powder 1/4 tsp black pepper 1/2 tsp celery seed 1 tsp salt 1/2 tsp ground cumin To make it easy, before you leave for the camping trip, put all the dry chili dog sauce ingredients in a container ready to use at mealtime. 1. Brown hamburger in a Dutch oven or a frying pan on a stove and crumble into small pieces 2. Drain excess oil and add remaining chilidog sauce ingredients 3. Simmer and stir uncovered for 15 minutes 4. Boil hotdogs in a pot of water while sauce is cooking (or cook on stick over fire) 5. Remove chili sauce from fire and let sit for 5 minutes 6. Dice onion and shred the cheese 7. Put a hotdog on a bun, spoon 1/4 C of sauce on top, chopped onion, and shredded cheese as desired. Taco Salad To Go Small (individual) Frito bag for each boy, grated cheese, chopped lettuce, chili, chopped olives, chopped tomatoes, sour cream Warm chili. Open top of Frito bags and add spoonfuls of each ingredient to the Fritos. The boys can eat taco salad - and throw the bags away when done. This is a great "on the go" lunch for camporees or events when no one has time to prepare a big meal (or eat one!) Travelin Tacos Serves 4 1 lb lean ground beef 1 (1¼ oz) package taco seasoning mix ¾ cup water 4 (2 oz) singe-serve bags corn chips 1 cup shredded lettuce 1 tomato, chopped 1 cup shredded cheese ¼ cup salsa ¼ cup sour cream 1. Cook the ground beef in a frying pan. Remove from heat and drain excess grease 2. Stir the taco seasoning and water into the ground beef 3. With the chip bags still sealed, carefully crush corn chips in the bag 4. Cut each bag open along one side 5. Add beef mix, lettuce, tomato, cheese, salsa & sour cream to the chip bag 6. Eat right out of the bag with a fork
118 Miscellaneous Gravy with No Drippings 2 T. margarine 2 T. flour 1 c. cold or cool water (don't add warm!) 1-3 t. chicken or beef bouillon or base Salt and pepper to taste Preparation Melt margarine in a microwaveable bowl or a glass measuring cup that holds at least 2 cups. Stir in flavoring. Then stir in flour. Slowly add water to blend. Microwave on high, stirring every minute until the mixture is thickened and mixed well. Taste and add salt and pepper as desired. Sometimes I add about 1-2 T. milk after the gravy is finished to make it a little richer. This will also thin it if it's too thick.
119 Mr. Smith s Dirty Rice A Cajun favorite, for traditional dirty rice, white rice is mixed with chicken livers or gizzards (the "dirty" part of the rice). It also typically contains sautéed onion, bell pepper and celery and some versions contain seafood (crawfish or shrimp), beef, or sausage. Try this modified version. Main Equipment Cast Iron Dutch oven or cooking pot & camp stove 2 C uncooked white rice 2 C uncooked brown rice 1 pkg Trader Joe s Italian Chicken Sausage ½ lb misc sausage meat, pork, grnd beef, etc. 2-3 Celery ribs, finely chopped 1 med onion, finely chopped 4-6 cloves garlic Olive oil (or canola oil or vegetable oil) 2 Tbsp flour (for roux) Seasoning* Water or stock/broth for cooking rice Basic Ratios: 4C cooked rice, 1 2½lbs meat, 1C onions, 8 garlic cloves, 1C celery, ½C grn onions Other options: - Any type of sausage, ground beef or ground pork (if using ground beef or pork, it should be seasoned and it must be pre-cooked) - Chopped red/green peppers - Green onions (¼ ½ cup) - Chopped broccoli, parsley - Corn Instructions In advance, cook the rice. This can be done at home prior to the campout, and stored in zip-loc bags. The white and brown rice must be cooked separately. For each, heat a medium sized pot (med flame) and add just enough oil to cover the bottom. I suggest adding a tablespoon or so of chopped onions, and sauté briefly. Add the rice and stir until it is coated with the oil and well mixed. Add the appropriate amount of water (white rice: / brown rice: ), stir and bring to a boil. As soon as it is boiling, turn off flame, cover the pot with a lid and move it to a back burner on simmer. For white rice simmer for minutes. For the brown rice simmer for minutes. Rice is better if broth is used instead of water. Pre-heat the DO or the cooking pot. Add 2-3 tablespoons of oil, then make a dark roux by adding the flour and stirring constantly using a wooden spoon. Add the onions and the garlic, and sauté. Add any vegetables that being used and mix well. After a few minutes, add the cooked sausage and/or meats. Next add the rice and mix well. Season to taste (see below). Suggested amount: Keep heating and mixing until everything is warm. This can be a main dish or a side dish. Comments The brown rice adds a very nice texture to this dish, and it is also much healthier than white rice. This dish is an easy way to be sure you are including vegetables in your meal. Be sure the vegetables are chopped small for this dish. There are many vegetables that would work well. Try to use fresh vegetables. Any sausage can be used, but the Trader Joe s Italian Chicken Sausage is not only much lower in fat, it already has chopped peppers in it, and is nicely seasoned. It works very well in this recipe. However, feel free to modify this basic recipe. SEASONING: I generally do not measure seasoning, but taste it and adjust as I go along. I like to use a Cajun Seasoning (Emeril s) that I make myself. You can use any Cajun seasoning, or a combination of the following: Salt (Kosher) and or Lowry s seasoned salt, black pepper, Cayenne pepper, onion powder, garlic powder, thyme, oregano, paprika. Below is the recipe for the Cajun seasoning I use, which is also a great rub for chickens, etc. Cajun Seasoning/Rub (small container): 2-1/2 Tbsp paprika 2 Tbsp salt (kosher) 2 Tbsp garlic powder 1 Tbsp freshly ground black pepper 1 Tbsp onion powder 1 Tbsp cayenne 1 Tbsp dried oregano 1 Tbsp dried thyme
120 Turkey Joes Serves 8 ½ Tbsp vegetable oil 1 med onion, finely dices 1 lb ground turkey 1 cup chili sauce 5. Fry diced onion and turkey in lightly oiled skillet, stirring well to break up any clumps of meat. Cook until turkey is no longer pink. 6. Blend chili sauce, applesauce, mustard, and Worcestershire sauce into the ground turkey. 7. Simmer until liquid thickens (about 15 minutes) 8. Serve on buns 1 cup applesauce 2 tsp Worcestershire sauce 8 hamburger buns 5. For each sandwich, sprinkle a little taco seasoning mix on one slice of bread 6. Spread one-eighth of Velveeta cheese block on top of seasoning mix 7. Close the sandwich with another slice of bread. Melt ½ Tbsp butter in frying pan. Cook on medium-low heat until side is lightly browned. Flip and repeat on other side 8. With cheese slightly melted, remove sandwich from pan, open, and add 2 Tbsp of black bean and corn salsa. This can also be prepared used a pie iron. Jenny Jump Sandwiches Serves 4 8 slices of bread (your choice) 1 (8 oz) package cream cheese 4 Tbsp butter 4. Using the eight slices of bread, make for sandwiches with the cream cheese 5. Butter outside of each slice of bread 6. Fry each cream cheese sandwich until golden brown on both sides Goes great with soup. Mexican Grilled Cheese Sandwiches Serves 8 16 slices of bread 1 (1¼ oz) packet taco seasoning mix 1 (16 oz) package Velveeta Mexican cheese product 4 Tbsp (½ standard stick) butter 1 (16 oz) jar black bean and corn salsa
121 Soups, Stews & Chili Homestyle Chili 1 lb ground beef 1 large yellow onion, chopped 3 cloves garlic, minced 1 tbs cumin 2 tbs chili powder 1 tbs Worcestershire sauce 1 (20 oz) can tomatoes, chopped 1 green bell pepper, chopped 1 c red wine(dry) Salt & pepper to taste 1 lb uncooked kidney beans Cover beans with 2"-3" water. Bring to boil, remove from heat and let stand 1 hour. Drain and set aside. Brown ground beef with onion and garlic. Add remaining ingredients. Cover and simmer about 1 hour. Variations: Use black beans instead of kidney beans. Add fresh ground ginger, paprika or cocoa. Green Chili 2 lb lean pork 2 stalks of celery, chopped 1/2" 2 medium tomatoes, chopped 1/2 c Ortega Green Chilies 6 cloves garlic, minced 3 tbs jalapeno pepper sauce Brown pork in a dab of oil. Add remaining ingredients and mix well. Add 1-2 cups water. Cover and simmer 45 min to 1 hour. If it is too thin, remove cover and continue to simmer until thickened.
122 California Chili 1 lb. lean ground beef 2 15-oz cans diced tomatoes 2 15-oz cans red kidney beans 1 large onion chili powder salt and pepper 2-3 chili peppers (optional) Equipment One large stew pot sharp knife One large cooking spoon can opener Instructions Dice the onion and brown it with the ground beef in the stew pot. Add the cans of tomatoes and kidney beans, liquid and all, and heat to a simmering boil. Add chili powder, salt, and pepper to taste. Goes great with biscuits! For a different, more Southwest flavor, cut up and add two or three large, green chili peppers (remove seeds and stem) and brown with the meat and onions. Comment: You can cook dumplings on top of this stew. Make them by using complete biscuit mix according to the recipe on the box for drop biscuits. Cover and cook the chili at a simmer until the dumplings are done. Chuck Wagon Stew 1 lb. ground beef 2 med. potatoes, unpeeled and cut into small pieces 2 Tbs. minced onion (optional) 1 1/4 tsp. salt 1 tsp. instant beef bouillon 2 Tbs. Worcestershire sauce 1 16oz. can diced tomatoes (don't drain) 1 8oz. can cut green beans (don't drain) Equipment Deep skillet or pot with lid, camp stove or hot coals Instructions Brown and drain ground beef. (or you can use dried) Add everything else. Stir, cover and simmer for 20 min. or until potatoes are tender. Stir occasionally Comment: This feeds 4. Grab bigger pots and double, triple, or whatever you need to feed everybody. Serve with cornbread.
123 Taco Stew 1 pound hamburger 1 package taco seasoning 1 16 oz can of Corn (not cream style) 1 10 oz can of Rotel (diced tomatoes with green chilies) 1 bag of Taco Chips Equipment: Big pot, big spoon, can opener Instructions Brown meat in pot, drain grease Add taco seasoning and coat hamburger Add corn & Rotel Stir and heat up, Serve over Taco chips when hot. * For every pound of hamburger double the ingredients except for the taco seasoning. 1 package of taco seasoning will season up to 2 pounds of hamburger. Comment When we have a large turnout we chop up new potatoes and add as well as some chopped green beans or black beans. It is quick 10 minutes or less from start to finish. Sometimes we put the chips in an individual bag and serve like Frito pie. Patrol Stew 2-3 pounds of hamburger 2 large onions (finely chopped) 1 can of food from each patrol member (anything like vegetables, meats, beans, chilies, just not tuna) Equipment Dutch oven, large stir spoon Instructions Put Dutch oven over coals. Put hamburger in oven and brown. Add onions and stir in with meat and let cook until onions are tender. Have each patrol member open their can and pour into the pot. Put lid on pot. Put coals on the lid and let cook for minutes. Note...in all the years we have done this, we have never been disappointed with the delicious results even with the creative choices of the boys. Comment This is a great way to build patrol spirit by having each boy contribute to the dutch oven. It is always exciting to see what each boy brought.
124 Cowboy Soup Potato chunks Chili powder 1 can peas 1 can tomato soup 1 lb ground beef 1 can corn 1 can green beans 1 can tomatoes 1 medium onion Bay leaf 1 can baked beans Nutmeg, salt, pepper Brown ground beef and onion together. Add all except seasonings. Do not drain vegetables. Cook until potatoes are done. Add seasonings and cook 30 min. Chicken Corn Soup 1 qt. chicken broth 2 stalks celery, diced 1 med. onion, chopped 4 c. corn 2 med. potatoes, diced 3 c. cooked chicken, diced 1 qt. water Heat broth and water. Add celery, onion, potatoes, corn and chicken. Cook until vegetables are tender. Salt and pepper to taste. 2 x 4 soup 2 lbs Ground beef 2 (10 oz) cans diced tomatoes and green chilies (do not drain) 2 (15 oz) cans pinto beans (drained) 2 (10 ½ oz) cans condensed vegetable soup Crackers 1. Brown ground beef in a large skillet. Drain grease. 2. In a large pot, combine browned meat, tomatoes, pinto beans, and vegetable soup. Stire 3. Heat thoroughly and serve
125 Pasta Basic No-Tomato-Sauce Pasta Pasta of your choice (smaller cooks faster) Olive Oil Garlic Parmesan cheese Seasoning* Ideas for added ingredients: - Cubed ham, diced sausage, salami, cooked bacon, canned clams, cooked shrimp, tuna, cooked chicken - RAW: Tomatoes, cucumbers, shredded carrots, parsley, olives - SAUTÉED: Onions, broccoli, celery, zucchini, eggplant, green beans, asparagus, mushrooms, corn - Other: Sun-dried tomatoes, pesto, marinated mushrooms *Seasoning ideas: Pepper flakes, oregano, thyme, rosemary, cilantro, basil, onion powder, garlic powder, salt pepper, try pre-mixed seasonings (Italian, Cajun, etc.) or dry rubs. Any meat that is added here should be cooked first 1. Cook the pasta 2. Heat a large pan or a pot, add the olive and heat. Briefly sauté the garlic. 3. Add any vegetable that need to be sautéed and stir. Season to taste. 4. Add any meat that is being included. 5. Add cooked pasta and mix thoroughly. Check flavor to see if it needs more seasoning. 6. Top with parmesan and serve hot. If you have garlic and olive oil in the kitchen, you're on your way to quick and easy pasta! Take a big frying pan, peel the garlic and sauté until golden in the olive oil, add some hot pepper if you wish, pour the cooked pasta into the frying pan (let the oil cool a bit),a pinch of salt and a turn of ground black pepper, a sprinkling of parsley - your meal is ready. To this basic recipe you can add anchovy, canned tuna, tomato, almost anything you have in the house - simple additions that transform the basic dish. Or try the dairy based sauces - you can start by melting some butter in your frying pan and pouring cooked fettuccine into it. Salt and pepper, and you have a dish you can enjoy, or add to: cream, parmesan cheese, salmon, arugula.
126 Easy Spaghetti Bolognese Total time: 15 minutes Yield: Serves 4 ½ pound ground beef 1 26-ounce jar pasta sauce 1 tsp kosher salt (or half as much table salt) 1 tsp sugar 2 Tbsp olive oil 2 C water ½ pound angel hair pasta, broken into thirds 2 C greens: baby spinach or chopped kale Freshly grated parmesan cheese Directions In a large, heavy pot over medium heat, sauté the beef until it is browning in places and no longer pink -- 3 or 4 minutes. Add the sauce and cook, stirring, for a minute or two, then stir in the salt, sugar, olive oil, water, pasta, and greens. Stir constantly until the mixture comes to a boil, then turn the heat down to low, cover the pot, and simmer gently -- stirring frequently so that the bottom doesn't scorch -- for 10 or so minutes, until the pasta is tender. Serve with grated parmesan cheese. Fiesta Macaroni & Cheese 1 pound ground beef 1 box macaroni and cheese (your choice) Corn (preferably fresh, not canned) Salsa (temp depends on you) Preparation Cook the ground beef and drain. Prepare the macaroni and cheese per instructions. Cook the corn and drain. Mix all together and add salsa. Or, use separate bowls for the fussy eaters. Option: Use chunks of ham or canned tuna or chicken instead of ground beef. Preparation time: 20 minutes
127 Mac n Cheese Makeover 1 box macaroni and cheese Skim milk 1 large can diced tomatoes, un-drained 1 tbsp oregano Salt and pepper to taste Cook pasta according to directions. Add skim milk and leave out the butter that is called for in directions on box. Blend with cheese mixture. Heat and add tomatoes, salt, pepper and oregano. Heat through and serve. Number of Servings: 4-6 Family Pleasing Macaroni l - 16 oz box macaroni 1 pound ground beef l - 15 oz can diced tomatoes 1-15 oz can tomato sauce l medium onion 1/4 C diced bell pepper Optional: Salt and pepper Garlic powder or garlic diced In a medium to large skillet, sauté onions, bell pepper and garlic. Add ground beef and cook until beef is done. Add all remaining ingredients, except for pasta, and simmer on low for approximately l0 minutes. Prepare macaroni as package directs, drain and place in large bowl. Add sauce mixture and toss. Number of Servings: 10-12
128 Skillet Macaroni and Cheese Hands-On Time: 10 minutes Ready In: 25 minutes Yield: 4 servings 4 Tbsp butter 1 onion, finely chopped ¼ tsp oregano 1 tsp salt 1 Tbsp flour 3 ½ C half and half 8 oz Dry Macaroni (about 3 cups) -- you can also use fusilli or penne pasta 2 C shredded sharp cheddar cheese (do not use the pre-bagged kind because it contains cornstarch) Melt the butter in a large skillet over medium-low heat. Add the onion and cook for 5 minutes, stirring occasionally until onion is soft and translucent. Stir in the oregano, salt and flour and cook for 1 minute more. Add the half and half and pasta and bring to a boil. Cover, reduce heat to low and simmer for 15 minutes or until pasta is cooked through. Add the cheese and stir until melted. Serve immediately. Ramen/Onion Stuff One packet of Ramen noodles Salt/Pepper One diced onion Cooking Oil Equipment Stove/Fire Pot Instructions Caramelize onions by slowly frying them in small amount of cooking oil, season to taste. Cook Ramen noodles and insert flavor pack. Mix together and serve hot. Comment: Just something for when weight counts but you crave something other than just pasta.
129 One Pot Noodles 1 Tablespoon Butter 1/2 Cup Chopped onion 10 oz Canned sliced mushrooms, drained 5 x 1/5 ounce beef bouillon cubes 2 1/2 c Boiling water 8 oz Fusilli pasta 1/2 c Pine nuts (or almonds), toasted in 350øF oven for 5 to 8 mins. (optional) Instructions Melt margarine in large pot or Dutch oven. Add onion and mushrooms. Sauté until onion is soft. Dissolve bouillon cubes in boiling water in small bowl. Add to mushroom mixture. Add pasta. Bring to a boil. Cover. Simmer slowly for about 10 minutes until pasta is tender and liquid is absorbed. Add a bit more boiling water if needed during cooking. If mixture boils too fast won't have time to cook before liquid is absorbed. Serve with nuts stirred in, or sprinkled over, pasta. Makes 6 cups. Ramen with Flair 1 package Ramen noodles (any flavor) Jerky (any flavor) Hot sauce Equipment Heat source small pot Instructions Prepare Ramen noodles according to directions. Add jerky during last couple minutes, cook to desired doneness. Add hot sauce to taste. Comment I love to experiment with different spices in this recipe.
130 VEGETABLES Skillet Fried Corn 4 slices bacon 3 c. fresh cut corn 1/4 c. chopped green pepper 1/4 c. finely chopped onion 1 tsp. salt Dash of pepper Cook bacon until crisp; drain and crumble. Add vegetables to drippings. Cover. Cook over low heat for 5 to 8 minutes or until tender. Season with salt and pepper. Sprinkle bacon over top. Should serve 5-6 as a small side dish. Camping Corn Hash 1 can corn and its liquid 5 long slices of bacon cut into rough squares 1/2 medium onion diced 1/2 can diced tomatoes Salt & Pepper to taste * 1/2 teaspoon red pepper flakes (optional) In a cast iron skillet, begin frying your bacon until it gives all of its grease and the bacon is browned and crispy. Add the onions directly to the skillet. Fry the onions for about two minutes. Add a dash of salt. Add the diced tomatoes and the can of corn with the corn liquid. Cook the mixture until nearly all of the water has boiled out. Add the pepper and pepper flakes if desired. Serve immediately.

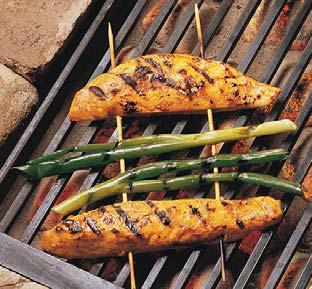
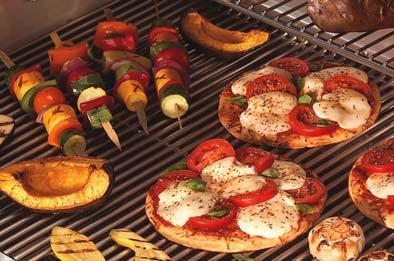

131 GRILLING
132 Cooking with the Grill IMPORTANT: Be sure to reserve the grill for the meal that you plan to use it. There is only one grill and a number of patrols as well as adults cooking. It may be possible to share it, especially if quick meals (hot dogs, hamburgers) are being prepared. You are working with fire, so prepare as you would for a campfire. Have a bucket of water nearby. Be careful near the grill (as you should be near a campfire). There is absolutely no playing, pushing, or running anywhere near the grill. It is a No-Play zone. Lighter fluid is not allowed. Place the grill in a safe location, where the heat will not cause any dangers. Keep it away from propane tanks, pathways and anything that can easily burn. Do not use it under a canopy or under a tree with low hanging branches. Smoke from your grill or smoker contains carbon monoxide, Polycyclic Aromatic Hydrocarbons (PAH), and other dangerous substances. It is best to let it get away without breathing it in. Lighting the coals is only to be done with the charcoal chimney. This requires adult supervision. Wear an insulated fire retardant barbecue mitt when lighting coals. A charcoal fire takes minutes to reach the proper cooking heat after you light it. You can tell when the coals are at proper cooking temperature because gray ash will form evenly over the briquettes. Using a Chimney Starter 1. Place crumpled newspapers in the bottom portion of the starter 2. Remove the rack from the grill and place the chimney starter in the bottom. 3. Fill the upper portion of the starter with charcoal. 4. Then light the newsletter through holes in the bottom of the starter. The fire will draw up through the starter, lighting the charcoal. 5. Leave the chimney starter where it is, and in about minutes the coals will be ready. 6. With a heavy, long-sleeved oven mitt, carefully empty the coals into the grill pan. 7. Arrange the coals into an even layer with long tongs. Grilling Tips Charring the food not only makes it taste bad, but it is unhealthy to eat. Be sure your food is cooked all the way through. Use thinner, smaller cuts of meat. Kabobs are great. Charcoal should be left in the grill until cold to the touch or thoroughly soaked in water before disposal. Do not use loose clothing when cooking Have everything you need nearby before you get started


133 Direct and Indirect Cooking An indirect grilling technique simply means the heat source is not directly under the food. The heat rises from the charcoal and circulates around the grill. This indirectly cooks the meat, almost like an oven. So why must you use this method instead of a normal BBQ method? A grill produces a high dry heat. This cooks food really quickly. Large pieces of meat like a chicken for instance would simply burn the outside and leave the inside raw. An indirect technique allows you to grill the meat slowly and make sure it gets cooked properly without burning it. Keep the grill temperature relatively low. Use this method for any large pieces of meat or food. Like your rib racks, pizza, brisket or large pieces of steaks. Place the lid of the grill on. This traps the heat and causes it to circulate. Open the top air vent slightly while you are grilling, this allows a small amounts of smoke to escape. The Direct Method is similar to broiling. Food is cooked directly over the heat source. For even cooking, food should be turned once halfway through the grilling time. Use the Direct method for foods that take less than 25 minutes to cook: like steaks, chops, kabobs, sausages and vegetables. Direct cooking is also necessary to sear meats. Searing creates that wonderful crisp, caramelized texture where the food hits the grate. It also adds nice grill marks and flavor to the entire food surface. Steaks, chops, chicken pieces, and larger cuts of meat all benefit from searing.
134 The Grill GRATE Keep it Clean Really, keep it clean It is easier to clean when it is warm (do not clean it when it is still hot!) Don t set it on the ground. You are going to cook food on it. Keep it clean. Remember, you are going to cook food on it. Lightly oiling the grill will help prevent sticking problems - BUT o DON T spray Pam on a grill that is positioned over hot coals! The can may easily ignite. o To oil the grill, use a pair of tongs to hold a paper towel that has been oiled, and use that to apply the oil to the grate. o If you are going to use Pam, the grate MUST be removed from the grill first. This should be done BEFORE the grill is too hot to handle. Don t break any of the above rules. Really. The Grill VENTS Keep the bottom vents fully open all of the time (except during transport to keep the ash from leaving a mess). Check that the bottom vents are clear of ash. The top vents should be fully open UNLESS o You are having flare ups o You want to reduce the temperature of the grill o In these cases, Partially close the top vents Clean up the Ash Every time you use the grill, after it has completely cooled, you must clean the ash from the bottom. Scoop it out and bag it and dispose of it properly.
135 Marinades and Rubs A marinade is a highly seasoned liquid used to impart flavor and in some cases, tenderize tougher meats. A rub is a highly concentrated blend of herbs and spices that flavors the exterior of the meat as it grills. Marinades consist of liquid ingredients such as fruit or vegetable juices, wine (although not on a Scout campout) or water and oil in combination with seasoning for several hours or as long as overnight to impart flavor and/or tenderize. In order to tenderize, a marinade must contain an acidic ingredient such as lemon juice, wine, vinegar, or yogurt. The acid penetrates the meat fibers to help tenderize them. Rubs are applied to the exterior surface of the meat just before Grilling; they need no standing time. For convenience, rubs may be applied several hours in advance. The coated meat should be refrigerated until grilling time. Flavors become more pronounced the longer the rub is on the meat. Create your own blend or seasonings for rubs or use a commercial blend. There are many dry rubs available in the market. Tips for marinating - Always marinate in the refrigerator; never at room temp - Allow ¼ - ½ cup of marinade for each 1-2 lbs. of meat - Marinades may be cooked or uncooked. Cooked marinades should be completely cooled before use. - A heavy-duty plastic food bag is convenient for marinating. - Select dishes In which the meat will fit snugly but lie flat - Turn meat occasionally during marinating so all sides are exposed to the marinade for tenderization to take place - Most meat cuts must be marinated for at least 6 hrs, or as long as overnight. - For flavor, marinate 15 minutes or as long as 2 hours. - Marinades may also be brushed on during grilling (but do not use any marinade that has been used on raw meat). - Discard used marinades - never reuse them.
136 .

137 GRILLING RECIPES
138 Basic Marinade 1 small onion, diced 3 garlic cloves, minced 1/2 cup olive oil 1/4 cup white wine vinegar* 2 tablespoons Worcestershire sauce 2 teaspoons sugar 1 teaspoon salt 1 teaspoon pepper Preparation Stir together onion and remaining ingredients. * Fresh lemon juice may be substituted for white wine vinegar Basic Marinade for Pork, Chicken or Steak Yield: 1 cup of marinade 3/4 c. Extra Virgin Olive Oil 1 Tbsp. Fresh Rosemary, roughly chopped 2 Tbsp. Fresh Thyme 2 Tbsp. Fresh Parsley, roughly chopped 2 cloves Fresh Garlic 1/2 tsp. Red Chili Flakes Juice of one Fresh Lemon Kosher Salt and Fresh Cracked Pepper (Do not add into marinade; see below) Method Combine in food processor or blender and blend until all ingredients are incorporated. In a ziploc bag or shallow marinating dish, rub marinade into meat and let sit in the fridge for at least 2 hours, or overnight. Season with the kosher salt and fresh cracked pepper right before cooking. Simple Marinade A bottle of your favorite Italian dressing
139 Vegetable Marinade ¼ cup tamari soy sauce ¼ cup balsamic vinegar ¼ cup olive oil ¼ cup water 1 to 2 cloves garlic, pressed or finely minced Freshly ground pepper to taste In a lidded jar, shake all the ingredients well until they are well blended. Variations: Adding herbs to this basic marinade gives distinctive flavors to your grilled vegetables. These are the three that I use most often; feel free to experiment with your own combinations of herbs and spices. I often divide a batch of Basic Marinade in half and make two different variants. Simple Asian Marinade ¼ cup low sodium soy sauce 3 tbsp honey 3 tbsp olive oil 1-2 cloves of garlic, minced salt and pepper Other options: Sesame oil, rice wine vinegar, fresh ginger root or ginger spice, raw sesame seeds, onion Southwestern Marinade 1/4 cup salsa 2 tablespoons cilantro, chopped 2 tablespoons lime juice 1 tablespoon vegetable oil 1 garlic clove, minced 1/4 teaspoon ground cumin Southwestern Marinade 2 1 small onion, diced 3 garlic cloves, minced 1/2 cup olive oil 1/4 cup lime juice* 2 tablespoons Worcestershire sauce 2 teaspoons sugar 1 teaspoon salt 1 teaspoon pepper 1 tablespoon chopped fresh cilantro 1 teaspoon ground cumin
140 For Dry Rubs: Clean out an old, empty spice container for storing and sprinkling your home-made dry rub. All Purpose Rub for Meat 4 tablespoons white sugar 4 tablespoons salt 1 tablespoon paprika 2 tablespoons mustard powder 1/2 teaspoon ground black pepper 1 pinch dried oregano 1 pinch dried thyme Directions In a small bowl, combine the sugar, salt, paprika, mustard, pepper, oregano and thyme. To use: coat meat in mixture, and then grill as desired. Memphis Rub 1/4 cup paprika 1 tablespoon packed dark brown sugar 1 tablespoon white sugar 2 teaspoons salt 2 teaspoons monosodium glutamate (MSG) 1 teaspoon celery salt 1 teaspoon ground black pepper 1 teaspoon cayenne pepper, or to taste 1 teaspoon dry mustard 1 teaspoon garlic powder 1 teaspoon onion powder Jerk Seasoning Hey! No name calling please! 2 tablespoons dried minced onion 2 1/2 teaspoons dried thyme 2 teaspoons ground allspice 2 teaspoons ground black pepper 1/2 teaspoon ground cinnamon 1/2 teaspoon cayenne pepper 1/2 teaspoon salt 2 tablespoons vegetable oil Cajun Dry Rub 2 tablespoons paprika 1 tablespoon salt 1 tablespoon black pepper 2 teaspoons garlic powder 2 teaspoons onion powder 2 teaspoons ground red pepper 1 teaspoon dried oregano 1 teaspoon dried thyme
141 Basic Dry Rub ½ cup kosher salt ½ cup sugar ½ cup ground black pepper ½ cup paprika All Purpose BBQ Rub ¼ cup coarse salt (kosher or sea) ¼ cup dark brown sugar ¼ cup sweet paprika 2 Tbsp freshly ground black pepper Makes about 3/4 cup. Granulated sugar can be used instead of brown sugar. Johnnies Grub Rub Basic BBQ Rub Original Recipe Yield 0.75 cup 1 tablespoon garlic powder 2 tablespoons ground black pepper 1 tablespoon salt 1 tablespoon mustard powder 1 tablespoon chili powder 1 tablespoon ground cumin 1 tablespoon brown sugar 4 tablespoons ground paprika 1/2 teaspoon dried oregano Asian Dry Rub 4 teaspoons dried basil 4 teaspoons dried mint 2 teaspoons salt 2 teaspoons ground ginger Asian Dry Rub 2 1 tablespoon black peppercorns, crushed ¼ teaspoon salt 1 teaspoon brown sugar ½ teaspoon ground ginger 2 teaspoons paprika 1½ teaspoons ground red pepper 1 teaspoon freshly ground black pepper ½ teaspoon garlic powder ½ teaspoon ground cinnamon 1½ teaspoon anise seeds, crushed ¼ teaspoon ground cloves
142 .
143 MAIN MEAL Party Pork Strips Direct Grilling 10 Strips of Pork Meat 1 bottle of lite teriyaki sauce (Kikkoman)) 2 big squares of aluminum foil Garlic Powder Place pork strips on sheet of aluminum foil and pour the bottle of teriyaki sauce on pork sprinkle garlic powder on and put the top piece of aluminum foil on and curl up the edges-b-q for minutes. Good when your camping or anytime. Shish Kabobs Suggested items for grilling on a shish kabob Meats Beef, cut in approx 1 cubes Chicken cubes Shrimp Sliced sausage Miscellaneous Your favorite marinade (or see marinade recipes in this book) Zip-loc bags Skewers Vegetables Green/red sweet peppers (1 squares) Cherry tomatoes Mushrooms Onion (1 cubes) Zucchini or Summer Squash (1 cubes) Directions Take selected ingredients for the shish kabobs and place them a zip lock bag with your marinade. Allow it to sit for hours or overnight. You may want to have several bags to separate some of the kabob items. Everyone fixes their own kabob from the bag with the ingredients that they like and cook their own. If using wooden sticks, the stick must be soaked for several hours in water before cooking so they don t burn. Grill for about 4-5 minutes then flip and continue to grill until done. Be careful and check the meats to be sure they are cooked through.

144 Grilled Quesedilla Quick & Easy 12 Tortillas 3 cups grated cheddar cheese Salsa, if desired Instructions Flatten each roll into an 8-inch circle. On outdoor grill or on the stove top using a grilling pan, grill one circle about one minute on each side. Grill another circle on one side, turn over and top with 1/2 cup cheese. Put already grilled circle on top, and allow bottom circle to grill. Repeat with each set of rolls. Serve warm with salsa if desired. Makes 6 Quesadillas. Marinated Grilled Chicken Breasts 1 Chicken breast per person Marinade (see marinades section) Seasoning of choice Buns / Side Dishes If the chicken breasts are in individual packets, they can be removed at home and all placed in a zip-loc bag for transport in the cooler. Marinate the chicken breasts right in the zip-loc bag. This can be prepared in advance and brought to the camping in the zip-loc with the marinade already started. If marinating at the campsite, they need to sit in the marinade for at least 30 minutes. The chicken must be kept in the cooler while marinating (unless the outside temperature is below 40F). Use direct grilling, with the coals spread out evenly. Set the chicken on the grill and season (salt, pepper, season salt or your favorite dry rub). The cooking time will vary depending on how large the chicken breasts are, and the outside temperature. They will usually take about 8-10 minutes total (turning after 5-6 minutes). However, to be sure they are fully cooked, check the internal temperature with an instant read thermometer (165F to 170F). These can be served on hamburger buns with lettuce, tomato, mayo, etc. They can be served as is. They can also be cut up and put in a pasta salad or a lettuce salad. SUGGESTED SIDES: Pasta, baked beans, potato salad, French fries, salad, grilled vegetables, corn, etc. Be sure to include a vegetable! This can also be cooked in a pan on the stove.
145 Coke Can Chicken 1 can (12 ounces) Cola (can also try Lemon/Lime soda) 1 chicken (3½ to 4 pounds) 2 Tbsp All-Purpose Barbecue Rub (recipe in Dry Rubs section) or your favorite dry rub 2 tsp vegetable oil Vertical chicken roaster (optional) Pop the tab off the soda can and pour out half of the contents (drink it, whatever). If cooking the chicken on the can, using a church key-style can opener, make 2 additional holes in its top. Set the can aside. Remove the packet of giblets from the body cavity of the chicken and set aside for another use. Remove and discard the fat just inside the body and neck cavities. Sprinkle 1 teaspoon of the rub inside the body cavity and ½ teaspoon inside the neck cavity of the chicken. Drizzle the oil over the outside of the bird and rub or brush it all over the skin. Sprinkle the outside of the bird with 1 tablespoon of rub and rub it all over the skin. Spoon the remaining 1½ teaspoons of rub into the soda can through a hole in the top of the can. Don t worry if the beer foams up: This is normal. If cooking on a can Hold the bird upright, with the opening of the body cavity at the bottom, and lower it onto the can so the can fits into the cavity. Pull the chicken legs forward to form a sort of tripod, so the bird stands upright. The rear leg of the tripod is the can. If cooking on a roaster Fill it with the soda mixture and position the chicken on top, following the manufacturer s instructions. Tuck the tips of the wings behind the chicken s back. Set up the grill for indirect grilling and preheat to medium. Place a large drip pan in the center. Stand the chicken up in the center of the hot grate, over the drip pan and away from the heat. Cover the grill and cook the chicken until the skin is a dark golden brown and very crisp and the meat is cooked through (about 180F on an instant-read meat thermometer inserted in the thickest part of a thigh, but not touching the bone), 1¼ to 1½ hours. You ll need to add 12 fresh coals per side after 1 hour. If the chicken skin starts to brown too much, loosely tent the bird with aluminum foil. If cooking on a can Using tongs, hold the bird by the can and carefully transfer it in an upright position to a platter. If cooking on a roaster Use oven mitts or pot holders to remove the bird from the grill while it s still on the vertical roaster. Let the chicken rest for 5 minutes, then carefully lift it off its support. Take care not to spill the hot soda or otherwise burn yourself. Halve, quarter, or carve the chicken and serve. Serves 2 to 4 Tip: Use an empty soup can it provides better support than a soda can. Also, the rub is easier to apply if it is in an old seasoning container with large holes in the top for sprinkling.
 allows")
, and spread them evenly under half of the grate, once they are completely hot. Allow the grate to preheat, covered, for five minutes. 2.")


146 How to Make Grilled Pizza 1. Arranging the Coals: Grilled pizza restaurants often cook directly over the coals for the entire process, but a two-zone indirect fire (with the coals to one side of the grill, as shown here) allows for more wiggle room and is a good place to start if you're a grilled-pizza newbie. Light up a grill with a ¾ full chimney (About 75 briquettes), and spread them evenly under half of the grate, once they are completely hot. Allow the grate to preheat, covered, for five minutes. 2. On a Roll: As the coals are heating, roll out your dough on a well-floured surface. Any shape is fine, but I find oblongs about 13-by 9-inches to be the easiest to pick up and place. You want the dough to be about ¼-inch thick. Shake off excess flour and stack the rolled dough between pieces of wax paper to keep them from drying out or from sticking to each other. 3. Oil it Up: Brush the top of the dough with a thin, even coat of olive oil or flavored olive oil, and season with kosher salt. I like to use olive oil with minced garlic in it. 4. Lay it On: Lay the dough directly on the grill over the hot side with the oiled side down. Don't worry, it won't fall through the grate. 5. Re-oil: Within a few seconds, it should start to bubble up. Brush the sky-facing side with another thin layer of oil, and salt that side as well. At this point, you'll have to start moving the dough around and checking the undercarriage with a thin spatula or metal pizza peel to ensure that it's cooking evenly. Cook it until the entire underside is golden brown with a few dark blistered spots. 6. Getting Cheesy: Once the pizza is done and flipped, slide it over to the cool side of the grill while you apply toppings. Grilled pizzas are topped in reverse so that the cheese will melt properly. Apply cheese sparingly about 1 ½ ounces of a good melting cheese (like mozzarella, fontina, or Jack) and a half ounce of a flavorful Parmiggiano or Pecorino is all you need. 7. Sauce It: For sauce, simpler is better. I use whole canned San Marzano tomatoes that I break up with my fingers over a strainer and let drain for a few minutes, then season with salt. Place 1-tablespoon dollops of sauce in spots across the surface of the pizza. This allows the cheese to show through and melt, and prevents the crust from getting overly soggy. 8. Top It Off: If adding toppings that need heating through (like, say, fresh mozzarella or slices of soppressata), place them sparingly on the pizza remember, this is about the crust then cover for 1 minute to help them melt or heat through (your pizza should still be on the cool side of the grill at this point). You can skip this step if you are going just plain tomato and cheese (my favorite way). 9. Cook the Underside and Garnish: After your toppings have heated through, return the pizza to the hot side of the grill and cook until the bottom side is nicely blistered, about 30 seconds to a minute. Transfer is to a cutting board using a metal spatula or a pizza peel, and top with fresh basil or sliced scallions.
147 Quick & Easy Pizza Tortillas, Pita Bread, or Boboli Pizza sauce (can or jar) Mozzarella (or similar) cheese Favorite toppings (pepperoni, fresh mushroom, olives, roasted peppers, etc.) Cooking Oil (preferably Olive Oil) Directions Use indirect cooking. Set coals on no more than ½ of the grill, and use the other half to cook over. Lightly oil both sides of the tortilla (or pita bread or Boboli) and place on grill. As soon as the bottom is heated and lightly crisp, turn over and quickly add the toppings: - Cheese first - Then other toppings - Then the sauce (apply sparingly) Cover grill and heat just until the cheese is melted. Be careful not to burn the bottoms. Make individual servings and each person can add what they like to their personal pizza. Keep them simple. Adding a lot of ingredients will make it hard to warm through before the bottom has burned. NOTE: If cooking these on a grate over campfire coals, use aluminum foil to make a lid to help the cheese melt and the top to warm up.
148 SIDE DISHES & VEGETABLES Mr. Smith s Grilled Vegetables Assorted vegetables, as are available: Zucchini Summer Squash Assorted Sweet Peppers Cherry Tomatoes Whole Mushrooms Onions Garlic powder Salt The amounts depend on the size of your crowd. Use a fairly even distribution, but the mushrooms tend to go fast! Use larger portions of your favorite vegetables Dice the vegetables into generous bite-size pieces. The cherry tomatoes and mushroom can be left whole (unless they are very large). Place the cut-up vegetables in a large bowl. Sprinkle with olive oil and blend. Season with garlic powder and salt. To grill the vegetables use a grilling tray or basket that will hold the vegetables, yet let the grill s heat and smoke come through. If a grilling tray is not available, use foil to make a tray with a lipped edge and cook the vegetables on that. Turn the vegetables every few minutes, almost as you would a stir-fry. Cook until they just begin to brown and soften. Usually minutes. Roasted New Potatoes 2 lbs small new potatoes (washed) Olive Oil 2 Tbsp dried rosemary (you can also used thyme and oregano) 2 Tbsp garlic powder 2 Tbsp paprika 1 tsp black pepper 1 tsp Salt In plenty of salted water, par-boil the potatoes until the tip of a knife can be inserted easily (roughly 10 minutes depending on size). Drain, then toss the potatoes in enough oil to just coat them, then toss with the rosemary, garlic powder, paprika and about 1 1/2 teaspoons salt as well as the pepper. On a campfire grill, grill over direct heat, turning often, until browned and grill marked, minutes. Serves 6-8.


149 COOKING WITH F I R E!


 provides much")

 Cooking Food inside")
150 Cooking with a Campfire Cooking with fire is actually about cooking with the hot coals created after a fire has been burning for a while. Attempting to cook directly over a fire is too difficult due to the unevenness of the temperature. Cooking over the coals (embers) provides much more consistent heat, as well as being MUCH safer for the cook. Rotisserie Skewers Cooking on a Rock Cooking on the Coals (Cooking in Foil) Cooking Food inside of Food / Cooking on Leaves Cooking in Paper Coffee Can Cooking Grilling Grate over Campfire Coals - Direct Heat - Indirect Heat

151 Rotisserie Cooking Rotisserie cooking is the ultimate in slow grilling to make sure your roasts are evenly cooked and browned all around. The concept is similar to indirect heat except that you don't have to keep going back to flip your roasting meat several times throughout the cooking process. It simply turns on the rotisserie! This insures even cooking and prevents one side from getting all the heat while the others go cold. This does require some special equipment though. A rotisserie can be hand turned or hooked up to a motorized rotisserie to continually turn your roast on its own. Skewers This is the most simple and primitive form of fire pit cooking. You just need an open fire pit where you have access to a hot fire! It is limited somewhat in what you can cook, but if you get creative you can make some tasty treats. You basically need a long skewer or two. They should ideally have wood handles so you don't burn your hands and be at least 2 feet long. It is easy to roast hot dogs, sausages and marshmallows (to make s'mores!) over an open fire this way. Just don't accidently drop them in the fire pit! If you get creative you can cook other smaller foods (you won't be able to hold up a heavy piece of meat for long on the skewer!) such as shish kabobs, sausage or hot dogs. Cooking on a Rock A rock can be used as a cooking surface for your camp mealtime. The heat is conducted through a rock from coals or fire below. Choosing a Rock Pick your special rock carefully. Look around for a rock that is flat and less than 2 inches thick. Carefully avoid using rocks that are wet, or that have recently been in water as they may explode. (Example: Shell or limestone may retain moisture.) Heating the Rock Make a fire that is key-hole shaped. Place the clean rock over the square part of the keyhole and then put hot coals under it. Heat the rock slowly. If one side heads too quickly and expands more rapidly than the other side, the rock may break. Turn the rock over, allowing it to heat on each side gradually and as evenly as possible.

 You can cook directly on coals: - Toast: Place a slice of bread directly on white glowing coals.")

152 Use the Rock as a Grill When the rock is finally hot, use it as a grill by placing it directly over the coals. Place your food directly on the rock to cook it; you may want to cover the cooking surface with foil. When the upper surface cools, turn the rock over, brush it off, and cook on the hot side. If you have found a very thin rock, the heat will conduct through it and the rock won t need to be turned. Have Lots of Patience It may take some time to cook your food thoroughly. Be persistent. It's worth the wait. Then, enjoy! Cooking in Coals (Cooking with Foil) You can cook directly on coals: - Toast: Place a slice of bread directly on white glowing coals. After about a minute, turn the bread to brown the other side. Remove from heat and blow the ashes away. Butter and enjoy! - Ash Cakes: Make stiff biscuit dough, then form small flat cakes and place them on a bed of white hot ashes. When they are golden brown, turn them over to cook the other side. Eat with jam or honey for a yummy snack.. - Meats: Fish, steak, or hot dogs can be cooked directly on hot coals. It gives them a tasty flavor much different from other cooking methods. A more common and more versatile method is to cook your food wrapped in foil. One advantage of foil-wrapped parcels, or tin foil dinners, is that they can be prepared, seasoned and packed in advance of cooking. Everyone can make his or her own dinner and season it to taste. This cuts down on preparation time and gives everyone an activity. Another plus is that these dinners will hold their heat for 10 to 15 minutes. You can enjoy dinner served directly out of the foil wrap. Drugstore Wrap 1. Cut one or two pieces of lightweight foil or one piece of heavy-duty or extra-heavy-duty foil twice the distance around the item to be wrapped. 2. Arrange food in the center of one piece of foil. 3. Bring opposite sides of the foil together and fold down in small ½-inch folds until package can no longer be folded. 4. Flatten the two sides of the package and then roll the open edges toward the center in small folds. Edges of the package must be tightly sealed. 5. If the package needs to be wrapped again for strength, place the folded top of the package upside down in the center of another piece of foil and repeat.


153 Cooking Food inside Food or Cooking in Leaves Oranges are a popular item used to cook food inside of food (see recipes for Orange Muffin, Orange Eggs and Orange Brownies). You can also try cooking a hamburger inside of a hollowed out onion. To cook with leaves: Prepare and season the meat. Put your meat in the center of the leaf. Place the leaf on top the hot coals. While it cooks, the outside of the leaf becomes limp, and scorched. Don t worry, though. The area of the leaf that is underneath the meat will stay cool and moist. When the meat is half cooked, remove the leaf from the coals and turn the meat over to allow the meat to cook evenly. Return it to the coals to finish cooking. You can use large cabbage or lettuce leaves or corn husks to cook meats in your campfire when you are camping. Other leaves can also be used (just make certain that the leaf is not poisonous). Cooking in Paper Cooking in paper is an unusual campfire cooking method that is worth a try. As long as the paper is wet when you place it on the coals, it won t burn. Fish is a food that works well with this type of cooking. Oil or butter your fish. Place oiled fish on a piece of wet brown paper or a brown paper sack. Get a sheet of newspaper wet, then roll the packaged fish up in it. Cook for 10 to 15 minutes. The cooking time will fluctuate depending on the size of the fish and how hot the coals are. If you like this method, you can experiment with other foods. Use a Paper Cup to Boil Water You wouldn t think to use a paper cup in your campfire cooking would you? Well, it s possible! When liquid is heated inside an un-waxed paper cup, the container won t burn. You can heat water or milk in a paper cup placed in the coals. Be careful that the flames don t reach the top of the cup where no liquid touches or the cup will burn. You can also hard-cook eggs this way Pot or Coffee Can Cooking Another "primitive" way to cook on a fire pit grill is to simply hang or sit a fire-proof pot or pan (such as a cast iron pan) on your grill or directly into your fire. This is great for stews and soups or even pan frying fish or vegetables! It is also ideal for cooking on a campfire! If you don't have a cast iron pot or the necessary equipment to hang a pot over your fire, you can even use a heavy metal can covered in tin foil. But be careful, if you put some smaller cans in a hot fire they can melt!
154 Grilling on a Fire Direct Heat Grilling Open direct heat grilling on a fire pit grill is similar to cooking on a barbecue with the lid off except that you are doing it over a real firewood fire. "Direct heat" refers to the fact that your food is cooking directly over the heat source, rather than away from the heat source cooking in the circulating hot air (see below). This type of grilling is ideal for smaller food items that cook fast or that require high heat searing. You can cook a classic grilled steak, marinated chicken breasts, brined pork tenderloin or chops, hamburgers, hot dogs, sausages, lamb chops or game birds this way. The hot direct heat cooks your food quickly to a nice golden brown caramelized color and leaves the interior succulent and juicy! Indirect Heat Grilling "Indirect heat" means that rather than cooking your food in direct proximity to the hot embers or fire, your food cooks slowly in the hot air circulating around it, similar to how foods roast in the oven. This is beneficial for larger roasts because over direct heat they would burn on the outside before the interior was even warm! Indirect cooking on your fire pit grill requires two things: (1) Your fire and/or glowing embers should be off to one side of your fire pit or grill. This creates an area on the fire pit grill where there is no direct heat below it. I recommend placing a small metal pan of water below this area to catch drippings and to vaporize and humidify the air in your fire pit grill. (2) You need a solid lid for your fire pit grill. Not all fire pits come with a lid, whereas most barbecue grills do. If not, you will either have to improvise something or find a lid that fits your grill. The goal is to keep heat contained under the lid so that your food, which is placed away from the fire or coals, cooks slowly in the swirling hot smoky air inside your fire pit grill. This is ideal for larger roasts that take a long time to cook, like tri-tip roasts, whole chickens, and whole racks of ribs. Cooking with Fire Tips Use two or four large coffee cans filled with water and covered with heavy duty aluminum foil as grill holders. As your meals cook, water heats up for dishes or cleanup. Store in their own plastic bags to keep soot from other items. Cook on or over coals (either wood or charcoal). Coals provide a more steady, even heat without the smoke. Avoid burning your food and avoid undercooked food in the middle.


155 RECIPES FOR CAMPFIRE COOKING
156 BREAKFAST Breakfast in a Paper Bag 1-2 Strips of Bacon 1-2 Handfulls Frozen Hash Browns 1-2 Eggs Equipment Lunch Sized Paper Bag Hot Campfire Coals Pointed Stick Fork Instructions 1. Open paper bag and place bacon strips on bottom. 2. Toss in potatoes. 3. Break in egg(s). 4. Close by folding down top of paper bag at least three times but leaving 3"-4" of air space above the food. 5. Insert pointed stick only through the top folded part of the bag. 6. Prop with rocks, or hold bag on the stick about 4"-5" over the hot coals for about 8-10 minutes (careful not to touch the coals or hold over flames or you'll set your breakfast on fire.) 7. When you can't stand the delicious aroma anymore and your nose is making your tummy SCREAM Remove from heat and pull out the stick with an oven mitt. 9. Open the bag and fold down the paper. Eat right out of the brown bag. 10. Throw your "dishes" in the fire (but don't forget to save the forks.) Comment: It's good to have Leader's supervise folding the bags and inserting the sticks so there's no mistakes. Foil Breakfast Hash brown potatoes Eggs Sausage Spices Aluminum foil Place potatoes, scrambled eggs (uncooked), sausage and spices in aluminum foil. Wrap securely. Place on coals for approx. 15 minutes. Turn and rotate as needed.
157 Sticky Eggs Eggs Equipment Stick or skewer or metal marshmallow roasting stick Instructions 1. Find a green stick somewhere, making sure that it isn't poisonous, like poison oak or oleander, and sharpen one end very well. This is the end that's going to go through the egg. Remove the bark at least 4 or 5 inches on the sharpened end of the stick, so it doesn't end up embedded in the cooked egg. 2. Make a small hole, about pea-sized, in each end of the egg, being very careful not to crack it. You can use your sharpened stick for this, but the point of a pocket-knife or paring knife works better. 3. Carefully, gently, slide the sharpened stick all the way through the egg, starting at the hole in the larger end, and coming out the hole at the smaller end. Make sure at least an inch of stick is showing at the end furthest from your hand, so the egg won't slip off easily. 4. Hold the stick parallel to the ground, as much as possible, and hold the small end of the egg directly in the flames until a little of the white leaks out and solidifies on the end of the egg. This is what will hold the egg on the stick while you cook it. 5. Hold the egg above coals, turning frequently, until pulling on the stick offers resistance and no more uncooked egg white leaks from either hole. If you want the egg soft-cooked, it's done now. Otherwise, hold the egg over the fire until it is quite hard to remove the stick, at which time it will be hard-cooked with a slightly scrambled yolk Orange Muffins Recipe Navel oranges, blueberry muffin mix (add water only), butter or margarine Equipment Aluminum foil Instructions Mix muffin mix according to pkg directions. Cut a slice off the top of the orange and scoop out insides. Set aside. Fill orange shell half full with muffin mix, put the top slice back on, and wrap in a square of foil. Bake directly on hot coals minutes. Eat the orange while the muffin is cooking. When done, add butter, scoop out and eat!
158 Orange Eggs Recipe Eggs,and oranges Equipment Open fire, or charcoal, knife Instructions 1. Cut an orange in half 2. Hollow out a section, so it forms a shell 3. Crack an egg into the shell 4. Place on fire, until done, and enjoy-has an orange taste (very delicious) Trash Breakfast 1 bag shredded hash browns 6 eggs 1 lb sausage or ham, cooked 1 chopped medium onion 2 cups shredded sharp cheese Seasoning salt and pepper Butter Peppers (optional) Aluminum Foil Bag Take an aluminum foil cooking bag and spray with Pam. Sprinkle with seasoning salt and put some butter in the foil bag. Open the hash browns. Beat the eggs and chop the onions and peppers. Pour all ingredients into the bag of hash browns. Mix by squeezing the bag. Then pour the mixture into the foil cooking bag and spread out. Add more seasoning salt and pepper and a bit more butter on top of the hash brown mixture. Place the aluminum cooking bag on a preheated grill (medium heat) and turn the bag every five minutes. The bag will start to puff and you can open it to check for doneness. Servings: 6 Preparation time: 30 minutes Breakfast Sausage and Egg (This turned out surprisingly delicious. The egg did not leak out of the nest or packet.) 1/4 lb breakfast sausage (we used bulk sausage although link would work, too) 1 large potato, grated 1 egg Spray a piece of foil. Press the sausage into a patty in the center. On top of the sausage, mound the grated potatoes and form them into a nest. Crack a raw egg into the center of this nest. Season with salt and pepper. Seal foil, keep upright until cooking. We cooked this for 15 minutes on one side then turned it over and cooked it for 5 minutes on the other side. The egg actually cooked inside the nest. It looked professional and tasted wonderful. Total cooking time: 20 minutes.
159 Breakfast Potatoes 2 slices of raw bacon 1 large potato, sliced 1/4 c. onion, sliced 1 T. oil Spray a piece of foil. Lay bacon on bottom. Toss potato and onion slices in oil. Put them on top of the bacon and season with salt and pepper or anyway you want. Seal foil and cook. Cook for 10 minutes on one side then turn it over. Cook for 10 minutes on the other side. Total cooking time: 20 minutes Mini Hash Equipment: Aluminum foil, paper towel 1 egg ½ cup hash browns 1 sausage patty (precooked) Spices Instructions Lay down square of aluminum foil. Wet a paper towel and lay it down. Lay another square of foil down. This moisture layer helps minimize burning. Place sausage on foil. Spread hash browns in flat layer. Crack egg onto hash browns. Spice as much as you want. Fold up and seal the foil. Place in fire coals for 10 to 15 minutes. Paper Bag Bacon & Eggs 2 Thick-cut strips of bacon 2 Eggs Paper lunch bag 1. Cut the bacon strips in half and lay the pieces side by side in a paper lunch bag. If the bag is not sturdy, double up using a bag inside a bag. 2. Crack 2 eggs within the bag over the bacon 3. Roll the top of the bag in flattened sections as you would the end of a tube of toothpaste and skewer it closed with a toasting fork so that the bag hangs at the end of the fork. 4. Toast the food in the bag by holding it with the fork above the hot coals, being careful not to set the bag on fire. The bacon fat will be absorbed by the paper and protect the bag from burning. The bag shouldn t drip unless it is torn. 5. Once the egg becomes firm, carefully tear the bag open to make a bowl. Eat your breakfast right from the bag.
160 Jacob s Tastee Egg & Bacon Breakfast Servings: 1 multiply as required Equipment: Empty tin can, about 8oz in size, label removed, heavy-duty aluminum foil 1 tsp Butter 1 slice Canadian bacon 1 Egg 1 slice cheese 1 Pillsbury Grands biscuit dough rounds Option: 1 precooked sausage patty (replacement for Canadian bacon) 1. Place butter in the bottom of a small, clean tin can. Lay bacon on top of butter. 2. Crack egg over top of bacon. Cover with slice of cheese. Place biscuit dough on cheese. 3. Wrap can with heavy-duty aluminum foil, leaving room for the biscuit to puff up while heating. 4. Cook over hot coals for about 20 minutes or until the biscuit has browned. Serve straight from the can. Orange Shell Breakast Servings: 1 multiply as required ½ Shell from a large Orange 2 slices turkey bacon 1 egg Salt & pepper to taste 1. Eat the pulp from orange half, leaving behind peel and remove any remaining membrane. 2. Lay 2 bacon slices in the orange shell, making a criss-cross in the bottom. 3. Break egg into orange shell. Season with salt & black pepper to taste 4. Take the 4 corners of a sheet of heavy-duty aluminum foil and pull them together above the orange. 5. Squeeze the foil together around the bottom and sides of the orange shell while keeping the rest of the foil standing up straight above the orange 6. Squish in the top of foil to retain heat, but leave it loosely packed to make it easier to check on the egg while it is cooking. 7. Set the foil-covered orange shell in the coals or on a very hot grill and bake for 3-5 minutes until egg is cooked to your liking 8. Serve right out of the orange.
161 MAIN MEAL Rotisserie Chicken Get your fire going. While you wait for the coals to ready you can prepare the chicken on the spit. Prepare the Chicken by removing the giblets and emptying the cavity. Pat the chicken with paper towels. Securing the Chicken to the Spit. When securing food to a spit for grill cooking, try to shape the food so it has a universal thickness around and down the spit. This helps the food cook uniformly. To prevent the wings and legs from burning, use a truss. This is a piece of wet string or wire that secures the legs and wings close to the body of the bird. This makes the bird symmetrical so it cooks evenly. Tie the middle of a piece of string to the base of the legs, crisscross the bird, wrapping the wings and tie behind the neck. The chickens need to be fairly well balanced or they will turn on the stick so the bottom heavy side will always be in the direct heat and it will not cook evenly. The chickens must be rotated to change position every 10 minutes or so. Oil and season the chicken after it is on the spit. A dry rub will work well, however, there are many ways to season the bird. If using BBQ sauce, wait until near the end of cooking to apply it. Now you are ready to cook. Set the skewered chicken on the spit over the hot coals from the fire. The chicken will need to cook for approximately 1 to 1½ hours, but the time can vary greatly, depending on the size of the bird, your heat source and the weather conditions. You must turn the chicken often minutes so it does not burn. Also, keep the fire just below the chicken so it is not quite touching the meat. If you see the skin starting to burn try to lower the flame and turn the chicken. When you see the legs start to loosen up its getting close to done. Use an instant read thermometer to check doneness. The breast meat should read 160 degrees, the thigh should be 180. When you think the chicken is done take it off the campfire and set it on a plate. Take the spit out of it and let the chicken rest for 5 or 10 minutes before cutting and serving. This lets the juices subside and makes for a juicier chicken. If you don't want such a smoky taste to the chicken you can wrap it in foil but you'll get soft skin, not crispy.
: Wrap the chicken thoroughly in three to four layers of foil, taking care that none of the chicken s skin shows.")

162 Campfire Coal Roasted Chicken After preparing chicken as desires (oiled, seasoned, stuffed, etc.): Wrap the chicken thoroughly in three to four layers of foil, taking care that none of the chicken s skin shows. Then place the foil-wrapped chicken in the campfire among the hot coals, layering them over the chicken. Roast the chicken in the campfire, rotating it and re-covering it with hot coals every thirty minutes to ensure even cooking for at least two hours. Carefully remove the roasted chicken from the fire and allow it to rest for about fifteen minutes before removing foil and serving. YIELD: 4 to 6 servings TIME: 5 to 10 minutes (preparation), 2 to 3 hours (in the campfire) Campfire Stick Roasted Chicken Boy s Life Magazine Nov, 2007: Troop 33, Charlotte, NC Whole chicken Salt and pepper Your preferred seasoning Heavy string (100 percent cotton) Skewers Season chicken inside and out. Tie chicken securely with string (secure wings and legs close to the body so they do not burn). Spear the chicken with sticks to help maneuver it while cooking (see photo). Using another long piece of string soaked in water, make a loop that wraps around the sticks and hang chicken from thick branch pounded into ground securely. Cook over coals, letting drippings fall into pan, which keeps drippings from creating flames. Occasionally, turn chicken end over end. Chicken is done when thermometer reads 165 to 170 degrees.
 Heavy aluminum foil 1 large smooth river rock for (2 medium-size smooth rocks) Clean")


163 Stone Chicken Boy s Life Magazine Nov, 2007: Troop 33, Charlotte, NC Whole chicken Salt and pepper Fresh sage (diced) Heavy aluminum foil 1 large smooth river rock for (2 medium-size smooth rocks) Clean stone(s) and place in fire. Make sure each stone is dry; residual moisture could result in popping rocks. Season chicken inside and out with salt, pepper and diced sage. Using tongs, place stone inside chicken. Wrap chicken tightly with foil. Place inside gallonsized zippered bag (to catch juices). Place bagged chicken inside of a burlap bag filled with straw or dried grass or leaves (this acts as insulation). Tie burlap bag and let cook 5 to 6 hours. Chicken is done when thermometer reads 165 to 170 degrees. The burlap bag can be left to cook at your campsite or carried in a backpack. The stone cooks the chicken as you walk.
164 Curly Dogs 8 frozen dinner rolls, thawed but still cold 1 package hot dogs, 8 count Instructions Roll each roll into a 14 to 15-inch rope. Twist rope around each hot dog 4 or 5 times, securing ends in dough. Cook slowly on a stick over hot coals until golden brown. Serve immediately with desired condiments. Can also be prepared on a grill or in a Dutch Oven. Three Minute Pizza 1 pkg. pita bread 1 can spaghetti sauce 1 cup grated mozzarella cheese 1 pkg. sliced pepperoni Any other toppings as desired Equipment aluminum foil can opener spoon Instructions Cut pita in half and spoon spaghetti sauce into pocket spreading evenly. Add mozzarella and pepperoni and any other "toppings" you wish. Wrap in heavy duty foil and place in coals. Cook for 1½ minutes on each side. (You just want it to get warm and to melt the cheese. For really hot coals this is plenty of time.) Comment: Serve with salad for a quick meal or it makes a great campfire snack! Can be cooked on a grill as well. Heavenly Fish Fish Fillets (trout is best) Cherry tomatoes Lemon Garlic Lemon salt Foil Lemon/Lime soda Start with heavy duty foil and tear off a square, if using thin foil, double it up. Place a fish fillet in the foil, trout's the best to use for this recipe, but any fish will do. Place halved cherry tomato, halved small lemon, and a pinch of garlic and lemon salt in the foil. Pure about 1/3 cup of Sprite or 7up in the foil. Seal the foil tightly and place the pocket on the coals for approximately minutes. Remove from coals
 About ¼ cup olive oil Juice from 1 lemon Salt and pepper Dried")

 head first with tail sticking up straight.")
165 Fish on a Skewer Fresh fish, cleaned inside and out (trout, crappie, bluegill, perch, brim, catfish or bass) About ¼ cup olive oil Juice from 1 lemon Salt and pepper Dried parsley Wooden skewers 12 inches long Directions Mix olive oil, lemon juice, salt, pepper and parsley together then brush on cleaned fish. Starting at the tail end, spear skewer through fish, with pointed end coming out through mouth. Place fish in coals (no flames) head first with tail sticking up straight. Cook for about 10 minutes until flaky (165 degrees).
166 Coffee Can Stew Meat: Bacon + meatballs(ground beef/turkey/sausage or store-bought); beef stew meat; or diced chicken breast. Diced Veggies: potatoes, carrots, green peppers, celery, rutabaga, tomatoes, onions, etc. Various spices. Water. Equipment Empty coffee can and aluminum foil Oven mitts. Instructions Put some cut up bacon in the bottom of the coffee can, this keeps the rest from sticking. Next layer meat, veggies, and spices until the can is about 3/4 full. Put in about 1-1 ½ cups water. Cover can tightly with foil. Sit can in hot campfire coals for about 1 hour. NO PEEKING! Use oven mitts to take cans out of the coals. Stir up stew and serve Comment: Have everything cut up beforehand and let each person add what they want to their stew. Hobo Dinner 18-inch heavy-duty aluminum foil 2 carrots, peeled and thinly sliced 2 medium potatoes, peeled and thinly sliced 2 onions, sliced *1 pound ground beef, shaped into four patties 1 teaspoon salt 1/2 teaspoon pepper Optional: other favorite seasonings Cut four squares of foil. Divide vegetables into four equal portions. Layer with one-half carrots, potatoes, onions and ground beef; finish with onions, potatoes and carrots in that order. Season with salt and pepper. Seal using the drugstore wrap as explained above. Cook on a bed of hot coals for 15 minutes on each side. Serve as a main dish or supper. Serves four. *Breast of chicken or fish fillets can be substituted for ground beef patties. Cooking time may need adjusting.
167 Kid s Favorite Foil Dinner A camping recipe from Char from Fife, Washington. My kids, now grown (21 and 24 ), still ask if we are going to have this when we go camping. 1 pound ground beef or turkey 2 stalks celery, cubed into small pieces 2 cups baby carrots 2 medium potatoes, diced 1 small onion, thinly sliced Seasoning salt, to taste (see dry rubs in Grilling section for options) ketchup or steak sauce, whichever you prefer Preparation Take a 12" piece of foil, put ¼ of the meat on it, flatten it into a patty shape, sprinkle with seasoning salt (or favorite seasoning or dry rub), and then top with one quarter of all other ingredients. Sprinkle again with seasoning salt and wrap tightly with the foil. I always wrap with another piece, just to be safe. Continue to make three more foil dinners. Place on grate over campfire coals for 45 minutes, turning over about every 10 minutes. Remove from fire, put pouch on plate, open and enjoy. Servings: 4
168 Corn on the Cob SIDE DISHES Always cook corn with the husks on to protect it from burning during cooking. The corn is much sweeter than when cooked in water. Aluminum foil, Ears of corn with husks, Butter or margarine, softened, Salt & Pepper Method #1 Corn with husk (preferred) Peel back the husks from the ears. Remove the silk. Spread with butter; season with salt and pepper. Pull the husks over the ears of corn and wrap individually in aluminum foil. Cook on a bed of hot coals for 10 to 15 minutes, turning frequently. Method #2 Corn without husk Brush ears with butter. Add salt and pepper. Wrap each ear individually in aluminum foil and cook on grill over a bed of hot coals for 15 to 20 minutes, turning frequently. More Preparation The ears of corn should be soaked in cold, salted water for a half hour to an hour. This helps to keep them from drying out or cooking too fast, and the salt brings out the sweetness of the corn. Fire Begin by building a hot fire. The idea is that you want to continue to stoke the fire until you have a hot bed of coals. The coals are what cooks the corn. Once you've reached the point where the coal are hot, the corn can be added to the fire. Just leave the shucks on the corn, or wrap each ear in foil if there are no shucks. If foil is used, the shiny side should face the corn. The foil should completely cover each ear of corn. Both methods allow the corn to cook while also sealing in the flavor and sweetness. Cooking Place the ears of corn into the coals, arranged around the sides rather than in the middle, to prevent overcooking. A set of long handled tongs such as those sold for barbecuing, is good for this, and subsequent steps. Remember that the coals are hot and that there is a difference between cooking the corn in the fire and cooking it over the fire. Allow the corn to cook about 10 to 30 minutes, depending on the heat of the coals, turning them occasionally so they can cook evenly. This should also be done gently. The corn kernels become softer as they are cooked, so too much pressure on the ear can cause them to rupture. After they are done, remove the corn from the fire and allow them several minutes to cool down, since the ears will be hot and steamy. Remove the foil or pull back the shucks. These will retain moisture in the form of steam, so use reasonable care when doing this, so you don't burn yourself. The shucks or foil allow the corn to cook in its own juices, as the shucks concentrate it toward the corn as it is cooking. Serving Butter each of the hot corn ears and salt to taste. As a special tip, a slight sprinkle of sugar can help bring out the flavor of the corn. This trick has been long used by some of the best cooks, whether the corn is on the cob or not. Cooking the corn in this way is even suitable for a barbecue. Note, however, that the starches in corn can easily caramelize. That is, the corn turns black, if it gets too hot. The corn is still very good tasting, but it doesn't look as appealing. Additional ideas Dusting the corn with onion or garlic powder can enhance the flavor. Campfire cooked corn on the cob is also great when served with fresh and cold tomato slices. Best of all, the corn can be served with most meat dishes as a natural compliment
169 Scalloped Potatoes Red Potatoes Parmesan Cheese Equipment Heavy Duty foil Yellow Onions Butter Knife Instructions Cut potatoes into thin slices Cut onion into 1/4" slices and cut slices into quarters. Place on half the foil sheet then Add some butter, top with parmesan cheese Wrap and place on coals minutes according to taste. (Any heating source will do.) Comment: This is a simple and tasty side dish to any meal! Campfire Potatoes This meal pretty much cooks itself - just leave it in the coals! Be sure to count how many potatoes you put in the fire, because the becomes covered with ash, and blends in well with the coals. foil Large baking potatoes Whole onions (red or yellow) Seasoning: Dill, parsley, bacon bits, salt pepper Butter Directions Slice potato almost all the way through, but leave enough to hold it together. Slice the onion, and put one slice in between each potato slice. Sprinkle with bacon bits and a little dill. Wrap well with heavy aluminum foil and bury in the coals of the fire. Leave untouched for about 45 minutes, and test for doneness by piercing with a fork - the fork should lift out without lifting the potato. Cooking time depends on size of potatoes and strength of fire. Serve with pat of butter and a few sprigs of parsley.
170 Pocket One-ders Here's a wonderful method for campfire cooking which is simple, versatile and doesn't even require cookware or a grill. All you need is some heavy-duty tin foil. Tear off a 12" sheet of foil and fold it back over your fist, making a "pocket". Roll the sides in a few turns so the pocket is only open at the top, and roll a turn or two up from the bottom for extra strength. The pocket needs to be leak-proof, and formed well enough to withstand cooking directly in the coals. If your foil is thin, you may need two layers. Start by lining the bottom of the pocket with thin slices of lemon. This helps keep the food contents from burning, and imparts flavor to the meal. Chop potatoes and carrots (cut small enough to cook all the way without overcooking everything else), tomatoes, mushrooms, peppers, onions, green beans, etc. and stuff the pockets. Add garlic, salt and pepper, olive oil, and a dash of cayenne. Add 1/4 cup of water (or broth), fold the top edges of the pocket closed and set directly into the hot coals...it takes anywhere from 20 to 40 minutes, depending on how everything's cut. All the veggies slow roast in their own juices!


171 BREADS, BISCUITS, ETC. Bannock, the Bread of Adventurers Bannock, the word itself has a ring of adventure to it, if you have ever read many books or articles about the early days of exploration of North America. There are lakes and streams in the far north that have been named after this famous bread, and more than one sled dog was named Bannock. Bannock is a Gaelic-rooted word that comes from the Latin panecium, which means baked things. Add a thousand years of passing the word from Hadrian s soldiers to Scottish ones and you see how panecium became bannock. The European version of bannock originated in Scotland and was made traditionally of oatmeal. The first European explorers to the far north of America brought bannock with them and it became the bread of the wilderness. From the early 1700s until today, those who spend much of their time in the backcountry depend upon this simple but delicious bread. A bannock is a small, flat loaf of bread risen by a leavening agent, most often a chemical one, although yeasty bannocks are sometimes baked, as in a sourdough recipe. They are meant to be cooked hearth-side, whether a fireplace or a campfire. They are simple, and in the woods, simple is good. Bannock is Versatile The bannock mix can be used for pancakes, dumplings, cakes and rolls. It is an easy bread to have in camp regardless of whether you are cooking on a stick, modern oven, Dutch oven, reflector oven or sheepherder s stove. Bannock bread cooked on a stick

172 Campfire Bannock There are many variations to be found on this simple recipe. Use this as a starting point. Serves about 6. 3 cups flour 1 teaspoon salt 2 tablespoons sugar 2 tablespoons baking powder ¼ cup butter or shortening Optional: 3/4 cup powdered milk. 2 eggs Milk instead of powdered milk & water Pinch of baking powder At Home Mix all of the ingredients in a bowl. Stir until the shorting has became well dispersed and the texture is even. Store the mixture in a plastic bag, squeezing out the excess air before sealing. Store the bags in a cool place. At Camp Allow about 15 minutes in your meal schedule for preparing and frying Bannock. Add water to the mix in the bag by pressing and squeezing with your hands. Add enough cold water to the bannock mix to make a soft dough. Mold this rapidly, with as little handling as possible, into a cake about 1 inch thick and lay into a hot cast iron skillet. The reason for handling the bannock as little as possible is that when the liquid is added to the dry mix, it releases gas from the baking powder. The gas causes the dough to rise. Rough handling can cause the gas to escape, leaving you with flat, hard bread. It is worthy to note that cold water releases the gas much more slowly than warm, giving more time to form the bread and get it into the pan. Squeeze the dough out of the bag into the frying pan. Twist the bag from the bottom down, as if you were wringing water from a towel, and you won't waste a drop. Pat the dough with a spatula until it settles to a uniform thickness of about one inch and place the pan over a bed of hot coals, or a wire grill. Once the bannock is in the hot skillet, hold it over the fire until crust forms on the bottom, and then turn it over. Now prop the skillet at a steep angle in front of the fire so that the loaf will receive a lot of heat on top. When it looks golden brown, test it for doneness by sticking a twig in the loaf. If the dough sticks, the loaf needs to cook longer. After you have cooked bannock awhile, you will learn to tap it with your finger and gauge by the hollow sound when it is done. It usually takes about 15 minutes to cook. Options and Tips: - Make a hole in the center of the dough in the skillet so it cooks more evenly - Try making individual biscuit sized servings - Add a variety of ingredients: o Breakfast: Brown sugar, raisins, cinnamon, chopped apples, dried fruit, etc. o Snack or Dinner Rolls: Add herbs, cheese, or even bacon - Experiment this is a base for many delicious meals
173 Cinnamon Bannock Delight Howard Holtman 1½ cups enriched white flour or bran flour 1 round tsp. fresh baking powder 1/4 tsp. salt 2 Tbsp brown sugar 1 Tbsp butter 2 rounded Tbsp powdered milk 2 tsp cinnamon 1 handful raisins 1. Warm about a cup of water. 2. Mix 1 the butter with brown sugar. Add remaining dry ingredients (but not the raisins) and cut butter/sugar mixture into dry ingredients until no lumps exist. Now add raisins. (Add raisins only after lard and dry materials have been mixed otherwise you will have trouble "cutting" in the lard with the dry materials) 3. Carefully add a little warm water and mix. Add more water as needed mixing thoroughly after each addition. Do not add too much! Dough is wetter than it appears before being fully mixed. As soon as dough forms a ball stop adding water. Dough should not stick to hands. Form the stiff dough into a ball, and set pot near fire, where dough will stay warm and rise. Allow a full 10 minutes. Do not miss or rush this step. 4. Check your fire when you put the dough down to rise. You will want nothing but coals/embers to cook on, and you will need the embers for about 20 minutes. Put on a couple of small logs at this point and in 10 minutes they should be burnt down to embers 5. Remove dough from pot and place into a greased pan. Press dough into frying pan to a maximum depth of 1 inch and cook flat over moderate heat for 8 to 10 minutes a side. (Moderate heat means coals only. If flame touches the pan, bannock will burn) If all previous directions have been followed, bannock will be cooked through in 16 minutes. Sometimes it takes a little longer. To check if done, tap the bannock on each side. It is done when it sounds hollow. Total time should be 30 to 45 minutes depending on cooking time: 4 minutes to make dough, 10 minutes to rise, 16 minutes to cook. Variations/Hints If you have problems it is because: 1. You added too much water and dough will be wet/spongy inside. Try again adding less water. 2. You did not let the dough rise for at least 10 minutes in a warm place (80 + degrees) and bannock was flat and spongy 3. You cooked it too fast (burned on outside & moist on inside) or over too low a heat (very light brown on outside & moist inside) But with practice you will make beautiful bannock every time! Comments This does take practice to get golden brown and cooked all the way through. Once you get it your group will demand it every day.


174 Variations on Bannock Dumplings Make a bannock dough while cooking a pot of soup...when soup is nearly ready, spoon small golf ball sized pieces of bannock dough into soup to make dumplings. Breakfast Bannock. Use basic bannock recipe but add a packet of vanilla sugar and a handful of dried berries...serve hot with honey or maple syrup. Pancake Bannock Prepare breakfast bannock as above but also mix in 1 tsp milk powder and 1 tsp egg powder OR 1 whole egg and 1 tbsp milk powder...add enough water to make a thick pancake batter. Fry as pancakes and serve with maple syrup! Pizza! I carry 2 or 3 packs of instant yeast in my camp larder just to change up the bannock. Start with basic recipe. Take a packet of instant yeast and in a separate zip-lock add yeast, 1 cup lukewarm water and 1 tbsp of sugar. Let yeast mixture sit for 10 minutes to activate yeast. Add yeast mix to dry bannock ingredients, knead and add more lukewarm water as needed to make a dough. Let dough rise for 10 minutes in zip-lock. Remove from zip-lock and flatten dough to make a pizza crust...add tomato sauce and toppings and bake in the fire, Outback Oven, or Reflector Oven! Campfire variation for pizza pockets Divide the dough into two balls. Flatten the first and place into an oiled pan and place on the fire, spread on a little tomato sauce and some of your favorite cheese. Take the second ball of dough and flatten and place on top of the toppings...bake as a bannock for a cheesy Pizza Pocket treat! Peaches and Cream Bannock 1 pack basic bannock mix 2 packages Quaker instant oatmeal, peaches and cream flavor Mix dry ingredients well together, add enough water to make a dough and bake.
175 Savory Garlic Bannock 1 zip-lock of Basic Bannock mix 2 tbsp dry garlic granules 3 tbsp dry onion flakes 1 packet instant yeast 1 tbsp sugar 2 tbsp parmesan cheese and 1 tbsp melted butter or olive oil (optional) Add garlic and onions to a zip-lock with 1 cup luke warm water and let rehydrate for ten minutes. Prepare instant yeast mixture as above. Pour yeast and garlic/onion mixes into dry Basic Bannock ingredients, knead and add more water as needed to make a dough...bake as per basic bannock instructions. Optional...at the last minute before bannock is finished...brush loaf with butter or olive oil and sprinkle with parmesan cheese Cinnamon Rolls Mix up your favorite bannock mix, and roll it out thin on a flat surface. Spread a thin layer of margarine over the entire surface. Sprinkle brown sugar and powdered cinnamon on top of the margarine. Roll up like a jelly roll, and place in an oven to bake. Dog Biscuits Slice a wiener open and fill with a small slice of processed cheese. Secure the wiener to a green wood skewer. Take a piece of bannock dough in your hand, and flatten it out into a 4 by 4 inch piece. Completely enclose the wiener in the bannock, and pinch the ends tight to secure the wiener and filling. Roast over the coals, making sure to rotate it often enough to cook the bannock evenly on all sides. Cooking should take approximately fifteen minutes. For a different variation, try changing the type of filling. some possibilities are: Sauerkraut, pickles, cheddar cheese, Swiss cheese, blue cheese, chilli, beans, hot peppers, etc...
176 Tips for making Bannock There are no rules. You will find there are many recipes for Bannock, and they can vary quite a bit. Bannock is usually made from whatever ingredients you have on hand. The recipe will be altered to create the type of mixture you require, for whatever method you are cooking it. Minimum ingredients would include some type of flour, and a liquid to bind the flour together. I have eaten bannock made from just flour and water, cooked on a hot rock, in an open fire, and I found it to be delicious. However, if you took the same two ingredients, and mixed in too much liquid, you will create a great glue for paper mache. In order to make great bannock, you must practice, practice, practice. Typical bannock recipes might include ingredients from the following categories: Flour White all purpose, whole wheat, cracked wheat, etc Exotic types of flour could include flour made from the roots of plants, and the inner bark of trees. Rendered Fat Butter, margarine, cooking oil, bacon grease and lard are among the modern favorites Baking Powder Necessary for the bannock to rise (fluffy and light in texture) Salt A pinch will help bring out the flavors Sugar Brown is my favorite Always thoroughly mix the dry ingredients, then add the fat and mix again until it is all absorbed. Lastly add the water, a little at a time, until you have a dough of the right consistency for your cooking method. There are many things you can add to Bannock to alter it's taste. Flavored instant oatmeal can change taste and texture Milk, either powdered or dry, will cause the bannock to brown when baked Adding cornmeal, or rolled oats can change the texture Any sweet liquid can be a substitute for both sugar, and moisture. Some examples are corn syrup, maple syrup, honey, orange juice, Baileys, etc Add instant coffee, or cinnamon Try adding candied fruit, brown sugar, and cinnamon for a dessert style bread. Cooking methods can change both taste and texture Baking in an oven usually produces a light, airy type of bannock If you roast it over, or in an open fire, the bannock will pick up some of the smoke flavor of the fire. It will absorb the flavor of any type of fat you fry it in. If thinned out, and poured into a hot, dry skillet, you will have hot cakes You can steam raw dough on top of any type of stew to create dumplings.
177 Bannock-on-a-stick The recipe is simple enough. The execution, however, can be challenging, especially if you're not used to cooking over a fire. For this reason, I've included some tips, gleaned from a lifetime of bannock-on-a-stick-making memories (both triumphs and tragedies) that will help you make that perfect, deliciously golden tube of bannock... Makes about ten servings. Halve the recipe for smaller groups 3 cups flour Dash of salt 1 tsp baking powder 2 tbsp lard or Crisco (canola or corn oil can be used as a substitute) Water Before leaving on your trip, mix dry ingredients and the lard (or oil) in a large Ziplock-style bag (double bagged) or sealable container. Do not add water. Making the Stick Wrap foil around the end of a broom stick (walking stave), about up, starting at the tip. Mixing the Bannock Mix with Water Gradually add water to the dry ingredients. This can be done right in a zip-loc bag or in a bowl. Your dough should be slightly sticky, so it will adhere to itself and the stick. Be careful, though. If you add too much water, your dough will droop off the stick when you cook it. Tip: If this is your fist time making bannock-on-a-stick, Bring the bannock mix in re-sealable bags, but also bring a container for mixing water into the dry ingredients. Reserve some of the bannock mix in case you accidentally add too much water. As you become more comfortable with the amount of water to be added, you can keep your hands clean during the mixing by mixing the dough directly in the bag (if you intend to use the whole amount of bannock mix). Putting the Dough on the Stick Take some dough, about the size of 1-2 golf balls, and wrap/twist around it the stick. Twisting it around the stick helps to keep the dough from splitting along the seam (and falling off) as it cooks. If you want your bannock to cook quickly, apply the dough thinly. If you have a little more patience and want your bannock more bread-like, use more dough and wrap it a little thicker. Cooking the Bannock over the Fire You don't need big pieces of wood; wrist-sized pieces of wood will give you better coals faster than big logs will. Be patient. Cooking your bannock over flames will blacken the outside of your bannock and will leave the inside doughy. Instead, wait until a good bed of coals has been made and cook your bannock over the coals, rotating your stick as needed. Removing the Bannock from the Stick If your bannock is golden brown and you think it had cooked right through, it's time to remove it from the stick. Be careful, because it will be hot! If your bannock slides easily off the stick, it's cooked through. If it wants to cling to the stick, the inside is still doughy and it needs to cook longer. Tip: Slice along the length of your cooked bannock with a knife and tuck some of your favorite jam into the hole for an extra-tasty treat.
178 Foil Biscuits Recipe Biscuit or ready-made, Butter (Squeeze or stick) Equipment Foil Instructions Foil should be long enough for the biscuits to be laid out in a line. Place enough butter on the foil to completely coat it. Place biscuits in the center and seal foil. Make sure the foil is a little baggy around the biscuits. Wrap in another strip of foil and place directly on the coals. Turn every minute. Depending on the heat will be done within 5-8 minutes. The butter acts as the grease and you don't need to butter them when they are done.
179 DESSERT Banana Boat 18-inch heavy-duty aluminum foil 1 banana, unpeeled Miniature marshmallows Milk chocolate chips or broken candy bars Cut a slit lengthwise about two-thirds of the way through the banana from the stem to the base. Fill the slit with miniature marshmallows and milk chocolate chips or broken pieces of chocolate bars. (I like to use milk chocolate chips because they melt in your mouth, in your hand they melt everywhere.) To heat the banana boat, wrap in foil and cook on hot coals for five minutes, or until the chocolate and marshmallows have melted. Serve as a snack, a dessert or a treat around the campfire. One word of caution: If you leave the boats in the coals too long, the bananas will liquefy. You can also create a fruit banana boat by using maraschino cherries, shredded coconut, nuts and pineapple Apple-sweet Make a hole in an apple, so the seeds are gone. Put apple on top of a piece of tinfoil. Then mix some sugar with cinnamon (also can try syrup). Pour the cinnamon mixture into the hole in the apple. The tinfoil prevents it from running away. Then wrap the tinfoil around the apple. Put it for minutes in the fire. Result: a nice soft apple-sauce in an apple skin! Orange Brownies Oranges (1 per person) Brownie mix (and ingredients needed as labeled on the box) Foil Take an orange, and cut about half an inch off the top, keep the top. Use a spoon to scrape out the insides. Fill the orange with brownie mix (follow directions on box to make the mix). Put the top back on the brownie and completely cover the orange in foil. Cook the orange in the coals for about 20 minutes or until the brownie is done. Enjoy the brownie with the orange pieces you scraped out earlier.
180 .

181 Cooking with a Pie Iron What is a Pie Iron and just how do I use it? A Pie Iron is a mold of cast Iron with handles. Each side also serves as a small skillet. Bread is placed in first and then the filling into the generous cooking cavity. The two sides and then sandwiched together and placed over hot coals. The solid cast iron design holds up to the rigors of the campfire and must be watched closely to avoid burning. Pie Iron's are fun to use, and make terrific sandwiches and desserts. One word of caution - the fillings can get very hot! In its most basic function, a pie iron is a way to cook grilled cheese sandwiches and fruit pies over a campfire. This is done by placing the food (in the above cases, two pieces of buttered bread with cheese or fruit filling) inside a cooking compartment formed by two metal casting that hook together using a hinge. Metal rods with wood handles extend from the castings so the user can easily maneuver the pie iron over a campfire. A few minutes over the heat and a perfectly toasted sandwich or pie emerges from the cooker. This all is related to foil cooking but better. Look over these recipes below and enjoy. Pie irons must be seasoned, cleaned and cared for the same way any other cast iron cookware is maintained, such as a Dutch oven.
182 PIE IRON RECIPES Breakfast Recipes :: Bacon, Egg & Cheese Biscuit :: 1 Egg for each Biscuit / Bacon, fried Buttermilk Biscuits, canned / Cheese, sliced The ingredients are for 1 sandwich, so it s good to cook up a batch of ingredients first for a herd. Start by frying some scrambled eggs (or individual eggs, breaking the yolks) and bacon, nice and crispy. Set this aside and spray oil on both sides of your Pie Iron, then take a large biscuit for each side from the can (or 2 if they are small ones). Roll or pat them out thin (big enough to flop over the edges of the Pie Iron) and lay 1 in the oiled Pie Iron, now layer some scrambled egg, a slice of bacon (cut in half) and top it off with a cheese slice (your choice), put the other biscuit on top and close up the Pie Iron. Cook for a few minutes on each side over medium heat, turning periodically, until golden brown. These make great breakfast sandwiches, the biscuits really "Puff" up. Be sure to have lots of Pie Irons handy if you have a large stock of hungry campers to feed. Us "Kids" really love these... :: All-In-One Boondockers Breakfast :: Bacon, 1 slice for each / Egg, 1 for each Cheese, sliced / Bread, your choice First, make sure your fire is going well and everyone has had their first cup of coffee. The ingredients listed are for each Breakfast Pie. Now, spray your Pie Iron with oil, then cut your bacon strips in half and lay them in the bottom of the Pie Iron. Put a piece of bread on top of the bacon (no oil needed), gently pressing it down. Crack an egg on top of the bread and break the yolk, then add a slice of cheese and top it with the remaining slice of bread (oil or butter this one on the outside). Close up the Pie Iron, trim any protruding bread and cook, turning periodically. Check it every now and then, when the bacon looks done the egg should be done also. Let it set for a few minutes in the Pie Iron after its removed from the fire to cool down and finish cooking...
183 :: Chunky French Toast :: Bread, your choice / Eggs, 1 for each Milk, just a bit / Syrup or Jam, as topping To start, make an egg wash by whisking your eggs with a Tbs. of milk per egg, you can add a little grated nutmeg or cinnamon if you wish. Now, cut or tear your bread into "Chunks" about 1/2" is size. Put your bread chunks in the egg wash and mix it up a bit so its all coated. Spoon into your oiled Pie Iron, close it up and cook over medium heat, turning frequently, so it won't burn, until it s done. This is my favorite way to make French toast in a Pie Iron, because it s so easy. Top with butter and serve this with jam or syrup and maybe a few slices of crispy fried bacon.. :: French Toast a la Preserves :: Eggs / Bread, white, sourdough, raisin, whole wheat Milk, just a little / Preserves (your choice) / Cream Cheese, softened Make an egg batter by beating a Tbs. of milk with each egg used. Now, mix some preserves with the softened cream cheese and spread on a slice of your bread (keep it towards the middle), top with the other slice of bread and soak in a dish about the same size as the bread for about 1 minute, flip it over and let the other side soak for another minute. Seal it up in your trusty ol' Pie Iron (oiled, of course) and cook for about 3 minutes per side or until a nice golden brown. Serve with a couple of slices of crispy bacon and top with butter and a dusting of powdered sugar... :: Campfire Cinnamon Rolls :: Tubes of Refrigerated Cinnamon Rolls These are great for Sunday morning breakfast or even as a snack. Spray or butter your Pie Iron sections and also the individual rolls. Close 'em up in the Pie Iron and cook over med~low heat until done (they need to cook slow so the outside doesn't burn before the inside gets done), turning often. When done, spread with the glaze and enjoy (I like mine with just a little butter on top). Everyone can make their own cinnamon rolls. You better have extras, and a pot of coffee, on hand for all the neighboring campers that just happen to drop by...
184 :: Egg N' Burger Onion Basket :: Eggs / Onions, medium size Ground Beef and/or Ground Sausage / Salt & Pepper This is kind-of fun to make and good too. To start, cut the ends off of an onion and then cut this in half, across the middle (still keeping rings intact). Now, peel the halves and then push out the centers leaving single thick onion rings. The onion ring is the basket which will hold an egg. Put the onion ring in the center of the Pie Iron (small end down) and pack ground beef (I like a mixture of beef and Jimmy Dean Sausage) around the onion, don't be shy, fill it up as the meat will shrink some as it cooks. Now, crack your egg in the center of the onion ring, close up your Pie Iron and cook for about 8 minutes over medium heat (you'll have to pour off grease as it forms so have a can or bowl handy), turn it over and cook another 4 or 5 minutes. You can open it up and check the egg for doneness (just touch it for firmness). If you don't want to use the meat you can substitute hashbrowns instead... :: Cheesy Bread Pudding :: 8 slices Bread, stale / 3 Eggs, beaten / 3/4 cup Milk Salt & Pepper, to taste / 2 cups Cheese, your choice, shredded First, break the bread into small pieces into a bowl. Next, beat the eggs, milk, salt & Pepper in a bowl and then add to the breadcrumbs. Beat it together with a fork or egg beater, add the cheese and mix well. Spoon into well oiled Pie Irons and cook over medium heat turning often until nicely browned on the outside and done on the inside. Turn out onto a plate and serve with a couple slices of bacon. :: Peanut Butter & Jelly Omelet :: 3 Eggs / 1/4 cup milk 1 heaping Tbs. Peanut Butter / 1 heaping Tbs. Jelly or Jam Beat everything together with a fork in a small bowl and pour into an oiled Pie Iron to just below the rim. Cook over med/low heat for a few of minutes on each side, it doesn't take long. Check to see if your eggs decided to stick, if so tap the pie iron a few times to unstick them. This makes 2 omelets if using large eggs, 3 if using jumbo sized eggs. You can top your omelet with a spoonful of Peanut butter and jelly, too...
185 :: Pie Iron Frittata :: 1 slice Bacon / 4 slices Potato, or use Hash-Browns Veggies, chopped / 1 Egg, whisked / 1 Tbs. Milk Salt & Pepper, to taste / Cheese, your choice Italian Seasoning, just a dash To start, cut your bacon into thirds and put in the bottom of your Pie Iron (no need to oil), top with 4 thin slices potato (I used Yukon Gold) or some thawed shredded hash-browns, add your chopped veggies (I used broccoli slaw). Now whisk the egg with a tablespoon of milk (I added a teaspoon of pesto to mine) and spoon over your ingredients in the Pie Iron just about to the rim. Spray the top with oil, close and cook, without turning, over med/low heat for 7 to 8 minutes. At the end, add the cheese of your choice and a dash of italian seasong and give it a minute to melt. Toppings can include tomato, sour cream, salsa, etc... :: Tater-Tot Patty :: Tater Tots, thawed / Onion & Red and Green Bell Pepper, chopped fine Garlic Salt, Pepper, to taste / Cheese, shredded, your choice Spray your trusty Pie Irons with oil and layer one side with thawed Tater Tots, give it a shake of garlic salt, a grind of pepper and a heaping tablespoon of chopped onion/pepper mixture. Close the Pie Iron and cook for about 5 minutes per side over medium/low heat, open the Pie Iron, sprinkle with cheese and cook for another minute (cheese side up). To serve, slide it out onto a plate. I top mine with a couple of Pie Iron Basted Eggs (below) and a few shakes of Tabasco sauce... :: Pie Iron Basted Eggs :: 2 Eggs per serving / 1 Tbs. Water Spray both sides of an opened Pie Iron, crack 2 eggs into the bottom side and put over medium heat for a minute. Open the top and pour in about a tablespoon of water, close the top and cook for a few more minutes until its done the way you like it. Try not to peek, you'll let the steam out. There's no need to cook both sides as the water will cook the top as it steams. Invert onto a plate to serve...
186 :: Biscuit Stuffed Onions & Peppers :: Onions & Red or Green Peppers / Refrigerated Biscuits First, cut the ends off of your onions and peppers and then cut them in half (crosswise) making rings about 1-1/4" thick. Clean the insides out of the peppers and carefully press out the centers of the onions, leaving a single ring. Oil your trusty Pie Iron and put a ring of pepper or onion centered in the middle (largest side up) and stuff the middle with a biscuit. Don't waste the corners of your Pie Iron, I like to stuff them with slices of sausage, veggies, etc. Long zucchini slices takes on a nice roasted flavor. Cook over low heat for 6 or 7 minutes on each side. I like mine tapped with a couple of Pie Iron Basted Eggs (above). This can also be topped with a slice of cheese at the end of cooking... Breakfast Pie Eggs Diced Ham, Bacon or Sausage Cheese Bread Instructions Before leaving for your trip, scramble some eggs and put them in a zip lock bag and store in the cooler (or use sliced, hard boiled eggs). When morning comes at the camp site, put eggs, cheese and diced ham (bacon or sausage will also work) together in between bread (buttered on the outside) and make the pie. They are "dishless" so less mess to clean up after! Breakfast Pie #2 Bacon Egg Cheese Bread Pam Instructions Spray your pie iron with Pam, then cut your bacon strips in half and lay them in the pie iron. Set 1 slice of bread on top of the bacon. Gently pat down the bread. Crack egg onto the bread. Lay cheese over top and cover with the other slice of bread. Close and cook slowly. When the bacon is cooked, the egg inside will be cooked. Awesome! Fried Potatoes Place sliced potatoes in cooker, add butter, salt and pepper (to taste) and close. Grill on both sides over low heat.
187 Lunch Recipes :: Hobo Bacon & Tomato Sandwich :: Bread, any kind / Tomato, sliced thin Bacon, fried crispy / Avocado, sliced Put a slice of your favorite bread (I like sourdough) on the bottom of an oiled Pie Iron (be sure to spray or butter the outside of your bread, too) and top it with crispy fried bacon, tomato, avocado and finally the other slice of bread (you can put some mayo on the bread if you want). Toast over hot coals for about 3 minutes per side, or until browned. Cheese can also be added, if desired... :: Elvis Sandwich :: Bread, Elvis liked white / Banana, sliced or mashed Peanut Butter / Bacon, fried crispy To start, butter the outside of your bread and put a slice in your oiled Pie Iron (butter side down, of course). Spread peanut butter on the bread, add bananas (enough to cover the peanut butter) and finish with a couple of slices of crispy fried bacon, add the remaining slice of bread and close up the Pie Iron. Cook until its golden brown (not too long, the peanut butter will be runny). Its true, Elvis really did like this sandwich. Do you think he tried it in a Pie Iron??? Grilled Roast Beef Sandwiches 1 Can (4 oz) Green Chilies, chopped 2 Tbsp. Mayonnaise (not salad dressing or Miracle Whip ) 1 Tbsp. Dijon Mustard 10 Slices Rye Bread 5 Slices Swiss Cheese 10 Thin Sliced, Cooked Roast Beef 2 Tbsp. Butter or Margarine, softened Salsa or Picante Sauce (optional) Instructions Combine chilies, mayonnaise and mustard. Butter one side of each slice of bread; place bread, butter-side down in pie iron. Spread about 1 Tbsp. of chili mixture on non-buttered side of bread. Top half of the chili mixture with one slice of cheese and two slices of beef. Close pie iron and cook until golden brown. Serves 5. Comments: Awesome! Can be assembled in pie irons a few hours before eating so you can hike, bike or do whatever and then put on the campfire when you're ready
188 :: Boondockers Spam Pocket :: Bread, your choice / Spam, sliced Cheese, sliced / Green Pepper, sliced thin Onion, sliced thin / Mustard Start by lightly sauteing the green pepper and onion in oil or butter. Oil up your trusty Pie Iron and put in a buttered slice of bread. Put slices of Spam on the bread and top with sauteed pepper/onion mix, spread on some mustard and top with your choice of cheese. Put the other piece of buttered bread on top and cook till golden brown and heated through. You can vary the ingredients to suite your taste, maybe add pickles, tomato, catsup, etc... :: French Toasted Tuna Melt :: 1 can Tuna (or Salmon) / Bread, your choice / 4 Eggs, beaten Milk, just a little / Tuna Salad Fixins' / Mayonnaise / Cheese, sliced Make some tuna salad with the tuna (or salmon, for a treat), mayo and fixins' (this can be done at home and kept in the cooler). Spread this on your bread and top with a slice of cheese of your choice to make a sandwich. Now, beat the eggs in a shallow bowl with a little milk (about 1 Tbs. per egg) and dip the sandwich in the egg batter, Cook in a well oiled Pie Iron until golden brown... :: Boondockers Taco Pockets :: Bread or Tortillas / 1/2 lb. Ground Beef, cooked, drained & crumbled 1/2 cup Sour Cream / 1/2 Pk. Taco Seasoning / Onion, chopped 1/2 cup Cheddar Cheese, shredded / Cilantro, a few sprigs chopped (optional) To start, fry your ground beef, crumbling it up as you go, add your taco seasoning (according to package directions) and let cool, you can do this at home and keep it in a ziploc bag in the cooler. At camp, mix the ground beef with with the sour cream, cheese, and cilantro in a bowl. You can use bread or tortillas (6" flour or corn), if using tortillas you can make 2 at a time, just insert them in the Pie Iron, stuffed with ingredients, sideways from corner-to-corner folded. When close your Pie Iron, trim the edges with a knife. Cook until the ingredients get heated thru and outside is a golden brown color. I like mine served on a plate and eaten with a fork, mounded with shredded lettuce, chopped tomato, and salsa...
189 :: Ham 'N Apple Grilled Cheese :: Deli-Sliced Smoked Ham / Baking Apple, sliced thin Bread, your choice / Cheddar Cheese, sliced or shredded Make a sandwich with slices of ham, apple (pared and sliced thin) and cheese (medium or sharp cheddar) keeping the ingredients inside the edges of the bread. Now, spray or butter the outsides of your sandwich, close into the Pie Iron, trim and cook over medium heat till nice and browned on both sides. Plain, simple and good. Try using sourdough bread... :: Crispy Grilled Cheese Sandwich :: 2 Eggs / 1/2 cup Milk / Bread, your choice Cheddar Cheese, sliced thin / 1-1/2 cup Corn Chips, crushed Start by mixing the milk and eggs in a shallow dish. Then, make sandwiches with the bread and cheese slices, dip on both sides in the egg wash and then press in the crushed corn chips. Insert in your trusty lubed Pie Iron, trim the edges and cook over medium/low heat until lightly browned and the cheese is melted. A new twist on an old classic. Let cool for a minute before eating, the cheese can get quite hot... :: Doggie In A Blanket - Pie Iron Style :: Hot Dogs or Sausages / Refrigerated Canned Biscuits / Cheese, sliced Use regular size hot dogs or sausages for these, they will fit in a regular 4" Pie Iron, corner-tocorner. You can use large or small biscuits, you can roll 2 small biscuits together for better coverage. Pat, stretch or roll out the biscuit dough large enough to roll your hot dogs in, I roll them out in waxed paper, lightly dusted with flour. Once you have your biscuit rolled out, cut a slit, longwise, almost down through the center of the hot dog and insert a slice of cheese, cut to fit, in the slit. Roll the hot dog up in the biscuit, seal the edges and insert in an oiled Pie Iron, corner-to-corner and cook over low heat, turning once, until nicely browned on both sides. Be sure to have some mustard and ketchup handy to dip 'em into...
190 Grilled Salmon Sandwich 1 Can of Salmon (or Tuna) Mayo Salt / Pepper Onion Powder or however you make tuna salad 8 Slices of Bread (I use wheat) 4 or 5 Eggs, scrambled Butter Instructions Make salmon/tuna salad, spread on bread to make like a sandwich. Melt a tab of butter in pan, dip sandwich in eggs and place in pan. Cook like french toast. Comments: My mother used to make these when we went camping, and I've tried it on our camping trips and it's a hit. Tuna Melts Mix canned tuna fish, chopped pickle and mayonnaise. Place on slice of bread, buttered side down, and add slice of Havarti cheese and a slice of tomato. Cover with remaining side of buttered bread and grill until hot and toasty Pie Iron Pizza 2 slices bread or one English muffin sliced in half 1 Tbsp butter 1 Tbsp pizza sauce 4 slices pepperoni 1 slice mozzarella cheese 1. Spread butter on one side of each slice of bread 2. Place bread in the pie iron with the buttered sides against the iron surface 3. Place cheese between the slices of bread and close the pie iron 4. Cook over the fire for several minutes, turning once, until bread is golden brown
191 Dinner Recipes :: Boondockers Salmon Cakes :: 1 lb. can Salmon / 10 oz. package Seasoned dressing Mix 1 can Condensed Cream of Mushroom Soup / Green Onions, sliced thin Salmon cakes (you can use tuna or crab, too) are great for dinner as a side dish or for breakfast with hash browns and a couple of eggs. To start, mix all ingredients in a bowl, you can do this at home and freeze this if you want for use at camp. Scoop thawed mix into an oiled Pie Iron (don't be stingy), add a tsp. of water and cook over medium heat, turning periodically until nice and crusty on the outside, the inside will be moist and fluffy. This will make about 6 cakes... :: Creamy Chicken Pot Pie :: Refrigerated Tube of Grand Size Biscuits 1 Can of Chunky Creamy Chicken Soup or stew (ready to serve style) Make sure you use a thick-and -creamy soup for this one, it doesn't necessarily have to be chicken. Open your tube of biscuits and stretch or roll the dough out so that it hangs over your Pie Iron some. Lay your first biscuit in the bottom section of the Pie Iron, spoon in chicken soup or stew (not too much, but don't be shy) and top with another stretched out biscuit and close up your Pie Iron. You can trim the edges of the Pie Iron now if you want, I like to wait and pull it off and eat it as it gets done while cooking. Its done when the biscuits are nice and golden brown, open your Pie Iron and peek periodically to make sure it doesn't burn. This should be eaten on a plate as it will be hot and could leak a little. Good as-is for lunch or serve with veggies and a salad for dinner... :: Roasted Garlic :: Garlic Heads / Olive Oil If you like roasted garlic (most people do once they've tried it), you'll be glad to know you can do it in the Boondocks with your trusty Pie Iron. Just give your Pie Iron a spray with Olive Oil spray, load it up with cloves (separated, but un-peeled) of garlic, cook over medium-low heat for 8 to 10 minutes, turning periodically. When done I cut the root-tip off with a sharp knife and just squeeze it out onto a crostini slice (toasted bread, I like sourdough French), spread it out with a knife. Have a small bowl of good quality olive oil handy to dip it into (or spray the crostini with olive oil before spreading the garlic) and hit it with a dash of salt and pepper.
192 Roasted garlic takes on a pleasant sweetness when its roasted and becomes soft enough to spread with a knife. You can also eat it straight out of the clove, or mash it with a fork in a small bowl and used for cooking. Try mashing with a little sour cream for baked potatoes, or mixed with grated parmesan for pasta. Who knows, It might even repel Vampires... :: Stuffed Onions & Peppers :: Small to Medium size Onions and Peppers Tube Refrigerated Biscuits / 1/2 lb. Ground Beef / 1/3 lb. Ground Pork / 1 Egg / About 7 crushed Soda Crackers 1/4 cup Chopped Onion & Green Pepper / Salt, Pepper, Garlic Salt (to taste) Your going to like these, they're stuffed with meatloaf and have their own biscuits, built right in. Cut the ends off of your onions and peppers and then cut them in half (crosswise), so you have rings about 1-1/4" thick. Now, clean the insides out of the peppers and carefully press out the centers of the onions, leaving a single ring (chop the insides and ends for the meatloaf). You can use your own favorite meatloaf recipe if you wish or use the remaining ingredients to make mine. Oil your trusty Pie Iron and put a ring of pepper in (or onion), centered in the middle. Stuff with the meatloaf mixture and cook for about 5 minutes, over med/low heat, open it up and insert biscuits (take a biscuit and cut it into quarters) in the corners, close it up and cook an additional 3 minutes. Flip the Pie Iron over and give it another 5 minutes or until done. Invert onto a plate and serve with your favorite condiments, I like catsup and mustard with chopped tomatoes on the side... :: Chicken Chimichangas :: 4-7" size Flour Tortillas / 1/2 cup Chicken, cooked & chopped 1/2 cup Onion, chopped / 1/2 cup Green Bell Pepper, chopped 1/4 cup Picante or Enchilada Sauce, green or red / 1/4 tsp. Ground Cumin Salt & Pepper, to taste / Garlic Salt, a few shakes 1/2 cup Cheddar Cheese, cubed First, cook the chicken, onion and bell pepper in a pan with a little oil until the onions turn clear. Add the cumin, salt & pepper and garlic salt and cook for a few minutes more and remove from heat, add the cheese and stir to mix. This can be done at home and kept in the cooler in a baggie until needed or it can be done at camp, in fact you can make the chimichangas up at home and freeze 'em wrapped in Foil. To make the chimichangas, put spoonfuls of chicken mix in the center of a warmed tortilla, fold the sides in, and then fold the bottom and top in to form a square (check to make sure it will fit in your Pie Iron). Oil your Pie Iron well, insert the chimichanga and cook over med/low heat until nicely browned on both sides and the chicken mix is well heated. To serve, place a chimichanga on a bed of hot refried beans and top with shredded lettuce, chopped tomato, sour cream and salsa. You'd better make lots of 'em, they're good...
193 :: Boondockers Potato Bake :: Potatoes, sliced thin / Onion, sliced thin Garlic Salt / Pepper Oil or butter your Pie Iron and layer with sliced potatoes and onions (give these a light oiling also and maybe even a splash of soy sauce). Season with garlic salt and pepper to taste and cook until done, turning often... :: Crab Crescent Roll-Ups :: 1-6-oz. can Crab Meat, rinsed & drained / 3-oz. Cream Cheese, softened 2- Tbs. Chopped Chives or Green Onions / 1/3 tsp. Garlic Salt Start by mixing the crab, cream cheese, chives (or onions) and garlic salt with a fork, mix well. Unroll the Crescent Rolls and spoon a heaping teaspoon of cream cheese mix onto the wide end, roll up and pinch the sides so it won't leak. Cook in your oiled Pie Iron (3 at at a time) for about 3 to 4 minutes per side. Let cool a few minutes before eating. I like to dip mine in a mix of Sambal Olek, Hoisin sauce and soy sauce (see your local Oriental market for these)...
194 Breads. Biscuits, Etc :: Savory Garlic Bread :: French Bread, thick sliced, or Hamburger Buns / Butter Garlic Salt, Paprika & Parsley Butter the bread or buns and sprinkle with garlic salt, paprika and parsley. Place in the Pie Iron and cook until they're a nice golden brown. If using buns insert them "inside out" (back to back) in the Pie Iron... :: Cornbread with Pizzazz :: Cornbread Mix, small box / 1 can Chopped Chillies 1/2 cup Cheddar Cheese, shredded / 1 small Onion, chopped Prepare the cornbread mix according to the package directions and mix in the cheese, onions and chillies (try chopped chipotle peppers with adobo sauce for a real zing). Fill a well oiled Pie Iron about 1/3 full and cook over low heat until done, turning often... Chile Cheese Cornbread Cornbread Mix 1/2 Cup Cheddar Cheese, Grated 1 Can Chopped Chiles
195 Pour mixture into a well greased pie iron to about 1/3 full. Bake over low heat Cornbread Prepare cornbread mix according to direction on package. Into a well greased cooker, fill cavity about one third with mix. Close, latch handles and bake over very low heat until done.
196 Biscuits 1 Small Can Pillsbury Buttermilk Biscuits (or like brand) 2 Tbsp. Melted Butter Sugar / Cinnamon Mixture (for cinnamon biscuits) 1 Tsp. Garlic (for garlic biscuits) Pam Instructions Spray Pam on pie iron. Open biscuits and separate. Cut biscuits in half and shape into balls. For Plain: Put a biscuit ball (buttered or unbuttered) in pie iron until golden brown. For Cinnamon: Put a biscuit ball in melted butter and roll in sugar / cinnamon mixture and cook until golden brown. For Garlic: Put a biscuit ball in melted butter and garlic salt mixture and cook until golden brown. Comments: You may cook biscuits by closing pie irons or if you are in a hurry, use two open-faced pie irons. This is also a fun activity for kids to get involved in the cooking.
197 SNACKS & TREATS :: Apple Raisin Pie :: 1 cup Apple Pie Filling / 1/2 tsp. Cinnamon / 2 Tbs. Raisins or Dried Cranberries 1 Pkg. Refrigerated Pie Crusts / 1 Tbs. Butter or Margarine, melted First, put your pie filling in a bowl and run a knife thru it to cut-up any large apple chunks, add your raisins and cinnamon and mix. Now, lay out your pie crust and cut to fit (just a little larger) your Pie Iron. Spray your Pie Iron and lay a dough piece in it, add a spoonful of filling, top with another dough piece and seal the edges by closing the Pie Iron. Next, open up the Pie Iron and brush melted butter or margarine over the top, close it back up and turn over, open again and brush the other side. Cook over medium heat for about 15 minutes, turning periodically until done. Its best to eat these on a plate as they will be HOT. For an alternative you can make these with a pierogi maker and even freeze them (thaw before using), I like the Pampered Chef Cut'N'Seal... :: Boondockers Monkey Bread :: Cans of Refrigerator Biscuits / 1 cup Sugar / 1 cup Brown Sugar / 1/2 cup Roasted Hazelnuts 2 tsp. Cinnamon / Butter At home, in a blender or food processor, combine the hazelnuts (optional), brown sugar, sugar and cinnamon until blended fine (you can run it thru a wire strainer to get any chunks out). At camp, cut your biscuits into wedge shaped pieces, 6ths (for large biscuits) or 4ths (for regular size), coat well in the sugar mixture and stuff a single layer into a buttered Pie Iron. Add a few dabs of butter and close the Pie Iron up and cook for 3 to 4 minutes per side over medium/low heat. Watch so they don't burn. Invert the finished Monkey Bread onto a paper towel and let cool for a minute. If you want you can drizzle a sugar (or fruit) glaze over the pieces. To eat just pull out the individual pieces and enjoy. You can also make savory Monkey Bread for dinner or breakfast, try coating the dough wedges with dried herbs, like sage, thyme, oregano or parsley, or try garlic salt. Try Pillsbury Grands Shortcake Biscuits for a sweeter Monkey Bread... :: Pie Iron Danish :: Grands Size Refrigerator Biscuits / Canned Pie Filling / Marshmallows To start, take your biscuit in hand and, working around the edge, stretch it out so its thin in the middle and thicker on the outside (like a pizza), lay it inside your Pie Iron and spoon some filling in (I like large fruit pieces in mine). If you use large marshmallows, slice them in thirds and put 3 slices in.
198 If you want you can top it with some canned frosting. You'll need to eat this off of a plate, it can be hot and a little messy, but good...
199 :: Peanut Butter Cups :: Bread, your choice / Chocolate Bar Peanut Butter Oil your Pie Iron and place a slice of buttered bread (butter side down) in the bottom half. Now, spread peanut butter in the center of the bread and top with pieces of your favorite chocolate bar. Put another buttered slice of bread on top (butter side out), close and trim the bread and cook till both sides are toasted a nice golden brown. Let cool a few minutes before eating... :: Caramel Apple Pudgie Pie :: Bread, your choice / Apple Slices Cinnamon/Sugar Mix / Caramel Apple Dip / Butter To start, peel, core and slice your apples. Now, oil your Pie Iron and butter 1 side of 2 slices of bread and put a piece (butter side down) in the opened Pie Iron. Layer some apple slices on the bread, drizzle with caramel, sprinkle with cinnamon/sugar mix and dot with butter. Top with the other slice of bread (butter side out this time), close and trim the Pie Iron and cook over medium heat until nicely browned. Let cook a few minutes before eating... :: Lemon Chiffon Pie :: Bread, your choice / Lemon Custard Pie Filling Mini Marshmallow's Oil the Pie Iron and butter the outside of your bread as usual, put a slice in your Pie Iron and spread a large spoonful of lemon filling in the center and tip iwth mini marshmallow's (OK, its not real chiffon). Top with the other slice of buttered bread, close and trim the Pie Iron and cook until the bread is a golden brown. The marshmallow will be your "chiffon" and will blend with the lemon filling when its cooked. Let it cool some before eating... :: Pie Iron Smores :: Bread, your choice / Hershey's Chocolate Bar Marshmallow's, large ones sliced Everyone enjoys Smores. Of course you can prepare this popular campfire treat in a Pie Iron, too. Oil your Pie Iron and butter your bread on the outside, put a slice (butter side down) in your Pie Iron. Layer pieces of chocolate bar in the center of the bread and put slices of marshmallow on
200 top of the chocolate (you can also use mini marshmallow's). Close and trim the Pie Iron and cook over the fire or in the coals until browned...
201 ::Turtle Pies :: Biscuit Dough, canned / Caramel Sauce / Pecans, chopped / Chocolate chips Flatten out 2 biscuits (if they're small use 2 for each side) and put them into an opened oiled Pie Iron, one on each side. Now, spread some caramel sauce on the inside of both biscuits and scatter pieces of chopped pecans and chocolate chips around on one of the biscuits. Close the Pie Iron and cook until the biscuits are puffed up and golden brown, turning often. Let cool a bit before eating, the filling will be "HOT"... :: Apple Blossoms :: Granny Smith Apples, large / 1 can Pillsbury Crescent Rounds First, pare and core the apples, slice crosswise in quarters creating rings about 1/2" thick. Now, separate the Crescent Rounds, unroll a roll and (carefully) stretch it out to about 15" long. Thread it through the center of an apple slice, wrap around, weaving back through the hole, all around the slice ending by pinching it to the beginning. Cook in a Pie Iron over low heat until evenly browned. I like mine as-is, but you can add icing, cinnamon/sugar, or??? Sunny Peach Sandwich 2 Slices Buttered White Bread / 1 Canned Peach Half 1 Marshmallow / Powdered Sugar Place one slice of bread buttered side down on one side of the iron, then a peach half with the marshmallow in the hollow. Now put the other slice of bread on top with the butter side facing up. Close the iron and toast over the fire. When your sandwich is toasted just right remove from the iron and dust with powder sugar. Comments: This is a childhood memory recipe. We would make this on the gas stove on cold wintry evenings in Michigan.
202 Apple Strudel 1 Can Pie Apples Cinnamon & Sugar (to taste) Raisins (if desired) 2 Sheets Puff Pastry Powdered Sugar (for dusting ) Cooking Spray Instructions Mix the apples, sugar, raisins and cinnamon. Heat pie iron, spray lightly with cooking spray. Cut each sheet of puff pastry into four even squares, place one square on the bottom of pie iron, spoon in mixture. Cover with another sheet of puff pastry and cook until pastry is golden brown and puffy. Remove from pie iron, sift powdered sugar over top. Campfire Pie Pie Crust Cooking Spray Canned Pie Filling Directions: Instructions I cut enough pie crust to make several pies and place waxed paper between the crusts. I place them in a gallon zip lock bag and take them camping with us, keeping them ref. Any left over at the end of the weekend, can be frozen until next time they are needed. Spray pie iron with Pam Cooking Spray and place a crust on each side. Fill with your favorite pie filling (we like Wilderness Extra Fruit) close the iron and trim the crust on the outside. Bake over hot coals...we lay ours on a grill that is about 5-6" above the coals. Watch carefully, check often and turn as needed, they will cook in about minutes at the most. Rocky Road Treat Spread peanut butter on 2 slices of bread. Add one large marshmallow and one chocolate bar square between buttered bread slices/ Toast in cooker until bread is golden brown
203 Cinnamon Pie 1 Package Pillsbury Crescent Roll Dough Cinnamon/Sugar Mixture Butter Instructions Coat the pie irons with vegetable oil (you can use butter or margarine but the pies usually stick to the irons). Unroll the crescent roll dough and fill each half of the pie iron (1 package of dough will make 2 pies). Butter each piece of dough, pour a generous amount of cinnamon/sugar mixture onto 1 half and close the irons. Cook over the fire, turning frequently until golden brown. They usually cook in less than 10 minutes.
204 .

205 BACKPACK COOKING
206 Backpack Food Preparation
207 Backpacking Food Tips Pack just enough food to get you thru your planned trip, plus an extra cold meal or two just in case you run into a delay in getting out, or run out of fuel. Instead of carrying food in its original container, carry serving-sized amounts in sealable baggies. This cuts down on weight and trash, and the bags can have many other uses during your trip Cover your cooking pot when heating to save fuel. Love condiments but don t want to pack a refrigerator? Bring an assortment of those little packs of ketchup, mayo, mustard, etc. found in your favorite fast food restaurant or convenience store. No refrigeration required! Drink lots of water when you eat to aid digestion. Reasonable amounts of sugar-carbs are OK since you ll be burning off the calories. Better still are complex carbs for longer, controlled calorie absorption - energy bars are better than candy bars for that. Protein during the day won t absorb as well to give off the energy you may need; save your protein-heavier foods for dinner after you re in camp. There s nothing wrong with protein-friendly tuna fish or peanut butter during the day; just be sure to supplement with some carbs if you ll be working hard. Beware of too much chocolate in energy bars or snacks; not because of the calories it s the melting that s the pain. M&Ms are a better option for your chocolate fix. Avoid overeating in general during the day; eat just enough to keep your energy levels up, but not so much to get bogged down from trying to hike hard on a full stomach. Adding various spices to otherwise bland food is a big help; just don t overdo it and get your stomach all in knots. Some good suggestions - garlic cloves, onion, spiced oil, hot mustard, and dried salsa. Stash in clean prescription bottles or other small plastic container. Avoid meals that are messy or time-consuming to prepare. Don t mix your food in the same pot you use to boil water unless it s a non-stick pot. Instead, take an additional easily cleaned container for mixing and re-hydrating dried foods. Use this container to hold food and condiments when stowed in your pack. To keep hungry animals away, store food away and pick up spills. Never sleep with food (or other aromatic items like toothpaste, gum, etc.) in your tent -- hang it in a bag from a high tree limb, or store in a bear canister. Check out the cooking times for anything you bring. Some packaged products require more than 20 minutes; stick to preparation times of 10 minutes or less to cut down on fuel usage and hassle. "Ounces mean pounds and pounds mean pain." --Allen M. Heine, Jr. (on selecting and packing gear)
208 Backpacking Food from the Grocery Store Make your own trail mix (aka GORP- Good Old Raisins and Peanuts) with M&M s, mixed nuts and raisins. Separate into a daily allotment in baggies so you don t overeat on it during any single day. It s great stuff, but real boring by day 3 or 4, so mix it up with some pretzels, other nuts, crackers, sesame sticks, malt balls, dried fruit, cheese, etc for longer trips. For a warming breakfast, take along a few flow-through coffee and tea bags, instant coffee packets, spiced cider packs or hot chocolate. You have lots of powdered soup options to choose from dump the containers and repackage in baggies. Look for tuna fish in foil pouches. The packets cost more, but weigh less than a can. Bread is OK for a few days, but prone to crushing. Try tortillas instead. Peanut butter is great on backpacking trips take it out of the jar and put in a baggie. Cut one corner off so you can squeeze it onto your bread without using a knife, then store that cut bag into another baggie. Some hard sausages and cheeses will keep for several days on the trail; keep well-sealed in your pack and eat first. When I'm backpacking, my food depends on what my daily objective is which most of the time is 10 miles a day, about 3,000 ft. elevation, and I'm shooting for 4,000+ calories, or about 2 pounds of food a day (very rough estimate.) My basic food is the old standby GORP. I custom mix my own, getting most of my ingredients from Trader Joe's, Peanut M&M?s are still great. Cheap, tasty, high in calories, easy to pack and eat. Energy bars are compact and have reasonable caloric density and nutrition. They are expensive though. I like Cliff Bars but end up taking Power Bars a lot of the time because I can get them cheaper. Peanut butter boosts my caloric density. Cheap and easy to pack. Crackers or dense bread add grains. Grape Nuts. Add grains. Use for breakfast with powdered milk. I used powdered milk (Milkman, other brands taste really bad!) and meat jerky in combination with grains (grape nuts, crackers, flour in pemmican bars) as a source for complimentary proteins. Milk boosts my calcium. Cheese is a treat and adds calories, protein and calcium. But doesn't keep as well as some other foods. Cheddar cheese is around 115 cal/oz and keeps fairly well. Parmesan is around 130 cal/oz and keeps very well. I sometimes bring hard, dry salami on a short trip or on the first few days of a long trip. I bring dried fruit to add fiber, variety, and as source of minerals and vitamins. I bring chocolate (as needed), to add fat and calories. Boost my cal/oz. total. Any room or extra weight I can deal with is for water
209 BREAKFAST Three Bears Porridge This is a hearty, "stick-to-your-ribs" kind of breakfast. ½ Cup cracked wheat ¼ Cup dry milk powder ¼ Cup raisins 3 Cups boiling water ½ Cup rolled oats ½ tsp. ground cinnamon ¼ Cup chopped dried apricots Equipment Stove Cooking pot Large Spoon Instructions At Home Measure and mix all dry ingredients and store in a Zip-loc bag. At Camp Add dry ingredients to boiling water in saucepan or pot. Stir until thoroughly mixed. Bring back to a boil. Reduce heat and simmer, covered for 10 to 15 minutes, or until desired consistency. Add honey or sugar to taste. 3-4 Servings Fruit And Rice Pudding 3/4 cups instant brown rice, 1/2 cup dry milk or 1 small can condensed milk, sprinkle of nutmeg, ginger, brown sugar and cinnamon (more it you like), 1.5 cups dried fruit Equipment On trail: 1 pot, 1 backpack stove Instructions Add all ingredients to 2.5 cups of water in pot. Bring to boil and simmer until rice and fruit are tender (about 8-10 minutes). Stir and serve warm. Comment This is a great breakfast too (lots of energy and good!). I'm asked to make it almost every camp out or trail camp. To save weight on trail, put all the dry ingredients into a zip-loc bag instead of original packs.
210 MAIN MEAL Backpacker's Chicken Chowder This is a great chicken recipe for backpackers since all of the ingredients are fairly light weight and easy to carry. It's also great on cool camping trips or as an appetizer to a main course. 1 package chicken soup mix 4 cups water 1 Cup Dry milk ¼ cup dried corn or 1 small can of corn 1 can or pouch white chunk chicken 1 pkg. chicken gravy mix Equipment Stove Cooking pot Measuring cups Large spoon Can opener Instructions Mix ingredients. Bring to a boil and then simmer until all are done (roughly 10 minutes). Serves 2-3 Beef Stroganoff Recipe By : "Backpacker's Cookbook" by Margaret Cross and Jean Fiske Serving Size : 4 Makes 7 1/2-8 cups. Package Together 2 oz Freeze-Dried Beef Chunks, Or 4 oz Beef-Flavored T.V.P. 4 cubes Beef Bouillon ½ C Freeze-Dried Mushroom Slices 2 Tbsp Instant Minced Onions 1/8 Tsp Garlic Powder 8 oz Whole-Wheat Pasta Package Separately 1 envelop Cream Of Mushroom Soup Mix 8oz Sour Cream Mix 7½ C Water 1. Add past-beef mix to 7 cups of boiling water and simmer, stirring occasionally, for 10 minutes. 2. Mix about 1/2 cup water with soup mix. Pour into pot, stirring, and simmer for 5-10 minutes, or until pasta and meat are tender. 3. Reconstitute sour cream mix with cold water and mix into pot.
211 Clam Chowder 1 pkg Knor Swiss Leak soup mix 2/3 cup instant potatoes 2/3 cup powdered milk 5 cups water 1 can (6 oz) chopped or minced clams - including the liquid. Instructions Mix all ingredients and bring to a boil. Simmer 5 minutes or until done. Comment Bacon sprinkled on top is a nice flavor addition. If you have a spare baked potato hanging around, cut it up into small cubes and add to mix. It makes a great addition. Serve with bread, crackers or a sandwich. All of the dry ingredients can be mixed in advance and stored in a ziploc bag. Salmon Or Tuna And Rice Uncle Ben's boil-in-a-bag rice cans of salmon bits or tuna or chicken Equipment Pot or #10 tin can, glove or pliers Instructions Bring water to boil. Add bags of rice and boil for few minutes. Open cans and drain some of the juice. Serve rice and add salmon, tuna or chicken on top. Comment: Easy cleanup. Boil in bag rice cooks like a tea bag and doesn t stick. Good recipe where only stoves allowed.
212 Cheese And Rice Plus Recipe By : "Backpacker's Cookbook" by Margaret Cross and Jean Fiske Serving Size : 2 4½ oz Dehydrated Cheddar Cheese 3¾ oz Instant Rice ½ oz Dehydrated Onions 1 ¾ oz Soy Ham, Or 1 Pkg Freeze-Dried Ham 1 Pkg Freeze-Dried Green Beans -- 1 oz 2 Tbsp Margarine Salt -- to taste 4 C Water 1. Heat water and dip out enough to rehydrate the freeze-dried foods. 2. Bring remaining water to a boil and add rice, onions and salt. Also add soy ham, if it is being used. Simmer until rice is tender. 3. Add ham and beans. Stir in cheese and margarine. Cover the pot and let simmer very low for a couple of minutes to rehydrate the cheese.
213 DESSERT Apple Crisp Recipe By Serving Size : 4 Package Together * ¾ C Flour ¾ C Brown Sugar ½ Tsp Cinnamon ½ C Margarine : "Backpacker's Cookbook" by Margaret Cross and Jean Fiske Package Separately ¾ C Evaporated Apples Water -- as needed 1. Simmer apples in water according to package directions. 2. When well heated, but not completely cooked, add the sugar/flour mixture and spread in a frying pan. Continue cooking until mixture is bubbly and thickened. 3. As an alternative this may be baked in a reflector over. Spread the apple mixture in a baking pan and pat out the flour/sugar mixture over them. Bake in front of a good high fire, turning the fan once or twice to assure even baking. Makes about 6 Sierra cups.
214 .
 Orange Carmel Easy Ring (DO) Little Smokies Egg Bake Easy Camp Breakfast (DO) Impossible Breakfast Pie (DO) STRATA (DO) Camp Guyasuta Breakfast Pizza (DO) Beaver Patrol Saturday Breakfast (DO)")
215 RECIPE INDEX BREAKFAST Mountain Man Breakfast -multiple recipes (DO) Pita Pocket Breakfast (DO) Quick & Easy Breakfast Casserole (DO) Biscuits & Gravy (DO) Breakfast Pizza (DO) Pecan Caramel Rolls (DO) Orange Carmel Easy Ring (DO) Little Smokies Egg Bake Easy Camp Breakfast (DO) Impossible Breakfast Pie (DO) STRATA (DO) Camp Guyasuta Breakfast Pizza (DO) Beaver Patrol Saturday Breakfast (DO) Brat Bake (DO) Peachy Dutch Oven French Toast (DO) Breakfast Tacos (DO or Stove) Skillet Breakfast (DO or Stove) Sausage Gravy w/ Biscuits (Stove) Quick N Easy Breakfast (Stove) Breakfast Egg & Bacon Muffin (Stove) Breakfast Tacos (Stove) Egg-Cheese-Bread Breakfast (Stove) California Egg Crackle (Stove) Buttermilk Pancakes (Stove) Whole Wheat Pancakes (Stove) Extra Light & Fluffy Pancakes (Stove) Pancake Mix (Stove) Flap Johns (Stove) Pumpkin Pancakes (Stove) Apple Walnut Caramel Syrup (Stove) French Toast (Stove) Idaho Pancakes [Potatoes] (Stove) Skillet Breakfast (Stove) Pocket Pita Breakfast (Stove or DO) Scout Breakfast Sandwich (Stove) Crunchy French Toast (Stove) Wagon Wheels (Stove) Breakfast in a Paper Bag (Fire) Foil Breakfast (Fire) Sticky Eggs (Fire) Orange Muffins (Fire) Orange Eggs (Fire) Trash Breakfast (Fire) Breakfast Sausage & Egg (Fire) Breakfast Potatoes (Fire) Mini Hash (Fire) Paper Bag Bacon & Eggs Jacob s Tastee Egg & Bacon Breakfast Orange Shell Breakfast Three Bears Porridge (Backpack) Fruit & Rice Pudding (Backpack)
216 MAIN MEAL Chicken Prairie Chicken (DO) Chicken Pot Pie (DO) Chicken & Dumplings (DO) Parmesan Chicken (DO) Dutch Oven Chicken (DO) Oven Fried Chicken (DO) Rattlesnake & Wild Rice (DO) Festive Chicken Bake (DO) Baked Chicken with Cheese (DO) Turkey Breast (DO) Chicken Spaghetti Bake (DO) Cajun Chicken Pasta (DO) Chicken Parmesan DO) Enchilada Lasagna (DO) Chicken Tortilla Casserole (DO) Creamy Green Chili Chicken Enchiladas (DO) Chicken Enchilada (DO) No Fuss Chicken (DO) Italian Chicken Couscous (Stove) Mr. Smith s Fiesta Fajitas (Stove) Chicken Gumbo (Stove or DO) Turkey Joes (Stove) Grilled Quesadillas (Grill) Marinated Grilled Chicken Breasts (Grill) Coke Can Chicken (Grill) Rotisserie Chicken (Fire) Campfire Coal Roasted Chicken (Fire/charcoals) Campfire Stick Roasted Chicken (Fire) Stone Chicken (Fire/Stone) Beef Cowboy Cornbread (DO) Garbage (DO) Easy Cheesy Meat & Potatoes (DO) GOOP (DO) Chuck Wagon Casserole (DO) Spanish Rice with Beef (DO) Dutch Oven Enchiladas (DO) Shepherd s Pie (DO) Onion Swiss Steak (DO) Steak & Mushroom (DO) Flank Steak Teriyaki (DO) Beef Goulash (DO) Beef Stew (DO) Hungarian Goulash (DO) Bacon Cheeseburger Meatloaf (DO) Round Steak Hawaiian (DO) Carne Guisada (DO) Chili Dogs (Stove) Chuck Wagon Stew (Stove) Taco Stew (Stove) Taco Salad To Go (Stove) Travelin Tacos (Stove) Coffee Can Stew (Fire) Hobo Dinner (Fire) Kid s Favorite Foil Dinner (Fire) Pig Ham & Potatoes Au Gratin (DO) Au Gratin Ham & Potatoes (DO) Honey Baked Ham (DO) Party Pork Strips (Grill) Miscellaneous Blue Ribbon Kielbasa (DO) Dutch Oven Stromboli (DO) Potato Casserole (DO) Jerry s Jambalaya (DO) Australian Camel Stew (really big DO) Sausage Balls (DO) Baked Southwestern Egg Rolls (DO) Sausage Turnover (DO) Texas Bender (DO) Chicken Rolls (DO) Gravy with No Drippings (Stove) Turkey Joes (Stove) Jenny Jump Sandwiches (Stove or Pie Iron) Mexican Grilled Cheese Sandwiches (Stove or Pie Iron) Shish Kabob (Grill) Coffee Can Stew (Fire) Curly Dogs (Fire) Heavenly Fish (Fire) Fish on a Skewer (Fire) Pie Iron Pizza (Fire) Salmon or Tuna and Rice (Backpack) Soups, Stews & Chili Corn Chowder (DO) Texas Chili (DO) Chicken Enchilada Soup (DO) Hearty Corn Chowder (DO) Homestyle Chili (Stove or DO) Green Chili (Stove or DO) California Chili (Stove) Taco Stew (Stove) Patrol Stew (Stove) Cowboy Soup (Stove) Chicken Corn Soup (Stove) 2x4 Soup (Stove) Clam Chowder (Backpack) Backpacker s Chicken Chowder (Backpack) Pasta / Rice Mr. Smith s Dirty Rice (Stove or DO)
 Ramen with Flair (Stove) Cheese and Rice Plus (Backpack) Pizza / Calzone Campfire Dutch Oven Pizza (DO) Pizza Calzone (DO) Dutch Oven Pizza (DO) How to Make Grilled Pizza (Grill) Quick & Easy")
217 Basic No-Tomato-Sauce Pasta (Stove) Easy Spaghetti Bolognese (Stove) Mac n Cheese Makeover (Stove) Family Pleasing Macaroni (Stove) Skillet Macaroni (Stove) Ramen/Onion Stuff (Stove) One Pot Noodles (Stove) Ramen with Flair (Stove) Cheese and Rice Plus (Backpack) Pizza / Calzone Campfire Dutch Oven Pizza (DO) Pizza Calzone (DO) Dutch Oven Pizza (DO) How to Make Grilled Pizza (Grill) Quick & Easy Pizza (Grill) Three Minute Pizza (Fire or Grill) Beef Stroganoff (Backpack) Vegetarian Quesadilla Pie (DO) Other Marinades Dry Rubs
218 SIDE DISH Vegetable Italian Zucchini (DO) Old Fashioned Macaroni & Cheese (DO) Green Been Casserole (DO) Skillet Fried Corn (Stove) Camping Corn Hash (Stove) Mr. Smith s Grilled Vegetables (Grill) Corn on the Cob (Fire or Grill) Pocket One-Ders (Fire) Beans Trailside Beans (DO) Cowboy Beans & Texas Toast (DO or Stove) Potato Garlic Potatoes (DO) Shark Patrol French Fries (DO) Dutch Oven Potatoes (DO) Parmesan Baked Potatoes (DO) Roasted New Potatoes (Grill) Scalloped Potatoes (Fire or Grill) Campfire Potatoes (Fire) Other Dutch Oven Stuffing (DO) Dips BREADS / BISCUITS Camper s All-Purpose Baking Mix Yeast Breads Pillsbury Crusty French Loaf (DO) Bread Bowls (DO) Bloomin Onion Bread (DO) Sweet Breads & Coffee Cakes Spiced Pear Bread (DO) Coffee Cake (DO) Banana Coffee Cake (DO) Sunrise Surprise Coffee Cake (DO) Biscuits / Rolls Canned Biscuits (DO) Biscuits Supreme (DO) Quick Biscuits (DO) Monkey Bread (DO) Dutch Oven Bacon Cheese Pull-Aparts (DO) Dutch Oven Cheese Nibbles (DO) Campfire Bannock (Fire) Foil Biscuits (Fire) Misc Camp-o-ree Cornbread (DO) Contagious Cornbread (DO) Buttery Cornbread (DO) Dutch Oven Bread (DO) Italian Pull-Apart Bread (DO) Campfire Bannock (Stove)
219 DESSERTS Cobblers Black Forest Cobbler (DO) Cinnamon Roll Cobbler (DO) Dump Cakes Dutch Apple Cobbler {Dump Cake} (DO) Dump Cake (DO) Easy Camp Cobbler {Dump Cake} (DO) Silly Rabbit Cobbler (DO) Cakes Chocolate Cherry To-Die-For Cake (DO) Chocolate Pineapple Upside- Down Cake (CO) Apple Gingerbread Cake (DO) Pineapple Upside-Down Cake (DO) Apple Spice Cake (DO) Miscellaneous Dutch Oven Candy Apples (DO) Pudding Delight (DO) Bread Pudding (DO) Banana Boat (Fire/Grill) Apple Sweet (Fire/Grill) Orange Brownies (Fire/Grill) Apple Crisp (Backpack / Stove) PIE IRON RECIPES Breakfast Bacon, Egg & Cheese Biscuit All-in-One Boondocker s Breakfast Chunky French Toast Egg & Burger Onion Basket Peanut Butter & Jelly Omlet Pie Iron Frittata Tator Tot Patty Pie Iron Basted Eggs Biscuit Stuffed Onions & Peppers Breakfast Pie Breakfast Pie 2 Fried Potatoes Cheesy Bread Pudding Lunch Hobo Bacon & Tomato Sandwich Elvis Sandwich Grilled Roast Beef Sandwich Boondocker s Taco Pockets Ham & Apple Grilled Cheese Crispy Grilled Cheese Doggie in a Blanket Grilled Salmon Sandwich Tuna Melt Meals Boondocker s Salmon Cakes Creamy Chicken Pot Pie Roasted Garlic Stuffed Onions & Peppers Chicken Chimichangas Boondocker s Potato Bake Crab Crescent Roll Ups Breads / Biscuits / etc. Savory Garlic Bread Cornbread with Pizzazz Chili Cheese Cornbread Cornbread Biscuits Snacks / Treats / Desserts Apple Raisin Pie Boondocker s Monkey Bread Pie Iron Danish Peanut Butter Cups Caramel Apple Pudgie pie Lemon Chiffon Pie Pie Iron Smores Turtle Pies Apple Blossom Sunny Peach Sandwich Apple Strudel Campfire Pie Rocky Road Treat Cinnamon Pie
220
 - Hard Boiled Eggs - Sandwiches - Cereal - Oatmeal - Ramen noodles (add cooked chicken) - Pasta (oil & parmesian) - Rice mixes - Pork & Beans - Bagels w/ cream cheese or")
221 APPENDIX A Quick & Easy Meal Ideas Meals - Hot Dogs / Bratwurst over fire (Cooking Sticks) - Canned Soup - Chef Boyardee, Spagettios, etc. - Grilled Cheese (with ham) - Hard Boiled Eggs - Sandwiches - Cereal - Oatmeal - Ramen noodles (add cooked chicken) - Pasta (oil & parmesian) - Rice mixes - Pork & Beans - Bagels w/ cream cheese or peanut butter (& honey); toast bagels in skillet Easy Sides & Snacks - Canned fruit (fruit cups) - Apple sauce - Fresh fruit - Baby carrots - Pudding Cups - Frozen Veggie Pouches (boil) - Granola bars - Nuts - Trail Mix Ideas for Cracker Barrel - Crackers with cheese and/or salami or cut-up lunch meat - Veggie tray with dip - Chips & salsa - Pretzels - Nuts (be careful of allergies) - Trail mix - Homemade Chex-Mix - Beef sticks / jerky
Troop 1 Boy Scouts of America Hopedale, MA Dutch Oven Guide
 Troop 1 Boy Scouts of America Hopedale, MA Dutch Oven Guide Troop Website: http://home.comcast.net/~troop1hopedale/html/home.html Table of Contents Introduction... 3 Care... 3 Cleaning Your Dutch Oven...
Troop 122 Cookbook Arranged by Matt Horned, Quartermaster, 2002 Revised 2012
 Troop 122 Cookbook Arranged by Matt Horned, Quartermaster, 2002 Revised 2012 General Hints Most dutch oven recipes call for a 350 oven. For a 12-inch dutch oven, this equates to approximately 10 coals
Dutch Oven Cooking 101 by Kimberly Cook
 Dutch Oven Cooking 101 by Kimberly Cook Why? flexibility Gives you the ability to cook anything at a campsite you can cook in your oven at home. easy cleanup If you use aluminum or foil liners, you throw
Apple Cider Floats. Apple cider Ice cream Caramel ice cream topping Cinnamon
 Apple Cider Floats Apple cider Ice cream Caramel ice cream topping Cinnamon In a glass add two scoops of ice cream. Then drizzle a spoonful of caramel ice cream topping on top of the ice cream. Also add
TURKEY CASSEROLE WITH CHEESE
 TURKEY CASSEROLE WITH CHEESE Prepare this turkey dish for brunch, lunch, or dinner. Feel free to use shredded Swiss or a mild Cheddar cheese in this flavorful turkey casserole. 3 cups diced cooked turkey
INGREDIENTS. Italian Chicken
 Italian Chicken 100 grams of chicken handful of fresh tomatos basil oregano 1/4 cup of onion 1/4 cup of spinach fresh garlic salt and pepper I cut up the chicken and put it in the pan and add tomatos only
November 2011 Menu. Our Choice: Sara - Chicken Fajita Casserole. Kristine - Chicken Packets. North American/European:
 Our Choice: November 2011 Menu Kristine - Chicken Packets Sara - Chicken Fajita Casserole North American/European: Bridget - Macaroni and Cheese "Surprise" Kirsten - Baked Pasta with Chicken Sausage Italian/Mediterranean:
May 2006 Meal (Season finale) Menu: "Old West"
 Menu: Old West") May 2006 Meal (Season finale) Menu: "Old West" Recipes Rattlesnake eggs (Jalapenos stuffed with chorizo and cream cheese) Makes 12 servings 2 tablespoons vegetable oil 2 tablespoons finely minced onion
May 2006 Meal (Season finale) Menu: "Old West" Recipes Rattlesnake eggs (Jalapenos stuffed with chorizo and cream cheese) Makes 12 servings 2 tablespoons vegetable oil 2 tablespoons finely minced onion
Menu Ideas and Recipes
 Menu Ideas and Recipes We do not have to follow a set menu for dinners at the shelter, but are providing some meal ideas and recipes as a resource in case persons preparing meals would like a pre-planned
2011 Warren RECC Recipe Cards
 2011 Warren RECC Recipe Cards 1. Baked Salmon with tomatoes, spinach & mushrooms (diabetic) 2. Easy Chili City Style 1. Slow Cooker Pork Loin (diabetic) 2. Summertime Turkey Burgers 1. Peanut Butter &
HOW TO COOK THANKSGIVING IN 5 EASY RECIPES
 HOW TO COOK THANKSGIVING IN 5 EASY RECIPES EASIEST ROAST TURKEY AND GRAVY Serves 10-12 For the turkey: One 14-16 lb turkey 4 lemons, halved ½ cup (1 stick) unsalted butter, at room temperature 3 tablespoons
Baked Encrusted Salmon
 Baked Encrusted Salmon 2 6-oz. wild Alaskan salmon filets 2 tsp. olive oil 1 lime 4 tsp. IsaCrunch Seasonings (garlic powder, onion powder, pepper) Yields: 2 servings, Calories 323 Grilled Chicken Breast
Bronxville Troop 5 Guide to Campfire Cooking
 Bronxville Troop 5 Guide to Campfire Cooking edited by J. Clayton Cordsen Troop 5 Bronxville, New York, 2010 Introduction Eating outdoors is one of the best things about camping, and camping is probably
SU Campus Food Bank Cookbook: A guide to getting the most out of a hamper Compiled by SU Campus Food Bank Volunteers
 SU Campus Food Bank Cookbook: A guide to getting the most out of a hamper Compiled by SU Campus Food Bank Volunteers 1 Index: Page 4- Pancake Breakfast Cups Page 4- Banana Apple Breakfast Muffins Page
How to Make a Turkey. By: Rosana Beharry, Stephanie Nino, Mandy Stutts TECM
 How to Make a Turkey By: Rosana Beharry, Stephanie Nino, Mandy Stutts TECM 2700.003 Table of Contents iii Getting Started... 1 Step 1 Gather Materials... 3 Thawing the Turkey... 5 THAWING TIMES FOR A
Baked Havarti Chili Chicken
 Chicken Baked Havarti Chili Chicken 4 boneless, skinless chicken breast halves (or a pack of chicken thighs) 1 8oz package sliced fresh mushrooms 2 4oz cans chopped green chilis 4 oz sliced Havarti cheese
GRUBMASTER S WORKSHEET
 GRUBMASTER S WORKSHEET PATROL: CAMPOUT: NUMBER TO SHOP FOR MENUS Saturday Breakfast GROCERIES (NO chips/soft drinks/candy) COST Saturday Lunch Saturday Supper Sunday Breakfast Total cost THINGS WE FORGOT
The Chicken Soup Collection
 About Baking: The Chicken Soup Collection Favorite Hearty Chicken Soup Recipes Contents Chicken Soup with Homemade Egg Noodles...3 Chicken and Black Bean Chili...5 Chicken and Dumplings...6 Crock Pot Chicken
Serve soup in bowls or a large tureen. Before serving, top with freshly ground pepper and fried sage leaves. Serves 12.
 Curried Butternut Squash Soup With Fried Sage Leaves ¼ cup butter 1 sweet yellow onion, chopped 3 garlic cloves, minced ¼ cup minced fresh-peeled ginger 2 medium-sized butternut squash, peeled, deseeded
Crock Pot Chicken Burrito Bowls
 Crock Pot Chicken Burrito Bowls 1 Lb. boneless skinless chicken breasts 1 (14.5 oz.) can diced tomatoes 1 cup chicken stock, divided, plus more if needed 2 tsp chili powder 2 tsp salt 1 tsp cumin 1 cup
Let s Go DUTCH. 65 hearty recipes for cast iron Dutch ovens that make outdoor cooking with coals a delicious experience.
 65 hearty recipes for cast iron Dutch ovens that make outdoor cooking with coals a delicious experience. Let s Go DUTCH Let s Go DUTCH Easy Recipes for Outdoor Cooking Easy Recipes for Outdoor Cooking
2018 Summer CSA Recipes Week 5
 CLASSIC CARROT SUMMER SALAD 10 oz. Shredded Carrots (or julienne 1 or 2 Carrots) 1/2 Cup Raisins 1/2 Cup Fresh Pineapple, diced 1/2 Cup Apple, diced 1/4 Cup Grapes, diced 1/4 Cup Mayonnaise (give Spectrum
Recipes PORK LOIN ROAST
 NOTES & TIPS: Roasts are easier to carve if allowed to set 15-20 minutes after removing from oven. Because meat continues to cook after removal from oven, it should be removed when thermometer registers
MEAT, POULTRY & SEAFOOD
 MEAT, POULTRY & SEAFOOD A roast with a bone in will cook faster than a boneless roast. The bone carries the heat to the inside more quickly. 110 Meat, Poultry, and Seafood Keep raw meat, poultry and seafood
Broccoli Scramble Serves 1 Prep time: 5 minutes Cook time: 15 minutes
 Week 7 Meals DAY 1 Broccoli Scramble Prep time: 5 minutes Cook time: 15 minutes 2 tbsp Olive oil 2 strips Bacon 2 stalks Broccoli, chopped 3 Eggs 1 Egg white Salt and Pepper, to taste Beat the eggs with
Bacon & Dijon Pork Burgers. Bacon-Glazed Meatloaf
 Bacon & Dijon Pork Burgers 1½ pounds ground pork 1 teaspoon Garlic Pepper Seasoning ¼ cup Bacon Pepper Jam, divided 5 tablespoons Honey Dijon Vinaigrette, divided 2 teaspoons olive oil, optional 6 slices
HI-SPEED LOW-ENERGY OVEN COOK S ESSENTIALS WAVE OVEN ITEM#: K32558
 HI-SPEED LOW-ENERGY OVEN COOK S ESSENTIALS WAVE OVEN ITEM#: K32558 RECIPE BOOKLET Contents 5 Poultry 13 Beef 17 Pork & Lamb 21 Fish & Seafood 25 Side Dishes 29 Dessert 2 Traditional cooking-reinvented.
Club. Week Twenty-Three
 Club Week Twenty-Three Elisa Prout Onceaweekcooking.com 2015 Elisa Prout - All Rights Reserved 1 http://onceaweekcooking.com NOTICE: You DO NOT Have the RIGHT to reprint or Resell this Report! You Also
Easy Italian Wedding Soup
 2 packed cups arugula Crunchy Winter Salad 2 celery sticks (about 1 cup), thinly sliced on the diagonal 4 radishes, thinly sliced 1 apple, cored and thinly sliced 1/4 cup gouda, sliced 1/2 cup toasted
Gluten Free Thanksgiving Made Easy By Gluten Free Cooking School Recipes
 Gluten Free Thanksgiving Made Easy By Gluten Free Cooking School Recipes Roasted Brined Turkey - pg 2 Gluten Free Cornbread - pg 3 Cornbread Dressing (12 servings) pg 3 or Bread Dressing (12 servings)-
Celebrate National Nutrition Month with Delicious, Healthy Recipes
 Celebrate National Nutrition Month with Delicious, Healthy Recipes Illinois Action for children s (IAFC) Healthy Food Program offers a variety of supports to child care providers and families that address
Fettuccini Alfredo Red Skin. Potato Salad. 6 cloves
 Fettuccini Alfredo Red Skin Potato Salad Taco Salad BBQ Meatloaf Baked Potato Pie Double Cheddar Burgers Baked Beans 2011 MakeDinnerEasy.com Grocery List for the week of October 2, 2011 = dish as outlined
COOKING FOR ONE OR TWO
 COOKING FOR ONE OR TWO Lack of variety and leftovers are real problems for many persons who fix food for a few. Here are some suggestions to help you have variety with a minimum of leftovers. 1. If you
EASY CROCKPOT RECIPES
 EASY CROCKPOT RECIPES ITALIAN CHICKEN 1 Ib. chicken breasts 2 T butter 2 oz. cream cheese and chives 1 can cream of chicken soup 1 package Italian dressing mix ¼ cup water Put chicken into crockpot. Mix
Egg Dishes. Foods Older Adults Should Avoid
 Egg Dishes Foods Older Adults Should Avoid As we get older our bodies don t work quite as well. Therefore, some foods are more likely than others to make older adults sick if they eat them. Below is a
10 Minute Omelets. ** If you use more than 2 eggs allow an extra 3-4 minutes for cooking time. Formatted: Centered
 10 Minute Omelets Formatted: Centered Works great to get everyone fed at once & with very little clean up. Kids especially like it. Vegies (green peppers, onion, mushrooms) meat (ham, bacon, sausage) cheese
Camp Baldwin Patrol Menus
 Camp Baldwin Patrol Menus Enclosed are menus to help you prepare each meal while you are at Camp Baldwin. Please read the instructions for each meal twice before you begin; it will help you understand
Classic Holiday Menu
 Classic Holiday Menu Herb Roasted Turkey Baked Sage Dressing Not Too Sweet Potato Casserole Green Bean Casserole with Bacon Simple Pan Gravy Cranberry Chutney Classic Mashed Potatoes Yeast Rolls Chocolate
Cooking Day Instructions: from meals prepared
 Cooking Day Instructions: from meals prepared 10.9.2017 #1 - Sriracha Salmon Thaw salmon if frozen. Preheat the oven to 425. Line a baking sheet with parchment paper. Place the salmon on the prepared pan
of our FAVORITE recipes
 of our FAVORITE recipes table of contents Italian Meat Lasagna Traditional Mexican Tostada The Only Chicken Salad You ll Ever Want Pork Souvlaki Shepherd s Pie Authentic Cuban Sandwich Beef Pierogi Keystone
(this isn t the exact recipe, I made some changes)
") Savory Pepper Steak http://crockingirls.com/recipes/savory-pepper-steak/ (this isn t the exact recipe, I made some changes) 1½ lbs round steak, cut into ½ in strips ¼ cup flour ½ tsp salt ½ tsp pepper
Savory Pepper Steak http://crockingirls.com/recipes/savory-pepper-steak/ (this isn t the exact recipe, I made some changes) 1½ lbs round steak, cut into ½ in strips ¼ cup flour ½ tsp salt ½ tsp pepper
Hi there, we are Olfa & Dawn, from Our Family World & Cook Your Heart Out.
 Hi there, we are Olfa & Dawn, from Our Family World & Cook Your Heart Out. We believe you can make great food even if you re short on time and trying to stay on a budget. We love food that leans towards
Oriental Chicken Tenders Curried Peanut Chicken
 Oriental Chicken Tenders Curried Peanut Chicken 1 c. soy sauce 1/3 c. sugar 4 tsp. vegetable oil 1 1/2 tsp. ground ginger 1 tsp. five spice powder 2 bunches green onion 16 chicken tenders (approx. 2 lbs.)
Pastured Poultry Recipes. Bountywoods Farm
 Pastured Poultry Past Recipes Bountywoods Farm Greetings from Bountywoods Farm! I ve put together a collection of recipes for pasture raised poultry, especially for you! I enjoy being an adventurous cook,
Cheesy 3-Meat Breakfast Hotdish
 Cheesy 3-Meat Breakfast Hotdish 12 ounces smoked bacon 12 ounces breakfast sausage 1 medium chopped onion 32 ounces frozen cubed hash browns 7 ounces black forest ham (diced) 2 cups shredded mild cheddar
Peanut Butter Cup Cookies (tarts) submitted by Elaine Wilson
 submitted by Elaine Wilson") Peanut Butter Cup Cookies (tarts) submitted by Elaine Wilson 1 (14-ounce) can EAGLE BRAND Sweetened Condensed Milk (NOT evaporated milk) 1 cup peanut butter 1 teaspoon vanilla 2 cups biscuit mix 1. In
Peanut Butter Cup Cookies (tarts) submitted by Elaine Wilson 1 (14-ounce) can EAGLE BRAND Sweetened Condensed Milk (NOT evaporated milk) 1 cup peanut butter 1 teaspoon vanilla 2 cups biscuit mix 1. In
Ethan s Scout Stew Recipe
 Ethan s Scout Stew Recipe Ingredients 1/4 lb. - lean beef per Scout (Beef stew meat, hamburger, etc.) 1 - medium-large potato per Scout (chopped to bite size) 1 - chopped large onion (yellow, Spanish,
Pasta Recipes Created by Nicole Porter Wellness
 Pasta Recipes 5.24.18 Created by Meal Prep Spaghetti with Chicken, Spinach & Tomatoes 8 ingredients 30 minutes 4 servings 1. Preheat oven to 450 degrees F and line baking sheets with foil. 2. In a bowl,
INCLUDES RECIPES CREATED FOR MODEL#GPC865, GPC655
 AIR Fryer INCLUDES RECIPES CREATED FOR MODEL#GPC865, GPC655 TABLE OF CONTENTS Breakfast & appetizers //// p. 7-15 Eggs / p. 7 Steamed Omelette / P. 9 Yogurt / p. 11 Mains and sides //// p. 16-31 Boiled
Refresh & Rejuvenate
 MEAL PLAN CLEANSE PHASE (DAYS 1-10) MEAL PLAN GUIDELINE DAYS 1-10 BREAKFAST SNACK LUNCH SNACK DINNER 2 scoops OsoLean powder 1 scoop NutriVerus powder 1 cup frozen fruit ½ to 1 cup fresh or frozen vegetables
KIELBASA SKILLET EASY TATER SUPPER
 FAST FOOD RECIPES KIELBASA SKILLET 12 new redskin potatoes, quartered 1 cup chicken broth 1 onion, quartered 2 tablespoon soy sauce 1 green pepper, diced 1 ½ lbs. kielbasa, sliced ½ thick 1 tablespoon
Directions: 1. Melt butter in your Gotham 10 1/4 Skillet on medium heat. Add onion and sauté until soft.
 30 Minute Irish Dinner Ingredients 2 tablespoons vegetable oil 1 (20 ounce) package Simply Potatoes Shredded Hash Browns 2 slices bacon, cut into small pieces 1 pound lean ground beef 1 2 cup chopped onion
Shopping List WEEK 09
 Shopping List WEEK 09 2016 paleoplan.com Shopping List WEEK 09 2016 paleoplan.com Shopping List WEEK 09 2016 paleoplan.com Shopping List WEEK 09 2016 paleoplan.com Prep List WEEK 09 Here is a prep list
Covered Roaster Recipes
 Covered Roaster Recipes APPETIZERS Reuben Dip 1 jar or bag (32 oz.) sauerkraut, drained 2 cups shredded Swiss cheese 3 packages (2 ½ oz. ea) corn beef, shredded ½ cup butter, melted 1 egg, beaten Rye cocktail
Gourmet Brunch December Holiday brunch Theme: "Fried Green Tomatoes."
 December 2005 - Holiday brunch Theme: "Fried Green Tomatoes." Gourmet Brunch 2005 Fried Green Tomatoes Boiled Shrimp Crab Stuffed Mushrooms Pizza Cookies Spiced and Stuffed Pork Peppered Beef Tenderloin
Table of Contents. Avocado and Garlic Soup Baked Eggs with Tomatoes and Spinach Carrot and Garlic Soup Chili Garlic Noodles...
 Table of Contents Avocado and Garlic Soup... 3 Baked Eggs with Tomatoes and Spinach... 5 Carrot and Garlic Soup... 7 Chili Garlic Noodles... 9 Creamy Garlic Penne with Spinach... 11 Garlic Bread... 13
Sloppy Joe Casserole Serves 4 to 6
 Sloppy Joe Casserole Serves 4 to 6 2 pounds ground beef ½ onion, chopped 1 green bell pepper, diced 1 (14-ounce) can petite diced tomatoes 1 tablespoon tomato paste 3 to 4 tablespoons brown sugar ¼ cup
Family-Friendly Menu: September
 Family-Friendly Menu: September Week one Maple glazed pork chops with baked potatoes and salad: One hour or less (A) Deluxe turkey burgers and fries: 30 minutes or less (B) Lemon Linguine with Broccoli
Crawfish Stew... 2 Spiced Fig Cake... 2 Fig Filling... 3
 Crawfish Stew... 2 Spiced Fig Cake... 2 Fig Filling... 3 Doberge Cake... 3 Lemon Filling... 4 Jumbo Pralines... 5 French Bread... 5 Cajun Crab Stuffed Pepperoncini... 6 Sweet Potato and Apple Salad...
Almond Crusted Fish. makes 2 servings
 Almond Crusted Fish makes 2 servings 1/2 pound mild white fish filets (sole, flounder, orange roughy, etc.) 1/6 cup sliced almonds 1 Tablespoon reduced-fat margarine, melted 1 Tablespoon lemon or lime
Seasonal Cooking with Chef Ethel Pangborn
 Seasonal Cooking with Chef Ethel Pangborn Fall Session: Roasting and Braising Once you learn these fundamental techniques, you ll be able to handle most recipes that use them. And while recipes are a great
Let us help you make your meals delicious & healthy
 Wild Thymes Farm, Inc. 245 County Route 351, Medusa, NY 12120 FOR MORE RECIPES VISIT US AT www.wildthymes.com Let us help you make your meals delicious & healthy Barbecued Salmon Serves 4 4 pieces salmon
Weekly Meal Planner ( ) Day One: Slow Cooked Pork Chops
 Day One: Slow Cooked Pork Chops") Weekly Meal Planner (05.11.07) Day One: Slow Cooked Pork Chops 4 pork chops (I use a package of center-cut chops) 1 package onion soup mix 1 cup chicken broth Place pork chops in the slow cooker. In a
Weekly Meal Planner (05.11.07) Day One: Slow Cooked Pork Chops 4 pork chops (I use a package of center-cut chops) 1 package onion soup mix 1 cup chicken broth Place pork chops in the slow cooker. In a
ANGIE GUBLER. Korean Steak on a Stick
 Recipes included: Korean Steak On A Stick Spicy Garlic Lime Chicken Grilled Flank Steak A Bit Of Everything Grilled Chicken (*note: this recipe calls for sherry) Marinated Grilled Shrimp Basil Burgers
Fettuccini Alfredo. Red Skin Potato Salad
 Fettuccini Alfredo Red Skin Potato Salad Taco Salad Braised Short Ribs Baked Potato Pie Double Cheddar Burgers Baked Beans 2018 http://www.makedinnereasy.com Grocery List for the week of November 5, 2018
SOUPS, SALADS & VEGETABLES
 SOUPS, SALADS & VEGETABLES Wrap celery in aluminum foil when putting in the refrigerator and it will keep better. To keep potatoes from budding, place an apple in the bag with the potatoes. 61 Soups, Salads,
Bacon-Wrapped Beef Tenderloin with Red Wine Sauce
 Bacon-Wrapped Beef Tenderloin with Red Wine Sauce David Venables Recipes QVC Recipes Kitchen & Food QVC.com Bacon-Wrapped Beef Tenderloin with Red Wine Sauce This recipe is prepared with the medium-sized
Lemon Rosemary Grilled Chicken Breasts with Zucchini, Corn, and Cherry Tomatoes
 Lemon Rosemary Grilled Chicken Breasts with Zucchini, Corn, and Cherry Tomatoes 1/4 cup olive oil 2 lemons, zest and juice 2 sprigs fresh rosemary, chopped 2 cloves garlic, chopped Lots of freshly ground
20 Ground Beef Slow Cooker Recipes
 20 Ground Beef Slow Cooker Recipes Freezer to Slow Cooker by Sarah Robinson copyright 2015 No portion of this e-book may be shared or transmitted, electronically or in print, without the express written
THIS WEEK'S MENU: DAY 2 DAY 1 DAY 3 DAY 4 DAY 6 DAY 7 DAY 5 SMALLER FAMILY Smaller Family- Avocado Chicken Bites
 SMALLER FAMILY- 10-05-2018 DAY 1 DAY 2 DAY 3 THIS WEEK'S MENU: Smaller Family- Avocado Chicken Bites Apple Coffee Cake Smaller Family- Slow Cooker Turkey Burger Joes Smaller Family- Loaded Baked Potato
COOKING WITH ENTERGY. Vegetables
 COOKING WITH ENTERGY Vegetables COOKING WITH ENTERGY VEGETABLES STUFFED ARTICHOKES 6 small artichokes 3 tablespoons chopped 1/3 cup olive oil parsley 2 cloves garlic, minced 1/4 teaspoon salt 2 cups French
SHELTER DINNER MENUS
 SHELTER DINNER MENUS MONDAY, MARCH 11, 2013 Baked Chicken Parmesan Couscous Casserole Black & White Summer Bean Salad Cool Cranberry Crisp BAKED CHICKEN PARMESAN Serving Size: 6 1 cup bread crumbs 1/3
Eight Can Soup. Chicken Tortellini Soup from the kitchen of Barb Determan. Italian Vegetable Soup with Pork from the kitchen of Barb Determan
 Italian Vegetable Soup with Pork 1.5 to 2.5 pounds diced pork loin 2 cans chicken broth Pesto Seasoning 2 cans Italian diced tomatoes 3 cans tomato soup 1 to 2 tsp. Italian seasoning 1.5 to 2.5 pounds
8 th grade Cookbook. Mrs. Rosenbaum Ms. Galante Ms. Strajanekova
 8 th grade Cookbook Mrs. Rosenbaum Ms. Galante Ms. Strajanekova Baked Ziti Penne or any tube-shaped pasta can be substituted if you can t find ziti. 1/2 pound uncooked whole-wheat ziti 1/2 teaspoon garlic
Noon First Friday of Each Month Leavenworth Public Library. One Dish Delights. July 6, 2016 Leavenworth Public Library
 Knowledge @ Noon First Friday of Each Month Leavenworth Public Library. One Dish Delights July 6, 2016 Leavenworth Public Library Presented by Sharon Riedel Kansas State University Research and Extension
Health Home and Happiness Grain- Free Bulk Cooking Sample Day
 Health Home and Happiness Grain- Free Bulk Cooking Sample Day Grocery List 1 gallon milk 1 pint half and half or heavy whipping cream (optional) 1 small plain yogurt (to start yogurt) 3 pounds ground beef
Shopping List WEEK 12
 Shopping List WEEK 12 2015 paleoplan.com Shopping List WEEK 12 2015 paleoplan.com Shopping List WEEK 12 2015 paleoplan.com Shopping List WEEK 12 2015 paleoplan.com Prep List WEEK 12 Here is a prep list
Microsteamer Recipes
 Microsteamer Recipes Sweet & Sour Chicken and Rice 1 cup instant rice 1/8 tsp. pepper 2/3 cup water 1 cup mixed vegetables 1 tsp. soy sauce 1 cup pineapple and cherries ¼ tsp. garlic powder ¼ cup sweet
AROMA HOUSEWARES. HSN Multicooker ARC-1230
 AROMA HOUSEWARES HSN Multicooker ARC-1230 Tex-Mex Breakfast Burritos Prep time: 5 minutes Cook time: 20-25 minutes Servings: 6 6 soft-taco size flour tortillas 8 eggs Salt and pepper, to taste ⅓ lb. chorizo
RECETTES DE PETIT-DÉJEUNER FACILES (EASY BREAKFAST RECIPES)
") RECETTES DE PETIT-DÉJEUNER FACILES (EASY BREAKFAST RECIPES) Muffins 1 ¾ cups all-purpose flour ⅓ cup sugar 2 teaspoons baking powder ¼ teaspoon salt 1egg, beaten ¾ cup milk ¼ cup cooking oil 1. Preheat
RECETTES DE PETIT-DÉJEUNER FACILES (EASY BREAKFAST RECIPES) Muffins 1 ¾ cups all-purpose flour ⅓ cup sugar 2 teaspoons baking powder ¼ teaspoon salt 1egg, beaten ¾ cup milk ¼ cup cooking oil 1. Preheat
FCS Lesson Plans: student Guide Meals in Minutes
 Thai Pork Pizza Recipe from PorkBeInspired.com Prep Time: 15 minutes Cook Time: 25 minutes Yield: Serves 4 2 boneless pork chops, 3/4-inch thick 2 teaspoons vegetable oil 1 15-oz package prepared pizza
Chocolate Cake with Fudge Sauce. Lobster and Beef Tenderloin. 827 A Taste of Cooking
 827 A Taste of Cooking Chocolate Cake with Fudge Sauce Cake: 1 pkg. (3.4 oz.) cook-and-serve chocolate pudding/pie filling mix 2 c. 2% milk 1 pkg. chocolate cake mix Fudge Sauce: 1/2 c. butter, cubed 1
Add 1 quart of water or chicken stock, 1/2 teaspoon of salt, celery, the quartered potatoes, and simmer minutes.
 Leeks POTATO LEEK SOUP 3 leeks 4 potatoes, quartered 1/4 cup butter 1/2 cup milk 1/2 cup light cream 1 qt. water or chicken stock 2 tbsp. each chopped celery and shallots 1/8 teaspoon celery seed parsley,
Savor the. Holidays. A gluten-free cookbook from
 Savor the Holidays A gluten-free cookbook from Contents Maple-Pecan Crusted Goat Cheese...1 Cranberry Crusted Baked Brie...2 White Cheddar Stuffed Mushrooms...3 Manchego Cheese, Prosciutto and Fig Crackers...4
Vegetarian Summertime Menu Plan
 Vegetarian Summertime Menu Plan Week 2 Grilled Veggie Quesadillas Super Easy Guacamole Bean Burgers with Avocado Cream Garlic Parmesan Fries with Spicy Aioli All-in-One Caprese Pasta Skinny Taco Salad
Maximizing Kitchen Appliances - Slow Cookers
 Pizza Fondue (Makes 18 1/4-cup servings) Sweet & Sour Sausage Balls (Makes 32 2-oz. servings) 1 lb. lean ground beef 2 cans (16-oz.) pizza sauce 8 oz. grated low-fat cheddar cheese 8 oz. grated part-skim
Club. Week Two. Elisa Prout OnceAWeekCooking.com
 Club Week Two Elisa Prout OnceAWeekCooking.com Onceaweekcooking.com NOTICE: You DO NOT Have the RIGHT to reprint or Resell this Report! You Also MAY NOT Give Away, Sell or Share the Content Herein If you
15 MUST DINNER RECIPES HAVE BY SAM AHEAD OF THYME
 15 MUST HAVE DINNER RECIPES BY SAM AHEAD OF THYME INTRODUCTION Hi, I'm Sam! Welcome to the family! As an official subscriber, you will now get first-hand, exclusive updates on all our new recipes delivered
Cookbook. Some of our Favorite Recipes
 Cookbook Some of our Favorite Recipes Marinades for Salmon and Halibut All of the recipes below are good with 4 lbs. of fish (salmon or halibut). The fish is done when it flakes when poked with a fork
THIS WEEK'S MENU: DAY 2 DAY 1 DAY 3 DAY 4 DAY 7 DAY 6 DAY 5 STANDARD PLAN Slow Cooker Chicken Enchilada Chili (Cafe Zupas Copycat)
") STANDARD PLAN - 12-14-2018 THIS WEEK'S MENU: DAY 1 5-Ingredient Ravioli Lasagna Winter Cranberry Apple Salad DAY 2 Slow Cooker Chicken Enchilada Chili (Cafe Zupas Copycat) Corn Flake Wreaths DAY 3 Hashbrown
STANDARD PLAN - 12-14-2018 THIS WEEK'S MENU: DAY 1 5-Ingredient Ravioli Lasagna Winter Cranberry Apple Salad DAY 2 Slow Cooker Chicken Enchilada Chili (Cafe Zupas Copycat) Corn Flake Wreaths DAY 3 Hashbrown
Easy Red Bean Soup. Brown the sausage in a heavy pot. Add onion and sauté until onion is soft.
 Easy Red Bean Soup 3 Cans Blue Runner Creole Cream Style Red Beans or Navy Beans 2 Cans Chicken Broth (Low Salt recommended) 1/2 lb. of sausage (hot or mild) sliced and quartered 1 onion -chopped 1 tbsp
Pink Party Salad. Ingredients. Directions. Nutrition Information. Makes: 6 servings
 Pink Party Salad Makes: 6 servings 4 potatoes (washed and cut in half) 3 cups beets, cooked (peeled and diced) 1 cup peas, green, fresh or frozen 3 eggs, hard boiled 1 apple 1 teaspoon lemon juice 2 tablespoons
SUNDAY MONDAY TUESDAY WEDNESDAY THURSDAY FRIDAY SATURDAY Bbq chicken with smoky roasted sweet potatoes
 January 2019 SUNDAY MONDAY TUESDAY WEDNESDAY THURSDAY FRIDAY SATURDAY Prep Day Pork chops and green beans Italian Meatballs and salad Prep day Leftovers 30 31 1 2 3 4 5 MEAL PREP Grilled chicken with broccoli
Table of Contents. Conversion Chart
 Breakfast: Breads: Bread Spreads: Salad Dressing and Dips: Salads: Muffins: Table of Contents Conversion Chart Raw Grain Muesli Granola Wheat Bread Nutty German Bread Dinner Rolls French Bread Raisin Bread
Thanksgiving Recipes
 Thanksgiving Recipes Traditional Thanksgiving Meal Turkey with stuffing Green Bean Casserole Sweet Potato Casserole Seven Layer Salad Cranberry Salad Pumpkin Pie Total calories for meal (one serving of
Creamed Corn. momsbistro.net
 Creamed Corn 2 tbsp butter 1/4 cup cream or milk 3 1/2 cups frozen corn 2 tbsp cream cheese 1 tsp each; salt and garlic powder 1/2 tsp black pepper In the bowl of a food processor, puree 1/2 cup frozen
Shopping List WEEK 11
 Shopping List WEEK 11 2016 paleoplan.com Shopping List WEEK 11 2016 paleoplan.com Shopping List WEEK 11 2016 paleoplan.com Shopping List WEEK 11 2016 paleoplan.com Prep List WEEK 11 Here is a prep list
Barbecue Cookbook. Compiled by cookdojo home edition. Powered by CookDojo Home Edition - Web Based Version. Page 1/ :06:36
 Barbecue Cookbook Compiled by cookdojo home edition Powered by CookDojo Home Edition - Web Based Version Page 1/11 2005-06-07 11:06:36 List of Recipes Barbecue Baked Barbecued Chicken Marinated Steak Kabobs
Chicken and Mushrooms with Cream Sauce. Lemon Pepper Salmon with Asparagus. Leftovers from D4. Spinach, Cucumber & Salmon Salad
 Week 4 Meal Plan Breakfast Lunch Dinner Day 1 Smoked Salmon Omelet Chicken and Mushrooms with Cream Sauce Mama s Meatloaf and Mashed Cauliflower A4 B4 C4 Day 2 Savory Sausage Breakfast Cups A1 D4 Lemon
HELPFUL HINTS: Bring enough to feed 12 people Don t cut your dishes ahead of time Bring a serving utensil Have FUN!
 ; Calvary MOPS Recipe and Brunch Idea Book 2018-2019 Favorite, easy and affordable recipes Quick In-A-Pinch ideas for when you re busy life-ing Tips on portions and quantities needed HELPFUL HINTS: Bring