User Manual. Fire Up the Good Life!
|
|
|
- Anissa Manning
- 6 years ago
- Views:
Transcription


1 User Manual CBO-500 CBO-750 Fire Up the Good Life! A MAJOR CAUSE OF OVEN-RELATED FIRES IS FAILURE TO MAINTAIN REQUIRED CLEARANCES (AIR SPACES) TO COMBUSTIBLE MATERIALS. IT IS OF UTMOST IMPORTANCE THAT THIS OVEN BE INSTALLED ONLY IN ACCORDANCE WITH THESE INSTRUCTIONS.


2 READ ALL INSTRUCTIONS BEFORE INSTALLING AND USING THIS WOOD BURNING OVEN. SAVE THESE INSTRUCTIONS. Before installation, contact local authorities having jurisdiction (municipal building department, fire prevention bureau, etc.) about required permits, restrictions and installation inspection in your area. Please read this entire manual before you install the Oven. Failure to follow instructions may result in property damage, bodily injury, or even death. Install and use the Oven only in accordance with Chicago Brick Oven s installation and operating instructions (or equivalent). For Outdoor Installation of non-ul-certified CBO-500 or CBO-750 models, local regulations regarding wood burning equipment should be consulted. For Indoor Installation, UL-certified CBO-500 or CBO-750 models are required. CAUTION: TO ENSURE THE STABILITY AND SAFE OPERATION OF THE OVEN, DO NOT USE MAKESHIFT MATERIALS IN ITS ASSEMBLY OR THE CONSTRUCTION OF ITS SUPPORT BASE OR DECORATIVE SURROUND. USE ONLY THE MATERIALS SUPPLIED OR RECOMMENDED BY CHICAGO BRICK OVEN. 3
 our website, chicagobrickoven.com.")


3 Outdoor Entertainment Welcome to a whole new dimension of outdoor cooking and entertaining with your new wood burning brick oven from Chicago Brick Oven! We invite you to visit (and frequent) our website, chicagobrickoven.com. It s a great source of information and suggestions that will help you enjoy your new oven to the fullest: Choose from dozens of mouthwatering recipes for everything from appetizers and breads to main courses and desserts, and of course, pizzas. Shop for accessories, like professional-grade griddles, skillets, pizza racks and more. View dozens of photos of creative outdoor living spaces other owners across the country have created around their ovens. Check out our blog and follow us on Facebook, Twitter and YouTube for the latest news. We, and your fellow Chicago Brick Oven owners and fans, appreciate hearing from you. We encourage you to share your experiences, special recipes, entertaining ideas and more. We especially invite you to take part in our Picture Sweepstakes. Send us your favorite photos showing how you ve used your wood burning brick oven from Chicago Brick Oven to create your favorite wood-fired foods, entertain family and friends or design a great outdoor dining space. If your photos are chosen, we ll send you a Chicago Brick Oven vest and hat and post the photos to our website. Fire Up the Good Life! Visit chicagobrickoven.com for more information. 4
4 Table of Contents CBO-500 Assembly Instructions CBO-750 Assembly Instructions Customized Enclosure Designs...20 Wood-Fired 101 Curing Your Oven...21 Firing Your Oven...22 How the Oven Works...23 Cooking in Your Oven Using Flavored Wood...25 Frequently Asked Questions Operating Instructions...28 Limited Warranty
5 CBO-500 Pre-Assembly INSTALL AND USE ONLY IN ACCORDANCE WITH CHICAGO BRICK OVEN S INSTALLATION AND OPERATING INSTRUCTIONS (OR EQUIVALENT). CONTACT LOCAL BUILDING OFFICIALS OR FIRE OFFICIALS ABOUT RESTRICTIONS AND INSTALLATION INSPECTION IN YOUR AREA. Requirements for Clearance from Combustible Materials To avoid the possibility of a fire, when installing your Chicago Brick Oven wood burning oven (either outdoors or indoors), you must adhere to the following requirements for minimum clearance between your Oven and any combustible materials. Clearance around the Oven: The sides and back of the Oven must be at least 10 inches away from combustible materials (See Aerial View below). The top of the Oven must have at least an 18-inch clearance and the bottom a 30-inch clearance from combustible materials (See Front View below). 10" 10" Aerial View 10" Clearance around the Door Opening: A minimum 30-inch clearance from combustible materials is required on each side of the Door opening and 36 inches from the front of the Door opening. (A Hearth extension may be required to meet these clearance requirements.) Clearance from Wood Storage Area: There must be a 7-inch clearance between the bottom Insulating Boards of the Oven and any wood storage areas that are under the Oven installation. To ensure the 7-inch clearance, it is recommended that you incorporate a non-combustible physical barrier or some other indicator of the distance within the wood storage area. THE FACE OF THE ENCLOSURE MUST BE CONSTRUCTED OF A NON-COMBUSTIBLE MATERIAL. WARNING: DO NOT PACK THE REQUIRED CLEARANCE AREAS WITH INSULATION OR OTHER MATERIALS. WHEN THIS OVEN IS NOT PROPERLY INSTALLED, A FIRE MAY RESULT. TO REDUCE THE RISK OF FIRE, FOLLOW THE INSTALLATION INSTRUCTIONS. Requirements for Outdoor/Indoor Chimney Installations When building the Chimney, it is important to refer to your local building code standards. Every CBO-500 Oven comes with a DuraVent Anchor Plate (Model # 9441) that works with a Class A 6" Pipe. You can buy this pipe from any building or hearth manufacturer. 18" 30" Front View A minimum 24" pipe section is required. If you are assembling your Chimney at 90, you can add additional 24" sections as required. (The Chimney Pipe cannot have a total bend of more than 30. ) The taller the Flue Stack is, the further away the exhaust is from the cook! Note: The Chimney Connector shall not pass through an attic, roof space, closet or similar concealed space, or a floor or ceiling. Where passage through a wall or partition of combustible construction is desired, the installation must conform to the CAN/CSA-B365 installation code for Solid-Fuel-Burning Appliances and Equipment. Note: For indoor installations that utilize a combustible enclosure, only a Class A Chimney should be used from the Anchor Plate on the Oven to the termination point outside of the building/structure. For outdoor non-combustible enclosures, a stainless steel connector can be used. Note: Please refer to the Exhaust Hood manufacturer s recommendations for inspection, maintenance and cleaning. WARNING: THE CHIMNEY MUST BE OF A TYPE SUITABLE FOR SOLID FUEL. THE CHIMNEY AND THE REQUIRED CHIMNEY CONNECTOR MUST BE IN GOOD CONDITION AND KEPT CLEAN. CAUTION: NEVER USE ANY COMBUSTIBLE MATERIALS NEAR THE ANCHOR PLATE OR FLUE STACK. WE RECOMMEND A MINIMUM 6" OF AIR SPACE BETWEEN THE ANCHOR PLATE AND FLUE AND ANY COMBUSTIBLE MATERIAL. AGAIN, CHECK WITH YOUR LOCAL BUILDING DEPARTMENT TO ENSURE YOU ADHERE TO LOCAL BUILDING CODES! Arch Dome Insulation Blanket Very important for correct functioning and life of the CBO-500 Oven! The Oven Dome must be covered with the supplied Ceramic Fiber Insulation Blanket. The Blanket, which withstands high temperatures, should cover the entire surface area of the Dome. You can cut the Ceramic Fiber to insulate around the Metal Anchor Plate. Since most heat loss will occur at the Metal Anchor Plate and top of the Oven, you should ensure these spots are well-insulated. You can choose to insulate the Oven further by packing Vermiculite or other non-flammable insulating material above the Blanket. The better you insulate your Oven, the better it will perform! Note: It is important that you use all of the Insulation supplied to avoid a possible fire. Note: All orders are FOB. Inspect all components for damage at time of delivery. Reject delivery if damaged or not on packing slip. If damages are discovered after delivery, contact your carrier for recourse. Note: Any variance from the Chicago Brick Oven installation instructions or alterations made to prefabricated Ovens without written approval from Chicago Brick Oven, will void your warranty. Note: Your Oven is designed for burning solid, dried wood only. Do not burn scrap wood, compressed logs or other materials. Failure to follow this instruction may damage your Oven and void your warranty. 6
 & Arch Decorative Door Nuts & Bolts ThermoWorks Thermometer DuraVent Anchor Plate (Model #9441, 6\") 18\" Gauge Galvannealed Steel Plate Insulating Boards")


6 CBO-500 Assembly Instructions CBO-500 ovens should be installed by a professional or suitably-qualified individual. Parts and Components Dome, Hearth (2 pieces) & Arch Decorative Door Nuts & Bolts ThermoWorks Thermometer DuraVent Anchor Plate (Model #9441, 6") 18" Gauge Galvannealed Steel Plate Insulating Boards Insulating Blanket Mortar Cooking Accessories: Pizza Peel and Brush Support Base The CBO-500 Oven Support Base must: be constructed of masonry or metal have at least the same area dimensions as the external footprint of the Oven You must check with your local Building Department to determine the amount of clearance required by local building codes between the Oven and Decorative Cover. CBO recommends you add at least 8" for the width (4" per side) and 5" for the depth (on the back side of the Oven) to accommodate the Decorative Cover and Insulation. Also see the Requirements for Clearance from Combustible Materials section on Page 5 of this manual. CAUTION: DO NOT USE ANY COMBUSTIBLE MATERIALS IN THE CONSTRUCTION OF THE COVERING (SHROUD) OF THE OVEN. ALL BUILDING MATERIALS USED NEAR THE OVEN, METAL ANCHOR PLATE AND FLUE PIPE SHOULD BE NON-COMBUSTIBLE AND NEVER MADE OF WOOD. The Support Base surface must be flat, level and strong enough to support the total combined weight of the Oven (350 lbs.) and the Decorative Cover design you choose. The two vertical support feet of the Support Base are typically made of concrete block. The horizontal Support Base is typically made of a 4"-thick, steel-reinforced concrete slab. The standard height of the horizontal part of the Support Base is 42." Note: Imagine the Oven s Support Base as a table. The table s legs are concrete blocks and the tabletop is a 4"-thick concrete slab. To build the Support Base, you build the support legs out of concrete block, then on top of that leg base, you build a frame to pour a concrete slab (the tabletop). On the concrete slab (the tabletop), you position the Sub-hearth Insulation Boards, then the Hearth, then the Oven. CAUTION: TO AVOID THE POSSIBILITY OF A FIRE, NON-COMBUSTIBLE MATERIALS MUST BE USED IN THE CONSTRUCTION OF THE SUPPORT BASE AND ANY FRAMING USED AROUND THE OVEN. 7
7 Hearth Insulation Sub-hearth Insulation Board (supplied) CBO-500 Assembly Instructions Your CBO-500 Oven comes with Insulation Boards (shipped in three pieces) that are placed under the 18-guage Galvannealed Steel Plate and both pieces of the Hearth for insulation. Place the Insulation Board on the Support Base. Next, lay the Galvannealed Steel Plate over the Insulation Board. Then set the Oven Base on the steel plate. Do not use any materials (mortar, cement, glue) to attach the Oven Base to the Galvannealed Steel Plate. It is very important that the entire Oven Base come in contact with the Galvannealed Steel Plate. Support Base Insulating Boards Galvannealed Steel Plate The Insulation Board must be cut so that it is flush, or slightly set back, with the front end of the Hearth, the Support Base and the two vertical support feet in order for the final Decorative Cover to fit properly and protect the Insulation Board from exposure to moisture. The Insulation Board can be cut-to-size with a regular jigsaw. The Oven s decorative finish should be built on top of the Support Base, not on top of the Insulation Board. Remember, the Insulation Board should not be exposed to the elements and should not get wet. Note: It is important that you use all of the Insulation supplied to avoid a possible fire. The Sub-hearth Insulation should not be exposed to the elements and should never get wet. It is recommended that you sweep or vacuum the Galvannealed surface to remove debris before hearth installation. Oven Assembly Shown is the final assembly of the three-piece CBO-500 oven. The final assembly will rest on the Galvannealed Steel Plate and Insulation Board on your support base. Hearth (2 pieces) Arch Dome 8
8 CBO-500 Assembly Instructions 1 After the Insulation Board has been set and the Galvannealed Steel Plate placed on top of it, you are now ready to set the Hearth into place. Line the Front Hearth piece up with the front of the Oven base. As you can see, the Insulation Board is not exposed to the elements and covers the entire Main Hearth. 2 Push the Main Hearth in place so there is a tight fit with the Front Hearth. 3 Remove the Front Hearth piece and place the Dome over the top of the Main Hearth. Make certain the front of the Oven is lined up, then replace the Front Hearth. Attach the Anchor Plate to the top of the Oven. 4 Lay the Insulating Blanket over the top of the Oven. Cut out a hole for the Flue Pipe, and cut the Insulation to line up with the front of the Oven. If you have any extra Insulation, put it on the top of the Oven. Note: Industrial-grade aluminum foil may be placed over the Insulation for moisture protection. Note: It is important that you use all of the Insulation supplied to avoid a possible fire. 5 Cut the back of the Insulation with a razor blade and tuck it into place. Pull the sides of the Insulation around the back of the Oven. You can tie the Insulation with metal straps, or aluminum tape, or just leave it in place. 9
9 CBO-500 Assembly Instructions 6 In this picture, you will see we have a Metal Shroud. If you are building a Stone or Brick Shroud, it should follow the contour of the Oven, but not rest on the Arch. Now slide the Front Hearth into place and abut up against the Middle Hearth as close as possible. 7 You are now ready to mortar the Arch to the Dome. Use the refractory mortar provided to completely seal the space between the Arch and Dome. You will also put some mortar on the Front Hearth under the Arch. You don t need a lot of mortar; just enough to make a seal. Place the mortar all the way around the Arch and on the Hearth on both sides under the Arch. Note: Be very careful to not get any mortar in the mounting holes for the Arch and Door. If you do get mortar in the holes, attempt to clean it out immediately; the bolts will not go in all the way if mortar is present. 8 Line up the Arch and put the two top bolts in place. Tighten the bolts to hand-tight. Upon completion of the install, you will tighten the bolts more; at this time you just want to hold the Arch in place. Note: Do not over-torque bolts or you may dislodge the threaded inserts! 9 Attach the Metal Door and insert the bolts to hold it in place. Once you have all four bolts in place, you should tighten them, but do not force it. You should create a nice seal between the Arch and the Dome with the mortar you used. Note: Do not over-torque bolts or you may dislodge the threaded inserts! 10 Use some mortar to finish off the install. If the Shroud is brick or stone, you should also use mortar around the top of the Arch. If you are using a Metal Shroud, use a high-temp silicone on the top of the Arch to seal the joint with the Shroud. Note: Each year you will need to touch-up the mortar and/or silicone for cosmetic reasons. 10

10 CBO-500 Operating Instructions To protect the interior of your oven from rain and other moisture, a protective rain cap must be installed on top of the flue pipe to ensure that moisture does not get into your oven. Operating Instructions Please follow these instructions exactly as written. Failure to follow instructions may cause permanent damage to your Oven and your warranty may be void. Although your Oven may seem dry once you complete the installation process, there are small amounts of moisture pockets that need to work their way out. If you build a large fire in your Oven from the onset, you could compromise your Oven s longevity and cooking efficiency, and can ultimately cause permanent damage, which may void the manufacturer s warranty. When lighting the first fire, keep the flames low so the moisture can be slowly released from the Oven and surrounding masonry work. This curing process should be conducted at a temperature as close to 212 F (100 C) as possible (do not exceed that temperature) over a 2- to 3-day period. CAUTION: NEVER USE GASOLINE, GASOLINE-TYPE LANTERN FUEL, KEROSENE, CHARCOAL LIGHTER FLUID, OR SIMILAR LIQUIDS TO START OR FRESHEN UP A FIRE IN THIS OVEN. KEEP ALL SUCH LIQUIDS WELL AWAY FROM THE OVEN WHEN IT IS IN USE. Note: Refer to Curing Your Oven on Page 21. A good suggestion is to build a fire in a separate location and place the coals into the Oven. You will generate heat without the flame and the Oven will cure as required. Due to thermal expansion, small cracks will appear in the Dome or Hearth during the curing and cooking process. Do not worry; this is normal and the quality of your Oven will not be compromised. After you have cured your Oven and are ready to start cooking, light a small fire and slowly build it up. The interior Dome of the Oven will at first turn black from the fire smoke. You will know the Oven temperature has reached 700 F when the inner walls turn from black to a whitish grey. This is a perfect temperature for many types of cooking. Use the included thermometer to check temperatures inside your Oven. You can just point and shoot to get a reading in any place in the Oven. Note: Please refer to the manufacturer s instructions for proper use of the thermometer that is included with your Oven. Note: You should re-cure your Oven if it has not been used for an extended period of time or if Oven has been exposed to excessive amounts of moisture. Note: Your Oven is designed for burning solid, dried wood only. Do not burn scrap wood, compressed logs or other materials. Failure to follow this instruction may damage your Oven and void your warranty. CAUTION: NEVER OBSTRUCT THE DAMPER OPENING WHILE OPERATING THE OVEN
11 CBO-500 Best Practices Other Precautions and Instructions Local regulations about wood-burning equipment should be consulted. CBO-500 Ovens should be installed by a professional or suitably qualified individual. For Indoor Installations, A Source Of Fresh Air Into The Room Shall Be Provided When Required. Check With Local Building Officials Regarding Ventilation Requirements. Do Not Use Products Not Specified For Use With This Oven. Do Not Install In A Mobile Home. Do Not Connect To Or Use In Conjunction With Any Air Distribution Ductwork. Unless Specifically Approved For Such Installations. Do Not Use Chemicals Or Fluids To Start The Fire. Do Not Burn Garbage Or Flammable Fluids, Such As Gasoline, Naphtha Or Engine Oil. Please Use Extreme Caution Around The Oven. The Oven Dome, Hearth, Arch And Door Will Be Extremely Hot When In Use And For Hours After Use. Keep Children, Clothing And Furniture Away. Contact May Cause Skin Burns. Never Allow Anyone Under The Age Of 18 To Operate The Oven. Do not throw chunks of wood violently into the Oven. Each time you light a fire, make sure the fire covers as much of the Hearth surface as possible. Always use dry hard woods (dried for at least two years)! If you see moisture coming from the logs while they are on the fire, the wood is not dry. Using wood that is not dry will cause the Oven to throw off a considerable amount of smoke and can also cause damage to the Oven because of the high moisture content. The first two times you cook in your new Oven, cook something simple (for example, a pizza shell) then throw it away without actually eating what you have cooked. The third time, you can begin enjoying what you have cooked in your new Oven. Always pre-warm any cooking accessory (the CBO Grill, a cast iron pot, etc.) before you put it in the Oven. If you place a cold accessory on a hot Hearth, the thermal shock may cause the Hearth to crack. You can also add an Oven Rack so the pot or pan doesn t sit directly on the Hearth. The manufacturer is not responsible for eventual environment damages, nuisance or smoke and carbon particles. You should recure your Oven if it has not been used for an extended period of time or if Oven has been exposed to excessive amounts of moisture. In cold temperatures, bring your Oven up to temperature slowly. Never use frozen foods directly on the Hearth. Never use water, marinades or other liquids directly on the Hearth. DO NOT OVER-FIRE! When flame spills out of the Oven, you are over-firing. A protective rain cap must be installed on top of the Flue Pipe to ensure that moisture does not get into your Oven. Ash Disposal: Brush out the ashes after each use with your CBO Wire Brush. Ashes should be placed in a metal container with a tight-fitting lid. The closed container of ashes should be placed on a non-combustible floor or on the ground, well away from all combustible materials, pending final disposal. When the ashes are disposed of by burial in soil or otherwise locally dispersed, they should be kept in the closed container until all cinders have thoroughly cooled. Regular Maintenance Your CBO-500 Oven will last years if you follow these simple, regular maintenance tips: Never use any cleaning products inside the Oven! Heat the Oven properly to clean it. The Decorative Door will occasionally show wear. Take a piece of steel wool to the Door, lightly, and repaint the Door with black Stove Pipe Spray Paint available at your local hardware store. Lubricate the Decorative Door hinges on a regular basis. Creosote-Formation and the Need for Removal. When wood is burned slowly, it produces tar and other organic vapors that combine with expelled moisture to form creosote. The creosote vapors condense in a relatively cool Oven Flue and Exhaust Hood of a slow-burning fire. As a result, creosote residue accumulates on the Flue Lining and Exhaust Hood. When ignited, this creosote makes an extremely hot fire. To reduce the risk of a creosote fire, inspect the Flue Connection/ Anchor Plate on a regular basis. Make sure it is free from any buildup. If you have buildup, use a wire brush to clean it. Contact your local municipal or provincial fire authority for information about how to handle a chimney fire. Have a clearly understood plan for how to handle a chimney fire. Inspect the Flue Pipe on a regular basis. Make sure it is in good repair and is seated securely into the Flue Connection/ Anchor Plate. If you are using a Single-Wall Pipe, check for rust. If rust is found, replace the Flue Pipe. Inspect your Flue Cap to ensure there is no buildup blocking the flow of air. If you have any buildup, you can use a wire brush to clean it. Touch-up the mortar around the Arch to maintain a nice finished look. You can use any refractory mortar found at your local hardware store. If you use the CBO Metal Shroud in your install, cover the Shroud with an inexpensive grill cover to help protect the Oven from the elements when not in use. The Oven must be cool to the touch before it can be covered. When using any CBO accessory, please do not allow any type of liquid to touch the Hearth or Dome. For example: When cooking steak on the Grill Grate, you need to create a bed of coals underneath the Grill Grate to catch the drippings. You could also use the Griddle as a catch basin underneath the Grill Grate. If you have any questions about the use and care of your CBO-500 Oven, please send us an to info@chicagobrickoven.com. 12
12 CBO-750 Pre-Assembly INSTALL AND USE ONLY IN ACCORDANCE WITH CHICAGO BRICK OVEN S INSTALLATION AND OPERATING INSTRUCTIONS (OR EQUIVALENT). CONTACT LOCAL BUILDING OFFICIALS OR FIRE OFFICIALS ABOUT RESTRICTIONS AND INSTALLATION INSPECTION IN YOUR AREA. Requirements for Clearance from Combustible Materials To avoid the possibility of a fire, when installing your Chicago Brick Oven wood burning oven (either outdoors or indoors), you must adhere to the following requirements for minimum clearance between your Oven and any combustible materials. Clearance around the Oven: The sides and back of the Oven must be at least 10 inches away from combustible materials (See Aerial View below). The top of the Oven must have at least an 18-inch clearance and the bottom a 30-inch clearance from combustible materials (See Front View below). 10" 10" Aerial View 10" Clearance around the Door Opening: A minimum 30-inch clearance from combustible materials is required on each side of the Door opening and 36 inches from the front of the Door opening. (A Hearth extension may be required to meet these clearance requirements.) Clearance from Wood Storage Area: There must be a 7-inch clearance between the bottom Insulating Boards of the Oven and any wood storage areas that are under the Oven installation. To ensure the 7-inch clearance, it is recommended that you incorporate a non-combustible physical barrier or some other indicator of the distance within the wood storage area. THE FACE OF THE ENCLOSURE MUST BE CONSTRUCTED OF A NON-COMBUSTIBLE MATERIAL. WARNING: DO NOT PACK THE REQUIRED CLEARANCE AREAS WITH INSULATION OR OTHER MATERIALS. WHEN THIS OVEN IS NOT PROPERLY INSTALLED, A FIRE MAY RESULT. TO REDUCE THE RISK OF FIRE, FOLLOW THE INSTALLATION INSTRUCTIONS. Requirements for Outdoor/Indoor Chimney Installations When building the Chimney, it is important to refer to your local building code standards. Every CBO-750 Oven comes with a CBO standard Anchor Plate that works with a Class A 6" Pipe. You can buy this pipe from any building or hearth manufacturer. 18" 30" Front View A minimum 24" pipe section is required. If you are assembling your Chimney at 90, you can add additional 24" sections as required. (The Chimney Pipe cannot have a total bend of more than 30. ) The taller the Flue Stack is, the further away the exhaust is from the cook! Note: The Chimney Connector shall not pass through an attic, roof space, closet or similar concealed space, or a floor or ceiling. Where passage through a wall or partition of combustible construction is desired, the installation must conform to the CAN/CSA-B365 installation code for Solid-Fuel-Burning Appliances and Equipment. Note: For indoor installations that utilize a combustible enclosure, only a Class A Chimney should be used from the Anchor Plate on the Oven to the termination point outside of the building/structure. For outdoor non-combustible enclosures, a stainless steel connector can be used. Note: Please refer to the Exhaust Hood manufacturer s recommendations for inspection, maintenance and cleaning. Warning: the chimney must be of a type suitable for solid fuel. The chimney and the required chimney connector must be in good condition and kept clean. CAUTION: NEVER USE ANY COMBUSTIBLE MATERIALS NEAR THE ANCHOR PLATE OR FLUE STACK. WE RECOMMEND A MINIMUM 6" OF AIR SPACE BETWEEN THE ANCHOR PLATE AND FLUE AND ANY COMBUSTIBLE MATERIAL. AGAIN, CHECK WITH YOUR LOCAL BUILDING DEPARTMENT TO ENSURE YOU ADHERE TO LOCAL BUILDING CODES! Arch Dome Insulation Blanket Very important for correct functioning and life of the CBO-750 Oven! The Oven Dome must be covered with the supplied Ceramic Fiber Insulation Blanket. The Blanket, which withstands high temperatures, should cover the entire surface area of the Dome. You can cut the Ceramic Fiber to insulate around the Metal Anchor Plate. Since most heat loss will occur at the Metal Anchor Plate and top of the Oven, you should ensure these spots are well-insulated. You can choose to insulate the Oven further by packing Vermiculite or other non-flammable insulating material above the Blanket. The better you insulate your Oven, the better it will perform! Note: It is important that you use all of the Insulation supplied to avoid a possible fire. Note: All orders are FOB. Inspect all components for damage at time of delivery. Reject delivery if damaged or not on packing slip. If damages are discovered after delivery, contact your carrier for recourse. Note: Any variance from the Chicago Brick Oven installation instructions or alterations made to prefabricated Ovens without written approval from Chicago Brick Oven, will void your warranty. Note: Your Oven is designed for burning solid, dried wood only. Do not burn scrap wood, compressed logs or other materials. Failure to follow this instruction may damage your Oven and void your warranty. 13
 & Arch Decorative Door Nuts & Bolts ThermoWorks Thermometer Mortar 18\" Gauge")
 Cooking Accessories: Pizza Peel and Brush Support Base The CBO-750 Oven Support Base must:")

 and 5\" for the depth (on the back side of the Oven) to")


 and the Decorative Cover design you choose.")


13 CBO-750 Assembly Instructions CBO-750 ovens should be installed by a professional or suitably-qualified individual. Parts and Components Dome, Hearth (3 pieces) & Arch Decorative Door Nuts & Bolts ThermoWorks Thermometer Mortar 18" Gauge Galvannealed Steel Plate Insulating Boards Insulating Blanket Anchor Box with DuraVent Anchor Plate For UL-Required Installations (Model #9441, 6") Cooking Accessories: Pizza Peel and Brush Support Base The CBO-750 Oven Support Base must: be constructed of masonry or metal have at least the same area dimensions as the external footprint of the Oven You must check with your local Building Department to determine the amount of clearance required by local building codes between the Oven and Decorative Cover. CBO recommends you add at least 8" for the width (4" per side) and 5" for the depth (on the back side of the Oven) to accommodate the Decorative Cover and Insulation. Also see the Requirements for Clearance from Combustible Materials section on Page 12 of this manual. CAUTION: DO NOT USE ANY COMBUSTIBLE MATERIALS IN THE CONSTRUCTION OF THE COVERING (SHROUD) OF THE OVEN. ALL BUILDING MATERIALS USED NEAR THE OVEN, METAL ANCHOR PLATE AND FLUE PIPE SHOULD BE NON-COMBUSTIBLE AND NEVER MADE OF WOOD. The Support Base surface must be flat, level and strong enough to support the total combined weight of the Oven (500 lbs.) and the Decorative Cover design you choose. The two vertical support feet of the Support Base are typically made of concrete block. The horizontal Support Base is typically made of a 4"-thick, steel-reinforced concrete slab. The standard height of the horizontal part of the Support Base is 42." Note: Imagine the Oven s Support Base as a table. The table s legs are concrete blocks and the tabletop is a 4"-thick concrete slab. To build the Support Base, you build the support legs out of concrete block, then on top of that leg base, you build a frame to pour a concrete slab (the tabletop). On the concrete slab (the tabletop), you position the Sub-hearth Insulation Boards, then the Hearth, then the Oven. CAUTION: TO AVOID THE POSSIBILITY OF A FIRE, NON-COMBUSTIBLE MATERIALS MUST BE USED IN THE CONSTRUCTION OF THE SUPPORT BASE AND ANY FRAMING USED AROUND THE OVEN. 14
14 Hearth Insulation Sub-hearth Insulation Board (supplied) CBO-750 Assembly Instructions Your CBO-750 Oven comes with Insulation Boards (shipped in three pieces) that are placed under the 18-guage Galvannealed Steel Plate and both pieces of the Hearth for insulation. Place the Insulation Board on the Support Base. Next, lay the Galvannealed Steel Plate over the Insulation Board. Then set the Oven Base on the steel plate. Do not use any materials (mortar, cement, glue) to attach the Oven Base to the Galvannealed Steel Plate. It is very important that the entire Oven Base come in contact with the Galvannealed Steel Plate. Support Base Insulating Boards Galvannealed Steel Plate The Insulation Board must be cut so that it is flush, or slightly set back, with the front end of the Hearth, the Support Base and the two vertical support feet in order for the final Decorative Cover to fit properly and protect the Insulation Board from exposure to moisture. The Insulation Board can be cut-to-size with a regular jigsaw. The Oven's decorative finish should be built on top of the Support Base, not on top of the Insulation Board. Remember, the Insulation Board should not be exposed to the elements and should not get wet. Note: It is important that you use all of the Insulation supplied to avoid a possible fire. The sub-hearth insulation should not be exposed to the elements and should never get wet. It is recommended that you sweep or vacuum the Galvannealed surface to remove debris before hearth installation. Oven Assembly Shown is the final assembly of the three-piece CBO-750 oven. The final assembly will rest on the Galvannealed Steel Plate and Insulation Board on your support base. Hearth (3 pieces) Arch Dome 15
15 CBO-750 Assembly Instructions 1 After you have built the Support Base and positioned the Insulating Boards and Galvannealed Steel Plate as shown, you are ready to place the Dome assembly on the Galvannealed Steel Plate. You have two Dome assembly placement options: You can align the front of the Dome assembly with the edge of the Galvannealed Steel Plate and your 2" Arch Assembly and Door will overhang. You can recess the Dome approximately 2" from the edge of the Galvannealed Steel Plate to accommodate the Arch and Door Assembly. 2 Place the two wing hearth pieces inside the Dome. The pieces should fit snug against the walls of the Dome. A Chicago Brick Oven is a custom-manufactured product so some variances may occur, but will not affect the performance of your Oven. 3 Finally, place the center Hearth piece into position. DO NOT DROP the center Hearth piece into position. The recommended approach is to gently slide the centerpiece into position. Align the edges of wing pieces to the edges of the centerpiece. A Chicago Brick Oven is a custom-manufactured product so some variances may occur, but will not affect the performance of your Oven. 4 Attach Anchor Box to the Dome assembly aligning the pre-drilled holes and included bolts. Install Anchor Box before attaching the Insulating Blanket to the Oven. 5 Lay the Insulating Blanket over the top of the Oven. Cut out a hole for the Flue Pipe, and cut the Insulation to line up with the front of the Oven. If you have any extra Insulation, put it on the top of the Oven. Note: Industrial-grade aluminum foil may be placed over the Insulation for moisture protection. Note: It is important that you use all of the Insulation supplied to avoid a possible fire. 16

16 CBO-750 Assembly Instructions 6 Cut the back of the Insulation with a razor blade and tuck it into place. Pull the sides of the Insulation around the back of the Oven. You can tie the Insulation with metal straps, or aluminum tape, or just leave it in place. 7 You are now ready to mortar the Arch to the Dome. Use the refractory mortar provided to completely seal the space between the Arch and Dome. You will also put some mortar on the Front Hearth under the Arch. You don t need a lot of mortar; just enough to make a seal. Place the mortar all the way around the Arch and on the Hearth on both sides under the Arch. 8 Note: Be very careful to not get any mortar in the mounting holes for the Arch and Door. If you do get mortar in the holes, attempt to clean it out immediately; the bolts will not go in all the way if mortar is present. 9 Line up the Arch and put the two top bolts in place. Tighten the bolts to hand-tight. Upon completion of the install, you will tighten the bolts more; at this time you just want to hold the Arch in place. Note: Do not over-torque bolts or you may dislodge the threaded inserts! 10 Attach the Metal Door and insert the bolts to hold it in place. Once you have all four bolts in place, you should tighten them, but do not force it. You should create a nice seal between the Arch and the Dome with the mortar you used. Note: Do not over-torque bolts or you may dislodge the threaded inserts! 11 Use some mortar to finish off the install. If the Shroud is brick or stone, you should also use mortar around the top of the Arch. If you are using a Metal Shroud, use a high-temp silicone on the top of the Arch to seal the joint with the Shroud. Note: Each year you will need to touch-up the mortar and/or silicone for cosmetic reasons. 17

17 CBO-750 Operating Instructions To protect the interior of your oven from rain and other moisture, a protective rain cap must be installed on top of the flue pipe to ensure that moisture does not get into your oven. Operating Instructions Please follow these instructions exactly as written. Failure to follow instructions may cause permanent damage to your Oven and your warranty may be void. Although your Oven may seem dry once you complete the installation process, there are small amounts of moisture pockets that need to work their way out. If you build a large fire in your Oven from the onset, you could compromise your Oven s longevity and cooking efficiency, and can ultimately cause permanent damage, which may void the manufacturer s warranty. When lighting the first fire, keep the flames low so the moisture can be slowly released from the Oven and surrounding masonry work. This curing process should be conducted at a temperature as close to 212 F (100 C) as possible (do not exceed that temperature) over a 2- to 3-day period. CAUTION: NEVER USE GASOLINE, GASOLINE-TYPE LANTERN FUEL, KEROSENE, CHARCOAL LIGHTER FLUID, OR SIMILAR LIQUIDS TO START OR FRESHEN UP A FIRE IN THIS OVEN. KEEP ALL SUCH LIQUIDS WELL AWAY FROM THE OVEN WHEN IT IS IN USE. Note: Refer to Curing Your Oven on page 21. A good suggestion is to build a fire in a separate location and place the coals into the Oven. You will generate heat without the flame and the Oven will cure as required. Due to thermal expansion, small cracks will appear in the Dome or Hearth during the curing and cooking process. Do not worry; this is normal and the quality of your Oven will not be compromised. After you have cured your Oven and are ready to start cooking, light a small fire and slowly build it up. The interior Dome of the Oven will at first turn black from the fire smoke. You will know the Oven temperature has reached 700 F when the inner walls turn from black to a whitish grey. This is a perfect temperature for many types of cooking. Use the included thermometer to check temperatures inside your Oven. You can just point and shoot to get a reading in any place in the Oven. Note: Please refer to the manufacturer s instructions for proper use of the thermometer that is included with your Oven. Note: You should re-cure your Oven if it has not been used for an extended period of time or if Oven has been exposed to excessive amounts of moisture. Note: Your Oven is designed for burning solid, dried wood only. Do not burn scrap wood, compressed logs or other materials. Failure to follow this instruction may damage your Oven and void your warranty. CAUTION: NEVER OBSTRUCT THE DAMPER OPENING WHILE OPERATING THE OVEN
18 CBO-750 Best Practices Other Precautions and Instructions Local regulations about wood-burning equipment should be consulted. CBO-750 Ovens should be installed by a professional or suitably qualified individual. For Indoor Installations, A Source Of Fresh Air Into The Room Shall Be Provided When Required. Check With Local Building Officials Regarding Ventilation Requirements. Do Not Use Products Not Specified For Use With This Oven. Do Not Install In A Mobile Home. Do Not Connect To Or Use In Conjunction With Any Air Distribution Ductwork. Unless Specifically Approved For Such Installations. Do Not Use Chemicals Or Fluids To Start The Fire. Do Not Burn Garbage Or Flammable Fluids, Such As Gasoline, Naphtha Or Engine Oil. Please Use Extreme Caution Around The Oven. The Oven Dome, Hearth, Arch And Door Will Be Extremely Hot When In Use And For Hours After Use. Keep Children, Clothing And Furniture Away. Contact May Cause Skin Burns. Never Allow Anyone Under The Age Of 18 To Operate The Oven. Do not throw chunks of wood violently into the Oven. Each time you light a fire, make sure the fire covers as much of the Hearth surface as possible. Always use dry hard woods (dried for at least two years)! If you see moisture coming from the logs while they are on the fire, the wood is not dry. Using wood that is not dry will cause the Oven to throw off a considerable amount of smoke and can also cause damage to the Oven because of the high moisture content. The first two times you cook in your new Oven, cook something simple (for example, a pizza shell) then throw it away without actually eating what you have cooked. The third time, you can begin enjoying what you have cooked in your new Oven. Always pre-warm any cooking accessory (the CBO Grill, a cast iron pot, etc.) before you put it in the Oven. If you place a cold accessory on a hot Hearth, the thermal shock may cause the Hearth to crack. You can also add an Oven Rack so the pot or pan doesn t sit directly on the Hearth. The manufacturer is not responsible for eventual environment damages, nuisance or smoke and carbon particles. You should re-cure your Oven if it has not been used for an extended period of time or if Oven has been exposed to excessive amounts of moisture. In cold temperatures, bring your Oven up to temperature slowly. Never use frozen foods directly on the Hearth. Never use water, marinades or other liquids directly on the Hearth. DO NOT OVER-FIRE! When flame spills out of the Oven, you are over-firing. A protective rain cap must be installed on top of the Flue Pipe to ensure that moisture does not get into your Oven. Ash Disposal: Brush out the ashes after each use with your CBO Wire Brush. Ashes should be placed in a metal container with a tight-fitting lid. The closed container of ashes should be placed on a non-combustible floor or on the ground, well away from all combustible materials, pending final disposal. When the ashes are disposed of by burial in soil or otherwise locally dispersed, they should be kept in the closed container until all cinders have thoroughly cooled. Regular Maintenance Your CBO-750 Oven will last years if you follow these simple, regular maintenance tips: Never use any cleaning products inside the Oven! Heat the Oven properly to clean it. The Decorative Door will occasionally show wear. Take a piece of steel wool to the Door, lightly, and repaint the Door with black Stove Pipe Spray Paint available at your local hardware store. Lubricate the Decorative Door hinges on a regular basis. Creosote-Formation and the Need for Removal. When wood is burned slowly, it produces tar and other organic vapors that combine with expelled moisture to form creosote. The creosote vapors condense in a relatively cool Oven Flue and Exhaust Hood of a slow-burning fire. As a result, creosote residue accumulates on the Flue Lining and Exhaust Hood. When ignited, this creosote makes an extremely hot fire. To reduce the risk of a creosote fire, inspect the Flue Connection/ Anchor Plate on a regular basis. Make sure it is free from any buildup. If you have buildup, use a wire brush to clean it. Contact your local municipal or provincial fire authority for information about how to handle a chimney fire. Have a clearly understood plan for how to handle a chimney fire. Inspect the Flue Pipe on a regular basis. Make sure it is in good repair and is seated securely into the Flue Connection/ Anchor Plate. If you are using a Single-Wall Pipe, check for rust. If rust is found, replace the Flue Pipe. Inspect your Flue Cap to ensure there is no buildup blocking the flow of air. If you have any buildup, you can use a wire brush to clean it. Touch-up the mortar around the Arch to maintain a nice finished look. You can use any refractory mortar found at your local hardware store. If you use the CBO Metal Shroud in your install, cover the Shroud with an inexpensive grill cover to help protect the Oven from the elements when not in use. The Oven must be cool to the touch before it can be covered. When using any CBO accessory, please do not allow any type of liquid to touch the Hearth or Dome. For example: When cooking steak on the Grill Grate, you need to create a bed of coals underneath the Grill Grate to catch the drippings. You could also use the Griddle as a catch basin underneath the Grill Grate. If you have any questions about the use and care of your CBO-750 Oven, please send us an to info@chicagobrickoven.com. 19


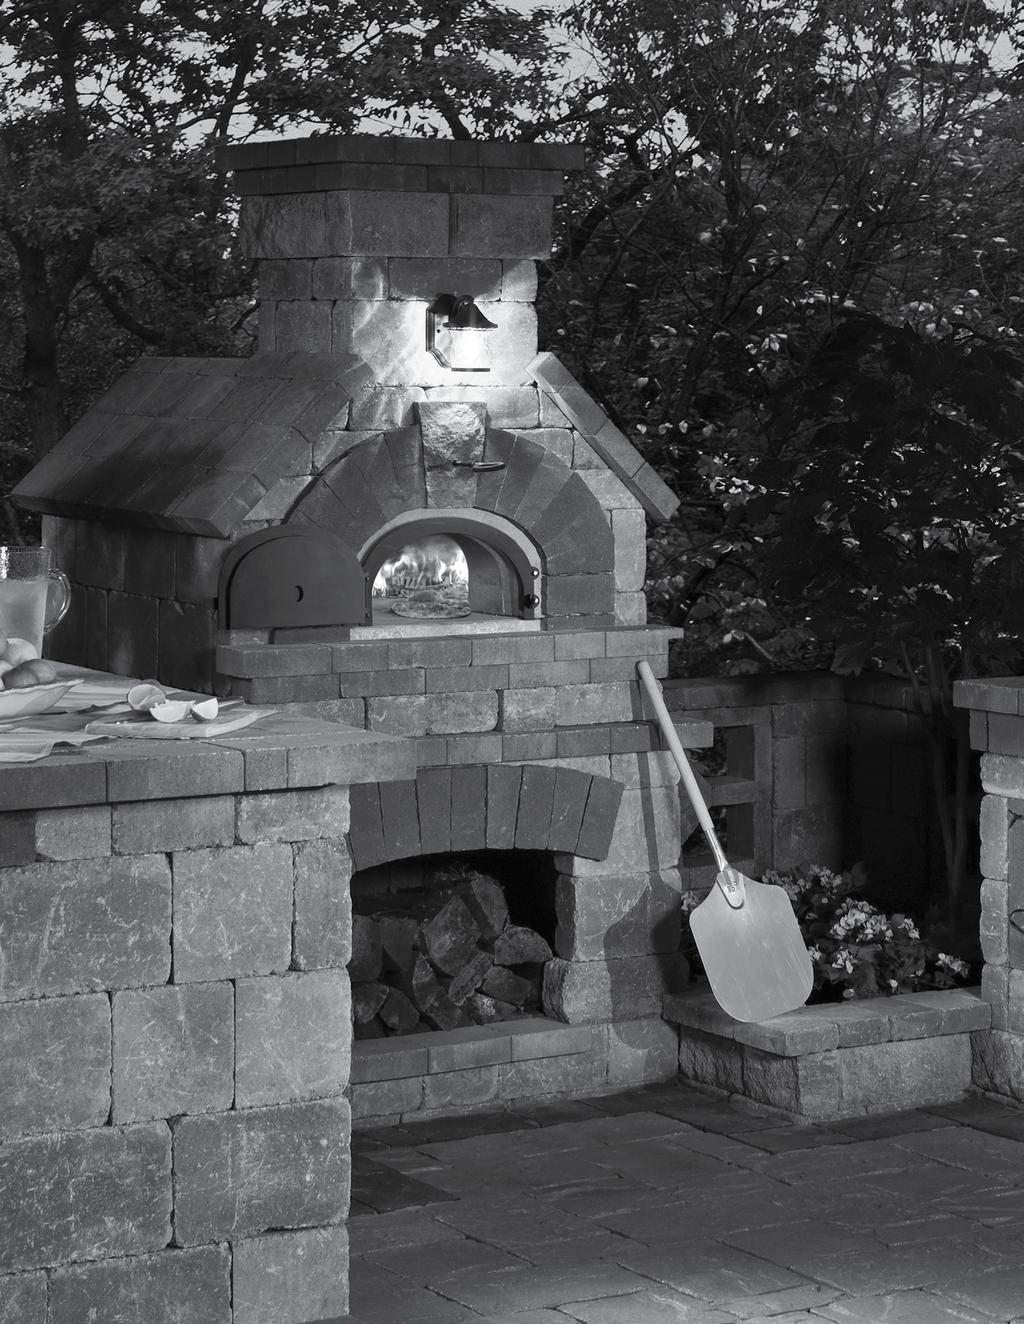
19 Customized Enclosure Designs However you plan to install your CBO Oven as a stand-alone unit or as part of a complete outdoor kitchen and whatever your material preference stone, brick, stucco, etc. your design choices for creating a customized enclosure are as limitless as your imagination. Here are just a few examples of how other homeowners have customized their CBO wood-fired ovens and created their ultimate outdoor cooking, dining and entertaining spaces. Visit chicagobrickoven.com and view our gallery for more inspiration. 20


20 Curing Your Oven Although your Oven may seem dry once you complete the installation process, there are small amounts of moisture pockets that need to work their way out. The initial fire must be started slowly. When lighting the first fire, keep the flames low so the moisture can be slowly released from the Oven and the surrounding masonry work. If you build a large fire in your Oven from the onset, you could compromise your Oven s longevity and cooking efficiency, and can ultimately cause permanent damage, which may void the manufacturer s warranty. Another method of curing your new Oven is to build a fire in a separate location. Then take the coals and place them into the Oven. You ll generate heat without the flame and the Oven will cure as required. Some new owners find this method a much easier way to cure the Oven and ensure the temperature doesn t get too hot. Note: You should re-cure your Oven if it has not been used for an extended period of time or if Oven has been exposed to excessive amounts of moisture. This curing process should be conducted at a temperature as close to 212 F (100 C) as possible (do not exceed this temperature) over a 2- to 3-day period. Exposing your new Oven to this temperature over a few days will cause all the moisture to evaporate so that your Oven properly cures. Note: Due to thermal expansion, small cracks may appear in the Dome or Hearth during the curing process. Don t worry; this is normal and the quality of your Oven will not be compromised. 21


21 Firing Your Oven A Once you ve properly cured your Oven, you re ready to fire it for cooking. B Always start with dry kindling placed 10" from the front of the Oven. CAUTION: NEVER USE CHEMICALS OR STARTER FLUIDS; YOU WILL NOT NEED THEM. C Once the fire is going, add small pieces of wood to build the fire. You want to raise the temperature slowly, so avoid building a huge fire that pours out of the mouth of the Oven. D We recommend adding large chunks of wood to the fire once it s going strong. Add these chunks and start moving the fire to the back of the Oven about 20 minutes after the fire is going. E You ll notice the Oven Dome turning black. As the temperatures rise and more heat is stored in the Dome, it will turn a whitish grey. Your goal is to heat the Oven in a way that the entire Dome turns whitish grey. 22


 or the Oven opening (when the Door is open).")
22 How the Oven Works Wood burning brick ovens are specially designed to take full advantage of all three cooking methods radiant heat, convection and conduction. FlameRoll Radiant Heat Only our proprietary low-dome construction creates the perfect FlameRoll from front to back. In this unique cooking method, the vent pulls the flame horizontally across the top of the Dome and then vertically back down the side. Not only does this funnel effect create higher temperatures for superior cooking, the rolling flames being drawn across the Dome are aesthetically beautiful, giving you a full wood-fired cooking experience. In competitive high-dome brick ovens, the flames get trapped in the upper portion of the Dome, too far away from the food to properly cook it. Convection Radiant heat comes from a direct source. In a wood-fired oven, radiant heat can come from two direct sources the fire and the heat that s stored in the Oven walls and Hearth. Radiant heat is very even and will cook food from all directions. The special shape of your CBO Oven reduces all cold spots and ensures that the stored radiant heat is used efficiently. By slowly building the Oven s stored heat, you ll be able to take advantage of the radiant heat for longer periods of time. You ll also be able to use radiant heat by leaving a fire or hot coals in the Oven. Use this method of cooking if you want high heat and a short cooking time, especially for pizzas. Conduction Convection is heated air circulating in an Oven. Cool air is drawn into the Oven through the access hole (when the exterior door is closed) or the Oven opening (when the Door is open). As the cool air is drawn into the Oven, it s rapidly heated by the fire and the stored heat in the Oven. This heated air passes over the food evenly. As the air continues to heat, it passes to the back of the Oven and rises. The heated air now again passes over the food on the way out of the Oven Flue. This draw causes a steady flow of heat to pass over the food, causing convection. You can also take advantage of convection with closed-door cooking. For example, when you add cool dough to the hot Oven, convection will take place through the moisture in the dough. As the hot air comes in contact with the dough, the heat is transferred. The air comes off the dough cooler, and then is heated again by the Oven. The third method of cooking in your wood-fired brick oven is through conduction. Conduction occurs when a cooler object comes in contact with a warmer object and heat is transferred. The amount of conduction that takes place depends on two things the temperature difference of the two items and the material (if any) that s between them. For example, you may want to sear a steak by placing a cast iron grill in a very hot Oven. Make sure any cooking device you put into your Oven is at 75 F or above to avoid thermal shock to the Hearth. Once the grill is at temperature, you ll place room-temperature steaks on the grill. This contact will cause conduction to take place and sear the steaks. Another example of conduction is putting a pizza directly on the Oven s heated Hearth. The heat transferred from the Hearth to the pizza will cause an excellent crust to form. 23


23 Cooking in Your Oven Once the oven has been heated to the point the entire dome has turned a whitish grey, you re ready to cook using either the open-door or closed-door method. Open-Door Cooking Open-door cooking is used to cook pizzas and other foods that require medium to high temperatures. Keep the fire going in the back of the Oven. Sweep out the front of the Hearth with a wire brush and you re ready to cook. The Oven will become hot enough and the small fire on top will generate radiant heat. For pizzas, the purpose of the flame is to melt the cheese and crisp the top. Closed-Door Cooking Spread the fire throughout the Oven. You will store heat in the Hearth and Dome by burning your fire hot for at least one hour. The longer you burn your fire, the more heat will be stored in the Hearth and Dome and the longer you ll be able to cook. The entire Dome of the Oven should turn a whitish grey. Once the fire has burned down, remove all coals and ashes into your ashbin. Sweep the Hearth and you re ready to go. Load your Oven with breads, roasts or casseroles and seal the Oven with the Insulating Door. Note: For closed-door cooking, the quality of the wood isn t a concern; you re mainly concerned with building heat and storing it in the Oven. However, never use treated woods. Save your flavored woods for open-door cooking! 4" Ember Bed 8" Maximize Your Real Estate After you have fired your Oven to the proper temperature, it s time to maximize your cooking real estate. Do this by removing the ashes and keeping just enough of the embers to create a small ember bed about 4" wide by 8" long on the Hearth at the very back of your Oven. 24


24 Using Flavored Wood Just imagine the aroma and mouth-watering taste of Apple Wood Turkey, Orange Wood Duck or Maple Wood Steak! To maximize your cooking experience, there s nothing better than using a fine cooking wood alder, apple, apricot, cherry, grape, hickory, lemon, maple, mesquite, nectarine, orange, peach, pear, pecan, plum, white oak. Which Kind of Wood to Use Hard, dry, aged wood burns hotter and cooks faster. The best burning hardwoods are arbor, ash, beech, bower, maple and oak. Soft woods, such as linden or poplar, create about 50% less heat than oak. The energy that comes from combustion doesn t depend on the type of wood you use, but on its degree of dryness. The ideal stacking period for wood is six months in the open and two years (up to three years for oak) in a dry, protected spot. The wood can also be dried in the oven after you make sure there are no coals or embers left, so the wood will not ignite. Which Wood Not to Use Resinous and treated woods are not recommended and can be dangerous to your health. Waste wood should also not be used because your wood burning oven is a cooking instrument. Note: If you purchased the optional Insulating Door, use it to achieve best results when baking. 25
25 Frequently Asked Questions What besides pizza can I cook in my wood burning brick oven? There is no limit to what you can cook in your CBO wood-fired brick oven. Anything you can cook in your home oven, you can cook in your CBO Oven whole turkeys, bread, grinders, chicken, steaks, chops, vegetables, stews, empanadas, desserts and more. When using any CBO accessory, please do not allow any type of liquid to touch the Hearth or Dome. For example: When cooking steak on the Grill Grate, you need to create a bed of coals underneath the Grill Grate to catch the drippings. You could also use the Griddle as a catch basin underneath the Grill Grate. Can the oven be used in all climates? Yes, you can use the Oven year-round. The structure you build around the Oven must keep the elements out and the Oven dry. Can I install my own oven? Yes, it can be a do-it-yourself project. You ll need to have some skill in concrete and masonry in order to keep your Oven safe from the elements. (Check out our Assembly Instructions section for more details.) I see that CBO sells an optional Insulating Door. Do I need this second door? Most of our competitors have either no doors or just one. We think you should have one Decorative Door to seal-off the Oven and keep the elements out when it s not in use. We think you should also consider the optional Insulating Door for when you want to control the internal temperature and hold it for long periods of time, especially when you re baking. What accessories come with the purchase of a CBO Oven? Every CBO Oven comes with Insulation, Decorative Door and two cooking accessories a pizza peel and a brush. What else will I need to do to start using my oven? The Oven must be installed on a foundation with a covering (Dome or Shelter) that will give it a finished look and protect it from the elements. How soon can I use the oven after installation? You should build a few small fires in your Oven before you cook in it. (See our Curing and Firing instructions.) These small fires will cure the Oven. A large fire in a new Oven may cause it to crack. Be patient! This is the reason you bought a wood-fired brick Oven in the first place. What kind of wood should I use for my oven? All kinds of hardwoods are suitable when they are clean and dry. Resinous and treated woods are not recommended and can be dangerous to your health. Waste wood should not be used because your wood burning oven is a cooking instrument, not an oven for heating. When buying wood, ask for wood that s been aged for about two years, or that has less than 25% moisture content. Soft woods are easy to light, but they produce less heat than hardwoods. We also recommend trying different varieties of aromatic, flavored wood to give different foods unique flavors. 26
26 Frequently Asked Questions Is the oven safe around children? Any time you have fire there is some potential danger. The outside of the Oven will be hot to touch; just how hot depends on your design and use of insulation. If installed properly, the Oven should not pose any more danger than a BBQ grill. How long does it take to heat the oven? We recommend building a small fire and slowly adding to it to bring up the temperature of the Oven. This process can take an hour or more, depending on the size of your Oven. Once it s hot, you can use your Oven for hours. What types of ovens are better refractory concrete, clay or brick? We re partial to refractory and brick ovens because of their look and durability. The first oven I owned was made of clay and in the first harsh Chicago winter, it cracked! Refractory ovens are more dependable, but in most cases the refractory has not been fired like CBO refractory ovens or CBO brick ovens. When my new oven arrived, there was some pitting on the dome s surface and it looked discolored. Is that normal? A certain amount of pitting naturally occurs during the vibration and screeding (leveling and smoothing) techniques used in manufacturing refractory precast shapes. Also, due to the blending of minerals used to create refractory and the high temperatures used to kiln-fire the Oven s Dome, Hearth and Arch, some color variation may occur. These cosmetic variations are not detrimental to the function of your Oven. What size oven should I purchase? Bigger is better! We think you should purchase the largest Oven you can afford and that will fit into your space. How much do the ovens weigh? They are heavy and do require a properly poured foundation. The total combined weight of the CBO-500 Oven and Decorative Cover design you choose is 300 lbs. The CBO-750 Oven is 480 lbs. How do I shut down my oven? Let the flames burn down, then close the Oven with the Door. The Oven will slowly cool down over several hours. Can you put a gas-assist in a brick oven? It s not necessary in a residential brick oven. You ll find it s easy to start a fire in a brick oven with very little effort. (A gas-assist cannot be covered under the CBO warranty.) Can I have a CBO Oven indoors? Yes. For Indoor Installation, UL-certified CBO-500 or CBO-750 models are required. You must check your local building codes to find out all of the permits, restrictions and inspection requirements. You must also install and use the Oven only in accordance with Chicago Brick Oven s installation and operating instructions (or equivalent). Do I need a chimney on my oven? Yes. You will need to install a Chimney that meets your local building code. The Chimney serves as an airflow regulator, which is essential for controlling the temperature and convection. Your Chimney should always be at least as tall as the Oven is deep. How are your ovens shipped? We take extra effort to ensure our ovens are palletized and that a protective crate is built around them. 27
27 Operating Instructions Important Failure to follow these instructions exactly as written may cause permanent damage to your Oven and may void your warranty. Curing Your Oven Failure to Properly Cure May Void All Warranty on This Product Although your Oven may seem dry once you complete the installation process, there are still small amounts of moisture pockets that need to work their way out. If you build a large fire in your Oven from the onset, you could compromise your Oven s longevity and cooking efficiency, and can ultimately cause permanent damage, which may void the manufacturer s warranty. When lighting the first fire, keep the flames low so the moisture can be slowly released from the Oven and surrounding masonry work. This curing process should be conducted at a temperature as close to 212 F (100 C) as possible (do not exceed that temperature) over a 2- to 3-day period. A good suggestion is to build a fire in a separate location and place the coals into the Oven. You will generate heat without the flame and the Oven will cure as required. Due to thermal expansion, small cracks may appear in the Dome or Hearth during the curing process. Do not worry; this is normal and the quality of your Oven will not be compromised. Cooking in Your Oven After you have cured your Oven and are ready to start cooking, light a small fire and slowly build it up. The interior Dome of the Oven will at first turn black from the fire smoke. You will know the oven temperature has reached 700 F when the inner walls turn from black to a whitish grey. This is a perfect temperature for many types of cooking. A Chicago Brick Oven Oven has a low chamber, so you do not need to overheat it like other ovens that have a high chamber. Note: The first two times you cook in your new Oven, cook something simple (for example, a pizza shell) then throw it away without actually eating what you have cooked. The third time, you can begin enjoying what you have cooked in your new Oven. Other Precautions and Instructions Chicago Brick Oven Ovens Should Be Installed By A Professional Or Suitably Qualified Individual. Please Use Extreme Caution Around The Oven. The Oven Dome, Hearth, Arch And Door Will Be Extremely Hot When In Use And For Hours After Use. Keep Children, Clothing And Furniture Away. Contact May Cause Skin Burns. Never Allow Anyone Under The Age Of 18 To Operate The Oven. Although these ovens are capable of warming a room, they must not be used as a method of heating and should not be considered as such. Do not throw chunks of wood violently into the oven. Each time you light a fire, make sure the fire covers as much of the Hearth surface as possible. Always use dry wood (dried for at least two years)! If you see moisture coming from the logs while they are on the fire, the wood is not dry. Using wood that is not dry will cause the Oven to throw off a considerable amount of smoke and can also cause damage to the Oven because of the high moisture content. Always pre-warm any cooking accessory (the CBO Grill, a cast iron pot, etc.) before you put it in the Oven. If you place a cold accessory on a hot Hearth, the thermal shock may cause the Hearth to crack. You can also add an Oven Rack so the pot or pan doesn t sit directly on the Hearth. When using any CBO accessory, please do not allow any type of liquid to touch the Hearth or Dome. For example: When cooking steak on the Grill Grate, you need to create a bed of coals underneath the Grill Grate to catch the drippings. You could also use the Griddle as a catch basin underneath the Grill Grate. The manufacturer is not responsible for eventual environment damages, nuisance, or smoke and carbon particles. Proximity of Combustible Materials Every local building code is unique. Please consult your local building code or your Fire Department for the exact specifications for your community. You are responsible for following all local building codes. Also see the Requirements for Clearance from Combustible Materials section on Pages 6 or 13 of this manual. 28
28 Limited Warranty Chicago Brick Oven, a manufacturer of wood-fired ovens, warrants the products to be free from defects in materials and workmanship for a period of three (3) years from the date of shipment. Local regulations about wood burning equipment should be consulted. Qualifications to the Warranty The complete Warranty is further subject to the following qualifications: 1. The oven must be installed in accordance with CBO installation instructions and local building codes. 2. Moisture can cause significant damage to the oven/hearth. Therefore, the enclosure/shroud (stone, brick, stucco, etc.) that surrounds the oven/hearth must be sealed and waterproof. Failure to do so will void this Warranty. 3. The oven is subjected to normal use, including burning such natural wood fuels as non-treated wood. Fuel products with abnormal burning characteristics including, but not limited to, fuel such as driftwood, coal or plywood and wood products using a binder, may burn at excessive temperatures and may cause damage to the oven or may cause it to function improperly. CBO does not warrant the oven when such fuels have been used. 4. This Warranty does not apply to normal wear and tear. Note that all refractory materials will form small cracks over time. These cracks will not affect the performance of the oven. 5. This Warranty does not apply to any cracking caused by over-firing or the failure to follow a proper curing schedule as outlined in the User Manual supplied with your oven or found online at 6. All CBO ovens are shipped FOB Factory by a third-party carrier. It is the recipient s responsibility to inspect the product(s) for damage before accepting/signing for the delivery. Damages incurred during shipment must be addressed with the carrier at the time of delivery. 7. A certain amount of pitting naturally occurs during the vibration and screeding (leveling and smoothing) techniques used in manufacturing refractory precast shapes. Also, due to the blending of minerals used to create refractory and the high temperatures used to kilnfire the oven s dome, hearth and arch, some color variation may occur. These cosmetic variations are not detrimental to the function of the oven. 8. Any alterations made to prefabricated ovens without written approval from Chicago Brick Oven, will void warranty. Limitation on Liability It is expressly agreed and understood that CBO s sole obligation and purchaser s exclusive remedy under this Warranty, under any other warranty, expressed or implied, otherwise, shall be limited to replacement, repair, or refund, as specified above. In no event shall CBO be responsible for any incidental or consequential damages caused by defects in its products, whether such damage occurs or is discovered before or after replacement or repair, and whether or not such damage is caused by CBO s negligence. Some states do not allow the exclusion or limitation of incidental or consequential damages, so the above limitation or exclusion may not apply to you. The duration of any implied warranty with respect to this oven is limited to the duration of the foregoing warranty. Some states do not allow limitations on how long an implied warranty lasts, so the above may not apply to you. Investigation of Claims Against Warranty CBO reserves the right to investigate any and all claims against this Warranty and to decide upon the method of settlement. Dealers Have No Authority to Alter this Warranty CBO employees and dealers have no authority to make any warranties, nor to authorize any remedies in addition to or inconsistent with those stated above. How to Register a Claim Against Warranty In order for any claim under this Warranty to be valid, CBO must be notified of the claimed defect in writing (info@chicagobrickoven.com) or by telephone ( ) to CBO. Claims against this Warranty in writing should include the date of installation and a description of the defect. 29
29


30 For more information, visit chicagobrickoven.com Chicago Brick Oven 205 E. Butterfield, #448 Elmhurst, IL Chicago Brick Oven. All rights reserved.
Outdoor Wood-Fired Oven
 Outdoor Wood-Fired Oven INSTALLATION INSTRUCTIONS Alsey Refractories Company 1600 S. Brentwood Blvd. Sandkuhl Clay Works, Inc. 5536 Kossuth-Amanda Road St. Louis, MO 63144 314-963-7900 Spencerville, OH
User Manual CBO-AMERICANO. Fire Up the Good Life!
 User Manual CBO-AMERICANO Fire Up the Good Life! A MAJOR CAUSE OF OVEN-RELATED FIRES IS FAILURE TO MAINTAIN REQUIRED CLEARANCES (AIR SPACES) TO COMBUSTIBLE MATERIALS. IT IS OF UTMOST IMPORTANCE THAT THIS
FOLLOW THIS GUIDE TO GET MAXIMUM RESULTS FROM YOUR OVEN.
 ALFA USING AN ALFA WOOD OVEN FOLLOW THIS GUIDE TO GET MAXIMUM RESULTS FROM YOUR OVEN. Your Alfa Oven is ready to use once assembled. Unlike other ovens the Alfa Forno series ovens do not need to be cured.
Tabletop Charcoal Grill Model # SRCG806 Instructions Manual
 259-0002 Tabletop Charcoal Grill Model # SRCG806 Instructions Manual WARNING FOR YOUR SAFETY 1. This grill is for outdoor use only, and shall not be used in a building, garage, or any other enclosed area.
" Table Top Charcoal Grill Model # SRYH1450 Instructions Manual
 259-0011 14" Table Top Charcoal Grill Model # SRYH1450 Instructions Manual WARNING FOR YOUR SAFETY 1. This grill is for outdoor use only, and shall not be used in a building, garage, or any other enclosed
Table of Contents. Foundation and Preparation 2 Hearth Base Dimensions 2. Laying the Inner Hearth 3 Inner Hearth Dimensions 4
 Table of Contents Foundation and Preparation 2 Hearth Base Dimensions 2 Laying the Inner Hearth 3 Inner Hearth Dimensions 4 Constructing the Firebox 5 Face Opening Dimensions 5 Setting the Rumford Throat
 #4187508 Attention! This grill will become very hot. Do not move it during operation. Caution! Do not use alcohol, gasoline or similar fluids for lighting or relighting. Warning! Keep children and pets
for Assembly, Operating & Maintenance of THIS CHARCOAL GRILL IS DESIGNED FOR OUTDOOR USE ONLY.
 Owner s Manual for Assembly, Operating & Maintenance of Model M-15AB Charcoal Grill www.bigjohngrills.com YOU MUST READ THIS OWNER S MANUAL BEFORE OPERATING YOUR CHARCOAL GRILL. WARNING: Do not ignite
BUILT IN DELUXE SPIT BRAAI MODELS: 1200 & 1500
 BUILT IN DELUXE SPIT BRAAI MODELS: 1200 & 1500 INSTALLATION INSTRUCTIONS Actual product may differ slightly from the picture above Features (this unit includes a light fitting, brass knob, stainless steel
SMOKE N GRILL OWNER S MANUAL ASSEMBLY AND OPERATION INSTRUCTIONS WARNING CHARCOAL SMOKER AND GRILL DS-30 CHARCOAL SMOKER AND GRILL
 SMOKE N GRILL CHARCOAL SMOKER AND GRILL DS-30 CHARCOAL SMOKER AND GRILL OWNER S MANUAL ASSEMBLY AND OPERATION INSTRUCTIONS WARNING READ AND FOLLOW ALL WARNINGS AND INSTRUCTIONS IN THIS MANUAL TO AVOID
OWNER S MANUAL GRAVITY FEED MODELS FOR OUTDOOR USE ONLY WARNING DO NOT STORE OR USE COMBUSTIBLE MATERIALS NEAR THIS UNIT
 OWNER S MANUAL GRAVITY FEED MODELS FOR OUTDOOR USE ONLY WARNING DO NOT STORE OR USE COMBUSTIBLE MATERIALS NEAR THIS UNIT Myron Mixon Smokers 179 Cross Road Waterford, CT 06385 (855) 464-7853 Table of Contents
NAPOLINO SERIES Outdoor Pizza Oven - Wood Fired
 NAPOLINO SERIES Outdoor Pizza Oven - Wood Fired Wood-Fired Ovens for the Home (800) 07-119 NAPOLINO SERIES OUTDOOR PIZZA OVEN Napolino Outdoor Pizza Oven is a Naples-Style Pizza Oven for your home. The
BakerBox multi-purpose pizza oven
 BakerBox multi-purpose pizza oven. ASSEMBLY & OPERATING INSTRUCTIONS Important: Read these instructions for use carefully so as to familiarize yourself with the appliance before putting it to your gas
How to Build a Wine Cellar
 How to Build a Wine Cellar Introduction This guide has been prepared as a general resource to help you build your own wine cellar. The information provided here has been gathered over the course of our
THIS ALL BEGINS WITH AN AUTHENTIC BRICK OVEN PRODUCT BROCHURE
 THIS ALL BEGINS WITH AN AUTHENTIC BRICK OVEN PRODUCT BROCHURE Anything cooked on a grill or in a conventional oven can be prepared in a wood-burning oven. The difference? Everything tastes better when
DRAGONFIRE KAMADO OWNERS MANUAL
 DRAGONFIRE KAMADO OWNERS MANUAL THE ULTIMATE COOKING EXPERIENCE IT TOOK ASIAN INGENUITY TO INVENT IT, IT TOOK AMERICAN INGENUITY TO PERFECT IT. For over 3,000 years in every part of the world our ancestors
ASSEMBLY AND OWNER S MANUAL FOR OUTDOOR HOUSEHOLD USE ONLY. NOT FOR COMMERCIAL USE.
 WATER SMOKER For the Ultimate Flavor Experience MODEL 5023 CHARCOAL ASSEMBLY AND OWNER S MANUAL CARBON MONOXIDE HAZARD This appliance can produce carbon monoxide which has no odor. Using it in an enclosed
Charcoal Smoker Oven
 Charcoal Smoker Oven Model No. CM160-001 FOR OUTDOOR USE ONLY 3467-05/12 IMPORTANT SAFETY WARNINGS WE WANT YOU TO ASSEMBLE AND USE YOUR SMOKER AS SAFELY AS POSSIBLE. THE PURPOSE OF THIS SAFETY ALERT SYMBOL
INSTRUCTION MANUAL. MODEL NUMBER: GBBK/GBBKR Outdoor Portable Charcoal Grill. For Outdoor Use Only!
 INSTRUCTION MANUAL MODEL NUMBER: GBBK/GBBKR Outdoor Portable Charcoal Grill For Outdoor Use Only! WARNING! BE CAREFUL OF SHARP EDGES DURING ASSEMBLY MADE IN CHINA Save these instructions for future reference.
Smoker & Grill. Model No. CBQ2003 FOR OUTDOOR USE ONLY
 Smoker & Grill Model No. CBQ2003 FOR OUTDOOR USE ONLY Charmate is a registered trade mark of: Sitro Group Australia Pty Ltd www.gasmate.com.au Aber Ltd - Hamilton, NZ www.gasmate.co.nz Important: The Installer
Vent-Free. Fireboxes. LogMate Vent-Free Gas Fireboxes Indoor / Outdoor. Premium Luxury Series. Performance Traditional Series
 LogMate Vent-Free Gas Fireboxes Indoor / Outdoor Vent-Free Premium Luxury Series Fireboxes Standard Traditional Series Performance Traditional Series Premium Traditional Series Full-View Traditional Series
TEXAS RANCHERO GRILL AND SMOKER (TEXASK)
") TEXAS RANCHERO GRILL AND SMOKER (TEXASK) User Manual FOR OUTDOOR USE ONLY READ INSTRUCTIONS CAREFULLY BEFORE ASSEMBLY AND SAVE THIS MANUAL FOR FUTURE REFERENCE. 1 TABLE OF CONTENTS SAFETY INFORMATION...
TEXAS RANCHERO GRILL AND SMOKER (TEXASK) User Manual FOR OUTDOOR USE ONLY READ INSTRUCTIONS CAREFULLY BEFORE ASSEMBLY AND SAVE THIS MANUAL FOR FUTURE REFERENCE. 1 TABLE OF CONTENTS SAFETY INFORMATION...
Gravity Feed Commercial BBQ Smoker
 Gravity Feed Commercial BBQ Smoker User Manual 2016 Mac s BBQ Ltd Congratulations on the purchase of your new ProQ Gravity Feed BBQ Smoker! The following guide will show you the basics on how to use, care,
BUILT IN ROTISSERIE BRAAI MODEL: 1000
 BUILT IN ROTISSERIE BRAAI MODEL: 1000 INSTALLATION INSTRUCTIONS & USER MANUAL Actual product may differ slightly from the picture above Megamaster products and factories comply with the Quality Management
HIGHLAND OFFSET SMOKER MODEL NUMBER
 HIGHLAND OFFSET SMOKER MODEL NUMBER 16202045 KRISWELL NUMBER 140 755 IE GB Operating Instructions, 2-3 Assembly Instructions, 6-11 2015 Char-Broil, LLC Columbus, GA 31902 Printed in China Assembly Instructions
SECTION MANUFACTURED GAS FIREPLACES
 SECTION 10305 MANUFACTURED GAS FIREPLACES PART 1 GENERAL 1.1 SECTION INCLUDES A. Modular luxury direct-vent gas fireplaces, vented to the exterior. 1.2 RELATED SECTIONS A. Section 15145 Plumbing Piping:
WARNING. Assembly and Operating Instructions for Outback Omega Charcoal 100 and Omega Charcoal 200 Barbecues. Omega Charcoal 100 Omega Charcoal 200
 Assembly and Operating Instructions for Outback Omega Charcoal 100 and Omega Charcoal 200 Barbecues Omega Charcoal 100 Omega Charcoal 200 Photographs are not to scale. Specifications subject to change
Charcoal Grill WARNING: Kay Home Products TM
 Kay ome Products T 30052 Charcoal rill WARNN: Your grill is intended for residential outdoor use only. Do not use for commercial cooking. Do not use in or on boats or recreational vehicles. Do not use
21.5 Inch Square Charcoal Grill
 21.5 Inch Square Charcoal Grill Model # OCFLA-2150 OUTDOOR USE ONLY! NEVER USE INDOORS! CARBON MONOXIDE HAZARD Burning charcoal inside may be fatal. It gives off carbon monoxide, which has no odor. NEVER
JUMBUCK RONDO MEDIUM CHARCOAL SPIT ROASTER (HS-FP002)
") JUMBUCK RONDO MEDIUM 3180887 CHARCOAL SPIT ROASTER (HS-FP002) SAFETY INSTRUCTIONS FOR OUTDOOR USE ONLY For outdoor use only. Improper installation, adjustment, alteration, service or maintenance can cause
JUMBUCK RONDO MEDIUM 3180887 CHARCOAL SPIT ROASTER (HS-FP002) SAFETY INSTRUCTIONS FOR OUTDOOR USE ONLY For outdoor use only. Improper installation, adjustment, alteration, service or maintenance can cause
Romana Pizza Oven / Smoker
 La Hacienda Romana Pizza Oven / Smoker User Instructions - Please keep for future reference 5610US V1.0 Tools list required (not included) User Instructions - Please keep for future reference IMPORTANT
Heavy-Gauge Vertical Smoker Assembly Instructions & User s Manual
 Heavy-Gauge Vertical Smoker Assembly Instructions & User s Manual ITEM# FSOGBG320 Please keep this instruction manual for future reference Warning: READ INSTRUCTION MANUAL BEFORE ATTEMPTING TO ASSEMBLE
LUCKENBACH MODEL Assembly Instructions Rev
 LUCKENBACH TM MODEL 03301800 Assembly Instructions Rev. 03-27-03 P/N: 42802113 WARNING! CAUTION! This unit is heavy. Tools needed: 2 adjustable wrenches, a flat screwdriver and hammer. DO NOT assemble
OWNER S MANUAL. Cabo. Adventurer Series Gas Grill Model A10-703
 OWNER S MANUAL Cabo Adventurer Series Gas Grill Model A10-703 For questions regarding performance, assembly, operation, parts, or returns, contact the experts at MAGMA by calling (562) 627-0500 7:00 a.m.
Eaton Filtration, LLC
 Eaton Filtration, LLC 44 Apple Street, Tinton Falsl NJ 07724 Phone: 732-212-4700 Fax: 952-906-3706 E-Mail: filtration@eaton.com Web: www.eaton.com/filtration Installation, Operation & Service Manual Model
Eaton Filtration, LLC
 Eaton Filtration, LLC 900 Fairmount Avenue, Elizabeth, NJ 07207 Phone: 908-787-1000 Fax: 908-351-7893 E-Mail: filtration@eaton.com Web: www.filtration.eaton.com Installation, Operation & Service Manual
IMPORTANT: READ THESE INSTRUCTIONS CAREFULLY BEFORE STARTING INSTALLATION OR USE. WARNINGS AND SAFETY CODES
 FIREMASTER OUTDOOR COUNTERTOP CHARCOAL GRILL Models 3324 and 3329 INSTALLATION INSTRUCTIONS AND OWNER S MANUAL INSTALLER: Leave these instructions with consumer. CONSUMER: Retain for future reference.
OWNER S MANUAL WARNING ES-90 ELECTRIC SMOKER & GRILL ASSEMBLY AND OPERATING INSTRUCTIONS
 S M O K E R A N D G R I L L ES-90 ELECTRIC SMOKER & GRILL OWNER S MANUAL ASSEMBLY AND OPERATING INSTRUCTIONS WARNING READ AND FOLLOW ALL WARNINGS AND INSTRUCTIONS IN THIS MANUAL TO AVOID PERSONAL INJURY
Kettle Charcoal BBQ. Assembly instructions. Please retain this manual for future reference
 Front.pdf 30/0/ ::5 Product size assembled: H88 x W5 X D6cm Ref No.: XZ08B Catalogue No.: 05-579 Tesco 0 Please retain this manual for future reference P.pdf 3/0/ 7:9:3 Assembly Instructions Warnings REMEMBER
VCS325SSBI Series and VCS525SSBI Series Assembly Procedures
 VCS325SSBI Series and VCS525SSBI Series Assembly Procedures Model VCS525SSBI Shown Tools Required: Knife or scissors, Phillips or Robertson (square head) screwdriver. WARNING: Some parts may have sharp
Specifications CHARCOAL GRILL. 2 Independence Charcoal Grill by Broilmaster
 C H A RC OA L GR IL L P R E M IU M G R ILL S CHARCOAL GRILL Specifications Housing: Cast Aluminum 26 ¾ W x 18 ¾ D x 20 ½ H 304 Stainless Steel (12-gauge) Charcoal & Ash Doors Cooking Grids: 2-Piece Stainless
TA B LE O F C O NTE NTS
 TABLE OF CONTENTS Table of Contents...1 Before you begin...2-6 Get to know the Kamander...2-4 Seasoning...5 Maintenance...6 Use your grill...7-16 Building your fire...7-9 Control...10-11 Type of cooking...12-13
Installation instructions and use and care guide
 Installation instructions and use and care guide ASSEMBLY INSTRUCTIONS FOR POLAR GRILL M8/M6/L8 If the grill is placed inside a cabin/hut, take care of ventilation e. g. by assembling ventilation pipes
14 ROUND TABLETOP GAS GRILL. Product code: UPC code: Date of purchase: / /
 OWNER S MANUAL 14 ROUND TABLETOP GAS GRILL Product code: 0-03946564-6 UPC code: 0 45774 87562 1 Date of purchase: / / Safety Guidelines... Safety Instructions... 1 2-3 Assembly Instructions... 4-7 Lighting
Features. Before first use
 Round Dutch Oven Features Colorful exterior enamel is shock-resistant to prevent chipping and cracking Sand-colored interior enamel has a smooth finish that promotes caramelization, prevents sticking and
Wood-fired Outdoor Oven
 The hottest trend in outdoor cooking! Wood-fired Outdoor Oven Buyer/User Guide Manufactured under license by: 2 Enjoy the unique flavor of wood-fired appetizers, pizza, seafood, meats, vegetables, side
Introducing 2012 Vermont Castings Signature Series Grills. Premium craftsmanship. precision cooking.
 Introducing 2012 Vermont Castings Signature Series Grills Premium craftsmanship. precision cooking. Make a Statement with Premium Design When you fire up a Vermont Castings grill, you re getting more than
OPERATING MANUAL. Sample PRO 100 Series. Electric Heating. Applies to Versions: SPE1*, SPE2, SPE4, SPE6
 OPERATING MANUAL Sample PRO 100 Series Electric Heating Applies to Versions: SPE1*, SPE2, SPE4, SPE6 NOTE: All electrically heated roasters in the Sample PRO 100 Series are modular and this manual applies
Pavilion 14,9 m2 health, beauty, peace of mind
 Pavilion 14,9 m2 h e a l t h, b e a u t y, p e a c e o f m i n d Specifications Wood Spruce Shape 8 corners Inside area, m 2 14.9 Total height 3.8 External dimensions (WxD), mm 4242x4242 Number of windows
OWNER S MANUAL BARREL GRILL
 OWNER S MANUAL BARREL GRILL Made in / Hecho en CHINA for Kmart Corporation, Hoffman Estates, IL 60179 SHOP kmart.com See our extensive assortment of outdoor living products on-line at www.sears.com and
INSTALLATION AND SPECIFICATION MANUAL
 INSTALLATION AND SPECIFICATION MANUAL LISTED RUMFORD STYLE MASONRY FIREPLACE SYSTEM MODEL FIRE ROCK 30, 36, 42, 48 INCH MODULAR FIREPLACES LISTED RUMFORD STYLE VENTLESS FIREBOX ENCLOSURE MODEL FireRock
CHARCOAL SERIES EXPERTS IN GAS & INFRARED GRILLING. napoleongrills.com.au
 CHARCOAL SERIES EXPERTS IN GAS & INFRARED GRILLING napoleongrills.com.au CHARCOAL PROFESSIONAL PRO605CSS Cooking Area: 5440 cm² CHARCOAL KETTLE NK22CK-L Cooking Area: 2340 cm² / Diameter: 57 cm Exclusive
INTRODUCTION. Your new smoker comes almost completely assembled. You will need to complete the assembly which includes:
 INTRODUCTION Congratulations on your purchase of this Smith & Wesson SMOKER, Model SWS032. With proper set-up, operation and maintenance, this smoker will provide you with years of cooking enjoyment. Your
Pavilion 9,2 m2 health, beauty, peace of mind
 Pavilion 9,2 m2 h e a l t h, b e a u t y, p e a c e o f m i n d Specifications Wood Shape Standard set Wall, roof, floor panels; Inside grill with the cooking platforms and a table around the grill; Adjustable
KF LARIAT CHARCOAL GRILL BLACK
 KF LARIAT CHARCOAL GRILL BLACK Owner s Manual Assembly and Operating Instructions Model Number # CG2203801-KF Tools required for assembly: (Not Included) Pliers, Philips & Flathead Screwdrivers, Adjustable
22 Kettle Charcoal Grill SAFE USE, CARE AND ASSEMBLY MANUAL
 22 Kettle Charcoal Grill SAFE USE, CARE AND ASSEMBLY MANUAL 85-1448-8 ST22022D Read and save this manual for future reference. If pre-assembled, leave this manual with unit for consumer s future reference.
NORTH / 1kg. Mill City Roasters, LLC rd Ave SE Minneapolis, MN 55414
 NORTH / 1kg Mill City Roasters, LLC. 1050 33rd Ave SE Minneapolis, MN 55414 Phone: +1 (612) 886-2089 Email: sales@millcityroasters.com Online: www.millcityroasters.com PART ONE 1 ! Note: Owner must post
Universal Ignitor Upgrade Kit
 Installation Instructions 120 volt Nitride Universal Ignitor Upgrade Kit for furnace, boiler or water heater a universal replacement nitride ignitor for silicone carbide ignitors We strongly recommend
Outdoor Charcoal Barbecue Grill
 OWNER S MANUAL Outdoor Charcoal Barbecue Grill Model No CBT1706W FOR YOUR SAFETY: 1 Do NOT store or use gasoline or other flammable liquids or vapors in the vicinity of this or any other appliance 2 When
HORIZON BARBECUE ROASTING HOOD OWNERS MANUAL
 HORIZON BARBECUE ROASTING HOOD OWNERS MANUAL 0 IMPORTANT READ ALL INSTRUCTIONS BEFORE ASSEMBLY, INSTALLATION OR OPERATING ROASTING HOOD SAFETY PRECAUTIONS AND WARNINGS Tucker Horizon barbecues and roasting
Owner's Manual: Stainless Steel Rotisserie Kit for Kenmore Elite & Kenmore Premium Grills
 Owner's Manual: Stainless Steel Rotisserie Kit for Kenmore Elite & Kenmore Premium Grills 141.158031 for 3/4 Burner Kenmore and Kenmore Elite Grills: 141.15804 for 5/6 Burner Kenmore and Kenmore Elite
BULL. ASSEMBLY & OPERATING INSTRUCTIONS
 BULL. Dutdaar Products Inc. "., Ontario, California 91761 ASSEMBLY & OPERATING INSTRUCTIONS Model No. 18038 7-Burner High Grade Commercial Stainless Steel Longhorn, LP Model No. 18039 7- Burner High Grade
Installation Instructions and Operator's Manual
 CERAMIC KAMADO GRILLS & SMOKERS MODELS: KG1120 KG1520 KG1920 KG1140 KG1540 KG1940 KG1160 KG1560 KG1960 KG1121b KG1521b KG1921b KG1141b KG1541b KG1941b KG1161b KG1561b KG1961b WARNING! THE INFORMATION IN
BROIL M AS T ER IN T RODUCES THE
 BROIL M AS T ER IN T RODUCES THE C H A RC OA L GR IL L P R E M IU M G R ILL S CHARCOAL GRILL Specifications Housing: Cast Aluminum 26 ¾ W x 18 ¾ D x 20 ½ H 304 Stainless Steel (12-gauge) Charcoal & Ash
GAS BARBECUE MODEL NO: BBQ4 USER GUIDE PART NO: /11
 GAS BARBECUE MODEL NO: BBQ4 PART NO: 6925305 USER GUIDE 2/11 INTRODUCTION Thank you for purchasing this CLARKE product Before attempting to use this product, please read this manual thoroughly and follow
STAINLESS STEEL GAS BARBECUE MODEL NO: SSBBQ4 USER GUIDE PART NO: /11
 STAINLESS STEEL GAS BARBECUE MODEL NO: SSBBQ4 PART NO: 6925310 USER GUIDE 2/11 INTRODUCTION Thank you for purchasing this CLARKE product. Before attempting to use this product, please read this manual
IF THERE IS ANY QUESTION ABOUT A CONDITION BEING SAFE OR UNSAFE, DO NOT OPERATE THIS PRODUCT!
 RO18BT 18 Quart Roaster Oven Operating Instructions READ ALL INSTRUCTIONS AND WARNINGS BEFORE USING THIS PRODUCT. This manual provides important information on proper operation & maintenance. Every effort
Hog Roast. This is a large project, for which you will need specialist equipment and skill.
 Hog Roast What you will need This is a large project, for which you will need specialist equipment and skill. Sheet steel (around 1mm thick) Square section, steel tubing (around 25mm sides) for framing
Downflow Conversion Kit used to Modify Air Handler Units for Downflow Application
 0672327-00 February 2015 Installation Instructions Downflow Conversion Kit used to Modify Air Handler Units for Downflow Application Scan to see the Downflow Installation Video Go to your app store and
LOT: PO: 4098_GelCanInsert_JW_ Model # oz Gel Fuel Can Firebox Insert
 LOT: PO: 4098_GelCanInsert_JW_010213 f i r e p l a c e s Model # 4098 13oz Gel Fuel Can Firebox Insert - Gel Fuel is flammable. Failure to follow warnings can result in property damage or serious burns.
Portable Charcoal Grill
 Portable Charcoal Grill DANGER! WARNING DO NOT use charcoal briquettes for indoor cooking or heating. TOXIC carbon monoxide fumes can accumulate and cause asphyxiation. DO NOT USE on boats or recreational
Assembly & Operation Manual
 Deluxe Outdoor Tabletop Gas Grill Model TT250 Assembly & Operation Manual DANGER 1. Never operate this appliance unattended. 2. Never operate this appliance within 10 ft (3.0 m) of any structure, combustible
IMPORTANT SAFEGUARDS. When using electrical appliances, basic safety precautions should always be followed, including the following:
 IMPORTANT SAFEGUARDS When using electrical appliances, basic safety precautions should always be followed, including the following: 1.Read all instructions. 2.Do not touch hot surfaces. Use handles or
Installation & Parts Manual 2" & 3" High Capacity Strainers For Class 1, Petroleum Applications
 Installation & Parts Manual 2" & 3" High Capacity Strainers For Class 1, Petroleum Applications Installation: M200-20 www.lcmeter.com Table of Contents Description Page Number Introduction... 2 What LC
MODEL 525 INSTALLATION INSTRUCTIONS & OWNER S MANUAL
 MODEL 525 INSTALLATION INSTRUCTIONS & OWNER S MANUAL Fogazzo Wood Fired Ovens and Barbecues, LLC Manufacturing, import, export, sales, and the distribution of wood fired ovens, barbecues, fireplaces, and,
Grill cabin. 6,9 m 2. health, beauty, peace of mind
 Grill cabin,9 m 2 health, beauty, peace of mind Specifications Inside area, m2.9 Shape External dimension (WxD), mm Standard set 8 corners 09x09 Number of Windows 4 Number of opening Windows 4 Weight,
Folding Grill Stand Manual
 O u t d o o r G r i l l i n g P r o d u c t s Folding Grill Stand Manual MODEL: CFGS-150 IMPORTANT SAFETY INSTRUCTIONS READ AND SAVE THESE SAFETY INSTRUCTION BEFORE USING THIS GRILL STAND m DANGER: m Failure
Grill Cabin. 9.2 m 2 with extension (2.90 m 2 ) health, beauty, peace of mind
 health, beauty, peace of mind") Grill Cabin 9.2 m 2 with extension (2.90 m 2 ) health, beauty, peace of mind Specifications Wood Shape Standard set Wall, roof, floor panels; Roof covered with bitumen shingles of your selected color;
Grill Cabin 9.2 m 2 with extension (2.90 m 2 ) health, beauty, peace of mind Specifications Wood Shape Standard set Wall, roof, floor panels; Roof covered with bitumen shingles of your selected color;
INSTALLATION AND OPERATING INSTRUCTIONS
 2 3 UNPACKING INSTRUCTION: Carefully unpack the oven and inspect immediately for shipping damages. Your counter top oven was shipped in a carton designed to give maximum protection in normal handling.
2016 Gourmia The Steelstone Group Brooklyn, NY
 2016 Gourmia www.gourmia.com The Steelstone Group Brooklyn, NY All rights reserved. No portion of this manual may be reproduced by any means whatsoever without written permission from The Steelstone Group,
INSERTS DIRECT VENT GAS FIREPLACE INSERTS
 INSERTS DIRECT VENT GAS FIREPLACE INSERTS REKINDLE THE FIRE GAS INSERTS GAS INSERTS No more drafty, dated fireplaces. No more messy maintenance. No more soot and smoke. It s time for an immediate upgrade,
Installation, Operation, Maintenance & Parts Guide
 For Outdoor Use Installation, Operation, Maintenance & Parts Guide Models: SOITALIA24X24 This manual was updated in July 2015 For the latest product information visit the website Owner s Manual www.solegourmet.com
W O O D F I R E G R I L L S G R I L L I N G R E D E F I N E D
 W O O D F I R E G R I L L S GRILLING REDEFINED SEAR A STEAK? COOK A WOOD-FIRE PIZZA? SMOKE A BRISKET? ROAST A TURKEY? BAKE FRESH ARTISAN BREAD? IT S ALL POSSIBLE ON A MEMPHIS THE POWER OF INTELLIGENT TEMPERATURE
NORTH / 30kg. Mill City Roasters, LLC rd Ave SE Minneapolis, MN 55414
 NORTH / 30kg Mill City Roasters, LLC. 1050 33rd Ave SE Minneapolis, MN 55414 Phone: +1 (612) 886-2089 Email: sales@millcityroasters.com Online: www.millcityroasters.com PART ONE 1 ! Note: Owner must post
Smoke Cabinet SAVE THESE INSTRUCTIONS!
 PART: 61299 Smoke Cabinet SAVE THESE INSTRUCTIONS! INSTRUCTION MANUAL WARNING: Please read the en re manual before installa on and use. Thank you for choosing to purchase a Louisiana Grill Cold Smoke /
DRAGON KAMADO INSTRUCTION MANUAL For safe use and enjoyment of your new barbeque Model: BC1450A0 Code: GKEG Tools required: Phillips Head Screwdriver
 DRAGON KAMADO INSTRUCTION MANUAL For safe use and enjoyment of your new barbeque Model: BC1450A0 Code: GKEG Tools required: Phillips Head Screwdriver IMPORTANT HEALTH & SAFETY INFORMATION 1. WARNING FOR
These modifications are inexpensive and easy yet they work wonders. Try them and see if they don t work for you, too.
 I bought my Hondo over ten years ago and really struggled to get good cue. I researched and researched and bought book after book but still struggled. I was ready to spend big bucks to purchase a fancy
for Assembly, Operating & Maintenance of THIS CHARCOAL ROTISSERIE IS DESIGNED FOR OUTDOOR USE ONLY.
 Owner s Manual for Assembly, Operating & Maintenance of Model M-251B Charcoal Rotisserie www.bigjohngrills.com YOU MUST READ THIS OWNER S MANUAL BEFORE OPERATING YOUR CHARCOAL ROTISSERIE. WARNING: DO NOT
Barrel Charcoal BBQ. Assembly instructions. Please retain this manual for future reference
 Barrel Front over.pdf 4// 0:4:4 Product size assembled: H76.5 x W75 X D96.5cm Ref No.: XZ8040B atalogue No.:07-0557 Tesco 0 Please retain this manual for future reference P.pdf 4// 0::4 Barrel charcoal
Assembly Procedures VCS322SSBI Series / VCS522SSBI Series
 Assembly Procedures VCS322SSBI Series / VCS522SSBI Series Tools Required: Knife or scissors, Phillips or Robertson (square head) screwdriver. Model VCS522SSBI Shown CAUTION: This grill is intended ONLY
T H E T H AT HELPED LAUNCH M E N U APPEAL AND A NEW ERA OF.
 T H E W O O D B U R N I N G GRILL T H AT HELPED LAUNCH A NEW ERA OF M E N U APPEAL AND P R O F I TA B I L I TY www.aztecgrill.com Try a Little Tenderness: Why Aztec Grills Deliver a Superior Product Grilling
INTRODUCTION INDEX. Page 2
 Page 1 INTRODUCTION Congratulations on the purchase of your new Heco Cookstove! We hope that you will really enjoy heating and cooking with your new cookstove. Our Story: The Heco Cookstove originally
BBQ Grill. Owner s Manual Save These Instructions - For Household Use Only For Sizes: 12 x 18 & 12 x 12
 BBQ Grill Owner s Manual Save These Instructions - For Household Use Only For Sizes: 12 x 18 & 12 x 12 Do not use the Copper Chef TM BBQ Grill until you have read this manual thoroughly. Warranty Information
Infierno 52/64/80 Installation & Use
 Infierno 52/64/80 A MAJOR CAUSE OF GRILL-RELATED FIRES IS FAILURE TO MAINTAIN REQUIRED CLEARANCES (AIR SPACES) TO COMBUSTIBLE MATERIALS. IT IS OF UTMOST IMPORTANCE THAT THIS GRILL BE INSTALLED ONLY IN
Kamado Ceramic Charcoal BBQ
 Kamado Ceramic Charcoal BBQ Model No. CM155-024 FOR OUTDOOR USE ONLY DO NOT OPERATE THIS APPLIANCE BEFORE READING THE INSTRUCTION BOOKLET DO NOT PLACE ARTICLES ON OR AGAINST THIS APPLIANCE DO NOT STORE
94306 Vertical Flame Arrester. Features. Vertical Flame Arrester. Unitized tube bank design
 The Shand & Jurs Flame Arresters are designed to provide a positive flame stop on low pressure tanks, storage tanks and anaerobic digesters containing flammable liquids, solvents or gases having a low
GSCS. Chef Quality Flavor Enhancer and Slow Cooking Oven. Series. Gourmet. Series. Series. GourmetSousChef. Series. Gourmet
 GourmetSousChef Series Gourmet Chef Quality Flavor Enhancer and Slow Cooking Oven Series Gourmet GSCS GourmetSousChef Series Series P.O. Box 250243 Plano, Texas 75025 Customer Service 800-265-9422 Email:
OWNER S MANUAL WARNING. Heavy-Duty Outdoor Charcoal Grills & Smokers ASSEMBLY AND OPERATING INSTRUCTIONS
 Heavy-Duty Outdoor Charcoal Grills & Smokers OWNER S MANUAL ASSEMBLY AND OPERATING INSTRUCTIONS WARNING READ AND FOLLOW ALL WARNINGS AND INSTRUCTIONS IN THIS MANUAL TO AVOID PERSONAL INJURY OR PROPERTY
INSTRUCTION MANUAL MODELS: RT-30, RT-36, RT-48, RT-60 & RT-72 REVISED APRIL, 2003 *PLEASE RETAIN FOR FUTURE REFERENCE
 INSTRUCTION MANUAL MODELS: RT-30, RT-36, RT-48, RT-60 & RT-72 REVISED APRIL, 2003 *PLEASE RETAIN FOR FUTURE REFERENCE THANK YOU for purchasing this quality product. Your Crown Verity Inc. rotisserie will
alfresco enjoy the experience
 alfresco enjoy the experience bringing european quality to your home 1 euro appliances Alfresco range - where Italian design, quality and culture come together for Australian lifestyles. Alfresco food,