DE HOTLINE: DE: AT: CH: FR HOTLINE : B : F : CH :
|
|
|
- Alvin Brown
- 5 years ago
- Views:
Transcription
1 UTSCH HOTLINE: : AT: CH: HOTLINE : B : F : CH : HOTLINE: : SERVIZIO CONSUMATORI: : CH: HOTLINE: UK: ROI: ESPRESSO AUTOMATIC SERIES EA9000 ESPRESSO AUTOMATIC SERIES EA XXXXXXX - Réalisatio : Espace Grapique

2 GLISH ESPRESSO AUTOMATIC SERIE EA9000


3 GLISH


4 GLISH WELCOME A FEW EXPERT TIPS Here are a few tips for acievig te best results from your macie: Dear Customer, Cogratulatios You are ow te proud ower of a Espresso Automatic Series EA9000. Wit your macie, you ca prepare a wide rage of driks; espressos, coffees or milk-based driks, etirely automatically. It is desiged so tat you ca ejoy te same quality at ome as i a restaurat, watever te time of te day ad trougout te week. You will appreciate bot te quality of te result i your cup ad its superior ease-of-use. Taks to its Compact Termoblock System wit built-i brewig camber, its 5 bar pump, ad because it ca use eiter coffee beas fresly groud just before te coffee is made or groud coffee fed via a fuel, your macie will give you ristrettos, espressos ad coffees ot from te first cup wit maximum aroma ad a fie creamy golde-brow top. Wit its exclusive ad pateted system for preparig milk-based driks automatically, you ca easily make delicious cappuccios ad caffe lattes, witout compromise: ot, wit te tree layer effect ad tick, creamy frot. Its automatic steam ozzle risig ad cleaig programmes guaratee assle-free ygiee for log-lastig performace, cup after cup. Wit te ot water fuctio, you ca prepare teas ad oter driks istataeously. You ca also persoalise all of tese driks usig te Favourites meu. You ca set te volume, proportios, itesity ad temperature of your driks. Te colour touc-scree makes avigatio ergoomic ad comfortable. It will guide you troug eac step, from preparig your drik to servicig your macie. We wis you may years of ejoymet wit your Krups macie. Te Krups team Te quality of your water sigificatly iflueces te quality of te flavours. Limescale ad clorie ca alter te taste of your coffee. We recommed tat you use te Claris Aqua Filter System cartridge or low mieral-cotet water to preserve all of te flavours of your coffee. We preparig ristretto, espresso ad coffee recipes, we recommed tat you use tulip-saped porcelai cups, preeated beforead (by ruig tem uder ot water, for istace), ad wose size is appropriate for te quatity you wat to make. For your cappuccio, caffe latte ad ot milk recipes, we recommed tat you use tick glass cups, for a appealig, precise ad gourmet presetatio. Roasted coffee beas ca lose teir flavour if tey are ot protected. We recommeded tat you use te amout of beas required for your cosumptio for te ext -5 days. As te macie automatically detects we tere are o beas, you ca be certai tat you will always ave sufficiet beas for preparig your coffee driks. Toug te quality of coffee beas is subjective ad varied, we ca everteless recommed tat you use arabica rater ta robusta. After a few trials, you will lear ow to mix ad roast te coffee beas accordig to your tastes. Lastly, please remember tat oily ad caramelised coffee beas must be avoided, as tey ca damage your macie. Te quality ad fieess of te gridig determie te stregt of te flavours ad te quality of te crema. Te fier te groud, te ricer te crema. Moreover, it must be adapted to te drik you wat: fie for ristretto ad espresso, coarser for coffee. For your comfort, te macie carries out tis operatio automatically. Taks to te groud coffee fuel ad spoo, you ca coose to serve your drik differetly. You ca vary te flavours ad stregts of your coffee as you wis. Groud coffee sould ideally be stored i te refrigerator i a ermetically sealed bag. You ca use pasteurised or UHT, skimmed, semi-skimmed or wole milk, straigt from te refrigerator (7 C). Usig special milks (microfiltered, raw, fermeted, ericed, etc.) ca produce less satisfactory results especially regardig te quality of te frot. However, we recommed tat you use fres, cold milk for pre-programmed recipes.
5 GLISH CONTTS Maufacturer SAS GSM Rue Sait-Léoard F-50 Mayee Frace IMPORTANT INFORMATION ON THE APPLIANCE AND INSTRUCTIONS 6. Guide to te symbols used i te istructios Safety guidelies Correct use Products supplied wit your macie Factory ceck... 9 OVERALL VIEW 0. Descriptio of te appliace Presetatio of te differet symbols.... Mai operatios of te appliace... Te duratio of tis guaratee is years. Please ceck your guaratee card for more details o te guaratee coditios i your coutry. Tis appliace is iteded for domestic use oly ad is ot suitable for commercial or professioal use. Ay use oter ta domestic will void te guaratee. Te guaratee does ot cover damage or faults resultig from improper use, repair by uautorised persos or o-observace of te istructios for use. Te guaratee will become ivalid if all of te maiteace operatios ad istructios ave ot bee followed, or if cleaig or descalig products wic do ot comply wit te origial KRUPS specificatios are used; if te Claris Aqua Filter System water filter is ot used i accordace wit KRUPS istructios. Normal wear ad tear of parts (gridig disks, valves, seals) is exempted from te guaratee, as well as damages caused by foreig objects i te coffee grider (e.g. wood, stoes, plastic parts etc.). 5 FIRST USE 6 INSTALLING THE APPLIANCE 6. Before first use Iitial settigs Defiig te settigs... 7 PREPARING DRINKS. Iformatio o recipes.... Preparig coffee-based driks from coffee beas.... Preparig coffee-based driks from groud coffee Preparig oter driks: ot milk wit or witout frot, ad ot water... 7 FAVOURES MU 0 6 SETTINGS 7 INFORMATION Cautio: For te guaratee to be valid, tis macie must be used oly wit Krups accessories. 8 MAINTANCE AND CLEANING 6 8. Maiteace meu Automatic cleaig programmes... 9 TROUBLESHOOTING 5 ACCESSORIES (sold separately) Actual appearace may vary 0 TECHNICAL DATA 8 TRANSPORT 8 F 088 Claris - Aqua Filter System cartridge ( cartridge supplied) XS 9000 ( bottles of steam ozzle cleaig liquid) F 05 Descalig powder ( sacet supplied) XS 000 Packet of 0 cleaig tablets ( tablets supplied) DISPOSAL OF WASTE 8
6 GLISH IMPORTANT INFORMATION ON THE APPLIANCE AND INSTRUCTIONS I tis maual you will fid all of te importat iformatio cocerig te preparatio, use ad maiteace of your automatic coffee/espresso macie. Importat safety guidelies are also icluded. Read tese istructios carefully before usig your appliace for te first time ad keep tem for referece: Krups may ot be eld resposible for ay icorrect use. Tis appliace is ot iteded for use by persos (icludig cildre) wit reduced pysical, sesory or metal capabilities, or lack of experiece ad kowledge, uless tey ave bee give supervisio or istructio cocerig use of te appliace by a perso resposible for teir safety. Cildre sould be supervised to esure tat tey do ot play wit te appliace. I case of igestio of ay of te products supplied wit te macie, iform your pysicia ad/or te poiso cotrol cetre immediately. Electrical power supply. Guide to te symbols used i te istructios Symbols ad associated words used i tese istructios. Dager: Failure to respect tese guidelies may lead to fatal ijuries due to electricity. Safety Istructios SYMBOL ASSOCIATED WORD MEANING Dager Cautio Importat Note Warig agaist risks of serious or fatal ijuries. Te ligtig bolt symbol wars agaist electrical dagers. Warig agaist risks of icorrect operatio, damage or destructio of te appliace. Geeral or importat ote o te operatio of te appliace. Importat: Tese safety guidelies are iteded to protect you ad oter persos, ad te appliace. Tey must terefore be respected. Coditios of Use Do ot immerse te appliace i water. Do ot immerse te power cord or te mais plug i water or ay oter liquid. Ay cotact of te coductive parts of te appliace wit moisture or water may lead to fatal ijuries due to te presece of electricity Tis appliace must oly be used idoors i dry areas. I te case of a cage i te ambiet temperature, from cold to ot, wait for a few ours before usig your macie so tat it is ot damaged by codesatio. Avoid leavig te appliace i direct suligt, exposed to eat, cold, frost or umidity. Do ot place te appliace o a ot surface suc as a ob or close to a aked flame, i order to avoid ay risks of fire or oter damage Keep te appliace out of te reac of cildre. Ceck tat te supply voltage marked o te ratig plate of te appliace is te same as tat of your electrical supply. Oly coect te appliace to a earted mais socket. Esure tat te mais socket is easily accessible so tat te appliace ca be uplugged easily, for example i te evet of ay failure or a tuderstorm. For te safety of te appliace, uplug it from te socket durig tuderstorms. Do ot pull o te power cord to uplug it from te socket. Uplug it from te mais socket immediately if ay operatioal failure occurs or if tere is a problem wit brewig. Uplug te appliace we it is ot to be used for a log period ad we you are cleaig it. Do ot use te appliace if te power cord or te appliace itself is damaged. If te power cord or te mais plug is damaged, tey must oly be replaced by a approved KRUPS service cetre. Do ot let te power cord dagle over te edge of a table or a worktop. Do ot leave te power cord close to or i cotact wit te ot parts of te appliace. We do ot recommed te use of extesios or multi-adapter plugs. Ay icorrect coectio ivalidates te guaratee. Appliace Do ot pour water ito te coffee bea cotaier ad/or uder te groud coffee fuel. Except for cleaig ad descalig as described i te istructios for te appliace, all work o te appliace must be carried out by a KRUPS approved service cetre. For your safety, oly use KRUPS approved accessories ad cosumables as tey are perfectly adapted to your appliace. Uplug te appliace we leavig te room or your ome for prologed periods. Never ope te appliace, as tere is a risk of fatal ijury due to electricity Ay uautorised opeig of te appliace ivalidates te guaratee. Do ot use your appliace if it is ot workig correctly or if it as bee damaged. I suc cases, we recommed avig te appliace cecked by a KRUPS approved service cetre (see te list i te KRUPS Service adbook). For safety ad approval (CE) reasos, ay trasformatio or modificatio of te appliace carried out by a idividual is proibited, as oly tested appliaces ave bee approved ad te maufacturer is absolved of all resposibility i te evet of damage. 6 7
7 GLISH We producig steam for makig cappuccio, ot milk or ot water, do ot block te mecaism tat brigs te steam ozzle forward, dowward, upward or backward. I suc cases, te maufacturer is absolved of all resposibility i te evet of damage to te appliace ad te guaratee will ot apply. For your safety, wile producig steam for makig cappuccio, ot milk or ot water, do ot place your ad uder te steam ozzle. Te steam ozzle ca be ot. Do ot adle it durig or immediately after a preparatio. Do ot place your ad or ay oter obstacle i frot of te ozzle tat ca ider te movemet of te ozzle. If you do ot set a cup i place or if you do so icorrectly, tere may be risks of picig or scaldig. Do ot put aytig but groud coffee or te cleaig tablet i te fuel provided for tis purpose; do ot add more ta te maximum dose of groud coffee ( spoo). I suc a case, ay damage to te appliace will ot be covered by te guaratee. Use ad Maiteace I te evet of a problem or icorrect operatio, ceck te appliace ad try to resolve te problem (see Sectio 9: Troublesootig ) or ave te appliace repaired if te problem persists. Always refer to te istructios for descalig/cleaig te appliace. Uplug from te socket before ay maiteace operatio. Sould cleaig or regular maiteace ot be carried out or if tere is a foreig body i te grider or i te groud coffee fuel, te guaratee will ot be valid.. Correct use Tis Espresso Automatic Series EA9000 coffee/espresso macie must oly be used to prepare espresso, coffee, ot water or to frot milk. Tis appliace is desiged for domestic use oly. It is ot iteded to be used i te followig eviromets ad te guaratee will ot apply for: - staff kitce areas i sops, offices ad oter workig eviromets, - farmouses, - by cliets i otels, motels ad oter residetial-type eviromets, - bed ad breakfast-type eviromets. Tis Espresso Automatic Series EA9000 coffee/espresso macie is ot desiged for commercial or professioal use. Ay use oter ta tat described i tis maual does ot comply wit tese recommedatios ad may lead to ijuries ad damage to equipmet as well as damage or destructio of te appliace (see Sectio., Safety guidelies ).. Products supplied wit your macie Ceck te products supplied wit your macie. If ay parts are missig, cotact our elplie (see.: Iitial settigs ). Parts supplied: Espresso Automatic Series EA9000 bottles of steam ozzle cleaig liquid cleaig tablets descalig sacet Claris Aqua Filter System cartridge wit fittig accessory cappuccio cups Groud coffee spoo wit built-i brus stick for testig water ardess Istructios List of approved Krups service cetres Guaratee documets power cord cleaig eedle.5 Factory ceck Your appliace as bee cecked ad tested before leavig te maufacturig plat. Despite all te care give to its cleaig, you may fid traces of coffee i te coffee grider ad/or coffee drops o te drip tray grid. Tak you for your uderstadig. We also recommed tat you rise te appliace oe or more times before you use it for te first time or if you ave ot used it for several days. 8 9
8 GLISH OVERALL VIEW. Descriptio of te appliace Te fold-out page sows a poto of te appliace. Fold out tis page. Te various cotrols of te appliace are listed below wit a brief descriptio of tem: No. INTIFICATION FUNCTION No. INTIFICATION FUNCTION ON/OFF butto To switc te appliace o ad off. Groud coffee butto To access te macie s groud coffee fuctio ad to ulock te groud coffee fuel. Colour touc scree To access te recipes ad oter fuctios of te macie. Removable water tak + lid Cotais water for preparig recipes, cleaig ad risig. 5 Used coffee collector Collects te used groud coffee. Cup rest To old ad preeat cups. Rigt door To access te water tak. 5 Left door 6 Coffee ozzles ad eigt-adjustable adle To access te cleaig liquid bottle, te groud coffee spoo/brus ad te used coffee collector. To dispese te prepared coffee recipe. 6 Small drip tray ad grid: ca be removed to positio tall cups To collect water or coffee tat migt flow out of te appliace durig/after preparatio. It ca be removed to use taller cups (large recipes, caffe latte i particular). 7 Power cord To supply power to te macie (removable). 8 Cleaig liquid bottle Cotais te product ecessary for automatic cleaig of te steam ozzle. 7 Large drip tray wit metal cotacts 8 Steam/ot water ozzle 9 Steam/ot water tube 0 Steam ozzle tip Collects water flowig out of te appliace (we draiig te Termoblock ad ydraulic system) or water comig from te small drip tray. To produce steam to eat or frot milk. Or To produce ot water. Steam ozzle cleaig cotaier For automatic programmes tat rise ad clea te milk ozzle. Groud coffee fuel Holds te groud coffee. Holds te cleaig tablet durig te automatic cleaig programme. 9 Cleaig liquid bottle drawer Holds te cleaig bottle (fittig). 0 Groud coffee spoo wit built-i brus Removable bea cotaier lid Coffee bea cotaier To measure te quatity of groud coffee ecessary to prepare a groud coffee. Te brus is used to remove groud coffee residue from te groud coffee fuel. Closes te bea cotaier. (Just ope te removable lid sligtly usig te otces o te side of te bea cotaier. Te it opes by itself.) Holds te coffee beas ad is equipped wit automatic detectio. LED cup ligtig Illumiates your drik as it is beig prepared. 0


 ca get ito te coffee bea cotaier as tey could damage te grider (ot covered by te guaratee).")


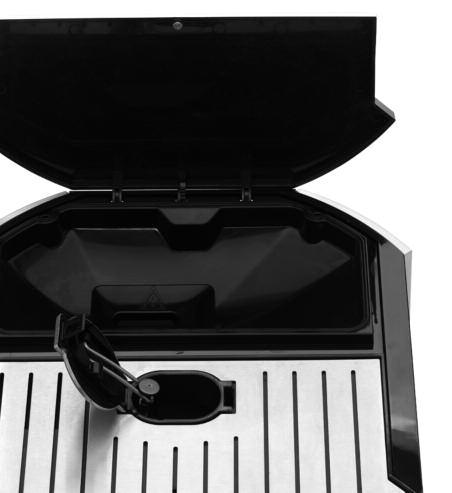
9 . Presetatio of te differet symbols Te table below summarises all te symbols used o te scree: GLISH Te macie prompts you to fill te bea cotaier altoug tere are beas i it: Some types of coffee ca iterfere wit optical sesors; you must sake te beas wit your ad to make te fuctio operatioal oce agai. To cofirm te step. To retur to te previous step. Te macie detects beas, but te coffee dispesed is very/too ligt: Some beas (especially tose tat are too large or too greasy) do ot easily go ito te grider. Use your ad to ease tem ito te grider ad/or cage te type of coffee beas. To scroll troug te differet optios. To brig te steam ozzle up i some meus. Te macie does ot detect te absece of coffee beas: Ceck tat a bea is ot obstructig te optical sesors. Oterwise, te fuctio is ot operatioal. To brig te steam ozzle dow i some meus. To go to te ext step or stop a preparatio i progress. For example, durig a cycle of cappuccio, to move from pase te foamig pase to te coffee pase durig coffee recipe or iterrupt te coffee pase at te ed of recipe. Cautio: Never put groud coffee or water ito te coffee bea cotaier. Esure tat o foreig bodies (e.g. small stoes, ard wood) ca get ito te coffee bea cotaier as tey could damage te grider (ot covered by te guaratee). To stop te cycle durig preparatio. Dager: Ay cotact of te coductive parts of te appliace wit umidity or water may lead to fatal ijuries due to te presece of electricity. Mai operatios of te appliace Turig te appliace o or off Fillig te water tak Press te O/Off butto. Fillig te bea cotaier Ope te rigt door. Lift ad pull te water tak towards you. Fill te tak. Replace te tak. Put coffee beas ito te cotaier, wic as a capacity of about 50 g. Te macie prompts you to fill te tak wit water altoug tere is water i it: Cautio: Te macie icludes a mecaism tat maages te water level required for te requested recipe. It is terefore ormal tat te water level is ot always te same i te tak we tere is a request to fill it. Ope te bea cotaier lid. Put i te coffee beas. Close te bea cotaier lid. Te macie does ot detect my tak: Please ceck weter te tak as bee iserted fully (util you feel resistace). Cautio: Oly put water i te tak
. Remove te used coffee collector (5). Empty ad clea it before puttig it back i place.")


10 GLISH Emptyig te used coffee collector Ope te left door. Remove te used coffee collector by pullig it towards you. Empty te used grouds. Replace te used coffee collector. Ope te left door (5). Remove te used coffee collector (5). Empty ad clea it before puttig it back i place. Cautio: Do ot was it i te diswaser. Your macie as two drip trays (6 ad 7). Te small drip tray collects drips from te coffee ozzles but ca be removed for preparatios wit tall glasses. Te large drip tray collects used water ad overflows from te small drip tray. Te large drip tray is fitted wit a overflow detectio sesor. We it eeds to be emptied, te request will be made o te scree. Te cover of tis tray is ecessary to avoid excessive codesatio ad water spills. Cautio: Te cover ad te grid ca fall we you empty te drip tray. If te tray is dirty, clea it uder ruig water. If te metal cotacts are dirty, clea by scrubbig tem uder water. Wipe te metal cotacts dry before puttig tem back i te macie. Te drip trays will be separated we you empty tem. Avoid spillig water as muc as possible o te metal cotacts located at te ed of te drip tray. If te macie asks you to empty te drip tray we it is empty, ceck weter te metal cotacts at te back of te drip tray are clea ad torougly dry. At eac stage ceck te messages o te touc scree Emptyig te drip trays Adjustig te coffee ozzle eigt Remove te small drip tray. Empty te small drip tray. Remove te large drip tray. Empty te large drip tray. Wipe te metal cotacts. If usig a mug: Caffe latte glass* witout te small drip tray Replace te large ad small drip trays. * Caffe latte glass ot supplied Your macie is supplied wit two cups oly wic ca be used for cappuccio or a caffe latte. 5


11 GLISH FIRST USE We your macie displays tis scree to you, or we you ave performed te water ardess test, you must idicate te umber of red ad gree zoes, usig te touc scree. If te stick sows red zoes ad gree zoes, press te first two red squares ad te last two gree squares o te touc scree. Te scree will te sow a idetical represetatio of your stick. Dager: Coect te appliace to a earted mais socket. Voltage 0-0V. Failure to do so meas tat you ru te risk of fatal ijury due to electricity Respect te safety guidelies (see sectio Safety guidelies ). INSTALLING THE APPLIANCE Place your macie o a stable, flat, eat-resistat surface away from water splases ad sources of eat. Esure tat te locatio cose is sufficietly well vetilated, as te appliace gives off eat. Please do ot place te appliace o surfaces suc as marble. Remove te protective films from te display ad grids.. Before first use Before usig te appliace for te first time, ceck te ardess of your water so tat you ca set te appliace accordigly. Tis operatio sould also be carried out we you use your macie i a place were te ardess of te water is differet or if you otice a differece i te ardess of te water. To ceck te water ardess, use te stick supplied wit your macie or cotact your local water autority. Measurig te water ardess Fill a glass of water ad immerse te stick i it for 5 secods. Wait for a miute before readig te water ardess. You will be asked for te ardess class observed (from 0 to ) durig te iitial setup of te macie. Te red zoes o te stick idicate te degree of ardess: class 0 = o red zoe, i.e. your water as a very low mieral cotet. Your water is more or less ard depedig o te umber of red zoes. Te details of te classes are give i te table below: Degree of ardess Class 0 Class Class Class Class dh < > > 7 > > If you move ome or if te quality of your water cages sigificatly, you ca also reset te water ardess at ay time.. Iitial settigs We usig te macie for te first time, you will be prompted to cofigure various settigs. Follow te idicatios displayed o te scree. Te aim of te followig paragraps is to give you a few visual cues.. Cofigurig te settigs Switc o te appliace by pressig te ON/OFF butto (). A welcome message is displayed o te scree, followed by te Laguage settig meu. After eac selectio, you ca go back by usig te symbol. Cofigure te oter settigs by followig te idicatios o te scree. Te appliace will also require you to set te followig parameters: LANGUAGE Your macie as a touc scree. Select a display laguage by pressig te arrows util Hello appears i te laguage of your coice. Press OK to cofirm. e <,75 > 5 > 8,75 > 7,5 > 6,5 f < 5, > 7, >,6 > 5, > 7,8 Appliace settig 0 0 HOTLINE NUMBER FOR COUNTRY OF RESINCE Tis umber is associated wit te coutry you ave selected. However, you ca cage it ad it may be caged at ay time. Te water ardess classes for te iitial settig of te appliace (sectio.) 6 7


.")


 to level (igest")

12 GLISH UN OF MEASURE INSTALLING THE FILTER (NOW) You ca select te volume uit of measure of your coice from oz ad ml. Filter istallatio: press Now. Ope te rigt door of te macie ad remove te water tak. DATE AND TIME Remove te filter cartridge ad te fittig accessory from te packagig ad assemble te cartridge fittig accessory as illustrated. Te correct date sould ormally be displayed automatically. If ecessary, you ca set te day, mot ad year usig te arrows. To adjust te time, press te required time format (H or AM/PM). Set te mot we te cartridge is fitted (positio o te illustratio, left side figure i te opeig) by turig te grey rig located o te upper ed of te filter. Te mot we te cartridge sould be replaced is idicated i positio o te illustratio. Attac te cartridge fittig accessory to te filter cartridge as sow i te illustratio. AUTO-OFF Lift te removable lid off te tak. You ca coose te legt of time after wic your appliace will switc off automatically: from 5 miutes to ours, i 5-miute periods. Set automatic switc-off usig te arrows. Press OK to validate. Screw te filter cartridge ito te screw tread at te bottom of te water tak: place te filter cartridge ito te tread ad screw i te cartridge. Remove te cartridge fittig accessory from te filter cartridge. Fill te water tak ad te put it back i te macie. Close te rigt door. Your macie will fill te filter cartridge. TEMPERATURE Your macie will fill te filter cartridge wit water. Tis will take a few secods. You will te be asked to empty te larger drip tray. You ca coose te temperature level of your driks, from level (lowest temperature) to level (igest temperature). Note: Te filter cartridge must be replaced approximately every 50 litres of water or at least every mots. Your macie tells you ow may days or litres remai before you eed to cage te cartridge. (see Sectio 7, Ifo meu ) INSTALLING THE FILTER (LATER) WATER HARDNESS You must set your macie accordig to te water ardess i your area, betwee 0 ad (see P6 ad P7). Press Later ad cofirm. Remove te water tak from iside te rigt door. Fill te water tak ad te put it back i te macie. Close te rigt door agai. Importat: You must remember to ru te istall fuctio every time you cage te cartridge as soo as you ca. 8 9


 To do so, press Now.")
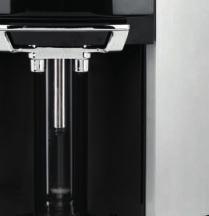
13 GLISH INSTALLING THE CLEANING LIQUID Press Now to cofirm or Later to do it later. PREPARING DRINKS Ope te left door (5). Pull te cotaier (9) ad screw te bottle (8) oto te cotaier. Replace te cotaier back wit te bottle ad close te door. Do ot screw i te bottle fully. Te bottle must be positioed i lie wit te drawer.. Iformatio o recipes Depedig o te recipes cose, your Espresso Automatic EA9000 will automatically adjust te quatity of groud coffee as well as te gridig fieess. We recommed tat you use appropriately sized porcelai cups, ideally preeated. For your milk-based recipes, we recommed tat you use tick glass cups. Table of driks ad parameters modifiable by te user COFFEE RECIPES Number of cups possible Possible settigs Volume (ml) Possible settigs Stregt RISTRETTO 0 to 5 ml (per 5 ml) Automatic AUTOMATIC STEAM NOZZLE CLEANING PROGRAMME Your macie will prompt you to start tis programme. ESPRESSO 0 to 70 ml (per 0 ml) To do so, press Now. Te cycle will last about 5 miutes ad te scree will display te progress of te cleaig. x x 0 to 70 ml (per 0 ml) i a sigle cycle Automatic COFFEE x 80 to 80 ml (per 0 ml) x80 to 80 ml (per 0 ml) i two cycles PREHEATING, AUTOMATIC MAINTANCE, RINSING Te macie will start by preeatig te circuits, te will carry out a automatic test ad fially will ask you if te appliace eeds to be rised or ot. Place a cotaier uder te coffee ozzles ad press YES if tis is required. Te risig procedure starts ad stops automatically, after aroud 0 ml ave passed troug. Te mai drik selectio meu is te displayed o te scree. Cappuccio is made wit followig proportios: / milk + / coffee + / milk frot. You ca obtai a maximum volume of aroud 00 ml. Caffe Latte is made wit followig proportios: /5 milk + /5 coffee + /5 milk frot. You ca obtai a maximum volume of aroud 60 ml. Hot milk wit frotig is made wit followig proportios: /5 milk + /5 milk frot. Note: If te first use cycle is iterrupted before it as fully completed, you will be asked to save certai parameters agai or to cofirm certai settigs. Hot milk wit frotig Fial volume Milk Small 80 ml 00 ml Medium 0 ml 50 ml Large 0 ml 00 ml Importat: Esure tat all of te lids, covers ad doors are closed ad tat all parts of te macie are fitted correctly before startig to prepare a drik. Hot water Fial volume From 0 ml to 50 ml 0
.")
, ad served i te cups")
 ca produce less satisfactory results especially we it comes to te quatity ad quality of te frot ad terefore are ot recommeded.")
. If your milk is at room temperature, reduce te pre-eatig time (press >> durig te recipe). Press te Cappuccio butto o te touc scree.")
14 GLISH. Preparig coffee-based driks wit coffee beas Tis sectio explais ow to operate te macie usig its features, takig te example of espresso ad cappuccio. Espresso Press te Espresso butto o te touc scree. If te macie detects o beas we you request tis recipe, it will ask you to fill te bea cotaier (see sectio.). If te macie detects o water we you request tis recipe, it will ask you to fill te tak. Place te cup(s) uder te coffee ozzles. You ca lower or raise te coffee ozzle to suit te size of your cup(s). Cappuccio Importat: To prepare your Krups milk-based recipes to perfectio: Te recipes suggested were made wit cold semi-skimmed UHT milk, straigt from a refrigerator (7 C), ad served i te cups supplied wit te macie. You ca also use (fres) cold pasteurised or UHT skimmed, semi-skimmed or wole milk, straigt from te refrigerator. Wat is importat is tat it sould be fres ad at tis temperature. Usig special milks (microfiltered, raw, fermeted, ericed, etc.) ca produce less satisfactory results especially we it comes to te quatity ad quality of te frot ad terefore are ot recommeded. To guaratee te best results, we recommed tat you follow te idicated proportios ad use te cups supplied wit your macie If you use a cup oter ta tose supplied wit te product, make sure you coose a cup suitable for te volume i te recipe (takig frotig ito accout). If your milk is at room temperature, reduce te pre-eatig time (press >> durig te recipe). Press te Cappuccio butto o te touc scree. Possible settigs You ca prepare oe or two cups wit your appliace. If te macie detects o beas we you request tis recipe, it will ask you to fill te bea cotaier (see sectio.). If te macie detects o water we you request tis recipe, it will ask you to fill te tak. Coosig te stregt: Te more beas you select, te stroger te preparatio will be. You ca modify te stregt usig te arrows o te left ad rigt of te symbols (except i te case of double espressos). Coosig te volume: Te scree displays te last volume settig associated wit espresso. You ca modify tis volume usig te arrows o te left ad rigt of te idicated value. Press te Start butto o te touc scree to start te preparatio. Coosig te volume (small/medium/large). Te scree sows te last volume settig associated wit cappuccio (volume of milk + volume of coffee + volume of frot). You ca modify tis selectio usig te arrows o te left ad rigt of te idicated value (small medium - large). Press te Start butto. Preparig a espresso Te macie starts preeatig, if required, ad te grids te beas, tamps te groud coffee ad fially brews te coffee. You ca adjust te coffee volume durig te cycle usig te up ad dow arrows. You ca stop te preparatio by pressig te Stop symbol or te O/Off butto () or te groud coffee butto (). Remove te cup we te scree sows: Your espresso is ready. Fill te cup wit te volume of milk idicated. Pour te quatity of milk idicated o te scree ito te cup. Press te OK butto.
 wit te cup; oterwise, it migt break off. You ca lower or raise te coffee ozzle to suit te size of your cup.")
, you migt ave to remove te small drip tray (6). Press te OK butto. 7 Te macie tamps te groud coffee ad te brews it. Te volume is cosistet wit te cose recipe.")


15 GLISH Place te cup uder te coffee ozzles. Coffee dispesig pases. Te cup must be placed close to te cleaig cotaier, uder te steam ozzle, at te back of te ice. However, do ot press te cleaig cotaier () wit te cup; oterwise, it migt break off. You ca lower or raise te coffee ozzle to suit te size of your cup. Te steam ozzle will desced just beid te coffee ozzles. Cautio: te maximum eigt of te cup is defied by te coffee ozzles; do ot tilt te cup to place it uder te coffee ozzles. To use a large cup (or mug), you migt ave to remove te small drip tray (6). Press te OK butto. 7 Te macie tamps te groud coffee ad te brews it. Te volume is cosistet wit te cose recipe. However, you ca modify te coffee volume durig te cycle. You ca stop te preparatio by pressig te Stop butto. Remove te cup we te scree sows: Your cappuccio is ready. Add a little sugar or some cocolate cips/powder to taste. You must add te sugar oly at te ed of te preparatio. 5 Milk preeatig pase: Te milk is first preeated ad durig tis time te beas are groud for preparig te coffee. Te ozzle moves forward ad goes dow ito te milk Te ozzle tip must be submerged i te milk by cm for perfect results. If tis is ot te case, te cup is ot suitable for te volume cose; stop te preparatio usig te Stop butto ad cage te cup. If te milk used is at a iitial temperature iger ta 7 C, you ca sorte te preeatig time by pressig >> ad move o to frotig to avoid spoilig te recipe. 8 Automatic risig of te ozzle. Te ozzle is rised automatically after every milk-based preparatio to guaratee te ygiee of te macie. You must wait for tis risig to be complete before startig te ext preparatio. Cautio: Cautio: Do ot place your ad or ay oter obstacle i frot of te ozzle tat ca ider te movemet of te ozzle. Cautio: If you do ot set a cup i place or if you do so icorrectly, tere may be risks of scaldig. If you press te Stop butto, te etire recipe is stopped, ad terefore te brewig will be cacelled. Te uused groud coffee will te be ejected. Importat: Remember to take out te small drip tray we preparig a caffe latte. 6 Milk frotig pase: Te milk is te froted accordig to te cose recipe. You ca icrease or decrease te frotig time. (Make sure te cup does ot overflow). Press te >> butto to stop te frotig ad move o to preparig te coffee. Importat: Te productio of steam does ot stop immediately after you press te >> butto (it takes to 5 secods to stop). Press te butto sufficietly early to avoid overflows. Te ozzle moves up ad draws back to retur to its cleaig cotaier.. Preparig coffee-based driks wit groud coffee Wit your Espresso Automatic EA9000, you ca prepare your driks from groud coffee, if you prefer decaffeiated coffee, if you wat variety, or if you ave ru out of beas. Cautio: Te volume available uder te lid is te maximum quatity of groud coffee permissible. Please put te groud coffee oly oce ito te fuel for eac recipe. Do ot tamp te groud coffee iside te fuel. If you ope te lid ad close it agai witout puttig i groud coffee, te macie will perform a self-test. If a object falls ito te macie, you must uplug it ad take it to te after-sales service cetre. Te groud coffee fuel is locked. To ulock it, press te groud coffee butto. ANY DAMAGE CAUSED BY INTRODUCING AN EXCESSIVE QUANTY OF GROUND COFFEE WILL NOT BE COVERED BY THE GUARANTEE. 5


 i te left door.")

16 GLISH Espresso via te groud coffee meu Tis sectio describes ow te recipes fuctio we you use groud coffee via te groud coffee fuel, takig te example of espresso. Te oter recipes are similar. Just follow te istructios o te differet screes. 5 Itroducig te groud coffee. Pour te groud coffee ito te fuel. Use oly oe spoo of groud coffee for eac recipe. Close te groud coffee fuel lid. Te fuel is te locked by te macie. Press te groud coffee butto. Coosig te volume. Press te Start butto. 6 Preparig coffee. Te groud coffee fuel is ulocked. Te macie tamps te groud coffee ad te brews it. Press te Espresso butto o te touc scree. If te macie detects o water we you request tis recipe, it will ask you to fill te tak. 7 You ca stop te preparatio by pressig te Stop butto. Ope te groud coffee fuel lid. If you otice moisture iside te fuel, it is recommeded tat you wipe it dry.. Preparig oter driks: ot milk wit or witout frot, ad ot water Hot milk wit frotig Press te Hot Milk butto o te touc scree. If te macie detects o water we you request tis recipe, it will ask you to fill te tak. Use te coffee spoo (0) i te left door. Coosig: wit or witout frot. Ceck te Frotig box if you wat frot i additio to ot milk. We you coose a milk recipe witout frotig, tere ca still be a very fie layer of frot. Press te Start butto to start te preparatio. Select te volume (small/medium/large). 6 7
 wit te cup; oterwise, it migt break off.")


 wit te cup; oterwise, it migt break off. Press OK. Te steam ozzle te comes out of its cleaig cotaier to stop just above your cup.")


17 GLISH Fill te cup wit te volume of milk idicated o te scree ad place it uder te coffee spouts. Te cup must be placed close to te cleaig cotaier, uder te steam ozzle, at te back of te ice. However, do ot press te cleaig cotaier () wit te cup; oterwise, it migt break off. You ca lower or raise te coffee ozzle to suit te size of your cup. Te steam ozzle will desced just beid te coffee ozzles. Cautio: te maximum eigt of te cup is defied by te coffee ozzles; do ot tilt te cup to place it uder te coffee ozzles. To use a large cup (or mug), you migt ave to remove te small drip tray (6). Press te OK butto. Coosig te volume. Te scree displays te last volume requested. You ca modify tis volume usig te arrows o te left ad rigt of te idicated value. Place your cup uder te coffee ozzles. To use a large cup (or mug), you must remove te small drip tray. Make sure tat te cup fits uder te coffee ozzles witout iterferece. Te cup must be placed close to te cleaig cotaier. Milk preeatig pase. Milk frotig pase: te milk is te froted accordig to te cose recipe. Cautio: use a cup tat matces te volume of te recipe. Te maximum eigt of te cup is defied by te coffee ozzles; do ot tilt te cup to place it uder te coffee ozzles. Cautio: Do ot press te cleaig cotaier () wit te cup; oterwise, it migt break off. Press OK. Te steam ozzle te comes out of its cleaig cotaier to stop just above your cup. Te ozzle moves up ad draws back to retur to its cleaig cotaier. Remove te cup we te scree sows: Your milk is ready. Risig te ozzle. Te ozzle is rised automatically. You must wait for tis risig to be complete before startig te ext preparatio. You will eed to modify te steam ozzle positio usig te + ad - symbols accordig to your coveiece. If te steam ozzle is too ig from te bottom of te cup, tere is a risk of splasig. Cautio: Te ozzle must ot touc te bottom of te cup eiter. Press te OK butto o te touc scree. 5 Dispesig ot water troug te steam ozzle. Hot water Press te Hot water butto o te touc scree. 5 If ecessary, te macie goes ito preeatig mode, te begis to dispese ot water. You ca modify te volume of your preparatio usig te arrows o te left ad rigt of te idicated value. Press Stop to stop te recipe. If te macie detects o water we you request tis recipe, it will ask you to fill te tak. Importat: Te productio of ot water does ot stop immediately after you press te Stop butto (it takes to 5 secods to stop). Press te butto sufficietly early to avoid overflows. 8 9

.")

18 GLISH 5 FAVOURES MU CREATING A PROFILE Te Favourites meu o your Krups Espresso Automatic Series EA9000 allows you to save your favourite recipes ad to customise tem to your tastes ad abits. You ca create up to 8 profiles, wic ca cotai up to 8 recipes eac. Te screes will guide you very ituitively troug tis etire meu. Tis sectio aims to explai te various features tis programme offers you, takig te example of espresso. Te first time you go to te Favourites meu, your macie will prompt you to create a ew profile. Press te OK butto. Durig subsequet uses, press te profile. ico to create a ew Customisable recipes are tose i te mai meu (see page ). Te followig criteria ca be customised, depedig o te recipes: volume of coffee, coffee stregt, coffee temperature, volume of milk, preeatig time ad milk frotig time. Te eter te ame of your profile usig te alpabetic keypad displayed o te scree ad cofirm by pressig OK. STEPS AND RECIPE SETTINGS IN THE FAVOURES MU RECIPES STEP STEP STEP Ristretto Coice of volume Cofirm te ame Espresso Coffee Cappuccio Caffe Latte Hot milk Coice betwee or cups Coice betwee or cups.volume of cold milk.frotig time**.volume of cold milk.preeatig time*.frotig time**.coice of frotig or ot.volume selectio.coffee stregt ().Temperature ().Volume selectio.coffee stregt ().Temperature ().Coffee volume.coffee stregt ().Coffee volume.coffee stregt ().Volume of cold milk.preeatig time.frotig time** Hot water Coice of volume Cofirm te ame * Allows you to icrease te temperature of your recipe. ** Allows you to icrease te proportio of frot i your recipe. To eter te Favourites meu, press te correspodig visual i te mai meu. Before creatig customised recipes, you must create a user profile. Cofirm te ame Cofirm te ame Cofirm te ame Cofirm te ame Cofirm te ame You must te select a colour for your profile. Coose it ad cofirm by pressig OK. Your profile will te appear i te Favourites meu. You ca associate up to 8 recipes wit it. We you press te profile butto, you will access te list of recipes associated. NB: At ay time, you ca: Create a ew profile by pressig te + butto - You must te repeat te same operatios, i.e. eter te ame ad coose te colour. Modify te profile caracteristics by pressig te (Cage) butto. - Coose te profile you wat to modify - Modify te ame etered - Modify te colour - Cofirm by pressig OK. Delete oe or more profile(s) by pressig te (Delete) butto. - Coose te profile(s) you wat to delete - Cofirm by pressig te OK butto. 0


 or modify it (by pressig Cage).")


19 GLISH CREATING A RECIPE Example of espresso 6 SETTINGS After creatig te profile, you ca associate a recipe wit tis profile by pressig te + butto. Several recipes are te displayed o te scree. Coose te Espresso recipe, i tis case. Te Settigs meu allows you to make cages to optimise your ease of use ad suit your prefereces. Below are te mai settigs available. Just follow te istructios o te differet screes i te display. Coosig te umber of cups: Coose or cups by pressig te appropriate box. Coosig te coffee settigs: Coose te volume (0 to 70 ml), stregt ( to beas) ad temperature (levels to ) of te espresso you wat to store. Cofirm by pressig OK. You ca access te Settigs meu from te mai meu by pressig te Settigs tab. You ca modify: te laguage, brigtess, date ad time, volume uit; but also water ardess, coffee temperature ad auto-off mode. To go back to te recipe sequece, press te small cup at te top rigt-ad of te scree. To quit te Settigs meu: press te Settigs tab. Amog te possible settigs, you will fid laguage, date ad time, uit of measure, water ardess ad coffee temperature. By default, a ame is give to your Espresso recipe. You ca decide to keep it (by pressig OK) or modify it (by pressig Cage). If you modify it, te idicatio Espresso will be preset i te ame ad you ca add a suffix usig te keypad. Te press OK to cofirm te ew ame. Brigtess Icrease or decrease te brigtess of te scree of your appliace. Press OK to cofirm. 5 Your recipe is te saved wit its ew ame ad appears i te scree sowig te recipes of te user profile i questio. NB: At ay time, you ca: Create a ew recipe by pressig te + butto - You must te repeat te same operatios of coosig te recipe settigs. Modify te recipe caracteristics by pressig te (Cage) butto. - Coose te recipe you wat to cage - Modify te recipe settigs - Modify te recipe ame - Cofirm by pressig OK. Delete oe or more recipe(s) by pressig te (Delete) butto. - Coose te recipe(s) you wat to delete - Cofirm by pressig te OK butto. Auto-off Decide ow log your appliace must remai tured o before turig off automatically; betwee 5 miutes ad two ours, i steps of 5 miutes. Press OK to cofirm. To quit te settigs meu Go back to te Settigs meu by pressig te symbol to te mai meu. Press OK to cofirm.. Te press te Settigs tab to retur


20 GLISH 7 INFO Risig Gives you te umber of risig cycles already carried out by te macie. Press OK to cofirm. Te Ifo meu provides iformatio about your use ad about certai stages i te life of your macie. It also iforms you about te maiteace of your macie. Below are te mai details available. Just follow te istructios o te various screes i te display. You ca access te Ifo meu from te mai meu by pressig te Ifo tab. You ca te view all te iformatio available o time limits i terms of: risig, descalig, replacig te filter, cleaig te ozzles, cleaig te coffee circuit, cagig te cleaig liquid ad preparatio cycles. To quit te Ifo meu: press te Ifo tab. Cleaig te coffee circuit Descalig Tells you te umber of brewig cycles performed sice te last cleaig/descalig ad te umber of cycles tat ca be performed before te ext descalig. You ca also start a coffee circuit cleaig programme. Press OK to cofirm. Automatic/maual cleaig of te steam ozzle Cycles Gives you iformatio about your drikig abits, i terms of coffee or milk-based driks as well as te umber of times you ave prepared tem via te Groud coffee or Favourites meus. Press OK to cofirm. 5 Tells you te umber of brewig cycles performed sice te last automatic/maual cleaig of te steam ozzle ad te umber of cycles tat ca be performed before te ext automatic cleaig of te steam ozzle. You ca also start up a automatic/maual programme for cleaig te steam ozzle. Press OK to cofirm. Helplie Here you ca fid te elplie umber for your coutry. You ca cage it by pressig Cage. Press OK to cofirm. Cleaig liquid Water filter Tells you, were relevat, te last time te water filter was replaced ad ext time te filter must be replaced. You ca also start a filter replacemet procedure. Press OK to cofirm. 6 Tells you te umber of cycles carried out sice te last replacemet of te cleaig liquid bottle ad te umber of cycles possible before te ext replacemet of te cleaig liquid bottle. You ca also start a cleaig liquid bottle replacemet programme. Press OK to cofirm. 5


 wit te steam ozzle (9). Do ot remove te tip seals, as tis may damage tem ad affect te frotig performace. Press Start.")


21 GLISH 8 MAINTANCE AND CLEANING 8. Maiteace meu Press te Maiteace tab to access te Maiteace meu. Automatic cleaig of te steam ozzle Te macie ca automatically clea te ozzle o your request, or automatically. Automatic cleaig is required depedig o te umber ad type of milk recipes prepared. Below are te mai steps i tis automatic cleaig we requested by te user. Oterwise, just follow te istructios o te screes displayed by te macie. You ca access te Maiteace meu from te mai meu by pressig te Maiteace tab. To clea te ozzle ad its cotaier, you must follow te sequece sow i te Maiteace tab. Failure to follow tis sequece may damage te system. Press te Maual cleaig of te ozzle butto o te touc scree. To quit te Maiteace meu, press te Maiteace tab. Te ozzle comes out of te cleaig cotaier. You ca clea all of te parts of te macie located beid te coffee ozzle. You ca access te Maiteace meu from te mai meu by pressig te Maiteace tab. Press te Automatic cleaig of te ozzle butto o te touc scree. NB: Te cleaig cycle must ot be iterrupted. To quit te Maiteace meu, press te Maiteace tab. If ecessary, te macie will ask you to replace te cleaig liquid bottle. Remove te two drip trays. Empty ad clea tem. Te ozzle moves forward ad sligtly dowward. Uscrew te ozzle tip (0) wit te steam ozzle (9). Do ot remove te tip seals, as tis may damage tem ad affect te frotig performace. Press Start. (if you do ot do so immediately, you will retur to te iitial scree). Te macie starts by risig te ozzle. Te ozzle comes out of its cleaig cotaier. Te cleaig liquid is itroduced automatically ito te ozzle cleaig cotaier. Te macie mixes water wit te cleaig liquid. Te, te macie cleas te ozzle by soakig it i tis mixture. Te ozzle is te rised twice wit water. Te cleaig cycle is fiised Cautio: Risk of scaldig wile uscrewig; te temperature of te ozzle ca be ig (> 50 C). Clea te tree oles o te ozzle tip usig te pi supplied for tis purpose wit te Welcome Pack. You must fully separate te two parts to clea tem properly. Do ot was te tip i te diswaser. Maual cleaig of te steam ozzle Te macie ca ask you to clea te ozzle maually or ca clea it o your request. Maual cleaig is requested depedig o te umber ad type of milk recipes prepared. Below are te mai steps i tis maual cleaig of te ozzle we requested by te user. Oterwise, just follow te istructios o te screes displayed by te macie. 5 Cautio: clea te tip properly. Press te OK butto. 6 7


.")
22 GLISH Te steam tube moves dow. Cleaig te steam ozzle cleaig cotaier 6 You ca tus clea it properly wit a damp clot (you ca use a little wasig-up liquid, but rise it torougly). Te steam tube caot be dismatled. Press te OK butto. Te steam tube moves up so tat te ozzle tip ad te ozzle ca be refitted. You ca access te Maiteace meu from te mai meu by pressig te Maiteace tab. To clea te ozzle ad its cotaier, you must follow te sequece sow i te Maiteace tab. Failure to follow tis sequece may damage te system. 7 Re-screw te ozzle wit te tip oto te steam tube. Press te OK butto. Te steam ozzle assembly moves up ad stops above te cleaig cotaier. Press te Cleaig cotaier butto o te touc scree. Te follow te istructios o te scree, referrig to te visuals i step 9 i te maual cleaig of te ozzle util you see te scree o te rigt. Tis cleaig cycle is fiised. Cleaig te steam ozzle cleaig cotaier (). Press YES to te questio: Do you wat to clea your cleaig cotaier? if you wat to clea it. Press te top of te cotaier to remove it. Clea it uder ruig water. Cleaig te groud coffee fuel Cautio: Do ot force te fuel ope; it is always locked we te recipes are prepared. 8 To put te cotaier back, first positio te lower part ad te press te upper part: you sould ear a click. Press te OK butto. You ca access te Maiteace meu from te mai meu by pressig te Maiteace tab. You caot clea te groud coffee fuel witout goig troug te Maiteace tab. Always follow te istructios give o te scree. Press te Cleaig te groud coffee fuel butto o te touc scree. Te groud coffee fuel lid is te ulocked. To quit te Maiteace meu, press te Maiteace tab. Ope te groud coffee fuel lid. Remove te groud coffee fuel. Replace te two drip trays (see visuals p. ). Te maual steam ozzle cleaig cycle is fiised. 9 Press OK to cofirm ad quit. Clea te groud coffee fuel. Cautio: Te maual cleaig of te ozzle ad te cleaig cotaier must be carried out i tis sequece: If ot, you risk damage to te steam ozzle assembly, malfuctio or breakage. You ca clea it wit te brus or uder ruig water. Cautio: Dry it torougly. It must be dry we you replace it. 8 9


23 GLISH Replace te groud coffee fuel. Close te fuel lid. Te fuel lid is te locked. If te macie asks you weter you ave take out te fuel: press te OK butto o te touc scree. Cleaig of groud coffee fuel completed. Cagig te cleaig liquid bottle Te macie ca request te replacemet of te cleaig liquid bottle, but you ca also make tis request. 8. Automatic cleaig programmes Automatic cleaig programme of te coffee circuit A message o te scree will idicate we a cleaig programme eeds to be ru for te appliace. Cleaig is required aroud every 60 preparatios. To ru tis cleaig programme, you will eed a recipiet wit a capacity of at least 0.6 litres wic ca fit udereat te coffee ozzle, ad a KRUPS cleaig tablet (two of wic are supplied i te Welcome Pack). Te automatic cleaig programme as tree pases: oe cleaig cycle ad two risig cycles. It lasts aroud 0 miutes. Protect your worktop from ay splases durig te cleaig ad descalig cycles, especially if it is made of marble, stoe or wood. You ca access te Maiteace meu from te mai meu by pressig te Maiteace tab. You must always use tis programme so tat te couters ca be updated. Press te Cagig te cleaig liquid bottle butto o te touc scree. To quit te Maiteace meu, press te Maiteace tab. Cautio: You are ot obliged to carry out te cleaig programme immediately te appliace requests it, but it must be carried out reasoably soo. Oly use KRUPS cleaig tablets oterwise te guaratee will ot cover ay material damage caused by te use of oter brads of tablets. Cleaig tablets are available from your KRUPS After-Sales Service Cetre. Cautio: To respect te guaratee coditios, te cleaig cycle must be carried out we te appliace requests you ot to postpoe it furter. Ope te left door (5). Pull out te drawer (9) of te cleaig liquid bottle. Uscrew te bottle to be caged. Use oly Krups bottles. Te use of oter products tat are icompatible or ot approved by Krups will ivalidate te guaratee. Here are te mai steps i tis programme. Oterwise, just follow te istructios o te screes displayed by te macie. Remove te cap from te ew bottle of cleaig liquid te screw it oto te drawer witout turig too tigtly (maximum oe ad a alf turs) (9). Screw i te ew bottle. Place te liquid bottle i te axis of te drawer. Screw at least two turs. You ca access te Maiteace meu from te mai meu by pressig te Maiteace tab. Press te Cleaig coffee circuit butto o te touc scree. To quit te Maiteace meu, press te Maiteace tab. Pus te drawer to te back. Empty te used coffee collector, remove ad empty te drip trays, ad fill te water tak. Close te door. Press OK. Tis programme is fiised. 0


24 GLISH Ope te groud coffee fuel lid. Remove te groud coffee fuel. Clea te groud coffee fuel. You ca clea it wit te brus or uder ruig water. Cautio: Dry it torougly. It must be dry we you replace it. Automatic descalig programme of te steam circuit A message o te scree will idicate we a descalig programme eeds to be ru for te appliace. Te frequecy of tis programme depeds o te quality of te water used (te arder te water, te more ofte te appliace as to be descaled) ad o weter a Claris Aqua Filter System filter is used or ot. To ru te descalig programme, you will eed a recipiet wit a capacity of at least 0.6 litres tat may be placed udereat te coffee ozzles ad te steam ozzle, ad a KRUPS descalig sacet (F 05 a 0 g sacet is supplied i te Welcome Pack). Te automatic descalig programme as tree pases: oe descalig cycle ad two risig cycles. Te programme lasts approximately miutes. Put te fuel back witout closig te lid. Cautio: You are ot obliged to carry out te descalig programme immediately te appliace requests it, but it must be carried out reasoably soo. Oly use KRUPS descaler sacets supplied i te Welcome Pack; oterwise te guaratee will ot cover ay material damage caused by te use of oter brads of sacets. Descaler sacets are available from your KRUPS After-Sales Service Cetre. Put te cleaig table ito te fuel. Cautio: To respect te guaratee coditios, te cleaig cycle must be carried out we te appliace requests you ot to postpoe it furter. 5 Close te fuel lid. You must ru tis programme rigt to te ed. Te fuel is locked. Press te OK butto o te scree. We te macie requests descalig, cofirm to start te programme. Empty te used coffee collector, take out ad empty te drip trays. Place a recipiet wit a capacity of at least 0.6 litres uder te coffee ozzles ad press OK. 6 Follow te istructios o te scree. Oce te cleaig cycle is complete, empty te recipiet ad put it back uder te coffee ozzles ad fill te tak agai wit water. After te secod risig, empty te recipiet ad te drip trays. Remove te water tak. If you use te Krups Claris Aqua Filter System filter cartridge, remove it before te descalig operatio. Empty te water tak ad te fill it wit water up to te CALC mark. Pour te descaler ito te water tak ad put it back. Use a large spoo wit a log adle to mix te water i te tak or remove te water tak ad carefully sake it from left to rigt util te descaler is fully dissolved. Cautio: Make sure tat te cleaig programme is completely fiised. If te cleaig programme is iterrupted by a power cut or accidetal upluggig of te macie, it must be started agai from te begiig. A ew cleaig tablet will be required i tis case. Te programme must be started agai completely i order to rise te water circuit ad elimiate ay traces of armful cleaig products.
Characteristics and dead-time of GM-tube
 Caracteristics ad dead-time of GM-tube GM-tubes are te most popular gas ioizatio detectors for te measuremet of - ad -radiatio. Gas ioizatio detectors ave tree types: ioizatio cambers, proportioal couters
Electric 4 Qt. Pressure Cooker
 Electric 4 Qt. Pressure Cooker INSTRUCTIONS FOR PROPER USE AND CARE Model #99450, 99452, 99453 IMPORTANT! Please keep these istructios ad your origial box packagig. Table of CoTeTs Importat Safeguards.............................................2-3
SN 60FP. 600mm Fanned Electric Oven / Grill. User & Installation Instructions
 SN 60FP 600mm Faed Electric Ove / Grill User & Istallatio Istructios Cotets User s Sectio..................................... 2-22 Itroductio................................................. 2 Be Safe
CafeRomatica NICR7.. Fully automatic coffee centre Operating Instructions and Useful Tips. A passion for coffee.
 CafeRomatica Fully automatic coffee centre Operating Instructions and Useful Tips NICR7.. GB A passion for coffee. 1 G F A M J / K A B C D E Display screen Left rotary knob Right rotary knob Bean symbol
DEUTSCH KRUPS ENGLISH. ESPRESSERIA AUTOMATIC SERIE EA 80xx FRANCAIS NEDERLANDS DANSK SVENSKA NORSK SUOMI. ITALIANO
 KRUPS ESPRESSERIA AUTOMATIC SERIE EA 80xx NORSK SVENSKA DEUTSCH ENGLISH FRANCAIS DANSK NEDERLANDS www.krups.com ITALIANO SUOMI 16 17 18 15 14 19 20 21 22 23 13 12 24 25 11 26 1 2 3 4 5 27 10 9 8 7 6 KRUPS
1. IMPORTANT SAFEGUARDS When using electrical appliances, basic safety precautions should always be followed to reduce the risk of fire, electric
 1. IMPORTANT SAFEGUARDS When using electrical appliances, basic safety precautions should always be followed to reduce the risk of fire, electric shock, and/pr injury to persons including the following:
AUTOMATIC. For domestic use only
 AUTOMATIC DE FR NL ES PT IT GR For domestic use only The length of the guarantee depends on the legislation in your country with a maximum of 3000 cycles a year. This product has been designed for domestic
ABBREVIATED GUIDELINES IMPRESSA S70, X70. Programming panel behind door Coffee key for 1 normal cup. Coffee key for 1 small cup
 J K L M ABBREVIATED GUIDELIES IMRESSA A I H G F E D C B V O Q R S T U A B C D E F G H I J K L M O Q R S T U V W rogramming panel behind door Coffee key for normal cups Coffee key for normal cup Coffee
G F I M J K L B C D E S O T H Q P U N R D 4
 1 2 3 4 G F I A M J K L 5 6 7 B C D E 8 9 10 S O T H Q P U N R 11 12 D 4 Equipment GB A B C D E Text display (main menu) Rotary control knob Button > Button exit Height-adjustable coffee spout CafeRomatica
SAFETY INSTRUCTIONS FOR USE
 INTRODUCTION Thank you for choosing this De Longhi Coffee machine. We hope you enjoy your new appliance. Please take a few minutes to read these instructions. This is the only way to ensure optimum results
Quick Reference Guide
 Impressa Z5 Quick Reference Guide This Guide does not replace the Operating Instructions. For details and cautions you must read all instructions. Watch the DVD instructions! Traces of Coffee Grounds in
IMPORTANT SAFEGUARDS. 3. To protect against fire, electric shock and injury to persons do not immerse cord, plug or unit in water or other liquid.
 IMPORTANT SAFEGUARDS When using electrical appliances, basic precautions should always be followed, including the following: 1. Read all instructions. 2. Make sure that your outlet voltage corresponds
MODELS 1315 & 1315-S La Pavoni CLUB COMBO
 IMPORTANT WARNINGS MODELS 1315 & 1315-S La Pavoni CLUB COMBO DUET Never operate your espresso machine without water in the tank. This may cause premature pump failure. Do not allow the power cord to come
BEAN TO CUP ESPRESSO AND CAPPUCCINO MACHINE. Instruction for use ECAM26.455
 2 5713216211/05.11 BEAN TO CUP ESPRESSO AND CAPPUCCINO MACHINE Instruction for use ECAM26.455 1 B2 B3 B4 B5 B6 B1 B7 B13 B8 B9 B10 B11 B12 D1 C2 D2 C1 C3 C4 A18 C5 D3 D4 C6 D5 D6 2 A1 A2 A3 A4 A5 A6 A11
Installation the DELTABEAM Frame
 Tese installation instructions are intended to be used togeter wit te project s erection metod statement were te instructions may be complemented. If tere are differences between te erection metod statement
This appliance can be used by children aged from 8 years and above and persons with
 IMPORTANT SAFEGUARDS Symbols used in these instructions Important warnings are identified by these symbols. It is vital to respect these warnings. Failure to observe the warning could result in life threatening
Get Started. Better Everyday ECAM23260
 Better Everyday Get Started This short guide is not intended to explain all the functions of the appliance. Please read all the owner s instruction booklet before use. Video available on www.youtube.com/delonghiusa
 www.krups.com a e e1 f g b i h l m n n1 c d k3 k1 k2 k4 k5 k k1 p p1 o j j1 j2 1 2 3 2 2 1 1 4 5 6 1 2 3 3 2 1 7 8 9a 9b 10 11 12 13 14 15 USA IMPORTANT SAFEGUARDS When using electrical appliances, basic
Contents. Electrical requirements (UK only) Preparing and attaching the hot chocolate carafe (D)... 14
 Preparing and attaching the hot chocolate carafe (D)... 14") Contents INTRODUCTION... 8 Symbols used in these instructions... 8 Letters in brackets... 8 Troubleshooting and repairs... 8 SAFETY... 8 Fundamental safety warnings... 8 DESIGNATED USE... 8 INSTRUCTIONS...
Contents INTRODUCTION... 8 Symbols used in these instructions... 8 Letters in brackets... 8 Troubleshooting and repairs... 8 SAFETY... 8 Fundamental safety warnings... 8 DESIGNATED USE... 8 INSTRUCTIONS...
THIS REPORT CONTAINS ASSESSMENTS OF COMMODITY AND TRADE ISSUES MADE BY USDA STAFF AND NOT NECESSARILY STATEMENTS OF OFFICIAL U.S.
 THIS REPORT CONTAINS ASSESSMENTS OF COMMODITY AND TRADE ISSUES MADE BY USDA STAFF AND NOT NECESSARILY STATEMENTS OF OFFICIAL U.S. GOVERNMENT POLICY Volutary - Public Date: 5/13/2016 GAIN Report Number:
Automatic Coffee Machine Instruction Manual
 Instruction Manual Page 1 of 17 8212-0 Automatic Coffee Machine Instruction Manual Instruction Manual Page 2 of 17 IMPORTANT INFORMATION For safety purposes please read these instructions carefully before
MODEL: POD BREWER AURORA SAF 68 HOMEMAKER ESPRESSO MAKER WITH COFFEE POD
 INSTRUCTION MANUAL Please read this Instruction Manual and the safety instructions before operating the appliance! MODEL: POD BREWER AURORA SAF 68 HOMEMAKER ESPRESSO MAKER WITH COFFEE POD Congratulation
USER MANUAL Type HD8966
 02 English USER MANUAL Type HD8966 Read carefully before using the machine. 02 EN Register your product and get support at www.philips.com/welcome IMPORTANT SAFEGUARDS When using electrical appliances,
Determining the Optimal Stages Number of Module and the Heat Drop Distribution
 3 Determiig te Optimal Stages Number of Module ad te Heat Drop Distributio 3. Aalytical Solutios A importat obective i te desig of a multi-stage axial turbie is to determie te optimal umber of stages
110cm Dual Fuel Range Cooker
 110cm Dual Fuel Rage Cooker Gas hob with electric oves INSTALLATION AND USER INSTRUCTIONS Model: CE 1100DF You must read these istructios prior to usig the appliace ad retai them for future referece. If
Contents. Downloaded from CoffeeMachineManual.com Manuals
 Contents Introduction... 7 Symbols used in these instructions...7 Letters in brackets...7 Troubleshooting and repairs...7 SAFETY... 7 Fundamental safety warnings...7 DESIGNATED USE... 8 INSTRUCTIONS...
Coffee Burr Grinder. Model #559. Instructions. Warranty
 Coffee Burr Grinder Model #559 Instructions Warranty IMPORTANT SAFEGUARDS When using electrical appliances, basic safety precautions should always be followed, including the following: 1. Read all instructions.
AUTOMATIC BEAN TO CUP COFFEE MACHINE
 AUTOMATIC BEAN TO CUP COFFEE MACHINE EB24 model USER GUIDE US CA CONTENTS Appliance parts 2 Safety and warnings 4 First use 7 Menu settings 11 Making coffee 15 Making cappuccinos and milk-based coffees
De Longhi Appliances via Seitz, Treviso Italy
 De Longhi Appliances via Seitz, 47 31100 Treviso Italy www.delonghi.com 5713229821/05.16 ECAM35X.15 BEAN TO CUP ESPRESSO AND CAPPUCCINO MACHINE Instruction for Use Instruction videos available at: http://ecam35015.delonghi.com
BEAN TO CUP ESPRESSO AND DE CAPPUCCINO MACHINE Instruction for use ECAM22.360
 5713218561/09.12 BEAN TO CUP ESPRESSO AND DE CAPPUCCINO MACHINE Instruction for use GB ECAM22.360 B B1 C C1 C2 B2 B3 B4 B5 B6 B7 C3 C4 C5 C6 B8 B9 B10 B11 B12 C7 D1 D5 D D2 D3 D4 Electrical connection
ESPRESSO AUTOMATIC SERIE EA88.
 EN... P. 1 21 A B H ESPRESSO AUTOMATIC SERIE EA88 EN C 1 1 I 3 D R 2 J E FR F W K M G L 1 2 ES N P Q 8080015669 www.krups.com 8080015669 www.krups.com O S R 0 1 2 3 1 4 2 1 sec. 1 2 3 4 5 6 7 8 9 10 11
De Longhi Appliances via Seitz, Treviso Italia
 De Longhi Appliances via Seitz, 47 31100 Treviso Italia www.delonghi.com 5713222711/01.14 ECAM44.62X BEAN TO CUP ESPRESSO AND CAPPUCCINO MACHINE Instruction for use EN page 6 B B12 B11 B10 B9 B8 B1 B2
USER MANUAL Type HD8965
 02 English USER MANUAL Type HD8965 Read carefully before using the machine. 02 EN Register your product and get support at www.philips.com/welcome IMPORTANT SAFEGUARDS When using electrical appliances,
AUTOMATIC BEAN TO CUP COFFEE MACHINE
 AUTOMATIC BEAN TO CUP COFFEE MACHINE EB60 model USER GUIDE NZ AU GB IE CONTENTS Appliance parts 2 Safety and warnings 4 First use 9 Menu settings 13 Making coffee 17 Making cappuccinos and milk-based
Fundamental safety warnings Checking the appliance... 9 Connecting the appliance... 9 Using the appliance for the first time...
 Contents INTRODUCTION... 7 Letters in brackets... 7 Troubleshooting and repairs... 7 SAFETY... 7 Fundamental safety warnings... 7 DESIGNATED USE... 8 INSTRUCTIONS... 8 DESCRIPTION... 8 Description of the
AUTOMATIC BEAN TO CUP COFFEE MACHINE
 AUTOMATIC BEAN TO CUP COFFEE MACHINE EB60 model USER GUIDE NZ AU GB IE CONTENTS Appliance parts 2 Safety and warnings 4 First use 9 Menu settings 13 Making coffee 17 Making cappuccinos and milk-based
12 CUP COFFEE MAKER User Guide
 BRAND 12 CUP COFFEE MAKER User Guide Item: 740553 Ginnys.com 800-544-1590 Facebook.com/GinnysBrand Pinterest.com/GinnysBrand Ginnys.com/Blog Welcome to the world of full-flavored coffee with the Ginny
SAVE THESE INSTRUCTIONS THIS PRODUCT IS FOR HOUSEHOLD USE ONLY
 IMPORTANT SAFEGUARDS When using electrical appliances, basic safety precautions should always be followed, including the following: Read all instructions. Do not touch hot surfaces. Use handles and knobs.
th griffins 38 hindmarsh square adelaide city tel
 as a veue 38 hidmarsh square adelaide city tel 8223 7954 The reovated Griffis Hotel offers you up to four stylish fuctios rooms i the heart of the CBD, overlookig the view of hidmarsh square parks ad city
TURNING THE APPLIANCE OFF...10
 contents INTRODUCTION...7 Symbols used in these instructions... 7 Letters in brackets... 7 Troubleshooting and repairs... 7 SAFETY...7 Fundamental safety warnings... 7 DESIGNATED USE...7 INSTRUCTIONS...8
FOR PERFECT RESULTS ACCESSORIES AND CONSUMABLES
 FOR PERFECT RESULTS Thank you for choosing this AEG product. We have created it to give you impeccable performance for many years, with innovative technologies that help make life simpler features you
For domestic use only
 AUTOMATIC DE FR NL ES PT IT GR For domestic use only The length of the guarantee depends on the legislation in your country with a maximum of 3000 cycles a year. This product has been designed for domestic
Burr Grinder. Automatic burr grinder with 17-position grind selector. Instruction Booklet EM0430
 Burr Grinder Automatic burr grinder with 17-position grind selector Instruction Booklet EM0430 Please read these instructions carefully and retain for future reference. Contents Sunbeam s Safety Precautions
Type HD8858 / HD8859 USER MANUAL
 Register your product and get support at www.saeco.com/welcome 02 English Type HD8858 / HD8859 USER MANUAL 02 EN PLEASE READ THIS USER MANUAL CAREFULLY BEFORE USING THE MACHINE. IMPORTANT SAFEGUARDS When
Belling Country Range
 100cm Dual Fuel Rage Cooker Gas hotplate ad Electric Oves ad Grill Natural Gas Bellig Coutry Rage If you smell gas: Do ot try to light ay appliace. Do ot touch ay electrical switch. Call the Gas Emergecy
12 CUP COFFEEMAKER User Guide
 BRAND 12 CUP COFFEEMAKER User Guide Item: 757147 Ginnys.com 800-544-1590 Facebook.com/GinnysBrand Pinterest.com/GinnysBrand Welcome to the world of full-flavored coffee with the Ginny s Brand 12-Cup Coffeemaker!
INDEX C o l l e c t i o n
 INDEX 1 DESCRIPTION OF THE APPLIANCE (see page 3)............................................7 2 SAFETY WARNINGS......................................................................7 3 INSTALLATION..........................................................................8
Operating and Installation Instructions
 Operating and Installation Instructions Coffee System CVA 4062 CVA 4068 To prevent accidents en - US, CA and appliance damage read these instructions before installation or use. M.-Nr. 07 816 880 Contents
De Longhi Appliances via Seitz, Treviso Italia
 De Longhi Appliances via Seitz, 47 31100 Treviso Italia ECAM45.760/11.13 ECAM45.760 BEAN TO CUP ESPRESSO AND CAPPUCCINO MACHINE Instruction for use EN page 6 B B15 B14 B13 B12 B11 B1 B2 B10 B3 B4 B5 B6
/09.06
 www.delonghi.com 5732147800/09.06 STAINLESS STEEL FULLY AUTOMATIC COFFEE CENTER A B C D E F H G X cappuccino container pointer in position 1 please wait... I W M J V K L N U T R O P S Q 1 2 3 cappuccino
Instructions for use CM 9945 H
 Instructions for use CM 9945 H A B C 2 3 4 Important safety instructions 6 Preliminary steps 8 Scrapping 8 Declaration of conformity CE 8 Built-in installation 9 Product description 11 Technical data 11
ECAM65X.55. BEAN TO CUP ESPRESSO AND CAPPUCCINO MACHINE Instruction for use
 ECAM65X.55 BEAN TO CUP ESPRESSO AND CAPPUCCINO MACHINE Instruction for use EN page 6 B B2 B3 B1 B4 B2 B10 10:00 SELECT BEVERAGE B14 B11 PROFILE 1 B15 B12 B16 B13 QUANTITY AROMA B17 B9 B8 B7 B6 B5 C C1
Type HD8752 / HD8881 USER MANUAL
 Register your product and get support at www.philips.com/welcome 02 English Type HD8752 / HD8881 USER MANUAL 02 EN PLEASE READ THIS USER MANUAL CAREFULLY BEFORE USING THE MACHINE. IMPORTANT SAFEGUARDS
France 2019 Information Pack
 Frace 2019 Iformatio Pack 8 th February 11th February 2019 Le Château du Broutel We would like to ivite all Year 6 childre to joi us o our aual residetial visit to Le Château du Broutel, a stately home
CONTENTS. MAKING HOT CHOCOLATE Preparing and attaching the hot chocolate carafe (D) IMPORTANT SAFEGUARDS...8 SAVE THESE INSTRUCTIONS...
 IMPORTANT SAFEGUARDS...8 SAVE THESE INSTRUCTIONS...") CONTENTS IMPORTANT SAFEGUARDS...8 SAVE THESE INSTRUCTIONS... 8 SHORT CORD INSTRUCTIONS...8 INTRODUCTION...9 Symbols used in these instructions... 9 Letters in brackets... 9 Troubleshooting and repairs...
CONTENTS IMPORTANT SAFEGUARDS...8 SAVE THESE INSTRUCTIONS... 8 SHORT CORD INSTRUCTIONS...8 INTRODUCTION...9 Symbols used in these instructions... 9 Letters in brackets... 9 Troubleshooting and repairs...
 www.krups.com e1 e2 e3 e4 e5 e6 e7 a c d e b f g j i3 i1 i2 i4 i5 i1 i k l l1 n n1 h h1 h2 m 1 2 3 2 2 1 1 4 5 6 1 2 3 3 2 1 7 8 9a 9b 10 11 12 13 14 15 USA IMPORTANT SAFEGUARDS When using electrical appliances,
CALIFORNIA CABERNET Class 1 Tasting
 CALIFORNIA CABERNET CLASS 1 TASTING What's i a Price Poit? GOALS AND MATERIALS Tastig Goals Compare ad cotrast wies at various price poits, payig special attetio to the differeces i quality, icludig extractio,
2 2D 2F. 1pc for each 20 m of wire. h (min. 45) h (min. 45) 3AC. see details J, E
 h (min. 45) 3AC. see details J, E") TEXTILE AIR DIFFUSERS - - INSTRUCTIONS AIR FOR MOUNTING 1 1D 1F see details A, B, C 2 2D 2F see details A, B, C (min. 32) min. every 0 mm 1pc for eac 20 m of wire min. every 0 mm 1pc for eac 20 m of wire
TEXTILE AIR DIFFUSERS - - INSTRUCTIONS AIR FOR MOUNTING 1 1D 1F see details A, B, C 2 2D 2F see details A, B, C (min. 32) min. every 0 mm 1pc for eac 20 m of wire min. every 0 mm 1pc for eac 20 m of wire
EP3559, EP3558 EP3551, EP3550
 Super automatic espresso machine 3100 series EP3559, EP3558 EP3551, EP3550 EN USER MANUAL DE BENUTZERHANDBUCH ES MANUAL DEL USUARIO FR MODE D EMPLOI IT MANUALE UTENTE NL GEBRUIKSAANWIJZING 1 EP3558, EP3550
EP5934, EP5930, EP5346 EP5345, EP5340, EP5335 EP5334, EP5333, EP5331 EP5330, EP5045, EP5040 EP5035, EP5034, EP5030
 Super automatic espresso machine 5000 series EP5934, EP5930, EP5346 EP5345, EP5340, EP5335 EP5334, EP5333, EP5331 EP5330, EP5045, EP5040 EP5035, EP5034, EP5030 EN USER MANUAL DA BRUGERVEJLEDNING DE BENUTZERHANDBUCH
A3 A4 A5 A10 A18 A19 A14 A13 A12 A15 A20 A7 A6 A21 A22 A23 A11 B7 B4 B5 B2
 5713216061/03.11 2 A A7 A6 A8 FR A3 A4 A5 A10 A18 A19 A2 A1 A14 A13 A12 A15 A16 A20 A17 A21 A23 A22 A9 A11 B B10 B11 B12 B6 B1 B7 B4 B5 B2 B8 B9 B3 3 2 1 1 2 3 4 5 6 7 8 9 10 11 12 13 14 15 16 4 FR 17
instructions COFFEE GRINDER KG 79/89
 instructions COFFEE GRINDER KG 79/89 DESCRIPTION OF APPLIANCE The following terms are used throughout the instruction manual Coffee-bean hopper lid Removable upper burr Coffee-bean hopper ON/OFF switch
Lusso / Espresso Si' Models:PL-16 PAB-16. Made In Italy
 Lusso / Espresso Si' Models:PL-16 PAB-16 Made In Italy la pavoni - PL-16 & PAB-16 We recommend using freshly roasted espresso beans ground medium to fine. Fresh coffee will produce better tasting espresso.
Conductivity in Bulk and Film-type Zinc Oxide
 Coductivity i ulk ad ilm-type Zic Oxide Je Hua Koo* ad Jisug Coi # ad Gook Hee Ha $ Departmet of Electrical ad iological Pysics, Kwagwoo Uiversity, Seoul 39-7, Korea Abstract Te coductivity of ZO is calculated
Physics Engineering PC 1431 Experiment P2 Heat Engine. Section B: Brief Theory (condensed from Serway & Jewett)
") Pysics Engineering PC 1431 Experiment P2 Heat Engine Section A: Introduction Te invention of steam engine played a very significant role in te Industrial Revolution from te late 1700s to early 1800s. Te
Pysics Engineering PC 1431 Experiment P2 Heat Engine Section A: Introduction Te invention of steam engine played a very significant role in te Industrial Revolution from te late 1700s to early 1800s. Te
IMPRESSA XJ5 Professional Instructions for Use. Original instructions for use Before using the machine read the instructions for use.
 IMPRESSA XJ5 Professional Instructions for Use KE Original instructions for use Before using the machine read the instructions for use. JURA Type 684 Table of contents Your IMPRESSA XJ5 Professional Control
Instructions. CONTENTS INTRODUCTION...7 Symbols used in these instructions...7 Letters in brackets...7 Troubleshooting and repairs...
 Instructions COFFEE AND CAPPUCCINO MAKER FR Français DE Deutsch PT Português IL English NL Nederlands GR Ελληνικά Italiano ES Espãnol RU Русский CONTENTS INTRODUCTION...7 Symbols used in these instructions...7
USER MANUAL Type HD HD8767
 02 English USER MANUAL Type HD8766 - HD8767 Read carefully before using the machine. 02 EN Register your product and get support at www.philips.com/welcome IMPORTANT SAFEGUARDS When using electrical appliances,
PICOBARISTO HD8924 EN DE ES FR IT NL USER MANUAL BENUTZERHANDBUCH MANUAL DEL USUARIO MODE D EMPLOI MANUALE UTENTE GEBRUIKSAANWIJZING
 PICOBARISTO HD8924 EN DE ES FR IT NL USER MANUAL BENUTZERHANDBUCH MANUAL DEL USUARIO MODE D EMPLOI MANUALE UTENTE GEBRUIKSAANWIJZING 4219.460.3607.1 HD8924 SAECO_PICOBARISTO AMF_WE_COVER_A5_FC.indd 1 01-09-16
BEAN TO CUP ESPRESSO AND CAPPUCCINO MACHINE. Instruction for use ECAM23.450
 5713215111/09.10 BEAN TO CUP ESPRESSO AND CAPPUCCINO MACHINE DE Instruction for use GB ECAM23.450 B C C1 B1 C2 B2 B3 B6 B7 C3 B4 B5 B8 B9 C4 C5 B10 D D1 D4 D2 D3 2 A 4 A2 A3 A4 A5 A6 A7 A8 A1 A9 A10 A12
Type HD8852 USER MANUAL
 Register your product and get support at www.philips.com/welcome 02 English Type HD8852 USER MANUAL 02 EN PLEASE READ THIS USER MANUAL CAREFULLY BEFORE USING THE MACHINE. IMPORTANT SAFEGUARDS When using
E8/E80 Instructions for Use
 8/80 Instructions for Use Table of contents Your 8/80 Control elements 4 Important information 6 Proper use...6 For your safety...6 1 Preparing and using for the first time 10 JURA on the Internet...10
QUALITY MILK FROTHER INSTRUCTION MANUAL MODEL NO. MMF005
 QUALITY MILK FROTHER INSTRUCTION MANUAL MODEL NO. MMF005 MILK FROTHER INSTRUCTION MANUAL Model No.: MMF005 READ ALL INSTRUCTIONS BEFORE USING THE FROTHER. KEEP THESE INSTRUCTIONS FOR FUTURE REFERENCE.
Get Started. Better Everyday ECAM26455
 Better Everyday Get Started This short guide is not intended to explain all the functions of the appliance. Please read all the owner s instruction booklet before use. ECAM26455 WELCOME Introducing the
OPERATING INSTRUCTIONS FOR YOUR SAFETY CAREFULLY READ THE OPERATING INSTRUCTIONS. FOR HOUSEHOLD USE ONLY
 OPERATING INSTRUCTIONS FOR YOUR SAFETY CAREFULLY READ THE OPERATING INSTRUCTIONS. FOR HOUSEHOLD USE ONLY 2 Opening Congratulations on choosing this high quality espresso machine and thank you for your
Type HD8779 INSTRUCTIONS FOR USE
 Register your product and get support at www.philips.com/welcome 02 English Type HD8779 INSTRUCTIONS FOR USE 02 EN PLEASE READ THIS USER MANUAL CAREFULLY BEFORE USING THE MACHINE. IMPORTANT SAFEGUARDS
HD8828 HD8834 USER MANUAL. Super automatic espresso coffee machine 3100 series. Read carefully before using the machine.
 Super automatic espresso coffee machine 3100 series 02 USER MANUAL Read carefully before using the machine. HD8828 HD8834 English 02 EN Register your product and get support at www.philips.com/welcome
Type HD8753 USER MANUAL
 Register your product and get support at www.philips.com/welcome 02 English Type HD8753 USER MANUAL 02 EN PLEASE READ THIS USER MANUAL CAREFULLY BEFORE USING THE MACHINE. IMPORTANT SAFEGUARDS When using
IMPORTANT INSTRUCTIONS MODE D EMPLOI IMPORTANT INSTRUCIONES IMPORTANTES ISTRUZIONI IMPORTANTI
 MOKA 22-04-2003 10:10 Pagina 1 IMPORTANT INSTRUCTIONS SAVE THESE INSTRUCTIONS MODE D EMPLOI IMPORTANT CONSERVEZ LES PRESENTES INSTRUCTIONS INSTRUCIONES IMPORTANTES GUARDE ESTAS INSTRUCCIONES ISTRUZIONI
Z6 Instructions for Use
 Z6 Instructions for Use Table of contents Your Z6 Control elements 4 Important information 6 Proper use...6 For your safety...6 1 Preparing and using for the first time 10 JURA on the Internet...10 Setting
USER MANUAL Type HD8772
 02 English USER MANUAL Type HD8772 Read carefully before using the machine. 02 EN Register your product and get support at www.philips.com/welcome IMPORTANT SAFEGUARDS When using electrical appliances,
User Manual. If you have any issues or questions, please contact us via
 User Manual Thanks for choosing ImportAppliances for your kitchen appliance purchase. We hope you are enjoying the convenience, quality and affordability of your new appliance. If you have any issues or
Type HD8752 USER MANUAL
 Register your product and get support at www.philips.com/welcome 02 English Type HD8752 USER MANUAL 02 EN PLEASE READ THIS USER MANUAL CAREFULLY BEFORE USING THE MACHINE. IMPORTANT SAFEGUARDS When using
S8 Instructions for Use Type 744
 S8 Instructions for Use Type 744 Table of contents Your S8 Control elements 4 Important information 6 Proper use...6 For your safety...6 1 Preparing and using for the first time 10 JURA on the Internet...10
EBC54524 EN Automatic coffee maker User manual
 EBC54524 EN Automatic coffee maker User manual 2 www.electrolux.com CONTENTS 1. 2. 3. 4. 5. 6. 7. 8. 9. 10. 11. 12. 13. 14. 15. 16. 17. 18. 19. 20. 21. 22. INTRODUCTION... 3 SAFETY INSTRUCTIONS... 3 PRODUCT
3. INTRODUCTION Letters in brackets Troubleshooting and repairs Download the App!...8
 CONTENTS 1. FUNDAMENTAL SAFETY WARNINGS... 7 2. SAFETY WARNINGS... 8 2.1 Symbols used in these instructions...8 2.2 Designated use...8 2.3 Instruction for Use...8 3. INTRODUCTION... 8 3.1 Letters in brackets...8
User Manual. Coffee recipes included
 User Manual Coffee recipes included Machine Features On/Off button (machine switches off after 9 minutes of inactivity to conserve energy) Water tank cover Capsule drawer 0.5 ltr water tank Coffee dispensing
KKK KKE EN User manual Automatic coffee maker USER MANUAL
 KKK884500 KKE884500 EN User manual Automatic coffee maker USER MANUAL FOR PERFECT RESULTS Thank you for choosing this AEG product. We have created it to give you impeccable performance for many years,
BEAN TO CUP ESPRESSO AND CAPPUCCINO MACHINE Instruction for use ECAM25462/ECAM25467
 5713220781/08.13 BEAN TO CUP ESPRESSO AND CAPPUCCINO MACHINE Instruction for use DE GB ECAM25462/ECAM25467 B B1 C C1 C2 C3 C4 B2 B10 B3 B9 B4 B5 B8 B7 C5 C6 B6 C7 D D1 D3 D2 D4 2 A A4 A2 A5 A6 A3 A7 A8
INSTALLATION & OPERATING GUIDE
 SURE TAMP STEAM INSTALLATION & OPERATING GUIDE BUNN-O-MATIC CORPORATION POST OFFICE BOX 3227 SPRINGFIELD, ILLINOIS 6278-3227 PHONE: (217) 529-661 FAX: (217) 529-6644 http://www.bunn.com/espresso/index.html
DE MANUAL BENUTZERHANDBUCH SM7683, SM7680 SM6080/SM6081/SM7080/SM7081 USER MANUAL BENUTZERHANDBUCH BENUTZERHANDBUCH
 SM7686, USER MANUAL SM7685, SM7684 SM7683, SM7680 SM6080/SM6081/SM7080/SM7081 BENUTZERHANDBUCH USER MANUAL MANUAL IT MANUALE DEL USUARIO UTENTE DE MANUAL BENUTZERHANDBUCH DEL USUARIO MODE NL GEBRUIKSAANWIJZING
INSTRUCTIONS FOR USE Type HD8762
 02 English INSTRUCTIONS FOR USE Type HD8762 Read carefully before using the machine. 02 EN Register your product and get support at www.philips.com/welcome IMPORTANT SAFEGUARDS When using electrical appliances,
Overall stability of multi-span portal sheds at right-angles to the portal spans
 Overall stability of multi-span portal seds at rigt-angles to te portal spans SCI s Senior Manager for Standards, Carles M King, explains te approac for design of long-span portal seds. 1. Introduction
INSTRUCTIONS FOR USE Type HD HD8764
 02 English INSTRUCTIONS FOR USE Type HD8761 - HD8764 Read carefully before using the machine. 02 EN Register your product and get support at www.philips.com/welcome IMPORTANT SAFEGUARDS When using electrical
EN Operating Instructions 21
 EN Operating Instructions 21 7 6 5 4 8 9 10 3 11 2 1 A 14 13 11 B C D E F G H I 3 Safety instructions Please carefully read and comply with the operating instructions. The appliance is intended for home
AT HALLMARK HOTEL GLOUCESTER
 AT HALLMARK HOTEL GLOUCESTER Cotets 3 DINE AND DISCO 4 INCLUSIVE PARTY NIGHTS 6 PRIVATE CHRISTMAS PARTY NIGHTS 7 JANUARY PARTY NIGHTS 8 CHRISTMAS RESIDENTIAL 9 NEW YEAR S RESIDENTIAL 10 MAKE A NIGHT OF
Operating and installation instructions Built-in coffee machine
 Operating and installation instructions Built-in coffee machine To avoid the risk of accidents or damage to the appliance it is essential to read these instructions before it is installed and used for
LB 951. Istruzioni per l uso Instructions Mode d emploi Bedienungsanleitung Instrucciones de empleo Instruções de utilização Gebruiksaanwijzing
 L ECCELLZA DEL MIGLIOR ESPRESSO FIRMATO LAVAZZA THE EXCELLCE OF THE BEST LAVAZZA ESPRESSO Istruzioni per l uso Instructions Mode d emploi Bedienungsanleitung Instrucciones de empleo Instruções de utilização
Z8 Instructions for Use
 Z8 Instructions for Use Table of contents Your Z8 Control elements 4 Important information 6 Proper use...6 For your safety...6 1 Preparing and using for the first time 10 JURA on the Internet...10 Operation
EP5961, EP5960, EP5365 EP5364, EP5363, EP5361 EP5360
 Super automatic espresso machine 5000 series EP5961, EP5960, EP5365 EP5364, EP5363, EP5361 EP5360 EN USER MANUAL DA BRUGERVEJLEDNING DE BENUTZERHANDBUCH ES MANUAL DEL USUARIO FR MODE D EMPLOI IT MANUALE