3650 NEW TOWN BLVD ST. CHARLES MO
|
|
|
- Juniper Floyd
- 6 years ago
- Views:
Transcription


1 Bistro 10 Operating Instruction Manual Model B-10-T NEW TOWN BLVD ST. CHARLES MO
2 Table of Contents Introduction & NEWCO Product Warranty.. 4 Machine Dimensions & Specifications. 5 Machine Features... 6 Plumbing Connections... 7 Installation Instructions 8 Set Up for Bistro 10 Unit... 9 Product Installation Procedure. 9 Drink Selection and Keypad Display Programming Instructions 12 Programming-Machine Calibration. 17 Programming-Changing Drink Recipes.. 19 Daily Cleaning 20 Whipper Disassembly 21 Cleaning and Sanitizing Instructions Service Notes Wiring Diagram


3 Warning Labels NOTICE: Read and follow all notices posted on this machine. Do not damage or destroy these notices as they are for your protection! WARNING DO NOT OVERLOAD CIRCUIT. ALWAYS ELECTRICALLY GROUND THE CHASSIS OR ADAPTOR PLUG. DO NOT DEFORM PLUG OR CORD. FOLLOW NATIONAL AND LOCAL ELECTRICAL CODES. KEEP COMBUSTIBLES AWAY. FAILURE TO COMPLY RISKS EQUIPMENT DAMAGE, FIRE OR SHOCK HAZARD. READ THE ENTIRE OPERATING MANUALBEFORE USING THIS PRODUCT
4 Introduction & Newco Product Warranty INTRODUCTION This machine is intended to brew 6-16 ounce single serving of coffee and / or powdered hot drinks into a cup. This machine will also dispense hot water for allied beverage use. It is intended for indoor use only on a sturdy counter or shelf. WARRANTY Newco warrants equipment manufactured by it for 1 year parts and labor. These warranty periods run from the date of sale Newco warrants that the equipment manufactured by it will be commercially free of defects in material and workmanship existing at the time of manufacture and appearing within the applicable warranty period. This warranty does not apply to any equipment, component or part that was not manufactured by Newco or that, in Newco s judgment, has been affected by misuse, neglect, alteration, improper installation or operation, improper maintenance or repair, damage or casualty. This warranty is conditioned on the Buyer 1) giving Newco prompt notice of any claim to be made under this warranty by telephone at (800) or by writing to 3650 New Town Blvd, Saint Charles, MO 63301; 2) if requested by Newco, shipping the defective equipment prepaid to an authorized Newco service location; and 3) receiving prior authorization from Newco that the defective equipment is under warranty. THE FOREGOING WARRANTY IS EXCLUSIVE AND IS IN LIEU OF ANY OTHER WARRANTY, WRITTEN OR ORAL, EXPRESS OR IMPLIED, INCLUDING, BUT NOT LIMITED TO, ANY IMPLIED WARRANTY OF EITHER MERCHANTABILITY OR FITNESS FOR A PARTICULAR PURPOSE. The agents, dealers or employees of Newco are not authorized to make modifications to this warranty or to make additional warranties that are binding on Newco. Accordingly, statements by such individuals, whether oral or written, do not constitute warranties and should not be relied upon. If Newco determines in its sole discretion that the equipment does not conform to the warranty, Newco, at its exclusive option while the equipment is under warranty, shall either 1) provide at no charge replacement parts and/or labor (during the applicable parts and labor warranty periods specified above) to repair the defective components, provided that this repair is done by a Newco Authorized Service Representative; or 2) shall replace the equipment or refund the purchase price for the equipment. THE BUYER S REMEDY AGAINST NEWCO FOR THE BREACH OF ANY OBLIGATION ARISING OUT OF THE SALE OF THIS EQUIPMENT, WHETHER DERIVED FROM WARRANTY OR OTHERWISE, SHALL BE LIMITED, AT NEWCO S SOLE OPTION AS SPECIFIED HEREIN, TO REPAIR, REPLACEMENT OR REFUND. In no event shall Newco be liable for any other damage or loss, including, but not limited to, lost profits, lost sales, loss of use of equipment, claims of Buyer s customers, cost of capital, cost of down time, cost of substitute equipment, facilities or services, or any other special, incidental or consequential damages


5 Machine Dimensions & Specifications 120 VAC-1600W HEATER-15A USA POWER SUPPLY 120 VAC-1400W HEATER-15A CANADIAN POWER SUPPLY 1/2 GALLON TANK 6-16 OZ CUP SIZE TEMPERATURE RANGE F DRIP TRAY & DRIP TRAY GRATE WATER INLET & POWER SWITCH PRODUCT SELECTION SWITCH PAD & DISPLAY PRODUCT DISPENSE AREA (CUP) LIQUID COFFEE BIBS REG COFFEE INLET HOT WATER OUTLET CHOCOLATE CANISTER MILK CANISTER DECAF COFFEE INLET WHIPPER CHAMBER COFFEE OUTLET DISPENSE NOZZLES Machine Features RINSE BUTTON
6 CALIBRATION NEEDED: POWDER PRODUCTS DECAF BUTTON SWITCHES TO DECAF BIB WHIPPER RINSE BUTTON AUTOMATIC POWDER LEVEL RESET PRE-PROGRAMMED DRINK RECIPES BUTTON ASSIGNMENT FOR RECIPES INDEPENDENT POWDER HOPPER COUNTDOWN & RESET CUSTOM CALL FOR SERVICE NUMBER POWER SAVE & POWER DOWN OPTION WATER FILTER MONITORING OPTIONS BEEPER VOLUME CONTROL PUSH & HOLD HOT WATER BUTTON DUMP VALVE DELIVERY FOR POWDERS 4 LB HOPPER SIZE THIS IS CONFIGURED AND READY TO DISPENSE 8-OUNCE DRINKS. TO CHANGE RECIPES SEE PROGRAMMING SECTION, MACHINE SET-UP. Powder and All button lock or unlock: Powder Lock Only: Push decaf button 4 times to lock or unlock. All Button Lock [including powder]: Push decaf button 5 times to lock or unlock. Special Programming: Press the decaf button or symbol button, as the unit is being powered up. In set-up you can change from 10 to 10T
7 Plumbing Connections Plumber s Installation Instructions CAUTION: Disconnect Power to machine before proceeding with plumbing installation. 1) Attach water line to water filter, rear of machine. 2) Flush water line before installing machine. Machine should be connected to COLD WATER LINE ONLY. 3) Water pressure should be at least 40 lbs. For less than a 25 ft run, use 1/4" copper tubing and connect to 1/2" or larger water line. For longer runs, use 3/8" copper tubing & connect to 1/2" or larger water line and provide an adapter fitting for connection to the brewer. A dedicated water line is necessary for this machine. Minimum flow rate is 1GPM. 4) If installed with saddle valve, the valve should have a minimum of 1/8" porthole for up to 25 ft run, and 5/16" porthole for over 25 ft runs. 5) Manufacturer recommends connecting to copper tubing. Electrical Hook-Up WARNING The Machine must be disconnected from the power source until specified in Installation Instructions. Determine the available on-site electrical requirements Refer to Data Plate on the Machine, and local/national electrical codes to determine circuit requirements. CAUTION Improper electrical installation will damage electronic components
8 Installation Instructions WARNING: - Read and follow installation instructions before plugging or wiring in machine to electrical circuit. Warranty will be void if machine is connected to any voltage other than that specified on the nameplate serial tag. 1) Machine must be on a flat and level surface. Plug or wire in machine to appropriate voltage as noted on the brewer serial tag. Serial tag is located on inside of machine. 2) With water line connected, turn machine power ON (power switch located lower left rear of machine). Install Drip tray and drip tray grate under brew area (slide tray between guide rails until seated). 3) Tank will automatically fill, and machine will start heating. If tank does not fill in 8 minutes, a tank fill error will occur. (Note: To reset error power machine on/off with power switch). 4) Allow 5 to 10 minutes for water in tank to heat to brewing temperature. (Additional water may drip into drip tray on initial expansion of water in the tank). This will not occur thereafter. 5) Heater will turn on when tank is at probe level. When tank noise is no longer heard, machine is ready to operate. If brew is initialized before tank temperature is reached, machine will display Heating until temp is reached, then will start dispensing. 6) In higher altitude locations (5000 feet above sea level) the temperature may have to be adjusted lower to prevent boiling [adjust temperature in set-up]: Brew water temperature is factory set at 202o F (94.4o C) Areas of high altitude will require lowering this temperature to prevent boiling. This chart should be used as a guide when readjusting the brew water temperature. Altitude (Feet) Boiling point of water o F o C Recommended water temperature o F o C


9 Set up instructions for Bistro 10-T Machine Fill and install ingredient hoppers with nozzles turned up, Chocolate on left and Milk on right. Make sure button on bottom of hopper is seated in slot in sheet metal. Slight manual rotation of the auger gear may be necessary to seat hopper in correct location. Rotate dispense nozzles down into whipper bowl. Turn machine on, machine should start filling, will shut off when full. Heater will turn on when tank is at probe level and will display Heating: Please Wait. When machine temperature reaches brew temp, display will change to Ready to Brew. If brew is initialized before tank temperature is reached, machine will display Heating until temp is reached, then will start dispensing. Place an empty cup in the dispense area, open the powdered hopper door, and depress the Rinse button next to the whipper bowl until the water runs clear. To dispense a drink, place a cup under the dispense area, press a brew selection, and press the button on the keypad which corresponds to the drink desired. When the drink is finished, the machine will beep 3 times and the display will change to Place cup, Centered-Select Your Drink NOTE: TO DISPENSE HOT WATER PUSH AND HOLD HOT WATER BUTTON, WATER WILL DISPENSE UNTIL BUTTON IS RELEASED, OR TIMES OUT AT 12 SECONDS Product Installation Procedure Fig. 1 Fig. 2 Fig. 3 Open product box and remove the BIB product Fig. 1. Place in BIB Tray [PN121929] as shown in Fig.2 & Fig


10 Product Installation Procedure Cont d Fig. 4 Remove the plastic insert from the BIB fitment as shown in Figure 4. Fig. 5 Using finger and thumb only to prevent over-tightening, thread the BIB connector on to the BIB fitment until seated as shown in Figure

11 Product Installation Procedure Cont d Fig. 6 Place the product in the storage compartment as shown in Figure 6. Fig. 7 Position the tubing as shown in Figure 7 NOTE: COFFEE BIB IS LH CONNECTOR AND DECAF BIB IS RH CONNECTOR SEE PAGE
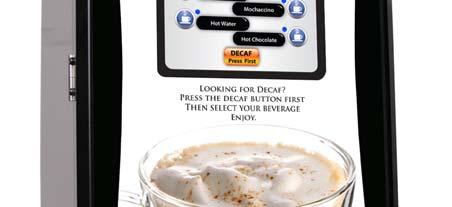
12 Drink Selection and Keypad Display PRODUCT SELECTION BUTTON DEFAULT HOT WATER BUTTON PROGRAM S ACCESS AND RESET BUTTON Programming Instructions MESSAGE DISPLAY AREA SELECTION INDICATOR LIGHT IMPORTANT NOTE: PRESSING DECAF BUTTON ONCE WILL CHANGE ALL DRINKS TO DECAFFOR 60 SECONDS. AFTER DRINK HAS DISPENSED OR TIMES OUT DRINKS RETURN TO REGULAR COFFEE To enter into Programming Mode, hold the Decaf button for 7 seconds. (Note, after 2 seconds display will change to Sanitation Mode, continue holding button until display reads Maintenance ).. The machine readout will display Select Menu Maintenance in the Message Display Area. LOOK FOR ICONS ON DISPLAY SCREEN THESE BUTTONS ARE USED TO ENTER A MENU CHOICE OR ADJUST A VALUE THESE BUTTONS ARE USED TO SCROLL UP & DOWN THROUGH THE MENU SCREENS
13 Programming Instructions (Cont d) Pressing the COFFEE-MILD Button will select the Mode Displayed Pressing the LATTE Button will scroll forward through the Select Menu Choices Pressing the CAPPUCCINO Button will scroll backwards through the Select Menu Choices Pressing the LATTE button repeatedly will loop the display in 5 Modes: Maintenance---Statistics---Setup---Calibration Recipe Entry--Exit Program Mode Maintenance 1. Press Button to Select Maintenance 2. Press LATTE Button to toggle Select Menu display Install Sanitizing solution-push Decaf Button to Start Sanitation Cycle (See Pages 22-27) Push & Hold Newco Decaf Button to Prime Pump (See Pages 22-27) Whipper Seal Remaining (Remaining powdered drink cycles before changing the whipper seal) Whipper Seal Reset (Select this after changing the whipper seal to reset whipper seal countdown) Exit Maintenance Mode REPLACEMENT WHIPPER SEAL PN SEE PAGE 21 [replace after 5000 cycles] Statistics 1. Press Button to Select Statistics 2. Press LATTE Button to Toggle display forward Total run cycles on machine Total Gallons water used Chocolate Powder Remaining Milk Powder Remaining Exit Statistics Mode Information Display Only
14 Programming-Cont d Setup 1. Press Button to Select Setup 2. Press Button to Toggle display Water Temperature Setting ( F) Buzzer volume 0-25 Filter Monitoring (On or Off) Filter size gallons (Only displays if ON ) Energy Save (Off, Semi [140F], Full [0FF] Energy Time -.5 to 4.0 Hrs. after last push (Only displays if ON ) Assign Recipes to Buttons *See Page 15 Edit Global Ratio (Default Ratio is 30:1-Can change to 25, 35, 40, 45:1) Call for service # (Re-settable phone Number) *See Page 16 Powder Tracking (On or Off) Choc Hopper Value-Grams of Chocolate in a full hopper (Only displays if ON ) Milk Hopper Value-Grams of Milk in a full hopper (Only displays if ON ) Cup Sensor (Optional Accessory) On or Off Exit Setup 3. Use to Change Values UP Or DOWN Water Temp Setting-Factory Default is 185 Deg F Buzzer Volume-Factory Setting is 13, + or - to hear volume change Filter Size-Select Filter size- 0 turns Filter Tracking off-if turned on filter size selections in gallons are: 500, 1000, 1500, 2000, 2500 and Message to change filter will appear when gallon usage is exceeded Energy Save-Selecting Partial or Full Mode asks delay time in hours after last drink has been dispensed (1-4 Hours) Assign Recipe to Buttons (See Page 15) Edit Global ratio allows the use of Coffee concentrate ratios of 25:1, 30:1, 35:1, 40:1 and 45:1. Default value is 30:1 Call for Service #-See Page 16 When Powder Tracking is turned ON Message to refill Hopper will appear when hopper is low. Chocolate and Milk Hopper values are the weight of the powder only in a full hopper. Default values are 850 Grams for Chocolate and 550 Grams for Milk. These values can be changed by toggling, step (3), above. Hoppers will automatically reset when removed from the machine for more than 15 seconds
15 Assigning Recipes to Buttons Programming-Cont d 1. Press Button to Select Setup 2. Toggle Selection to Assign Recipes 3. Select Assign Recipes 4. Scroll Up & Down Recipe Choices with these Two Buttons 5. Select Recipe to be assigned a Button 6. All lights will flash Depressing a button will assign the new recipe to that button 7. Selection Screen Will Return to Assign Recipes (Return to Instruction #3 to Repeat Button Assignment or Instruction #2 to Exit Menu ) Recipe List 1 Coffee 6oz Mild 22 Latte 10oz Single 43 Cappuccino 16oz Sgl 64 Mochaccino 6oz Sgl 85 Cafe Mocha 10oz Mld 2 Coffee6oz Reg 23 Latte 10oz Double 44 Cappuccino 16oz Dbl 65 Mochaccino 6oz Dbl 86 Cafe Mocha 10oz Reg 3 Coffee 6oz Bold 24 Latte 10oz Triple 45 Cappuccino 16oz Tpl 66 Mochaccino 6oz Tpl 87 Cafe Mocha 10oz Bld 4 Coffee 8oz Mild 25 Latte 12oz Single 46 Hot Cocoa 6oz Mild 67 Mochaccino 8oz Sgl 88 Café Mocha 12 oz Mld 5 Coffee 8oz Reg 26 Latte 12oz Double 47 Hot Cocoa 6oz Reg 68 Mochaccino 8oz Dbl 89 Cafe Mocha 12oz Reg 6 Coffee 8oz Bold 27 Latte 12oz Triple 48 Hot Cocoa 6oz Bold 69 Mochaccino 8oz Tpl 90 Café Mocha 12 oz Bld 7 Coffee 10oz Mild 28 Latte 16oz Single 49 Hot Cocoa 8oz Mild 70 Mochaccino 10oz Sgl 91 Cafe Mocha 16oz Mld 8 Coffee 10oz Reg 29 Latte 16oz Double 50 Hot Cocoa 8oz Reg 71 Mochaccino 10oz Dbl 92 Cafe Mocha 16oz Reg 9 Coffee 10oz Bold 30 Latte 16oz Triple 51 Hot Cocoa 8oz Bold 72 Mochaccino 10oz Tpl 93 Café Mocha 16 oz Bld 10 Coffee 12oz Mild 31 Cappuccino 6oz Sgl 52 Hot Cocoa 10oz Mild 73 Mochaccino 12oz Sgl 94 Steamer 6oz 11 Coffee 12oz Reg 32 Cappuccino 6oz Dbl 53 Hot Cocoa 10oz Reg 74 Mochaccino 12oz Dbl 95 Steamer 8oz 12 Coffee 12oz Bold 33 Cappuccino 6oz Tpl 54 Hot Cocoa 10oz Bold 75 Mochaccino 12oz Tpl 96 Steamer 10oz 13 Coffee 16oz Mild 34 Cappuccino 8oz Sgl 55 Hot Cocoa 12oz Mild 76 Mochaccino 16oz Sgl 97 Steamer 12oz 14 Coffee 16oz Reg 35 Cappuccino 8oz Dbl 56 Hot Cocoa 12oz Reg 77 Mochaccino 16oz Dbl 98 Steamer 16oz 15 Coffee 16oz Bold 36 Cappuccino 8oz Tpl 57 Hot Cocoa 12oz Bold 78 Mochaccino 16oz Tpl 99 Shot of Milk 16 Latte 6oz Single 37 Cappuccino 10oz Sgl 58 Hot Cocoa 16oz Mild 79 Cafe Mocha 6oz Mild 100 Hot Water 17 Latte 6oz Double 38 Cappuccino 10oz Dbl 59 Hot Cocoa 16oz Reg 80 Cafe Mocha 6oz Reg 101 No Drink (Disables Button) 18 Latte 6oz Triple 39 Cappuccino 10oz Tpl 60 Hot Cocoa 16oz Bold 81 Cafe Mocha 6oz Bold No Recipe (Custom Recipes) 19 Latte 8oz Single 40 Cappuccino 12oz Sgl 61 Espresso Shot Sgl 82 Cafe Mocha 8oz Mild 20 Latte 8oz Double 41 Cappuccino 12oz Dbl 62 Espresso Shot Dbl 83 Cafe Mocha 8oz Reg 21 Latte 8oz Triple 42 Cappuccino 12oz Tpl 63 Espresso Shot Tpl 84 Cafe Mocha 8oz Bold
16 Programming-Cont d Changing Call For Service Number Note: Whenever the machine detects a service problem, a description of the problem and a Call for Service Telephone Number Scrolls across the Display. This number can be changed during machine Set-Up. Select the Call for Service # in the Set-Up Menu 1. Press Button to Select Setup 2. Toggle Selection to Call for Service # ( is default #) 3. Select Call for Service # 4. Screen will Change to Edit Phone # & 7 Buttons Become Active A Blinking Cursor and a Phone # is Displayed on the Top line of the Display EDIT PHONE # (A) Toggles Characters or Numbers Changes Character Sets (A), (a), (9), (@) Store New Number Moves Cursor Forward & Backward Return to Setup Menu Without Storing # Character Set (A) A-Z Character Set (a) a-z Character Set (9) 1-9 Character Set (@)! # $ % & ( ) * +, -. / : ; < = >?@ (SPACE)
 Left Auger Speed 0-10 Left Auger Calibration Value in grams Right Auger Speed 0-10 Right Auger Calibration Value in grams Coffee")

17 Programming -Machine Calibration 3. Select Calibration Calibration 1. Press Button to Select Calibration 2. Toggle Selection to Calibration 4. Press Button to Toggle display Mix Bowl Calibration Value (Ounces) Left Auger Speed 0-10 Left Auger Calibration Value in grams Right Auger Speed 0-10 Right Auger Calibration Value in grams Coffee Calibration Value (Ounces) Exit Calibration 5. Use to ChangeValues UP or DOWN Factory Defaults Value Mix Bowl Cal 26.0 oz. Left Auger Speed 9 Left Auger Cal 156 grams Right Auger Speed 9 Right Auger Cal 90 grams Coffee Cal 23.0 oz. Dump Valve Mix Bowl Cal, Insert a measuring container capable of holding 32 or more ounces of water under delivery area of machine, then press the top left button to start calibration countdown period of 30 seconds. (Note: if machine is not up to temperature, machine will wait until temperature is reached before running calibration cycle, display will read Preparing to Brew ) At the end of the calibration cycle, display will change to Adjust Mix bowl Cal Enter the value measured (Step 5, above right) and press the Upper Right button when done- screen will change to Mix Bowl Cal again. This is in case there was a spill or problem during the cycle and the measurement needs to be repeated- - to repeat press the top right button to restart cycle. Left Auger Speed (Chocolate), this is the left or chocolate auger delivery duty cycle value, 1-10, to adjust the auger motor speed for delivering powdered product. This value should remain at 9 or 10 for the Wolfgang Puck powdered products. Value is set at 9 at the factory. Left Auger (Choc) Left Auger Cal (Chocolate), remove whipper chamber and hold a 12 ounce plastic cup under the left auger dispense spout, then press either of the top two buttons to start calibration countdown period of 30 seconds. At the end of the calibration cycle, display will change to Adjust Value. Use the upper left buttons to toggle the value, increasing or decreasing value until the display number matches the amount of the powder measured in grams (see instruction #5 above). Press the Upper Right button when done- screen will change to Left Auger Cal again. This is in case there was a spill of problem during the cycle and the measurement needs to be repeated- to repeat press the top right button to restart cycle. The default value is 156 Grams (5.5 oz)
18 Programming -Machine Calibration-Cont d Right Auger (Milk) Right Auger Speed (Milk), this is the right or milk product auger delivery duty cycle value, 1-10, to adjust the auger motor speed for delivering powdered product. This value should remain at 9 or 10 for the Wolfgang Puck powdered products. Value is set at 9 at the factory. Right Auger Cal (Milk), repeat the same steps as Left Auger Cal measuring the product from the right canister (Milk Product) The default value is 90 Grams (3.17 oz) Dump Valve Coffee Cal, Insert a container capable of holding 32 or more ounces of water under delivery area of machine, then press the top left button to start calibration countdown period of 30 seconds. (Note: if machine is not up to temperature, machine will wait until temperature is reached before running calibration cycle, display will read Preparing to Brew ) At the end of the calibration cycle, display will change to Adjust Coffee Cal Enter the value measured (Step 5, above right) and press the Upper Right button when done- screen will change to Adjust Coffee Cal again. This is in case there was a spill or problem during the cycle and the measurement needs to be repeated- - to repeat press the top right button to restart cycle
19 Programming-Changing the Drink recipes Changing the Drink recipes 1. Press to Select Recipe Entry NOTE: Editing and Changing the Name of a No Recipe recipe will Create a New Drink for that Recipe #. 3. Select Recipe to be Viewed or Edited 2. Scroll Up & Down Recipe Choices with these Two Buttons 4. Each time Button is Pushed Recipe Screen Advances to Next Option SEE OPTIONS BELOW 5. Selection Screen Will Return to Select Menu Recipe Entry (Return to Instruction #1 To Edit Another Recipe Press Café Latte Button To Exit Recipe Options Type: Perist. PreTime: Cof Volume: Cof Dly time: Pump Speed: Mix Bwl Vol: Mix Bwl Dly: Mix Bwl Run time: FIXED Milk Gm/Oz: Choc Gm/Oz: Edit Recipe Name: TYPE: Type of recipe, i.e. Coffee, Latte, Hot Chocolate, etc. PERIST. PRETIME: Time in 1/10 th of a second Coffee Pump runs w/o water. COF VOLUME: Volume, in ounces, of the coffee portion of the drink. COF DLY TIME: Time in 1/10 th of a second Coffee portion of the drink is delayed. PUMP SPEED: Adjusts Coffee strength-speeds 1-25, 25 being the highest strength. MIX BWL VOL: Volume, (oz.) of the Milk and/or Chocolate portion of drink. MIX BWL DLY: Time in 1/10 th of a second Coffee Pump runs without water. MIX BWL RUN TIME: Cannot change, info only. (Info for coffee delay, i.e.) MILK GM/OZ: Adjusts the strength of the Milk portion of the drink (gm/oz.) CHOC GM/OZ: Adjusts the strength of the Choc. portion of the drink (gm/oz) EDIT RECIPE NAME: Change the name of the drink (See pg. 16 for char map)


20 Daily Cleaning 1. Place empty cup in dispense area 2. Push and hold Rinse Button until water runs clear (Rinses Mixing bowl and Coffee Mix Chamber) Empty and remove cup 3. Rotate Tab on Whipper Base Counterclockwise to Five O- Clock 4. Pull and rotate Dispense Nozzle away from Whipper Bowl 5. Lift and remove Steam Cap from Whipper Bowl, Pull and Remove Whipper chamber from Base 6. Wash Steam Cap, Whipper Bowl and Whipper Blade in Warm Soapy Water 7. Remove Coffee, Milk & Chocolate Canisters & wipe Product Compartment with warm soapy water 8. Dry parts with a clean dry towel and re-assemble Whipper Chamber-Secure by turning tab clockwise on Whipper Base to Six O-Clock
![Whipper Disassembly 1 767376 WHIPPER STEAM CAP 2 767195 WHIPPER MOTOR 3 767196 BASE, WHIPPER MOUNTING [O-Ring & Shaft Seal Included] 4 767197 WHIPPER IMPELLER 5](/docs-images/72/67390207/images/21-0.jpg "767365 WHIPPER BOWL 6 767200 WHIPPER NOZZLE 7 781566 WHIPPER SEAL (REPLACE AFTER 5000 CYCLES) 8 767390 O-RING WHIPPER BASE RED [NOT SHOWN] 7 2 1 6 5 4 3 4.14.")
21 Whipper Disassembly WHIPPER STEAM CAP WHIPPER MOTOR BASE, WHIPPER MOUNTING [O-Ring & Shaft Seal Included] WHIPPER IMPELLER WHIPPER BOWL WHIPPER NOZZLE WHIPPER SEAL (REPLACE AFTER 5000 CYCLES) O-RING WHIPPER BASE RED [NOT SHOWN]


22 Cleaning Instructions Fig. 1 Fig Remove product from storage area and disconnect BIB connectors as shown in figures 1 &


23 Cleaning Instructions-Cont d Fig Place an empty container in the dispense area of the machine as shown in figure 3. *NOTE: MODEL B-10 SHOWN-MODEL B-10 T HAS 2 PRODUCTS & BIB CONNECTORS


24 Cleaning Instructions-Cont d 3. Connect the flushing solution to the BIB connector from the pump as shown in figure 4 Fig. 4 Flush Product & Type of Fittings: : Easy Clean Flush Solution removed from the box : Easy Clean Flush Solution : QCD Fitting : Scholle Fitting
25 Daily Cleaning Instructions 1. Remove the product BIBS from the machine and connect a BIB of cleaning solution to Pump 1 BIB connector as shown in figures 1 4 pages Enter Programming Mode by pressing & holding the Decaf button. 3. Press the Coffee Mild button on the display panel to enter Maintenance mode. 4. Display will change to Install Sanitizing Solution Press Decaf to Start Cleaning Cycle. Note: This function is used for both weekly cleaning/ sanitizing & daily cleaning. 5. Place an empty 12 oz. cup in the dispense area then press the decaf button to start the cleaning cycle. Cycle will start and finish automatically. 6. When cleaning cycle ends [2.5 minutes total: pump 45 sec., dwell 90 sec., & water 15 sec.], the buzzer alarm will sound 3 times if enabled during the Set-Up Programming. 7. When cleaning cycle ends, disconnect the BIB of cleaning solution from the Pump BIB connector and replace the coffee BIB product. The machine will automatically advance to the Prime Pump mode. 8. To Prime: Press and hold the Decaf button until a steady stream of products flows from the dispense area into the vessel. 9. Press Latte [upper right] button to advance to Pump 2. Change cleaning solution to Pump 2 and repeat steps 3 8 to clean Pump Press and release the Latte button until Exit Maintenance mode appears on the display press Coffee Mild button to exit. 11. Press and release the Latte button until Exit Programming mode appears on the display press Coffee Mild button to exit and return to normal Run mode. 12. Discard the contents of the 12 oz. cup. Note: The cleaning solution comes with two 1/2 gallon packs in a case (900044) or a single 1/2 gallon pack (900042). Name of the product is Easy-Clean

26 Weekly Cleaning Instructions 1. Following daily cleaning instructions above page Remove the bag connector from the product box and disassemble or prop open the internal valve to allow free flow of product through the connector. Note: Cutting the mating fitting from an empty bag makes an excellent free flowing connector for this purpose. 3. Place the bag connector into a one gallon [3.8 liter] container of warm soapy tap water 140 F [60 C]. 4. Place an empty container under dispense tip and activate the corresponding button until the clean soapy water is dispensed from the dispense tip. 5. Repeat steps 2 and 3 with warm tap water 140 F [60 C] to rinse the soapy water from the pump tubing. Continue dispensing until the water is clear, and no soapy water is being dispensed. 6. Prepare 1 gallon [3.8 liter] of sanitizing solution by dissolving 1 tablespoon of household bleach into 1 gallon [3.8 liter] of 120 F [48.9 C] water to ensure 200 ppm of available chlorine. 7. Place the coffee connector in the sanitizing solution. Again, repeat steps 2 and 3 with the sanitizing solution, ensuring that the bag connector remains covered in sanitizer. Once sanitizing solution is being dispensed, stop dispensing and allow the solution to sit for 5 minutes. 8. Repeat step 4 to flush out the sanitizing solution from the pump tubing. 9. Remove the mating connector from the bag connector. 10. Reattach the bag connector to product BIB. 11. Activate the Coffee Mild button until coffee appears. Then dispense two [2] 8 ounce cups of coffee and discard. 12. Remove whipper components [figure 6]
27 Weekly Cleaning Instructions-Cont d 13. Soak whipper components in remaining unused sanitizer for 5 minutes, then rinse thoroughly and let air dry before reinstalling. For Your Information: If the Easy-Clean product is not being used or need to sanitize. These adaptors open the appropriate connector and then the hose ends can be dropped into your solution of cleaner or sanitizer. PN: , QCD cleaning/flush adapter. PN: , Scholle cleaning/flush adapter. A cleaning adapter can be made by taking an empty BIB bag & cutting away as much of the empty bag possible. Wash the remaining connector & further trim off any excess bag pieces if desired. This is now your cleaning adapter. It will allow the check valve in the connector to stay open during the cleaning process. Cleaning adapters may be saved for later use. Cleaning Whipper System Maintenance The normal cleaning procedure for the whipper system is to remove and rinse all of the plastic parts with warm running water. However, a more thorough maintenance is recommended on a quarterly basis and for higher volume accounts. The following are a few things you should be aware of and pay special attention to when working with whipper system. Preventative Maintenance Rinse Cycle [Daily] It is extremely important to train the caretaker to perform a Powder Rinse cycle after refilling the powder dispensers. When the dispensers are put back into position after being refilled, powdered milk and chocolate may spill into the whipper bowl. To prevent a backup in the whipper system, this powder must be flushed from the system prior to placing the machine back into service. 1. Open the front door of the machine, and place a container under the dispensing spout[s]. 2. Press the Rinse button on the panel inside the front door. 3. Press the Rinse button until the water runs clear into the container

![The lubricant should be applied approximately on the center shaft [where the seal will sit]. Do not apply lubricant to the complete shaft as this is not required.](/docs-images/72/67390207/images/28-1.jpg "Replacing Worn Components The whipper system is equipped with a drainage system in case liquid gets past the seal and behind the base.")
28 Whipper System Maintenance-Cont d Lubrication As the whipper motor spins at a very high rate of speed, it is important to minimize friction between the motor shaft and the rubber seal to extend the life of both components. After disassembling and cleaning the whipper components with warmer water, add lubricant [item #: ] to the whipper motor shaft before re-installing the base. The lubricant should be applied approximately on the center shaft [where the seal will sit]. Do not apply lubricant to the complete shaft as this is not required. Replacing Worn Components The whipper system is equipped with a drainage system in case liquid gets past the seal and behind the base. Should this occur liquid will drip from the handle area as an indication that the seal is worn. At this point, the whipper system must be taken apart, cleaned, and the worn seal must be replaced
![Whipper System Maintenance-Cont d Replacing Worn Components Cont d When replacing the seal [781566] on the whipper](/docs-images/72/67390207/images/29-0.jpg "base, pay careful attention to the alignment marks on both the seal and the base.")
![If the two are not properly aligned, the hole in the seal [for the motor shaft] will be oval shaped and not round.](/docs-images/72/67390207/images/29-1.jpg "This will allow liquid to get past the seal and possibly into the whipper motor.")
![After replacing the seal, inspect the larger rubber O-ring [767390] in the base for cuts, nicks, and deformities.](/docs-images/72/67390207/images/29-2.jpg "If the O-ring appears damaged in any way, it should be replaced.")
29 Whipper System Maintenance-Cont d Replacing Worn Components Cont d When replacing the seal [781566] on the whipper base, pay careful attention to the alignment marks on both the seal and the base. If the two are not properly aligned, the hole in the seal [for the motor shaft] will be oval shaped and not round. This will allow liquid to get past the seal and possibly into the whipper motor. After replacing the seal, inspect the larger rubber O-ring [767390] in the base for cuts, nicks, and deformities. If the O-ring appears damaged in any way, it should be replaced. After servicing the whipper, add some Lubrifilm lubricant to the whipper motor shaft prior to re-installing the base onto the motor

.")
30 Whipper System Maintenance-Cont d Replacing Worn Components-Cont d Pay extra attention when installing the impeller onto the whipper motor shaft. The impeller has an indicator arrow that must be aligned with the flat spot on the shaft for proper installation. If the impeller is forced onto the shaft without properly aligning it, it will become extremely difficult to remove the next time maintenance is required. When installing the impeller onto the shaft, make certain that it clicks into position (figure2). If the impeller is not pushed in far enough (figure 1), it will rub on the whipper chamber and eventually seize. If it is installed too far on the shaft (figure 3), it may rub on the whipper base and eventually seize. In both cases, the product will not mix properly and may cause a blockage in the powder system outlet hose
31 Service Notes This machine uses advanced diagnostics to alert the operator should any of the motors or motor controllers sense the motors are not turning at the correct rate or sense a bad connection. These errors highlighted by a scrolling display such as Call for Service (Left Auger) Motor Error, and the Service Number entered during machine set-up will be displayed. These Motor error messages include Flipper Motor, Left and Right Auger Motors, Hot Water Bypass Pump, Water Pump (for powder mix), Whipper Motor, and Air Pump. Usually repairing a bad connection or replacing the indicated motor or pump will remedy the problem. Display Reads Possible Cause(s) Remedies Notes Fill Timeout Water shut off to Machine Check Water Supply Shutoff Initial fill time longer than 8 minutes Supply Line Blocked or too small Repair or Replace as needed Fill time Longer than 1 Minute Water Filter Restricted Replace-Service Req'd Water Probe has a 30 second Hysteresis cycle Inlet Solenoid valve Faulty Replace-Service Req'd Control Board Failure Replace-Service Req'd Thermistor Error Thermistor not plugged in Make sure plug in housing is latched Open or Shorted Thermistor Faulty Thermistor Replacement Control Board Failure Replace-Service Req'd Heater Timeout Faulty Thermistor Replacement 4 Minute Continuous Heater Run Faulty Heater Element Replace-Service Req'd Control Board Failure Replace-Service Req'd Motor Error Faulty wire connection Check connector/harness Auger Motors 24 v dc Control Board Failure Replace-Service Req'd Water pump 12 v dc Whipper motor 24 v dc DRAINING THE HOT WATER TANK THE DRAIN TUBE IS CLIPPED TO THE TANK PLATE IN FRONT OF THE TANK. TANK HOLDS APPROX 1 US GALLON. THE HOT WATER TANK CAN BE DRAINED FROM THE REAR OF THE MACHINE UNPLUG MACHINE FROM POWER SOURCE. CAUTION- UNLESS THE TANK IS LEFT TO COOL THE WATER IS EXTREMELY HOT AND CAN CAUSE HARMFUL BURNS. REPLACE DRAIN PLUG, ENSURE HOSE CLAMP IS TIGHT AND REPOSITION DRAIN HOSE BEFORE RE-FILLING THE HOT WATER TANK
32 Wiring Diagram
3650 NEW TOWN BLVD ST. CHARLES MO
 Bistro 10 T3 Operating Instruction Manual Model B-10-T3 1-800-325-7867 3650 NEW TOWN BLVD ST. CHARLES MO 63301 WWW.NEWCOCOFFEE.COM Table of Contents Introduction & Newco Product Warranty... 4 Machine Dimensions
3650 NEW TOWN BLVD ST. CHARLES MO
 Lcd Touch Operating Instruction Manual Model LCD-TCH 1-800-325-7867 3650 NEW TOWN BLVD ST. CHARLES MO 63301 WWW.NEWCOCOFFEE.COM Table of Contents Introduction & Newco Product Warranty... 4 Machine Dimensions
BISTRO-TCH NEW TOWN BLVD ST. CHARLES MO
 Bistro Touch PN. 128142 1-30-2018 Operating Instruction Manual Model BISTRO-TCH 1-800-325-7867 3650 NEW TOWN BLVD ST. CHARLES MO 63301 WWW.NEWCOCOFFEE.COM 1 Table of Contents Introduction & Newco Product
DISCONTINUED VERSION The information in this manual is no longer current. Espresso/Cappuccino OPERATING & SERVICE MANUAL BUNN-O-MATIC CORPORATION
 BUNNEspress BUNN Espress DISCONTINUED VERSION The information in this manual is no longer current. Espresso/Cappuccino OPERATING & SERVICE MANUAL BUNN-O-MATIC CORPORATION POST OFFICE BOX 3227 SPRINGFIELD,
Installation/Operation Manual
 Installation/Operation Manual FC-S3 FC-5 FC-3 FC-TD FC-AP FC-LD FC-S FC SERIES BREWERS FC-TS Oct. 18, 17 NEI 1.800.325.7867 www.newcocoffee.com P a g e 1 Table of Contents Plumber s Install Instructions
E N T E R P R I S E S
 N E W C O E N T E R P R I S E S P/N 110881 Issued 12/99 INSTALLATION and OPERATION MANUAL for OCS-16A BREWERS BREWER SPECIFICATIONS Model Width Length Height US 120V Amps CANADA 120V Amps OCS-16A 14 15-1/2
INSTALLATION and OPERATION MANUAL for GXD SERIES BREWERS
 Man Pt No 701859 Rev 3-01 INSTALLATION and OPERATION MANUAL for GXD SERIES BREWERS GXDF2-30 GXDF-8D Model BREWER SPECIFICATIONS No of Warmers Width Length Height* US 120V Amps US 120/240V Amps Phase GXDF2-15
E N T E R P R I S E S
 N E W C O E N T E R P R I S E S 2Man Pt No 701528 REV 10-01 INSTALLATION and OPERATION MANUAL for GX SERIES BREWERS GXF3-15 GXF-8D Model BREWER SPECIFICATIONS No of Warmers Width Length Height* US 120V
TD4, TD4T ICED TEA/COFFEE DISPENSERS
 TD4, TD4T ICED TEA/COFFEE DISPENSERS INTRODUCTION USE & CARE INSTRUCTIONS These dispensers are designed to hold and serve up to 4-gallons of iced tea or iced coffee. 10334.0000K 06/09 1998 Bunn-O-Matic
INSTALLATION & OPERATING GUIDE
 SURE TAMP STEAM INSTALLATION & OPERATING GUIDE BUNN-O-MATIC CORPORATION POST OFFICE BOX 3227 SPRINGFIELD, ILLINOIS 6278-3227 PHONE: (217) 529-661 FAX: (217) 529-6644 http://www.bunn.com/espresso/index.html
PROGRAMMING MANUAL. Sure Immersion 220 Bean-To-Cup, Single Serve, Air Infusion Brewer
 Sure Immersion 0 Bean-To-Cup, Single Serve, Air Infusion Brewer PROGRAMMING MANUAL To ensure you have the latest revision of the Operating Manual, or to view the Illustrated Parts Catalog, Programming
Coffee Burr Grinder. Model #559. Instructions. Warranty
 Coffee Burr Grinder Model #559 Instructions Warranty IMPORTANT SAFEGUARDS When using electrical appliances, basic safety precautions should always be followed, including the following: 1. Read all instructions.
TF SERVER (With & Without Base)
") 1.0 & 1. Gallon TF SERVER (With & Without Base) DISCONTINUED VERSION The information in this manual is no longer current. USE & CARE INFORMATION CAUTION: CLEAN AND SANITIZE YOUR SERVER BEFORE USING. SEE
1.0 & 1. Gallon TF SERVER (With & Without Base) DISCONTINUED VERSION The information in this manual is no longer current. USE & CARE INFORMATION CAUTION: CLEAN AND SANITIZE YOUR SERVER BEFORE USING. SEE
+ = Power up your Smart Cup while pressing the corresponding button to reach different program modes. Heat Exchange fill/tank Drain Page:
 Operating Manual Power up your Smart Cup while pressing the cresponding button to reach different program modes. 1 + = Power switch on back of brewer Heat Exchange fill/tank Drain Page: 2 + = Power switch
12 CUP COFFEE MAKER User Guide
 BRAND 12 CUP COFFEE MAKER User Guide Item: 740553 Ginnys.com 800-544-1590 Facebook.com/GinnysBrand Pinterest.com/GinnysBrand Ginnys.com/Blog Welcome to the world of full-flavored coffee with the Ginny
20:1 Coffee/Tea Brewer Operation and Service Manual
 Man PN 121751 Rev 20170617 20:1 Coffee/Tea Brewer Operation and Service Manual Model 20:1-AP Airpot not Included Model Height Width Depth US 120 V 20:1-LD 17.8 8.5 19.8 1750W 20:1-AP 19.3 8.5 19.8 1750W
BREW EXPRESS OPERATION GUIDE. model no. BE-112
 BREW EXPRESS OPERATION GUIDE model no. BE-112 by CONTENTS 1. Safety 1 2. Features 2 3. Controller Functions 3 4. Start Up 4 5. Operation 5 6. Maintenance 6 7. Troubleshooting 7 8. Parts & Service 8 9.
Pellet Pro 12 & 18 Lengths Large 35lb Hopper Assembly Operation Manual
 Pellet Pro 12 & 18 Lengths Large 35lb Hopper Assembly Operation Manual Now with our exclusive PID Controller & Universal Mounting Capabilities! FOR OUTDOOR USE ONLY Disclaimer: The hopper assembly is used
Hotpoint H/A - Ariston automatic, built-in coffee machine MCX 103 X - MCK 103 X/HA
 Hotpoint H/A - Ariston automatic, built-in coffee machine MCX 103 X - MCK 103 X/HA Automatic, built-in coffee machine Contents 1) Technical Specifications 2) Accessibility 3) Wiring diagram 4) Water circuit
Single-Serve Coffee Maker
 840251801 Single-Serve Coffee Maker IMPORTANT SAFEGUARDS When using electrical appliances, basic safety precautions should always be followed to reduce the risk of fire, electric shock, and/or injury to
BREW EXPRESS IMPORTANT NOTE: model no. BE-104 & BE-110. For more information see our instructional video online at
 BREW EXPRESS Operation GUIDE model no. BE-104 & BE-110 IMPORTANT NOTE: For more information see our instructional video online at www.brewexpress.com. Do not return this product to place of purchase without
Given a realistic scenario depicting a new site install, the learner will be able to install and setup the brewer for retail turnover without error.
 Unit 2 Setup Unit Objectives Given a realistic scenario depicting a new site install, the learner will be able to install and setup the brewer for retail turnover without error. Given an installed machine,
Installation and User Instructions Flushing System Kit
 Installation and User Instructions Flushing System Kit Model: ACFS Part No. 102532 Rev. A Copyright 2007 Dacor All rights reserved. All specifications are subject to change without notice. Dacor assumes
BREW EXPRESS OPERATION GUIDE MODEL BE112
 BREW EXPRESS OPERATION GUIDE MODEL BE112 Contents 1. Safety 2. Features 3. Controller Functions 4. Start up 5. Operation 6. Maintenance 7. Troubleshooting 8. Parts & Service 9. Warranty & Registration
INSTALLATION QUICK START GUIDE AND CHECKLIST ATTENTION!! DO NOT ATTEMPT A PARTIAL INSTALL.
 AND CHECKLIST CHECKLIST MUST BE SIGNED AND RETURNED TO RANCILIO GROUP NA TO RECEIVE PAYMENT FOR YOUR SERVICES ATTENTION!! Please check the site to make sure they are ready for installation before you begin
1. IMPORTANT SAFEGUARDS When using electrical appliances, basic safety precautions should always be followed to reduce the risk of fire, electric
 1. IMPORTANT SAFEGUARDS When using electrical appliances, basic safety precautions should always be followed to reduce the risk of fire, electric shock, and/pr injury to persons including the following:
Given a realistic scenario depicting a new site install, the learner will be able to install and setup the brewer for retail turnover without error.
 Unit 2 Setup Unit Objectives Given a realistic scenario depicting a new site install, the learner will be able to install and setup the brewer for retail turnover without error. Given an installed machine,
MODELS 1315 & 1315-S La Pavoni CLUB COMBO
 IMPORTANT WARNINGS MODELS 1315 & 1315-S La Pavoni CLUB COMBO DUET Never operate your espresso machine without water in the tank. This may cause premature pump failure. Do not allow the power cord to come
C AU T I O N : WA R M E R S A N D S U R FAC E S A R E H OT INSTALLATION & OPERATING GUIDE
 SMART FUNNEL SMART FUNNEL DUAL / GPR-DBC WITH SMART FUNNEL C AU T I O N : WA R M E R S A N D S U R FAC E S A R E H OT INSTALLATION & OPERATING GUIDE BUNN-O-MATIC CORPORATION POST OFFICE BOX 3227 SPRINGFIELD,
TEA CATER USER MANUAL. UM_EN Part No.:
 USER MANUAL UM_EN Part No.: 1730080-02 CONTENT CONTENT... 2 GENERAL... 4 Introduction...4 Warnings...4 Precautions...4 Intended use...4 Facts & weight...5 General functional description...5 OVERVIEW OF
Programmable Conical Burr Mill CBM-18
 Programmable Conical Burr Mill CBM-18 IMPORTANT SAFEGUARDS When using electrical appliances, basic safety precautions should always be followed, including the following: 1. Read all instructions. 2. To
Quick Start Guide Read this booklet thoroughly and save these instructions.
 Quick Start Guide Read this booklet thoroughly and save these instructions. FAQs can be found at www.espresso-works.com Email us for any unanswered questions: cs@espresso-works.com For product registration,
RELEASED FOR PRODUCTION PROGRAMMING MANUAL
 Sure Immersion Bean-To-Cup, Single Serve, Air Infusion Brewer PROGRAMMING MANUAL To ensure you have the latest revision of the Operating Manual, or to view the Illustrated Parts Catalog, Programming Manual,
INSTALLATION AND WARRANTY CERTIFICATE. Machine model Serial Number # Rating and optional. Installation Company: Technician ID: Date: / /
 INSTALLATION AND WARRANTY CERTIFICATE Machine model Serial Number # Rating and optional Installation Company: Technician ID: Date: / / Water-Line Pressure: NOTE: over 5bar/70psi, a pressure regulator must
The Scoop 2-Way Brewer
 READ BEFORE USE The Scoop 2-Way Brewer Visit www.hamiltonbeach.in for our complete line of products and Use and Care Guides as well as delicious recipes, tips, and other helpful information! Questions?
Armonia Smart. Quick Start Guide MACHINE DESCRIPTION STARTING UP
 Quick Start Guide Armonia Smart MACHINE DESCRIPTION LEGENDE. PRODUCT CANISTER 2. PRODUCT CANISTER / COFFEE HOPPER. COFFEE HOPPER. CARD READER. DECAFFEINATED DOOR. DISPLAY 7. DOSE BUTTON 8. INFO BUTTON
CafeRomatica NICR7.. Fully automatic coffee centre Operating Instructions and Useful Tips. A passion for coffee.
 CafeRomatica Fully automatic coffee centre Operating Instructions and Useful Tips NICR7.. GB A passion for coffee. 1 G F A M J / K A B C D E Display screen Left rotary knob Right rotary knob Bean symbol
K Mini Plus. Use & Care Guide. Get the most from your new Keurig brewer
 K Mini Plus Use & Care Guide Get the most from your new Keurig brewer STRONG STRONG Before You Brew 1 Plug & Power 2 Fill & Place Remove packing tape from brewer. Pull plug and extend cord from cord storage
User Manual. Stainless Steel Coffee Urns. Models: 177CU30, 177CU55, 177CU110 04/2018. Please read and keep these instructions. Indoor use only.
 Stainless Steel Coffee Urns Models: 177CU30, 177CU55, 177CU110 04/2018 Please read and keep these instructions. Indoor use only. www.avantcoequipment.com 1 NOTE: Save these instructions for future reference.
Lusso / Espresso Si' Models:PL-16 PAB-16. Made In Italy
 Lusso / Espresso Si' Models:PL-16 PAB-16 Made In Italy la pavoni - PL-16 & PAB-16 We recommend using freshly roasted espresso beans ground medium to fine. Fresh coffee will produce better tasting espresso.
Micro Casa Semiautomatica
 Micro Casa Semiautomatica Training Manual Contents Overview 1 Models 1 Specifications 1 Features 1 Available accessories 1 Package contents 2 Semiautomatic parts 3 Assembly 4 Operating instructions 4 Starting
5KEK1322 W A_v08.indd 1 5/13/16 2:25 PM
 5KEK1322 W10878653A_v08.indd 1 PARTS AND FEATURES PARTS AND ACCESSORIES Tea steeper lid (center section of lid with handle) Kettle lid (outer section) Stainless steel lime scale filter Removable stainless
Triple Brew. Model #352. Coffee & Tea Maker. Instructions Warranty
 Triple Brew Coffee & Tea Maker Model #352 Instructions Warranty IMPORTANT SAFEGUARDS When using electrical appliances, basic safety precautions should always be followed, including: 1. Read all instructions.
User Manual. Stainless Steel Coffee Urns. Models: 177CU55ETL, 177CU110ETL 10/2016. Please read and keep these instructions. Indoor use only.
 Intertek Stainless Steel Coffee Urns Models: 177CU55ETL, 177CU110ETL 10/2016 Please read and keep these instructions. Indoor use only. www.avantcoequipment.com 1 NOTE: Save these instructions for future
COFFEE GRINDER. Owner s Manual
 COFFEE GRINDER Owner s Manual 4 4 FEATURES Bean Hopper Lid Bean Hopper Grinder Start/Stop Button Bean Hopper Holder Bean Hopper Release Button Grinding Timer Dial Coffee Powder Outlet 0 Grind Thickness
6 oz SHOT. Use & Care Guide. Get the most from your new Keurig brewer
 6 Use & Care Guide Get the most from your new Keurig brewer 6 6 6 6 Before You Brew 1 Plug & Place Rinse & Fill 2 Remove packing tape from brewer and frother, and plug into a grounded outlet. Lower the
CHOCOLINO CAFÉLINO USER MANUAL UM_EN. Part No.: _01
 CHOCOLINO CAFÉLINO USER MANUAL UM_EN Part No.: 1764133_01 CONTENT CONTENT...2 GENERAL...4 Introduction...4 Warnings...4 Precautions...4 Intended use...4 Facts & weight...5 OVERVIEW OF COMPONENTS...6 CHOCOLINO/CAFÉLINO...6
2016 Gourmia The Steelstone Group Brooklyn, NY
 2016 Gourmia www.gourmia.com The Steelstone Group Brooklyn, NY All rights reserved. No portion of this manual may be reproduced by any means whatsoever without written permission from The Steelstone Group,
Automatic Cold Brewer
 Automatic Cold Brewer Model# GCM-6800 USER MANUAL Read this manual thoroughly before using and save it for future reference Model: GCM-6800 2017 Gourmia www.gourmia.com The Steelstone Group Brooklyn, NY
12 CUP COFFEEMAKER User Guide
 BRAND 12 CUP COFFEEMAKER User Guide Item: 757147 Ginnys.com 800-544-1590 Facebook.com/GinnysBrand Pinterest.com/GinnysBrand Welcome to the world of full-flavored coffee with the Ginny s Brand 12-Cup Coffeemaker!
Get Started. Better Everyday ECAM23260
 Better Everyday Get Started This short guide is not intended to explain all the functions of the appliance. Please read all the owner s instruction booklet before use. Video available on www.youtube.com/delonghiusa
Shotmeister Owner s Manual. The Sleekest Design, Pouring the Coldest Shots
 Shotmeister Owner s Manual The Sleekest Design, Pouring the Coldest Shots Thank you for purchasing a Jägermeister Shotmeister! REGISTRATION INFORMATION Register your Jägermeister Shotmeister Online: at
K35 Use & Care Guide. Get the most from your new Keurig coffee maker
 K35 Use & Care Guide Get the most from your new Keurig coffee maker K35 COFFEE MAKER A. Water Reservoir Lid B. MAX Fill Line C. Water Reservoir D. Water Reservoir Lock Tab Slots E. Power Cord F. Handle
MODEL: POD BREWER AURORA SAF 68 HOMEMAKER ESPRESSO MAKER WITH COFFEE POD
 INSTRUCTION MANUAL Please read this Instruction Manual and the safety instructions before operating the appliance! MODEL: POD BREWER AURORA SAF 68 HOMEMAKER ESPRESSO MAKER WITH COFFEE POD Congratulation
K Café. Use & Care Guide. Get the most from your new Keurig brewer LATTE COLD CAPP
 K Café Use & Care Guide Get the most from your new Keurig brewer AUTO OFF DESCALE ADD WATER 6 COFFEE & 8 0 oz oz oz 2oz SHOT Before You Brew Plug & Place 2 Rinse & Fill Remove packing tape from brewer
USE & CARE INSTRUCTIONS ESPRESSO MAKER FES4B
 USE & CARE INSTRUCTIONS ESPRESSO MAKER FES4B IMPORTANT SAFEGUARDS When using electrical appliances, basic safety precautions should always be followed, including the following: 1. Read all instructions.
User Manual. Thermo Pump System Coffee Brewers User Manual. Models: 177C10, 177C15 04/2018. Please read and keep these instructions. Indoor use only.
 Thermo Pump System Coffee Brewers User Manual Models: 177C10, 177C15 04/2018 Please read and keep these instructions. Indoor use only. www.avantcoequipment.com 1 Parts Diagram 177C15 2 5 177C10 3 4 6 4
MTN Products. AquaCafé r (Touch Capsules) Installation & Operations Manual
 Installation & Operations Manual") MTN Products AquaCafé r (Touch Capsules) Installation & Operations Manual Table of Contents SPECIFICATIONS... 1 TOUCH PADS INSTRUCTIONS... 3 SET- UP INSTRUCTIONS... 4 BOTTLE INSTRUCTIONS... 5 INITIAL COLD
MTN Products AquaCafé r (Touch Capsules) Installation & Operations Manual Table of Contents SPECIFICATIONS... 1 TOUCH PADS INSTRUCTIONS... 3 SET- UP INSTRUCTIONS... 4 BOTTLE INSTRUCTIONS... 5 INITIAL COLD
PLEASE READ THIS MANUAL BEFORE USE. SAVE FOR FUTURE REFERENCE.
 8-CUP STAINLESS STEEL CARAFE Coffee Brewer Model: BV1900TS HOUSEHOLD USE ONLY Customer Service Line: 1-855-664-1252 2-year limited warranty bonavitaworld.com Simple to operate Optional pre-infusion cycle
EXPOBAR OFFICE MACHINES
 EXPOBAR OFFICE MACHINES Supplemental Instructions Includes brewing guide, frothing techniques and recipes. These are supplemental instructions for the Expobar Office Control, Pulser and Lever. They are
User Manual. Stainless Steel Coffee Urn. Models: 177CU30 11/2018. Please read and keep these instructions. Indoor use only.
 Stainless Steel Coffee Urn Models: 177CU30 11/2018 Please read and keep these instructions. Indoor use only. www.avantcoequipment.com 1 NOTE: Save these instructions for future reference. Index Important
Important Safety Information... 1 The Xpress System The Xpress System Components... 3 Using the Espresso System... 4
 Xpress User Guide Table of Contents Important Safety Information... 1 The Xpress System... 2 The Xpress System Components... 3 Using the Espresso System... 4 Starting the System... 4 Starting the Machine
My Café AP PROGRAMMING MANUAL BUNN-O-MATIC CORPORATION POST OFFICE BOX 3227 SPRINGFIELD, ILLINOIS PHONE: (217) FAX: (217)
 FAX: (217)") My Café AP PROGRAMMING MANUAL BUNN-O-MATIC CORPORATION POST OFFICE BOX 3227 SPRINGFIELD, ILLIIS 62708-3227 PHONE: (217) 529-6601 FAX: (217) 529-6644 41170.0001A 05/12 2010 Bunn-O-Matic Corporation BUNN-O-MATIC
My Café AP PROGRAMMING MANUAL BUNN-O-MATIC CORPORATION POST OFFICE BOX 3227 SPRINGFIELD, ILLIIS 62708-3227 PHONE: (217) 529-6601 FAX: (217) 529-6644 41170.0001A 05/12 2010 Bunn-O-Matic Corporation BUNN-O-MATIC
Let s get brewing. K Quick Start Guide
 Let s get brewing. K-1500 Quick Start Guide IMPORTANT SAFEGUARDS - READ ALL INSTRUCTIONS BEFORE USING When using electrical appliances, basic safety precautions should be followed, including the following:
EP3559, EP3558 EP3551, EP3550
 Super automatic espresso machine 3100 series EP3559, EP3558 EP3551, EP3550 EN USER MANUAL DE BENUTZERHANDBUCH ES MANUAL DEL USUARIO FR MODE D EMPLOI IT MANUALE UTENTE NL GEBRUIKSAANWIJZING 1 EP3558, EP3550
Automatic Coffee Machine Instruction Manual
 Instruction Manual Page 1 of 17 8212-0 Automatic Coffee Machine Instruction Manual Instruction Manual Page 2 of 17 IMPORTANT INFORMATION For safety purposes please read these instructions carefully before
Manual Spark Ignition (MSI) Kit For Use only with Thermocouple Manual Safety (TMSI) UL Approved Fire Pit Pans with Burning Spur
 Kit For Use only with Thermocouple Manual Safety (TMSI) UL Approved Fire Pit Pans with Burning Spur") AAA Battery MODEL: MSI-BSTMSI Manual Spark Ignition (MSI) Kit For Use only with Manual Safety (TMSI) UL Approved Fire Pit Pans with Burning Spur Installation and Operating Instructions IF YOU CANNOT READ
AAA Battery MODEL: MSI-BSTMSI Manual Spark Ignition (MSI) Kit For Use only with Manual Safety (TMSI) UL Approved Fire Pit Pans with Burning Spur Installation and Operating Instructions IF YOU CANNOT READ
IMPORTANT SAFEGUARDS. 3. To protect against fire, electric shock and injury to persons do not immerse cord, plug or unit in water or other liquid.
 IMPORTANT SAFEGUARDS When using electrical appliances, basic precautions should always be followed, including the following: 1. Read all instructions. 2. Make sure that your outlet voltage corresponds
SINGLE SERVING AUTOMATIC POD MACHINE FKP-4T
 PN782164 REV 20170627 SINGLE SERVING AUTOMATIC POD MACHINE FKP-4T NEWCO ENTERPRISES INC, 3650 NEW TOWN BLVD SAINT CHARLES, MO 63301 1-800-325-7867 FAX 1-636-925-0029 Features/ Specifications AUTOMATIC
SG120 Model # Cup Stainless Steel Coffee Maker. Operating Instructions Product Registration Warranty
 SG120 Model #494 12-Cup Stainless Steel Coffee Maker Operating Instructions Product Registration Warranty IMPORTANT SAFEGUARDS When using electrical appliances, basic safety precautions should always be
6-in-1 K-Cup Coffee Maker
 6-in-1 K-Cup Coffee Maker Model# GCM-6000 USER MANUAL Read this manual thoroughly before using and save it for future reference Model: GCM-6000 2017 Gourmia www.gourmia.com The Steelstone Group Brooklyn,
Espresso Maker READ BEFORE USE. Questions? Please call us our friendly associates are ready to help
 Espresso Maker Visit www.hamiltonbeach.in for our complete line of products and Use and Care Guides as well as delicious recipes, tips, and other helpful information! Questions? Please call us our friendly
Burr Grinder. Model #551. Instructions. Warranty
 Burr Grinder Model #551 Instructions Warranty IMPORTANT SAFEGUARDS When using electrical appliances, basic safety precautions should always be followed, including the following: 1. Read all instructions.
Coffee Grinder Instruction Manual
 Coffee Grinder Instruction Manual CoffeeGrinder Manual-English Only.indd 1 07/01/2016 14:14:39 Savisto Home Coffee Grinder Voltage Supply: 220-240V~ 50/60Hz Power Consumption: 150W Eng Please read through
SERVICE SUPPLEMENT TO
 SERVICE SUPPLEMENT TO 39132.0000 BUNN-O-MATIC CORPORATION POST OFFICE BOX 3227 SPRINGFIELD, ILLIIS 62708-3227 PHONE: (217) 529-6601 FAX: (217) 529-6644 39132.0003C 01/14 2010 Bunn-O-Matic Corporation BUNN-O-MATIC
AND SAVE THESE INSTRUCTIONS
 COFFEE MACHINE Owner s instructions READ AND SAVE THESE INSTRUCTIONS CC100 E C B A D F Z2 Z1 Z G H I J Y Q R P S O T N U W V M X K L 3 1 2 3 4 5 6 MAX 6 oz. 7 8 4 9 10 11 12 B A 13 14 5 IMPORTANT SAFEGUARDS
Operator Manual 100 Series Coffee Grinders
 Operator Manual 100 Series Coffee Grinders Models 100 and 190SS Model 100 Model 190SS Specifications...2 Safety Information...2 Installation...3 Operation...3 Table of Contents Cleaning & Maintenance...6
Jura S Series Grinder Replacing
 Lansdale, PA 19446 Phone: 215-361-7000 Fax: 215-361-7434 Jura S Series Grinder Replacing Please read before using this guide: This guide is for users who have know the use of fully automatic machines,
Keurig Vue Brewer Use & Care Guide
 Keurig Vue Brewer Use & Care Guide IMPORTANT SAFEGUARDS Safe Operation & Use When using electrical appliances, basic safety precautions should be followed, including the following: 1. Read all instructions
MODEL# GCM5000 K CUP & ESPRESSO COFFEE MAKER
 MODEL# GCM5000 K CUP & ESPRESSO COFFEE MAKER Welcome to Freshly Brewed Espresso and Coffee! 2016 Gourmia www.gourmia.com The Steelstone Group Brooklyn, NY All rights reserved. No portion of this manual
Viking Professional Coffee Maker
 Viking Professional Coffee Maker Use and Care Instructions vikingrange.com Professional Coffee Maker VCCM12 Congratulations! You have just purchased a Viking Professional Coffee Maker. The professional
Models 2450 & Espressimo TM Espresso Cappuccino Machines. Operation & Installation Manual TABLE OF CONTENTS. For
 Espressimo TM Espresso Cappuccino Machines Operation & Installation Manual For Models 2450 & 1750 *Also includes information & instructions for Q & E models. TABLE OF CONTENTS Warning Labels...2 Initial
For Jura parts, repairs & tech support, contact: Services Unlimited, Inc./ Parts Guru
 For Jura parts, repairs & tech support, contact: Services Unlimited, Inc./ Parts Guru 209 Walnut street, Lansdale, PA 19446 Phone: 215-362-7000 Fax: 215-361-7434 email: sales@partsguru.com Online store
Barista Practice & Equipment Maintenance Coaching Sheets
 Co a c h ing Sh eet Barista Practice & Equipment Maintenance Coaching Sheets Tel l, Sh o w, Co a c h Cleaning a Shaerer Espresso Machine The espresso machine is a critical piece of equipment in your store.
HD8828 HD8834 USER MANUAL. Super automatic espresso coffee machine 3100 series. Read carefully before using the machine.
 Super automatic espresso coffee machine 3100 series 02 USER MANUAL Read carefully before using the machine. HD8828 HD8834 English 02 EN Register your product and get support at www.philips.com/welcome
Service Manual SLG Grinder
 Service Manual SLG Grinder IMPORTANT SAFEGUARDS & SYMBOLS This appliance is designed for commercial use. Any servicing other than cleaning and maintenance should be performed by an authorized Wilbur Curtis
USE AND CARE GUIDE FOR
 READ AND SAVE THESE INSTRUCTIONS Coffee Maker USE AND CARE GUIDE FOR MODEL ME2TMB IMPORTANT SAFEGUARDS When using electrical appliances, basic safety precautions should always be followed, including the
C AU T I O N : WA R M E R S A N D S U R FAC E S A R E H OT INSTALLATION & OPERATING GUIDE
 SMART FUNNEL SMART FUNNEL DUAL / GPR-DBC WITH SMART FUNNEL C AU T I O N : WA R M E R S A N D S U R FAC E S A R E H OT INSTALLATION & OPERATING GUIDE BUNN-O-MATIC CORPORATION POST OFFICE BOX 3227 SPRINGFIELD,
COLD BREW COFFEE MAKER. Model# GCM-7800 USER MANUAL
 COLD BREW COFFEE MAKER Model# GCM-7800 USER MANUAL Read this manual thoroughly before using and save it for future reference FOR CUSTOMER SERVICE QUESTIONS OR COMMENTS VISIT US @ GOURMIA.COM INFO@GOURMIA.COM
Get Started. Better Everyday ECAM26455
 Better Everyday Get Started This short guide is not intended to explain all the functions of the appliance. Please read all the owner s instruction booklet before use. ECAM26455 WELCOME Introducing the
BUNN TECHNICAL TRAINING ITCB
 BUNN TECHNICAL TRAINING ITCB Index Unit 1: Installation Site Requirements...4 Location of the Serial Number...4 Water Supply Install...4 Electrical Install...5 Initial Start-Up...5 Unit 2: Setup Setup
Model # Instructions Warranty. 950 Watts / 120 Vac / 60 Hz. Read this manual thoroughly before using and save it for future reference
 Perk Model #405.05 Instructions Warranty 950 Watts / 120 Vac / 60 Hz Read this manual thoroughly before using and save it for future reference IMPORTANT SAFEGUARDS When using electrical appliances, basic
Type HD8754 USER MANUAL
 Register your product and get support at www.philips.com/welcome 02 English Type HD8754 USER MANUAL 02 EN PLEASE READ THIS USER MANUAL CAREFULLY BEFORE USING THE MACHINE. IMPORTANT SAFEGUARDS When using
OWNERS MANUAL. My Rotisserie Pro Warranty. Please read and save this manual. PROFESSION AL SERIES MRP_MAN_QVC_ENG_V1_ FOR HOUSEHOLD USE ONLY.
 My Rotisserie Pro Warranty The manufacturer warrants that your My Rotisserie Pro is free of defects in materials and workmanship and will, at its option, repair or replace any defective rotisserie that
HD8847 HD8848 USER MANUAL. Super automatic espresso coffee machine 4000 series. Read carefully before using the machine.
 Super automatic espresso coffee machine 4000 series 02 USER MANUAL Read carefully before using the machine. HD8847 HD8848 02 English EN Register your product and get support at www.philips.com/welcome
Programming Guide For EXTRACTOR Coffee Brewers (CBS 2000e Series)
") Programming Guide For EXTRACTOR Coffee Brewers (CBS 2000e Series) Main: (847) 719-3000 email: techsupport@fetco.com Toll Free: (800) 338-2699 2004 Food Equipment Technologies Company www.fetco.com Part
Programming Guide For EXTRACTOR Coffee Brewers (CBS 2000e Series) Main: (847) 719-3000 email: techsupport@fetco.com Toll Free: (800) 338-2699 2004 Food Equipment Technologies Company www.fetco.com Part
Quick Reference Guide
 Impressa Z5 Quick Reference Guide This Guide does not replace the Operating Instructions. For details and cautions you must read all instructions. Watch the DVD instructions! Traces of Coffee Grounds in
Type HD8852 USER MANUAL
 Register your product and get support at www.philips.com/welcome 02 English Type HD8852 USER MANUAL 02 EN PLEASE READ THIS USER MANUAL CAREFULLY BEFORE USING THE MACHINE. IMPORTANT SAFEGUARDS When using
45-Cup Coffee Urn Big Brew Classic. Instruction Manual. Model ACU-045
 45-Cup Coffee Urn Big Brew Classic Instruction Manual Model ACU-045 Congratulations! Your Big Brew Classic will surely become one of the most practical appliances in your home or office. Enjoy fresh brewed
Customer Care Guide 1
 Customer Care Guide 1 12-cup capacity Rotational Steam Brewing More exquisite coffee flavors Steam & Hot Water Jets Steams and stirs your favorite coffee producing an exquisite coffee crema Saves money