U405 CART UP405 PEDESTAL
|
|
|
- Gwendoline McDonald
- 5 years ago
- Views:
Transcription


1 This gas grill must be used only outdoors in a well-ventilated space and must not be used inside a building, garage, screened-in porch, gazebo or any other enclosed area. APPLY SERIAL NUMBER LABEL FROM CARTON Serial No. XXXXXX MODEL NO. U405 CART UP405 PEDESTAL IF YOU SMELL GAS: DANGER Shut off gas to the appliance. Extinguish any open flame. Open lid. If odor continues, keep away from the appliance and immediately call your gas supplier or fire department. WARNING Do not try to light this appliance without reading the LIGHTING instructions section of this manual. Do not store or use gasoline or other flammable liquids or vapors in the vicinity of this or any other appliance. An L.P. cylinder not connected for use must not be stored in the vicinity of this or any other appliance. If the information in these instructions is not followed exactly, a fire or explosion may result, causing property damage, personal injury or death. Notice to Installer: Leave these instructions with the grill owner for future reference. Napoleon Appliance Corp., 214 Bayview Dr., Barrie, Ontario, Canada L4N 4Y8 Phone: (705) Fax: (705) wecare@napoleonproducts.com website: N APR 15/11


2 2 ULTRA CHEF gas grills are manufactured under the strict Standard of the world recognized ISO Quality Assurance Certificate. ULTRA CHEF products are designed with superior components and materials, and are assembled by trained craftsmen who take great pride in their work. The burner and valve assembly are leak tested and test-fired at a quality test station, and thoroughly inspected by a qualified technician before packaging and shipping to ensure that you, the customer, receive the quality product you expect from Napoleon Appliance Corporation. ULTRA CHEF GAS GRILL LIMITED LIFETIME WARRANTY Napoleon Appliance Corporation warrants the following materials and workmanship in your new ULTRA CHEF gas grill against defects for as long as you own the gas grill. This covers: aluminum castings (excluding paint), SOLIDO side shelves, stainless steel side shelves, LUXIDIO side shelf end caps, wheels, knobs, stainless steel burners, stainless steel lid inserts, and lid handles. Subject to the following conditions. During the first five years Napoleon Appliance Corporation will provide replacement parts at our option free of charge. From the sixth year to lifetime Napoleon Appliance Corporation will provide replacement parts at 50% of the current retail price. Components such as stainless steel sear plates, cooking grids, igniters (excluding batteries), temperature gauges and brass valves are covered and Napoleon Appliance Corporation will provide parts free of charge during the first two years of the limited warranty. All other components including regulators, casters, warming racks, hoses and connectors, fasteners and accessories are covered and Napoleon Appliance Corporation will provide parts free of charge during the first year of the limited warranty. Napoleon Appliance Corporation shall not be liable for any transportation charges, labour costs or export duties. Conditions And Limitations Napoleon Appliance Corporation warrants its products against manufacturing defects to the original purchaser only, provided that the purchase was made through an authorized ULTRA CHEF dealer and is subject to the following conditions and limitations: This factory warranty is non-transferable and may not be extended what so ever by any of our representatives. The gas grill must be installed by a licenced, authorized service technician or contractor. Installation must be done in accordance with the installation instructions included with the product and all local and national building and fire codes. This limited warranty does not cover damages caused by misuse, lack of maintenance, grease fires, hostile environments, accident, alterations, abuse or neglect and parts installed from other manufacturers will nullify this warranty. This limited warranty further does not cover any scratches, dents, painted finishes, corrosion or discolouring by heat, abrasive and chemical cleaners, nor chipping on porcelain enamel parts, nor any components used in the installation of the gas grill. Should deterioration of parts occur to the degree of non-performance within the duration of the warranted coverage, a replacement part will be provided. In the first year only, this warranty extends to the replacement of warranted parts, which are defective in material or workmanship provided that the product has been operated in accordance with the operation instructions and under normal conditions. After the first year, with respect to this President s Limited Lifetime Warranty, Napoleon Appliance Corporation may, at its discretion, fully discharge all obligations with respect to this warranty by refunding to the original warranted purchaser the wholesale price of any warranted but defective part(s). Napoleon Appliance Corporation will not be responsible for the installation, labour or any other costs or expenses related to the re-installation of a warranted part, and such expenses are not covered by this warranty. Notwithstanding any provision contained in this President s Limited Lifetime Warranty Napoleon Appliance Corporation s responsibility under this warranty is defined as above and it shall not in any event extend to any incidental, consequential, or indirect damages. This warranty defines the obligation and liability of Napoleon Appliance Corporation with respect to the ULTRA CHEF gas grill and any other warranties expressed or implied with respect to this product, its components or accessories are excluded. Napoleon Appliance Corporation neither assumes, nor authorizes any third party to assume, on its behalf, any other liabilities with respect to the sale of this product. Napoleon Appliance Corporation will not be responsible for: over firing, blow outs caused by environmental conditions such as strong winds, or inadequate ventilation. Any damages to the gas grill due to weather damage, hail, rough handling, damaging chemicals or cleaners will not be the responsibility of Napoleon Appliance Corporation. The bill of sale or a copy will be required together with a serial number and a model number when making any warranty claims from Napoleon Appliance Corporation. Napoleon Appliance Corporation reserves the right to have its representative inspect any product or part prior to honouring any warranty claim. Napoleon Appliance Corporation shall not be liable for any transportation charges, labour costs, or export duties.
3 WARNING! Failure to follow these instructions could result in property damage, personal injury or death. Read and follow all warnings and instructions in this manual prior to operating grill. Safe Operating Practices This gas grill must be assembled exactly according to the instructions in the manual. If the grill was store assembled, you must review the assembly instructions to confirm correct assembly and perform the required leak tests before operating the grill. Read the entire instruction manual before operating the gas grill. This gas grill must be used only outdoors in a well-ventilated space and must not be used inside a building, garage, screened-in porch, gazebo or any other enclosed area. This gas grill must not be installed in or on recreational vehicles and/or boats. Do not locate unit in windy settings. High winds adversely affect the cooking performance of the gas grill. Under no circumstances should this gas grill be modified. Do not operate unit under overhead combustible construction. Maintain proper clearance to combustibles 20 (508 mm) to rear of unit, 6 (152 mm) to sides. Additional clearance of 24 (610mm) is recommended near vinyl siding or panes of glass. Gas must be turned off at the propane cylinder or at the natural gas supply valve when the gas grill is not in use. Do not attempt to use a cylinder that is not equipped with a QCC1 type connection. When the propane cylinder is connected to the appliance, the gas grill and cylinder must be stored outdoors in a well-ventilated space. When the gas grill is to be stored indoors, the connection between the propane cylinder and the gas grill must be disconnected and the cylinder removed and stored outdoors in a well ventilated space out of reach of children. Disconnected cylinders must not be stored in a building, garage or any other enclosed area. Natural gas units must be disconnected from the supply when being stored indoors. Inspect the fuel supply hose before each use. If there is evidence of excessive abrasion or wear or the hose is cut, it must be replaced prior to using the gas grill with a replacement hose assembly specified by the grill manufacturer. Do not route hose underneath drip pan - proper hose clearance to bottom of unit must be maintained. Hose must not run behind the front leg. It must run around the front side of leg (if applicable). Leak test the unit before initial use, annually, and whenever any gas components are replaced. Follow lighting instructions carefully when operating grill. Burner controls must be off when turning supply cylinder valve on. The lid is to be closed during the gas grill preheating period on all models except the BISZ300NFT/PFT and the built-in side burner BISB245. The BISZ300NFT/PFT and the built-in side burner BISB245 are supplied with a flat cover for storage and protection from the elements. Never place this cover on the grill while hot or operating. Allow grill to cool completely before covering. Adults and especially children should be alerted to the hazards of high surface temperatures. Young children should be supervised near the gas grill. Do not leave grill unattended when operating. Do not light burners with lid closed. Do not operate rear burner with main burners operating. Do not move grill when hot or operating. Do not use condiment tray to store lighters, matches or any other combustibles. Keep any electrical supply cord and fuel supply hose away from any heated surfaces. Ensure sear plates are positioned properly according to sear plate installation instructions. The holes must be towards the front of the gas grill (if applicable). Clean grease tray and sear plates regularly to avoid build-up, which could lead to grease fires. Remove warming rack before lighting rear burner. The extreme heat will damage the warming rack. Inspect infrared burner venturi tube for spider webs and other obstructions periodically. Clean the tubes completely if you find any such obstructions. Do not allow cold water (rain, sprinkler, hose, etc.) to come in contact with heated unit. A large temperature differential can cause chipping in the porcelain. Do not allow cold water (rain, sprinkler, hose, etc.) to come in contact with ceramic burners. A large temperature differential can cause cracking in the ceramic tile. Do not use a pressure washer to clean any part of the unit. 3
4 4 General Information This Gas Barbecue Is Certified Under Canadian And American National Standards, CAN/CGA-1.6b-2002 and ANSI Z21.58b-2002 respectively for Outdoor Gas Grills and should be installed to conform with local codes. In absence of local codes, install to the current CAN/CSA-B149.1 Propane Installation Code in Canada or to the National Fuel Gas Code, ANSIZ223.1/NFPA 54 in the United States. If a rotisserie motor is used, it must be electrically grounded in accordance with local codes or, in absence of local codes, with the current CSA C22.1Canadian Electrical Code in Canada or the National Electrical Code, ANSI/NFPA 70 in the United States. California proposition 65: The burning of gas fuel creates by-products, some of which are on the list as substances known by the State of California to cause cancer or reproductive harm. When cooking with gas, always ensure adequate ventilation to the unit, to minimize exposure to such substances. Propane Cylinder Specifications WARNING! If these instructions are not followed exactly, a fire causing death or serious injury may occur. A dented or rusty cylinder may be hazardous and should be checked by your propane supplier. Never use a cylinder with a damaged valve. Use only a propane supply cylinder constructed and marked in accordance with the specifications for LP-gas cylinders of the National Standard of Canada, CAN/CSA-b339, Cylinders, Spheres and Tubes for Transportation of Dangerous Goods; and Commission, as applicable or the Specifications for LP-Gas Cylinders of the U.S. Department of Transportation (D.O.T.). This appliance has been designed for use with a 20 lb. (9.1 kg) size propane cylinder only (not supplied). The propane cylinder must be provided with a cylinder connection device compatible with the connection for outdoor cooking appliances. The propane cylinder must be provided with a shut-off valve terminating in a propane cylinder valve type QCC1, and a safety relief device having direct communication with the vapor space of the cylinder. The cylinder supply system must be arranged for vapor withdrawal and the cylinder shall include a collar to protect the cylinder valve. The cylinder shall incorporate a listed OPD (overfill protection device). Do not store a spare LP-gas cylinder under or near this appliance. Never fill the cylinder beyond 80 percent full. Use only the pressure regulator and hose assembly provided with this barbecue. Replacement pressure regulators and hose assemblies must be specified by the manufacturer. Do not store a spare propane cylinder on the shelf beneath the barbecue. The regulator supplies a pressure of 11 inches. water column to the gas grill and has a QCC1 type fitting. Cylinders to be used with this unit must be supplied with a QCC1 cylinder valve. A QCC1 cylinder has a positive seating connection, which will not allow gas flow until a positive seal has been achieved. It is also equipped with an excess flow device. In order to attain full flow to the grill, the valves must be in the off position when the cylinder valve is turned on. Gas Hook-Up Instructions WARNING! A fire will result if the gas supply hose makes contacts with the underside of the grill or drip pan. Cylinder Connection: Ensure that the gas regulator hose is kink free. Remove the cap or plug from the cylinder fuel valve. Insert the black QCC1 regulator nipple onto the QCC1 fuel valve. Hand tighten clockwise. Do not use tools. Leak test all joints prior to using the barbecue. A leak test must be performed annually, and each time a cylinder is hooked up, or if a part of the gas system is replaced. If this grill is to be connected directly to a house propane gas supply line, follow the instructions for the natural gas hook up. Optional side burners must also follow the natural gas hook up instructions. Note: The propane tank heat shield is not required when the grill is connected to a fixed fuel supply, as its sole function is to shield the propane tank normally used with the grill. Ensure that the supply pressure being supplied to the unit is 11 water column. Propane Cylinder Installation: Set cylinder into the groove of the lower tank mounting bracket. Ensure that tank valve faces away from the barbecue. Lower the top tank mounting bracket onto the cylinder and tighten with wing nut. IMPORTANT! Ensure that the hose is routed around the front side of the cart leg to maintain proper clearance to the underside of the unit.

5 Natural Gas Hook-Up: This natural gas grill is supplied with a 10ft (3m) supply hose (complete with a quick disconnect) designed for natural gas and certified for outdoor use. The gas grill is designed to operate at an inlet pressure of 7 inches water column. Piping and valves upstream of the quick disconnect are not supplied. The installation must comply with CAN B149.1 Natural Gas and Propane installation code in Canada, or to the National Fuel Gas Code, ANSI Z223.1 in the United States. The gas supply pipe must be sufficiently sized to supply the BTU/h specified on the rating plate, based on the length of the piping run. The quick disconnect must not be installed in an upward direction and a readily accessible manual shut-off valve must be installed upstream of, and as close to, the quick disconnect as is feasible. The flared end of the hose must be connected to the fitting on the end of the flex tube as illustrated in the Natural Gas Hose Attachment diagram. Tighten using two wrenches. (Do not use thread sealer/pipe dope.) These connections must be made by a licensed gas installer. Leak test all joints prior to using the gas grill. IMPORTANT! Ensure that the hose is routed around the front side of the cart leg to maintain proper clearance to the underside of the unit. Non-Side Burner Units: Connect the flared end of the hose to the fitting on the end of the manifold tube. Wrench tighten. (Do not use thread sealer/pipe dope.) Side Burner Units: Connect the 20 inch hose from the manifold, to the side burner as illustrated in the Natural Gas Hose Attachment diagram. Connect the supply hose to the flare connection, which faces down from the side burner. Tighten all connections using two wrenches. (Do not use thread sealer/pipe dope.) WARNING! The installation must be performed by a licensed gas fitter, and all connections must be leak tested before operating the grill. Do not route hose underneath drip pan. Do not route hose between space in bottom shelf and back panel. Do not route hose over top of rear panel. Ensure all hose connections are tightened using two wrenches. Do not use Teflon tape or pipe dope on any hose connection. Ensure the hose does not contact any high temperature surfaces, or it may melt and leak causing a fire. Leak test all the connections using a soap and water solution, as per the leak testing instructions found in this manual. Leak Testing Instructions WARNING! A leak test must be performed annually and each time a cylinder is hooked up or if a part of the gas system is replaced. WARNING! Never use an open flame to check for gas leaks. Be certain no sparks or open flames are in the area while you check for leaks. Sparks or open flames will result in a fire or explosion, damage to property, serious bodily injury, or death. Leak testing: This must be done before initial use, annually, and whenever any gas components are replaced or serviced. Do not smoke while performing this test, and remove all sources of ignition. See Leak Testing Diagram for areas to check. Turn all burner controls to the off position. Turn gas supply valve on. Brush a half-and-half solution of liquid soap and water onto all joints and connections of the regulator, hose, manifolds and valves. Bubbles will indicate a gas leak. Either tighten the loose joint or have the part replaced with one recommended by the Customer Care department and have the grill inspected by a certified gas installer. If the leak cannot be stopped, immediately shut off the gas supply, disconnect it, and have the grill inspected by a certified gas installer or dealer. Do not use the grill until the leak has been corrected. 5
 Side Burner Lighting (if equipped) 1. Open grill lid 1.")
6 6 Lighting Instructions Rear Burner Lighting Hole Igniter Left Burner Centre Burner Right Burner WARNING! Open lid Off Position WARNING! Ensure all burner controls are in the off position. Slowly turn on the gas supply valve. Main Tube Burner Lighting Rear Burner Lighting Main Infrared Burner Lighting (if equipped) Side Burner Lighting (if equipped) 1. Open grill lid 1. Open grill lid 1. Open grill lid 1. Open burner cover. 2. Turn left burner control to high position. 2. Remove warming rack and hanging basket. 2. Turn infrared burner control to high position. 2. Turn side burner control to high position. 3. Press and hold igniter button until burner lights, or light by match. 3. Light match and hold to ports on left side of rear burner. 3. Press and hold igniter button until burner lights, or light by match. 3. Press and hold igniter button until burner lights, or light by match. 4. If ignition is not immediate, turn burner control off. Wait 5 minutes. Repeat. 4. Turn rear burner control to high position. 4. If ignition is not immediate, turn burner control off. Wait 5 minutes. Repeat. 4. If ignition is not immediate, turn burner control off. Wait 5 minutes. Repeat. 5. With left tube burner operating on high, turn the center and/or right tube burner to high. 5. If ignition is not immediate, turn burner control off. Wait 5 minutes. WARNING! The propane cylinder is equipped with an excess flow device. Unless all burners are turned off prior to turning the cylinder on, only small flames and low heat will be achievable. WARNING! Do not use rear burner while operating main burner.
7 Cooking Instructions Initial Lighting: When lit for the first time, the gas grill emits a slight odor. This is a normal temporary condition caused by the burn-in of internal paints and lubricants used in the manufacturing process and does not occur again. Simply run the main burners on high for approximately one-half hour. Main Burner Use: When searing foods, we recommend preheating the grill by operating all main burners in the high position with the lid closed for approximately 10 minutes. Food cooked for short periods of time (fish, vegetables) can be grilled with the lid open. Cooking with the lid closed will ensure higher, more even temperatures that can reduce cooking time and cook meat more evenly. Food that has a cooking time longer than 30 minutes, such as roasts, can be cooked indirectly (with the burner lit opposite to the food placement). When cooking very lean meats, such as chicken breasts or lean pork, the grids can be oiled before pre-heating to reduce sticking. Cooking meat with a high degree of fat content can create flare-ups. Either trim the fat or reduce temperatures to inhibit this. Should a flare-up occur, move food away from the flames and reduce the heat. Leave the lid open. See Your All Season Grill cookbook by Napoleon for more detailed instructions. Direct Cooking: Place food to be cooked on the grill directly over the heat. This method is generally used for searing or for foods that do not require prolonged cooking times such as hamburgers, steaks, chicken pieces, or vegetables. The food is first seared to trap-in the juices and flavor, and then the temperature is lowered to finish cooking the food to your preference. Indirect Cooking: With one or more burners operating, place food to be cooked on the grill over a burner that is not operating. The heat circulates around the food, cooking slowly and evenly. Cooking with this method is much the same as cooking in your oven and is generally used for larger cuts of meats such as roasts, chickens or turkeys, but can also be used for cooking foods that are prone to flare-ups or for smoking foods. Lower temperatures and slower cooking times result in tender foods. Rear Burner Use (If Equipped): Remove the warming rack prior to use. Cooking grids should also be removed if they interfere with the rotisserie. The rear burner is designed to be used in conjunction with the rotisserie kit (included with most rear burner units) available from your dealer. See the rotisserie kit assembly instructions. To use the counterbalance - remove the rotisserie motor from the gas grill. Place the spit with meat being cooked across the hangers inside the grill. The meat will naturally hang with the heavy side down. Tighten the counterbalance arm and weight so the arm is facing up. Slide the counterweight in or out to balance the load and tighten in place. Re-install the motor and begin cooking. Place a metal dish underneath the meat to collect drippings for basting and naturally delicious gravy. Basting liquid may be added as required. To seal in juices, first operate rear burner on high until brown, then reduce the heat to thoroughly cook foods. Keep the lid closed for best results. Your roasts and fowl will brown perfectly on the outside and stay moist and tender on the inside. For example, a 3 pound chicken on the rotisserie will be done in approximately 1½ hours on medium to high. See Your all Season Grill cookbook by Napoleon for more detailed instructions. WARNING! Barbecue sauce and salt can be corrosive and will cause rapid deterioration of the gas grill components unless cleaned regularly. When finished cooking disassemble rotisserie components, wash thoroughly with warm soapy water and store indoors. 7 Side Burner Use (if equipped): The side burner can be used like any stove top burner, for gravies, soups etc. For best performance, the gas grill should be located with the side burner protected from the wind. WARNING! Never grill food directly on the side burner grate. It is designed for use with pots and pans only.
8 8 Cleaning Instructions WARNING! Always wear protective gloves and safety glasses when cleaning your grill. WARNING! To avoid the possibility of burns, maintenance should be done only when the grill is cool. Avoid unprotected contact with hot surfaces. Ensure all burners are turned off. Clean grill in an area where cleaning solutions will not harm decks, lawns, or patios. Do not use oven cleaner to clean any part of this gas grill. Do not use a self-cleaning oven to clean cooking grids or any other parts of the gas grill. Barbecue sauce and salt can be corrosive and will cause rapid deterioration of the gas grill components unless cleaned regularly. Note: Stainless steel tends to oxidize or stain in the presence of chlorides and sulfides, particularly in coastal areas and other harsh environments, such as the warm, highly humid atmosphere around pools and hot tubs. These stains could be perceived as rust, but can be easily removed or prevented. To provide stain prevention and removal, wash all stainless steel surfaces every 3-4 weeks or as often as required with fresh water and/or stainless steel cleaner. Grids And Warming Rack: The grids and warming rack are best cleaned with a brass wire brush during the pre-heating period. Steel wool can be used for stubborn stains. It is normal that stainless grids (if equipped) will discolor permanently from regular usage due to the high temperature of the cooking surface. Cast Iron Cooking Grids: The cast iron cooking grids supplied with your new grill offer superior heat retention and distribution. By regularly seasoning your grids you are adding a protective coating, which will aid in resisting corrosion and increase your grids non-stick capabilities. First Time Use: Wash the cooking grids by hand with mild dish soap and water to remove any residue from the manufacturing process (never wash in a dish washer). Rinse thoroughly with hot water and dry completely with a soft cloth. This is important to avoid moisture from entering the cast iron. Seasoning: Using a soft cloth, spread VEGETABLE SHORTENING over the entire grid surface ensuring all grooves and corners are covered. Do not use salted fats such as butter or margarine. Pre-heat your grill for 15 minutes, then place the seasoned cooking grids in the grill. Turn the burner control knobs to medium with the lid closed. Allow the cooking grids to heat for approximately one-half hour. Turn all the burners to the OFF position and turn the gas off at the source. Let the cooking grids stand until cool. This procedure should be repeated several times throughout the season, although it is not required for daily use (follow daily usage procedure below). Daily Usage: Before pre-heating, and cleaning with a brass wire grill brush, coat the entire top surface of the cooking grids with VEGETABLE SHORTENING. Pre-heat the grill and then brush away any unwanted residue with a brass wire brush. Stainless Steel Cooking Grids: (upgrade kit available - see replacement parts list). Stainless steel cooking grids are durable and corrosion resistant. They require less seasoning and maintenance than cast iron cooking grids. It is recommended that you follow the daily usage procedure listed above although you may find pre-heating and cleaning your grids with a wire brush is sufficient for your grilling needs. Control Panel: The control panel text is printed directly on the stainless steel and with proper maintenance will remain dark and legible. To clean the panel, use only warm soapy water or stainless steel cleaner available from your Ultra Chef dealer. Never apply abrasive cleaners on any stainless surfaces, especially the printed portion of the control panel or the printing will gradually rub off. Cleaning Inside The Gas Grill: Remove the cooking grids. Use a brass wire brush to clean loose debris from the casting sides and underneath the lid. Scrape the sear plates with a putty knife or scraper, and use a wire brush to remove the ash. Remove the sear plates and brush debris from the burners with the brass wire brush. Sweep all debris from inside the gas grill into the drip pan. Drip Pan: Accumulated grease is a fire hazard. Clean the drip pan frequently (every 4 5 uses or as often as required) to avoid grease buildup. Grease and excess drippings pass through to the grease tray, located beneath the gas grill and accumulate in the disposable grease tray below the grill. To access the disposable grease tray or to clean the drip pan, slide the drip pan free of the grill. Never line the drip pan with aluminum foil, sand or any other material as this could prevent the grease from flowing properly. The pan should be scraped out with a putty knife or scraper. Replace the disposable grease tray every 2 4 weeks, depending on gas grill usage. For supplies, see your Ultra Chef Gas Grill dealer. Cleaning The Outer Grill Surface: Do not use abrasive cleaners or steel wool on any painted, porcelain or stainless steel parts of your Ultra Chef Grill. Doing so will scratch the finish. Exterior grill surfaces should be cleaned with warm soapy water while the metal is still warm to the touch. To clean stainless surfaces, use a stainless steel or a non-abrasive cleaner. Always wipe in the direction of the grain. Over time, stainless steel parts discolor when heated, usually to a golden or brown hue. This discoloration is normal and does not affect the performance of the grill. Porcelain enamel components must be handled with additional care. The baked-on enamel finish is glass-like, and will chip if struck. Touch-up enamel is available from your Ultra Chef Grill dealer. Solido Side Shelves: Clean side shelves with warm soapy water and a plastic bristled brush.
9 Maintenance Instructions We recommend this gas grill be thoroughly inspected and serviced annually by a qualified service person. WARNING! Always wear protective gloves and safety glasses when cleaning your grill. 9 WARNING! Turn off the gas at the source and disconnect the unit before servicing. To avoid the possibility of burns, maintenance should be done only when the grill is cool. A leak test must be performed annually and whenever any component of the gas train is replaced or gas smell is present. Combustion Air Adjustment: (This must be done by a qualified gas installer.) The air shutter is factory set and should not need adjusting under normal conditions. Under extreme field conditions, adjustments might be required. When the air shutter is adjusted correctly the flames will be dark blue, tipped with light blue and occasionally yellow. With too little air flow to the burner, the flames are lazy yellow and can produce soot. With too much air flow, the flames lift erratically and can cause difficulties when lighting. Adjusting the air shutter: 1. Remove cooking grids and sear plates and leave lid open. The back cover must be removed for rear tube burner air shutter adjustment. 2. Loosen air-shutter lock screw located at the mouth of the burner and open or close air shutter as required. The normal opening settings are: Main Tube Burner Propane 3/16 (5mm) Rear Tube Burner Propane 3/8 (10mm) Natural 1/8 (3mm) Natural 1/8 (3mm) *Infra-Red burners have no air adjustment. 3. Light the burners and set to high. Visually inspect burner flames. When the shutters are set correctly, turn burners off, tighten locking screws, and replace removed parts. Ensure that the insect screens are installed. Light Blue Burner Burner Port Yellow Tipping Dark Blue Approximately 1/2 (13mm) Burner: The burner is made from heavy wall 304 stainless steel, but extreme heat and a corrosive environment can cause surface corrosion to occur. This can be removed with a brass wire brush. CAUTION! Beware of Spiders. Spiders and insects are attracted to the smell of propane and natural gas. The burner is equipped with an insect screen on the air shutter, which reduces the likelihood of insects building nests inside the burner but does not entirely eliminate the problem. A nest or web can cause the burner to burn with a soft yellow or orange flame or cause a fire (flashback) at the air shutter underneath the control panel. To clean the inside of the burner, it must be removed from the gas grill: Remove the screw (s) that attaches the burner to the back wall. Slide the burner back and up wards to remove. Cleaning: Use a flexible venturi tube brush to clean the inside of the burner. Shake any loose debris from the burner through the gas inlet. Check the burner ports and valve orifices for blockages. Burner ports can close over time due to cooking debris and corrosion, use an opened paperclip or the supplied port maintenance bit to clean them. Drill out blocked ports using this drill bit in a small cordless drill. The ports are easier to clean if the burner is removed from the grill, but it can also be done with the burner installed. Do not flex the drill bit when drilling the ports, as this will cause the drill bit to break. This drill is for burner ports only, not for the brass orifices (jets) which regulate the flow into the burner. Take care not to enlarge the holes. Ensure the insect screen is clean, tight, and free of any lint or other debris. Reinstallation: Reverse the procedure to reinstall the burner. Check that the valve enters the burner when installing. Replace sear plate mount and tighten screws to complete reinstallation.
10 10 WARNING! When reinstalling the burner after cleaning it is very important that the valve/orifice enters the burner tube before lighting your gas grill. If the valve is not inside the burner tube a fire or explosion could occur. WARNING! Hose: Check for abrasions, melting, cuts, and cracks in the hose. If any of these conditions exist, do not use the gas grill. Have the part replaced by your Ultra Chef Gas Grill dealer or qualified gas installer. Aluminum Castings: Clean castings periodically with warm soapy water. Aluminum will not rust, but high temperatures and weathering can cause oxidation to occur on aluminum surfaces. This appears as white spots on the castings. To refinish these areas, clean first and sand lightly with fine sandpaper. Wipe the surface to remove any residue and paint with high temperature barbecue paint. Protect surrounding areas from over-spray. Follow the manufacture s directions for curing. Troubleshooting Problem Possible Causes Solution Low heat / Low flame when valve turned to high. For propane - improper lighting procedure. Ensure lighting procedure is followed carefully. All gas grill valves must be in the off position when the tank valve is turned on. Turn tank on slowly to allow pressure to equalize. See lighting instructions. Excessive flare-ups/uneven heat. Burners burn with yellow flame, accompanied by the smell of gas. Flames lift away from burner, accompanied by the smell of gas, and possibly difficulties in lighting. For natural gas - undersized supply line. For both gases - improper preheating. Sear plates installed incorrectly. Improper preheating. Excessive grease and ash build on sear plates and in drip pan. Possible spider web or other debris, or improper air shutter adjustment. Improper air shutter adjustment. Pipe must be sized according to installation code. Preheat grill with both main burners on high for 10 to 15 minutes. Ensure sear plates are installed with the holes towards the front and the slots on the bottom. See assembly instructions. Preheat grill with both main burners on high for 10 to 15 minutes. Clean sear plates and drip pan regularly. Do not line pan with aluminum foil. Refer to cleaning instructions. Thoroughly clean burner by removing. See general maintenance instructions. Open air shutter slightly according to combustion air adjustment instructions. (This must be done by a qualified gas installer.) Close air shutter slightly according to combustion air adjustment instructions. (This must be done by a qualified gas installer.) Burner will not light with the igniter, but will light with a match. Dead battery / or installed incorrectly. Loose electrode wire or switch terminal wires. Wrong replacement igniter. Improper gap at electrode tip. Lifting flames on burner. Replace with heavy duty battery. Check that electrode wire is firmly pushed onto the terminal on the back of the igniter. Check that the lead wires from the module to the ignition switch (if equipped) are firmly pushed onto their respective terminals. One spark systems must use a one spark igniter. Ensure that the collector box is tight and the gap between the electrode end and the collector box is between 1/8-3/16 (3mm-5mm). The gap can be adjusted by bending the box in or out. Close air shutter slightly - see previous problem.
11 Problem Possible Causes Solution Humming regulator. Normal occurrence on hot days. This is not a defect. It is caused by internal vibrations in the regulator and does not affect the performance or safety of the gas grill. Humming regulators will not be replaced. 11 Burners will not cross light each other. Plugged ports along back of burner. Clean burner ports. See burner maintenance instructions. Paint appears to be peeling inside lid or hood. Burner output on high setting is too low. (Rumbling noise and fluttering blue flame at burner surface.) Infrared burner (if equipped) flashes back (during operation the burner abruptly makes a loud whoosh sound, followed by a continuous blow-torch type sound and grows dim.) Grease build-up on inside surfaces. Lack of gas. Supply hose is pinched. Dirty or clogged orifice. Spider webs or other matter in venturi tube. Propane regulator in low flow state. Ceramic tiles overloaded with grease drippings and build-up. Ports are clogged. Burner overheated due to inadequate ventilation (too much grill surface covered by griddle or pan.) Cracked ceramic tile. This is not a defect. The finish on the lid and hood is porcelain, and will not peel. The peeling is caused by hardened grease, which dries into paint-like shards, that flake off. Regular cleaning will prevent this. See cleaning instructions. Check gas level in propane cylinder. Reposition supply hose as necessary. Clean burner orifice. Clean out venturi tube. Ensure lighting procedure is followed carefully. All gas grill valves must be in the off position when the tank valve is turned on. Turn tank on slowly to allow pressure to equalize. See lighting instructions. Turn burner off and allow to cool for at least two minutes. Relight burner and burn on high for at least five minutes or until the ceramic tiles are evenly glowing red. Ensure that no more than 75% of the grill surface is covered by objects or accessories. Turn burner off and allow to cool for at least two minutes, then relight. Allow burner to cool and inspect very closely for cracks. If any cracks are found, contact your authorized Ultra Chef dealer to order a replacement burner assembly. Pilot will not light. (if equipped) Leaking gasket surrounding the ceramic tile, or a weld failure in the burner housing. Lack of gas. Obstruction in pilot orifice. Electrode wire loose or off. Dirty pilot electrode. Pilot is actually lit. Contact your authorized Ultra Chef dealer for instructions on ordering a replacement burner assembly. After turning pilot knob to high, wait approximately seconds for air to purge the gas supply line while pressing igniter. Fill propane cylinder. During initial set-up or after tank has been refilled, it is best to light one of the tube burners before lighting the pilot burner. This enables the gas to reach the valves on the manifold more quickly. Clean pilot orifice. Replace lead wire. Clean pilot electrode. The pilot flame, especially on natural gas units is very difficult to see. Place your hand 1 in. (2.5 cm) above grill surface over the pilot burner to feel for heat.
12 12 KEEP YOUR RECEIPT AS PROOF OF PURCHASE TO VALIDATE YOUR WARRANTY. Ordering Replacement Parts Warranty Information MODEL: DATE OF PURCHASE: SERIAL NUMBER: (Record information here for easy reference) Before contacting the Customer Care Department, check the NAC Website for more extensive cleaning, maintenance, troubleshooting and parts replacement instructions at www. ultrachefgrills.com. Contact the factory directly for replacement parts and warranty claims. Our Customer Care Department is available between 9 AM and 5 PM (Eastern Standard Time) at or fax at To process a claim, we must be provided with the following information: 1. Model and serial number of the unit. 2. Part number and description. 3. A concise description of the problem ( broken is not sufficient). 4. Proof of purchase (photocopy of the invoice). In some cases the Customer Care Representative could request to have the parts returned to the factory for inspection before providing replacement parts. These parts must be shipped prepaid to the attention of the Customer Care Department with the following information enclosed: 1. Model and serial number of the unit. 2. A concise description of the problem ( broken is not sufficient). 3. Proof of purchase (photocopy of the invoice). 4. Return Authorization Number - provided by the Customer Care Representative. Before contacting customer care, please note that the following items are not covered by the warranty: Costs for transportation, brokerage or export duties. Labor costs for removal and reinstallation. Costs for service calls to diagnose problems. Discoloration of stainless steel parts. Part failure due to lack of cleaning and maintenance, or use of improper cleaners (oven cleaner).
13 Ce gril doit être utilisé uniquement à l extérieur, dans un endroit bien aéré et ne doit jamais être utilisé à l intérieur d un bâtiment, d un garage, un gazebo, une véranda avec paramoustique, ou de tout autre endroit fermé. APPOSEZ LÉTIQUETTE DU NUMERO DE SERIE DU CARTON N O de série XXXXXX N O DE MODÈLE U405 CART UP405 PEDESTAL DANGER SI VOUS DÉTECTEZ UNE ODEUR DE GAZ : Fermez l alimentation en gaz à l appareil. Éteignez toute flamme nue. Ouvrez le couvercle. Si l odeur persiste, éloignez-vous de l appareil et appelez immédiatement votre fournisseur de gaz ou le service des incendies. AVERTISSEMENT Ne tentez pas d allumer cet appareil avant d avoir lu la section INSTRUCTIONS D ALLUMAGE de ce manuel. Pour votre sécurité n entreposez pas et n utilisez pas d essence ou autres liquides et vapeurs inflammables à proximité de cet ou tout autre appareil. Une bonbonne de propane de propane non branchée ne devrait pas être entreposée à proximité de cet ou de tout autre appareil. Si ces instructions ne sont pas suivies à la lettre, un feu ou une explosion pourraient s ensuivre, causant des dommages à la propriété, des blessures corporelles ou des pertes de vie. Note à l installateur : Laissez ces instructions au propriétaire du gril pour consultation ultérieure. Napoleon Appliance Corp., 214 Bayview Dr., Barrie, Ontario, Canada L4N 4Y8 Phone: (705) Fax: (705) wecare@napoleonproducts.com website: N APR 15/11

14 14 Les grils à gaz ULTRA CHEF sont fabriqués conformément aux normes strictes du Certificat d assurance de qualité mondialement reconnues ISO Les produits ULTRA CHEF sont conçus avec des composantes et des matériaux de qualité supérieure, assemblés par des artisans qualifiés qui sont fiers de leur travail. Le brûleur et le montage de la soupape subissent un test de détection de fuites et d allumage à une station de test de qualité et sont soigneusement inspectés par un technicien qualifié avant d être emballés et expediés pour garantir que vous, le client, recevez le produit de qualité dont vous vous attendez de NAPOLÉON APPLIANCE CORPORATION. GARANTIE À VIE LIMITÉE DES GRILS À GAZ ULTRA CHEF NAPOLÉON APPLIANCE CORPORATION garantit votre nouveau gril à gaz contre tous défauts concernant les matériaux et le procédé de fabrication tant et aussi longtemps que vous êtes propriétaire du gril. Cette garantie couvre : la fonte d aluminium (excluant les finis peints), les tablettes latérales SOLIDO, les tablette latérale en acier inoxydable,les embout en LUXIDIO de les tablettes latérale, les roues, les boutons de contrôle, les brûleurs en acier inoxydable, les poignées de couvercle, et l appliqué pour couvercle en acier inoxydable sous réserve des conditions suivantes. Pendant les cinq premières années, NAPOLÉON APPLIANCE CORPORATION fournira gratuitement les pièces de rechange selon son choix. De la sixième année à vie, NAPOLÉON APPLIANCE CORPORATION fournira les pièces de rechange à 50 % du prix de détail courant. Les composants tels que les plaques de brûleur en acier inoxydable, les grilles de cuisson, l allumeur (excluant les piles), la jauge de température et les soupapes en laiton sont couverts et NAPOLÉON APPLIANCE CORPORATION fournira les pièces gratuitement durant les deux premières années de la garantie limitée. Tous les autres composants tels que le régulateurs, les roulettes, les grilles de réchaud, les tuyaux et les raccords, les pièces d assemblage et les accessoires sont couverts et NAPOLÉON APPLIANCE CORPORATION fournira les pièces gratuitement durant la première année de la garantie limitée. NAPOLÉON APPLIANCE CORPORATION n assumera aucuns frais d expédition, de main-d oeuvre ou de taxes d exportation. CONDITIONS ET LIMITATIONS NAPOLÉON APPLIANCE CORPORATION garantit ses produits contre tous défauts de fabrication à l acheteur d origine seulement à condition que l achat ait été fait par l entremise d un représentant autorisé ULTRA CHEF et sous réserve des conditions et limitations suivantes. Cette garantie d usine n est pas transférable et ne peut être prolongée par aucun de nos représentants qu elle qu en soit la raison. Le gril à gaz doit être installé par un installateur ou entrepreneur qualifié. L installation doit être faite conformément aux instructions d installation incluses avec le produit et à tous les codes d incendie et de construction locaux et nationaux. Cette garantie limitée ne couvre pas les dommages causés par un usage impropre, un manque d entretien, feux de graisse, un environnement inadéquat, un accident, des modifications, de l abus ou de la négligence. L installation de pièces d autres fabricants annulera cette garantie. Cette garantie limitée ne couvre pas non plus les éraflures, les bosselures, la corrosion ou la décoloration causés par la chaleur ou les produits d entretien chimiques et abrasifs ni l écaillage des pièces de porcelaine émaillée ni les composantes utilisées dans l installation du gril à gaz. Dans le cas d une détérioration des composantes causant un mauvais fonctionnement pendant la période couverte par la garantie, un remplacement part des composantes sera effectué. Au cours de la première année seulement, cette garantie s applique à la réparation ou au remplacement des pièces garanties dont les matériaux ou la fabrication sont défectueux à la condition que le produit ait été utilisé conformément aux instructions d opération et dans des conditions normales. Après la première année, selon cette Garantie à vie limitée du Président NAPOLÉON APPLIANCE CORPORATION peut, à sa discrétion, se libérer complètement de toutes ses obligations en ce qui concerne cette garantie en remboursant à l acheteur d origine le prix de gros de toutes pièces garanties qui sont défectueuses. NAPOLÉON APPLIANCE CORPORATION ne sera pas responsable de l installation, main-d oeuvre ou autres coûts ou dépenses relatives à la réinstallation d une pièce garantie car de telles dépenses ne sont pas couvertes par cette garantie. Nonobstant toutes les dispositions contenues dans cette Garantie à vie limitée du Président, la responsabilité de NAPOLÉON APPLIANCE CORPORATION sous cette garantie est définie comme ci-dessus et elle ne s appliquera à aucun dommage accidentel, consécutif ou indirect. Cette garantie définit les obligations et responsabilités de NAPOLÉON APPLIANCE CORPORATION en ce qui concerne le gril à gaz ULTRA CHEF. Tout autre garantie énoncée ou implicite en ce qui concerne ce produit, ses composantes ou accessoires est exclue. NAPOLÉON APPLIANCE CORPORATION n endosse ni n autorise aucun tiers à assumer en son nom, tout autre responsabilité concernant la vente de ce produit. NAPOLÉON APPLIANCE CORPORATION ne se tiendra pas responsable d une surchauffe ou d explosions causées par des conditions environnementales tel que des vents forts ou une ventilation inappropriée. Tous dommages causés au gril par la température, un usage abusif ou l utilisation de produits d entretien chimiques ou abrasifs ne seront pas la responsabilité de NAPOLÉON APPLIANCE CORPORATION. La facture ou une copie sera requise ainsi que le numéro de série et de modèle du gril lors d une réclamation auprès de NAPOLÉON APPLIANCE CORPORATION. NAPOLÉON APPLIANCE CORPORATION se réserve le droit de demander à son représentant d inspecter tous produits ou pièces avant d approuver les réclamations. NAPOLÉON APPLIANCE CORPORATION n assumera aucun frais de transport, de main-d oeuvre ou taxes d exportation.
15 AVERTISSEMENT! Si ces instructions ne sont pas suivies, des dommages matériels, des blessures corporelles ou des pertes de vie pourraient s ensuivre. Lisez et respectez tous les avertissements et les instructions de ce manuel avant de faire fonctionner le gril. Pratiques Sécuritaires D utilisation Ce gril à gaz doit être assemblé conformément aux instructions du manuel. Si le gril a été assemblé en magasin, vous devez réviser les instructions d assemblage afin de confirmer que le gril ait été assemblé correctement et aussi pour effectuer un test de détection de fuite avant d utiliser le gril. Lire le manuel d instructions au complet avant d utiliser le gril. Ce gril doit être utilisé uniquement à l extérieur, dans un endroit bien aéré et ne doit jamais être utilisé à l intérieur d un bâtiment, d un garage, un gazebo, une véranda avec paramoustique, ou de tout autre endroit fermé. Ce gril à gaz n est pas conçu pour être installé dans ou sur des véhicules récréatifs et/ou des bateaux. N installez pas le gril dans un endroit venteux. Les vents forts nuiront à la performance de cuisson de votre gril. Ce gril ne devra être modifié en aucun cas. Ne pas utiliser le gril sous une construction inflammable quels. Respecter les dégagements recommandés des matériaux inflammables (20 (508mm) à l arrière du gril et 6 (152mm) sur les côtés). Une distance plus grande 24 (610mm)est recommandée à proximité d un recouvrement de vinyle ou d une surface vitrée. Lorsque le gril n est pas utilisé, l alimentation en gaz doit être fermée à la bonbonne de propane ou à la soupape d alimentation du gaz naturel. Ne pas tenter d utiliser une bonbonne qui n est pas équipée d un raccord de type QCC1. Lorsque la bonbonne de propane n est pas débranchée du gril, la bonbonne et le gril doivent être entreposés à l extérieur, dans un endroit bien aéré. Lorsque le gril doit être entreposé à l intérieur, la bonbonne de propane doit être débranchée du gril et entreposée à l extérieur dans un endroit bien aéré, hors de la portée des enfants. Les bonbonnes de propane ne doivent en aucun temps être entreposées à l intérieur d un bâtiment, d un garage ou de tout autre endroit fermé. Les appareils au gaz naturel doivent être débranchés de leur source d alimentation en gaz lorsqu ils sont entreposés à l intérieur. Inspectez le tuyau d alimentation en gaz avant chaque utilisation. S il montre des signes de fendillement excessif, d usure ou s il est coupé, il doit être remplacé par un ensemble de rechange spécifié par le fabricant avant d utiliser le gril. Ne pas passer le tuyau d alimentation sous le tiroir d égouttement afin de garder une distance raisonnable entre le tuyau et le fond du gril. Ne faites pas passer le tuyau d alimentation en gaz derrière la patte avant. Le tuyau doit passer devant la patte avant afin de respecter le dégagement recommandéentre le tuyau et le fond de l appareil (si c est approprié). Faire un test de fuites avant la première utilisation, annuellement et à chaque fois qu une composante de gaz est changée. Suivre les instructions d allumage à la lettre lorsque vous utilisez votre gril. Les soupapes des brûleurs doivent être fermées lorsque vous ouvrez la soupape d alimentation en gaz. Le couvercle doit être fermé lors de la période de préchauffage du gril sur tous les modèles à l exception du BISZ300NFT/PFT et du brûleur latéral BISB245. Votre gril encastré (BISZ300NFT/PFT) et brûleur latéral (BISB245) est fourni avec un couvercle plat servant pour le rangement et la protection contre les intempéries. Ne placez jamais ce couvercle sur le gril lorsque celui-ci est chaud ou en fonction. Laissez le gril refroidir complètement avant de placer le couvercle. Les adultes et particulièrement les enfants doivent être sensibilisés aux risques que représentent les surfaces exposées à des températures élevées. Surveillez les jeunes enfants lorsqu ils sont près du gril. Ne pas laisser le gril sans surveillance lorsqu il est allumé. Ne pas allumer le gril avec le couvercle fermé. Ne pas utiliser le brûleur arrière en même temps que le brûleur principal. Ne pas déplacer le gril pendant qu il fonctionne ou qu il est chaud. N utilisez pas le plateau à condiments pour entreposer des briquets, des allumettes ou autres matériaux inflammables. Gardez les fils électriques et les tuyaux d alimentation en gaz éloignés des surfaces chauffantes. S assurer que les plaques du brûleur sont bien en place selon le livre d instructions. Les trous doivent être placés vers l avant du gril (si c est approprié). Nettoyer le tiroir d égouttement et les plaques du brûleur régulièrement pour éviter les feux de graisse. Enlever la grille-réchaud avant d allumer le brûleur arrière. La chaleur intense pourrait l endommager. Inspecter les tubes de venturi des brûleurs infrarouges pour de toiles d araignées ou toutes autres obstructions régulièrement. Ne pas permettre à l eau froide (pluie, arrosoir, boyeau d arrosage etc) de venir en contacte avec le gril chaud. Une grande différence de température pourrait causer l éclatement de la porcelaine. Ne pas permettre à l eau froide (pluie, arrosoir, boyeau d arrosage etc) de venir en contacte avec les brûleurs en céramique. Une grande différence de température pourrait causer la céramique à fissurer. N utilisez pas un pulvérisateur pour nettoyer l appareil. 15
16 16 Information Générale Ce gril à gaz est certifié selon les normes nationales Canadiennes et Américaines, CAN/CGA-1.6b-2002 et ANSI Z21.58b-2002 respectivement pour des grils a gaz pour l exterieur et son installation devrait être conforme aux codes locaux. En l absence de codes locaux, installez selon les normes courantes CAN/CSA-B149.1 du code d installation de Propane au Canada ou selon les normes ANSIZ223.1 du National Fuel Gas aux États-Unis. Si un moteur de rôtissoire est utilisé, il doit être électriquement mis à la terre conformément aux codes locaux ou, en l absence de tels codes, conformément à la version courante du code CSA C22.1 électrique canadien ou au code ANSI/NFPA 70 aux États-Unis. Proposition 65 de la californie : La combustion de gaz crée des sous-produits, parmi lesquels certains se retrouvent sur la liste de substances connues par l état de Californie comme causant le cancer ou autres dangers pour la reproduction. Lorsque vous cuisinez avec le gaz, assurez-vous de toujours avoir une ventilation adéquate afin de minimiser l exposition à ces substances. Spécifications Pour La Bonbonne De Propane AVERTISSEMENT! Si ces instructions ne sont pas suivies à la lettre, un incendie pourrait s ensuivre, causant des blessures graves ou la mort. Une bonbonne bosselée ou rouillée peut être dangereuse et devrait être vérifiée par votre fournisseur de propane. N utilisez jamais une bonbonne avec une soupape endommagée. Utilisez uniquement une bonbonne de propane fabriquée et étiquetée selon la Norme nationale du Canada CAN/CSA-b339, Bouteilles et tubes utilisés pour le transport des marchandises dangereuses ; et selon la norme de la Commission canadienne des Transports, s il y a lieu, ou selon la norme du US Department of Transportation (DOT). Cet appareil a été conçu pour être utilisé avec une bonbonne de propane de 20 livres (9.1kg) uniquement (non fournie). La bonbonne de propane doit être équipée d un système de raccordement compatible avec le raccord des appareils de cuisson extérieurs. La bonbonne de propane doit être équipée d une soupape d arrêt se raccordant à une soupape de type QCC1. Une valve de sécurité doit être branchée directement sur la bonbonne. Le système d alimentation de la bonbonne doit être installé de manière à permettre l évacuation des vapeurs et doit avoir un collet pour protéger la soupape de la bonbonne. La bonbonne doit être munie d un dispositif de détection de trop-plein. Ne rangez pas de bonbonne de propane de rechange sous cet appareil ou à proximité. Ne remplissez jamais la bonbonne à plus de 80 pour cent de sa pleine capacité. Si ces consignes ne sont pas suivies à la lettre, un feu pourrait s ensuivre, causant des blessures sérieuses ou des pertes de vie. N utilisez que l ensemble de régulateur de pression et de tuyau fourni avec ce gril. Les ensembles de régulateur de pression et tuyaux de rechange doivent être recommandés par le fabricant. N entreposez pas de bonbonne de propane ou de bonbonne de rechange sur l étagère sous le gril. Le régulateur fourni une pression de 11 pouces de colonne d eau au gril. Le gril possède un raccord de type QCC1. Les bonbonnes utilisées avec ce gril doivent être munies d une soupape QCC1. Une soupape QCC1 possède un raccord qui empêche l écoulement du gaz jusqu à ce qu un joint étanche soit obtenu. Elle est aussi équipée d un dispositif de contrôle d écoulement du gaz. Afin d obtenir un débit maximal de gaz, les soupapes du gril doivent être fermées lorsque vous ouvrez la soupape de la bonbonne. Instructions De Branchement Du Gaz AVERTISSEMENT! Le tuyau doit être fixé de façon à ce qu aucune partie du boyau ne touche le dessous du gril ou le tiroir d égouttement. Si vous ne suivez pas ces instructions à la lettre, un feu en résultera. Raccord De La Bonbonne: Assurez-vous que le tuyau de gaz est sans anomalie. Enlevez les bouchons sur la soupape de gaz à la bonbonne. Connectez le régulateur QCC1 sur la soupape de gaz QCC1. Serrez à la main dans le sens des aiguilles d une montre. N utilisez pas d outil. Faites un test de fuites sur tous les raccords avant d utiliser le gril. Un test de fuites doit être fait annuellement et à chaque fois qu une bonbonne est remplacée ou qu une pièce du système de gaz est remplacée. Si le gril est branché directement au réservoir de propane de la maison, suivez les instructions pour le branchement au gaz naturel. Vous devez aussi suivre les instructions pour le branchement au gaz naturel pour les brûleurs latéraux optionnels. Note : le protecteur de chaleur n est pas requis lorsque le gril est branché à un système fixe d alimentation en gaz puisque sa fonction est d agir comme écran à la bonbonne de propane qui se trouve habituellement à l intérieur du gril. Assurez-vous que la pression d alimentation au gril soit de 11 pouces de colonne d eau.

17 Installation De La Bonbonne De Propane: Placez la bonbonne dans le socle. Assurez-vous que la soupape ne fait pas face au gril. Abaissez le support de montage du réservoir sur la bonbonne et fixez-le avec un écrou papillon. IMPORTANT! Assurez-vous que le tuyau est dirigé vers le côté avant de la patte afin de maintenir un dégagement approprié au-dessous de l unité. Branchement Au Gaz Naturel: Ce gril à gaz naturel est équipé d un boyau d alimentation de 10 pieds (incluant un système de déconnexion rapide) conçu pour un branchement au gaz naturel et certifié pour une utilisation extérieure. Ce gril à gaz a été conçu pour fonctionner à une pression d alimentation de 7 pouces de colonne d eau. Les tuyaux et les soupapes en amont du système de déconnexion rapide ne sont pas fournis L installation doit être conforme à la norme CAN B149.1 du Code d installation du gaz naturel et du propane au Canada, ou à la norme ANSI Z223.1 du National Fuel Gas Code aux États-Unis. Vous devez avoir une pipe de conducteur hors du quat d adé de gaz pour fournir ce gril le gaz de BTU/h indiqué sur la plaque de contrôle, basée sur la longueur de la course de tuyauterie. Le système de déconnexion rapide ne doit pas être installé verticalement et une soupape d arrêt manuelle, facilement accessible, doit être installée en amont, aussi près que possible du système de déconnexion rapide. Le bout évasé du tuyau doit être raccordé au raccord à l extrémité du tube flexible tel qu illustré dans le schéma de branchement du tuyau de gaz naturel. Serrez en utilisant deux clés. (N utilisez pas d enduits d étanchéité pour raccords filetés ou de composé pour raccord de tuyau.) Ces branchements doivent être effectués par un installateur de gaz qualifié. Faites un test de détection de fuites sur tous les raccords avant d utiliser le gril. IMPORTANT! Assurez-vous que le tuyau est dirigé vers le côté avant de la patte afin de maintenir un dégagement approprié au-dessous de l unité. Appareils Sans Brûleur Latéral: Raccordez le bout évasé du tuyau au raccord qui est au bout du tube collecteur. Resserrez avec une clé. (N utilisez pas de scellant/enduit à tuyaux). Appareils Avec Brûleur Latéral: Raccordez le tuyau de 20 à partir du collecteur, à travers la bague de fixation au-dessous de la base, au côté du brûleur comme montré. Installez le coude de 90 o faisant face à l arrière de l unité. Raccordez le tuyau d alimentation à ce coude et le bout évasé du tuyau d alimentation au brûleur latéral. Resserrez avec une clé tous les raccords. (N utilisez pas de scellant/enduit à tuyaux). AVERTISSEMENT! L installation doit être effectuée par un installateur certifié pour le gaz et tous les raccordements doivent être testés pour des fuites avant de faire fonctionner le gril. Ne pas passer le tuyau d alimentation sous le tiroir d égouttement. Ne passez pas le boyau entre l espace dans la tablette inférieure et le panneau arrière. N acheminez pas le boyau par-dessus le panneau arrière. Assurez-vous que tous les raccordements de boyaux sont serrés à l aide de deux clés. N utilisez pas de ruban de Téflon ou de composé pour raccord de tuyau sur les raccordements. Vérifiez pour des fuites de gaz en appliquant une solution d eau savonneuse selon les instructions de détection de fuites dans de manuel. Assurez-vous que le boyau ne touche à aucune surface à haute température sinon il risque de fondre, de provoquer une fuite et causer un feu. Test De Détection De Fuites AVERTISSEMENT! Il doit être fait avant la première utilisation, annuellement et à chaque fois qu une pièce du système de gaz est remplacée ou réparée AVERTISSEMENT! N utilisez pas une flamme nue pour vérifier pour des fuites de gaz. Assurez-vous qu il n y ait aucune étincelle ni flamme nue à proximité de l endroit à vérifier. Les étincelles ou les flammes nues provoqueront un feu ou une explosion, causant des dommages matériels, des blessures graves ou des pertes de vie. Test De Fuites: Il doit être fait avant la première utilisation, annuellement et à chaque fois qu une pièce du système de gaz est remplacée ou réparée. Ne fumez pas et enlevez toutes sources d allumage lorsque vous faites ce test. Consultez le schéma de test de fuites pour voir les endroits à tester. 1 - Fermez tous les boutons des brûleurs. Ouvrez la soupape de la bonbonne. 2 - Appliquez une solution de deux parts égales de savon liquide et d eau sur tous les joints du régulateur, le tuyau et ses raccords. 3 - Des bulles indiqueront une fuite de gaz. Resserrez le joint ou remplacez la pièce avec une autre recommandée par le détaillant. 4 - Si la fuite ne peut être réparée, fermez l alimentation de gaz à la bonbonne, enlevez-la et faites inspecter votre gril par votre fournisseur de gaz ou détaillant. N utilisez pas l appareil jusqu à ce que la fuite soit réparée. 5 - Fermez la soupape de la bonbonne. 17
18 18 Instruction D allumage Bruleur d arriere Access d alumage Bouton d allumeur Brûleur de gauche Brûleur de Centre Brûleur de droite AVERTISSEMENT! Ouvrir le couvercle. Fermez AVERTISSEMENT! Fermez tous les boutons de contrôle des brûleurs, ouvrez la soupape d alimentation en gaz lentement. Allumage du tube brûleur principal Allumage du brûleur arrière Allumage du brûleur infrarouge. (si équipé) Allumage de brûleur latéral (si équipé) 1. Ouvrir le couvercle 1. Ouvrir le couvercle 1. Ouvrir le couvercle 1. Ouvrir le couvercle du brûleur. 2. Tourner la commande du brûleur de gauche à HIGH. 2. Retirez la grille de réchaud et la grille de réchaud pivotante. 2. Tournez le bouton du brûleur infrarouge sur high. 2. Tourner la commande du brûleur latéral à HIGH. 3. Poussez et tenir la bouton d allumeur ou allumez avec une allumette. 4. Si l allumage n est pas instantané, tourner la commande du brûleur à la position d arrêt et attendre cinq minutes. 3. Allumer l allumette et la tenir aux ports du côté gauche du brûleur arrière. 4. Tourner la commande du brûleur arrière à HIGH. 3. Poussez et tenir la bouton d allumeur ou allumez avec une allumette. 4. Si l allumage ne se fait pas immédiatement, fermez le bouton de contrôle du brûleur et attendez 5 minutes. 3. Appuyer sur l allumeur à plusieurs reprises ou allumer à l aide d une allumette.. 4. Si l allumage n est pas instantané, tourner la commande du brûleur à la position d arrêt et attendre cinq minutes. 5. Avec le brûleur de gauche réglé à HIGH, tourner la commande du tube brûleur central ou de droite à HIGH. 5. Si l allumage n est pas instantané, tourner la commande du brûleur à la position d arrêt et attendre cinq minutes. AVERTISSEMENT! La bonbonne de propane est munie d un dispositif de régulation pour prévenir les débits excessifs. À moins de fermer tous les brûleurs avant d ouvrir le robinet de la bonbonne, seules de petites flammes seront possibles. AVERTISSEMENT! Ne pas utiliser le brûleur arrière pendant que le brûleur principal est en marche.
19 Instructions D opération Éclairage initial: Lorsqu il est allumé pour la première fois, le gril dégagera une légère odeur. Ceci est un phénomène normal et temporaire causé par l évaporation des peintures et lubrifiants internes utilisés dans le processus de fabrication et ne se reproduira plus. Allumez simplement les brûleurs de cuve à high pendant une demi-heure. Utilisation Du Brûleur Principal: Avant de cuire les aliments il est recommandé de préchauffer le gril à high avec le couvercle fermé pendant environ 10 minutes. Les aliments à cuisson courte (poisson, légumes) peuvent être grillés avec le couvercle ouvert. Une cuisson avec le couvercle fermé procurera des températures plus élevées et plus constantes qui réduiront la période de cuisson et cuiront la viande de façon plus égale. Les aliments qui requièrent un temps de cuisson de plus de 30 minutes, tels que les rôtis, peuvent être cuits en utilisant la méthode indirecte (avec le brûleur allumé du côté opposé à l emplacement de la viande). Lorsque vous faites cuire des viandes très maigres, comme une poitrine de poulet ou du porc maigre, il est à conseiller de huiler les grilles de cuisson avant le préchauffage ce qui aura pour effet d empêcher la viande de trop coller aux grilles. Le fait de cuire de la viande avec beaucoup de gras, peut causer des flambées soudaines. Il suffit alors d enlever le gras avant la cuisson ou de réduire la température pour remédier à ce problème. En cas de flambées, éloignez les aliments de la flamme et réduisez la température. Gardez le couvercle ouvert. Pour des instructions plus détaillées, veuillez consulter le Livre de recettes toutes saisons de NAPOLEON. Cuisson Directe: Placez les aliments à cuire sur la grille de cuisson, directement au-dessus de la chaleur. Cette méthode est habituellement utilisée pour faire saisir les aliments ou pour la nourriture nécessitant une courte cuisson - les hamburgers, les steaks, le poulet, les légumes, etc. La nourriture est d abord saisie afin d emprisonner les jus et la saveur, puis la température est réduite afin de terminer la cuisson selon vos préférences. Cuisson Indirecte: Avec un ou plusieurs brûleurs en fonction, placez la nourriture à cuire sur la grille au-dessus d un brûleur inactif. La chaleur circule autour de l aliment, ce qui le fait cuire lentement et de façon égale. Ce type de cuisson ressemble à la cuisson dans un four et est généralement utilisé pour les plus grosses pièces de viande telles que les rôtis, les poulets ou les dindes, mais il peut aussi être utilisé pour cuire la nourriture ayant tendance à produire des poussées de flamme. Ce type de cuisson diminuera la température; le ralentissement de la cuisson donnera une viande plus tendre à chaque fois. Utilisation Du Brûleur Arrière: (si équipé) Enlevez la grille-réchaud avant de l allumer. Les grilles de cuisson doivent également être enlevées si elles interfèrent avec l utilisation de la rôtissoire. Le brûleur arrière est conçu pour être utilisé avec l ensemble de rôtissoire. Consultez les instructions de montage de l ensemble rôtissoire pour plus de détails. Pour placer le contre-poids au bon endroit enlevez le moteur de la rôtissoire de son support. Placez la broche qui supporte la viande sur les deux supports à l intérieur du gril. Le morceau de viande se placera naturellement avec son côté le plus pesant vers le bas. Fixez le contre-poids en place en plaçant le bras vers le haut. Vous devez ensuite glisser le poids vers le haut ou vers le bas afin de contrebalancer le poids de la viande puis serrez- le en place. Replacez le moteur et commencez la cuisson. Placez la lèchefrite sous la viande pour récupérer le jus de cuisson qui servira pour arroser la viande et créer ainsi une délicieuse sauce naturelle. On peut également ajouter un peu d eau si nécessaire pour favoriser l arrosage. Afin de capturer le jus à l intérieur de la viande, réglez le brûleur arrière à high jusqu au brunissement puis, réduisez ensuite la chaleur pour une cuisson complète. Gardez le couvercle fermé pour obtenir de meilleurs résultats. Vos rôtis et volailles seront parfaitement dorés à l extérieur tout en restant tendres et juteux à l intérieur. Par exemple, un poulet de 3 livres sur la rôtissoire sera cuit dans approximativement 1h30 à une température entre moyenne et haute. Consultez votre Livre de recettes toutes saisons de NAPOLEON pour de plus amples informations. AVERTISSEMENT! La sauce BBQ et le sel sont corrosifs et causeront une détérioration rapide des composantes de votre gril à gaz à moins de les nettoyer régulièrement. Une fois la cuisson terminée, démontez les composantes de la rôtissoire, lavez-les bien à l eau chaude savonneuse et rangez-les à l intérieur. Utilisation Des Brûleurs Latéraux (si équipé) : Les brûleurs latéraux peuvent être utilisés comme un rond de cuisinière normal pour chauffer les sauces, les soupes etc. Le gril doit être placé de manière à ce que le vent n affecte pas le fonctionnement des brûleurs latéraux car il en réduirait la performance. AVERTISSEMENT! Ne faites jamais cuire des aliments sur les grilles des brûleurs latéraux. Elles Sont spécifiquement conçues pour les chaudrons et les casseroles. 19
20 20 Nettoyage AVERTISSEMENT! Portez toujours des gants protecteurs et des lunettes de sécurité lorsque vous nettoyez votre gril. AVERTISSEMENT! Assurez-vous que les brûleurs sont éteints avant de nettoyer. Éviter tout contact avec les surfaces chaudes. Nettoyez votre gril dans un endroit où les produits de nettoyage n endommageront pas votre patio, terrain ou terrasse. N utilisez pas de produit de nettoyage à fourneau pour nettoyer votre gril. La sauce BBQ et le sel sont très corrosifs et causeront une détérioration très rapide de votre gril à moins que vous ne fassiez un nettoyage régulier. Note : L acier inoxydable a tendance à s oxyder ou à tacher en présence de chlorures et de sulfures que l on retrouve particulièrement dans les zones côtières ainsi que dans les environnements chauds et humides tels que les piscines et les spas. Ces taches peuvent être prises pour de la rouille mais il peuvent être facilement enlevées et même évitées. Afin de prévenir les taches, nettoyez toutes les surfaces en acier inoxydable à toutes les trois à quatre semaines ou au besoin avec de l eau douce et un nettoyant à acier inoxydable. Grilles de cuisson et grille de réchaud : Les grilles de cuisson et la grille de réchaud sont plus faciles à nettoyer durant la période de préchauffage en utilisant une brosse en laiton. Une laine d acier peut être utilisée pour les taches les plus tenaces. Il est normal que les grilles de cuisson en acier inoxydable (s il y a lieu) décolorent de façon permanente à l usage en raison des températures élevées de la surface de cuisson. Grilles de cuisson en fonte : Les grilles de cuisson en fonte incluses avec votre nouveau gril offrent une rétention et une distribution supérieures de la chaleur. En huilant vos grilles de cuisson, vous vous trouvez à ajouter une couche de protection qui aidera les grilles à mieux résister contre la corrosion et à augmenter les caractéristiques antiadhésives. Première utilisation : Nettoyez les grilles de cuisson à la main avec un savon à vaisselle doux et de l eau afin d enlever tout résidu provenant du procédé de fabrication (ne jamais laver au lave-vaisselle). Rincez bien avec de l eau chaude et séchez complètement avec un linge doux. Ceci est important pour éviter que de l humidité pénètre la fonte. Entretien : À l aide d un linge doux, appliquez une couche de SHORTENING VÉGÉTAL sur toute la surface de la grille en vous assurant de couvrir toutes les encoches et les coins. N utilisez pas de corps gras salés comme du beurre ou de la margarine. Préchauffez votre gril pendant 15 minutes, puis placez les grilles de cuisson dans le gril. Tournez les boutons de commande à feu moyen puis fermez le couvercle. Laissez les grilles de cuisson chauffer environ une demi-heure. Éteignez le brûleur et fermez l alimentation en gaz à la source. Laissez refroidir les grilles de cuisson. Cette procédure devrait être répétée plusieurs fois durant la saison, bien qu elle ne soit pas requise à chaque utilisation du gril (suivez la procédure d utilisation quotidienne ci-dessous). Utilisation quotidienne : Avant de préchauffer et de nettoyer avec une brosse en laiton, appliquez une couche de SHORTENING VÉGÉTAL sur toute la surface des grilles. Préchauffez le gril et enlevez tous les résidus avec une brosse en laiton. Grilles de cuisson en acier inoxydable : (ensemble de remplacement disponible consulter la liste des pièces de rechange). Les grilles de cuisson en acier inoxydable sont durables et à l épreuve de la corrosion. Elles nécessitent moins d entretien que les grilles de cuisson en fonte. Nous vous recommandons de suivre la procédure d utilisation quotidienne décrite plus haut, bien que le préchauffage et le nettoyage avec une brosse en laiton puissent s avérer suffisants pour vos besoins. Nettoyage Du Panneau De Contrôle : Le texte sur le panneau de contrôle est imprimé directement sur l acier inoxydable. Avec un entretien adéquat, le texte demeurera toujours foncé et lisible. N utilisez pas de détergents abrasifs (Ajax, Vim, Old Dutch etc.) pour nettoyer les surfaces en acier inoxydable, spécialement la partie imprimée du panneau de contrôle. Le texte disparaîtra graduellement si vous utilisez ces produits. Utilisez seulement le nettoyant d acier inoxydable, disponible chez votre détaillant Ultra Chef. Nettoyage De L intérieur Du Gril: Enlevez les grilles de cuisson. Utilisez une brosse en laiton pour enlever les débris non-incrustés sur les côtés de la cuve et à l intérieur du couvercle. Grattez les plaques de brûleur avec un couteau à mastic ou un grattoir puis utilisez une brosse en laiton pour enlever la suie. Enlevez les plaques de brûleur et nettoyez les débris sur le brûleur à l aide de la brosse. Nettoyez tous les débris qui se trouvent à l intérieur du gril en les faisant tomber dans le tiroir d égouttement. Le tiroir d égouttement devrait être gratté à l aide d un couteau à mastic ou d un grattoir en jetant les débris dans le récipient à graisse jetable. Le récipient jetable devrait être remplacé entre deux et quatre semaines selon la fréquence d utilisation du gril. Pour vous procurer des récipients de rechange informez-vous à votre représentant. Assurez-vous de replacer les plaques de brûleur dans la bonne position. (Consultez les instructions de montage si nécessaire pour un positionnement correct).
21 Tiroir d égouttement : L accumulation de graisse peut créer un risque de feu. Nettoyez le tiroir d égouttement fréquemment (à toutes les 4 ou 5 utilisations ou au besoin) afin d éviter une accumulation de graisse. La graisse et les jus de cuisson tombent dans le tiroir d égouttement qui se trouve sous la cuve du gril et s accumulent dans le récipient à graisse jetable qui se situe sous le tiroir d égouttement. Pour accéder au récipient à graisse jetable ou pour nettoyer le tiroir d égouttement, glissez ce dernier hors du gril. Ne tapissez jamais votre tiroir d égouttement de papier d aluminium, de sable ou de tout autre matériau, car ceci aurait pour effet de nuire au bon écoulement de la graisse. Le tiroir d égouttement devrait être gratté à l aide d un couteau à mastic ou d un grattoir. Remplacez le récipient à graisse jetable toutes les deux à quatre semaines selon la fréquence d utilisation du gril. Pour vous procurer des récipients de rechange, consultez votre détaillant de gril Ultra Chef. Nettoyage De L extérieur Du Gril: N utilisez pas de produits abrasifs pour nettoyer les pièces peintes, de fini porcelaine ou en acier inoxydable. Les éléments en porcelaine émaillée doivent être manipulés avec soin. Le fini émaillée étant cuit il devient comme du verre; il s ébrèchera au moindre choc. Vous pouvez vous procurer de la peinture émaillée pour les retouches chez votre détaillant Ultra Chef. Utilisez une solution d eau savonneuse chaude pour nettoyer l extérieur du gril pendant qu il est encore tiède au toucher. Pour nettoyer les surfaces en acier inoxydable utilisez un produit de nettoyage à acier inoxydable ou un produit de nettoyage tout usage sans abrasif. Frottez toujours dans le sens du grain. N utilisez pas de laine d acier car elle égratignerait le fini. Les pièces en acier inoxydable vont décolorer sous l effet de la chaleur pour habituellement prendre une couleur dorée ou brune. Cette décoloration est normale et n affectera pas la performance du gril. Les Tablettes Latérales En Solido: Nettoyez les tablettes latérales à l aide d une solution d eau savonneuse chaude et d une brosse de nylon. Instructions D entretien Nous vous conseillons de faire inspecter ce gril à gaz annuellement par un technicien de service qualifié. AVERTISSEMENT! Portez toujours des gants protecteurs et des lunettes de sécurité lorsque vous nettoyez votre gril. AVERTISSEMENT! Fermez le gaz à la source et débranchez l appareil avant l entretien. L entretien devrait être effectué seulement lorsque le gril est froid pour éviter toutes possibilités de brûlure. Un test de détection de fuites devrait être effectué annuellement ou à chaque fois qu une composante de gaz est remplacée. Ajustement De L air De Combustion (ceci doit être effectué par un installateur qualifié): Le volet d air est réglé à l usine et ne devrait pas avoir besoin normalement d être ajusté. Cependant dans des conditions exceptionnelles un ajustement peut être requis. Lorsque le volet d air est bien ajusté, les flammes seront bleues foncées avec des pointes bleues pâles ou quelques fois jaunes. Si le brûleur ne reçoit pas assez d air, les flammes seront jaunes pâles et produiront possiblement de la suie. Si le brûleur reçoit trop d air, les flammes scintilleront de façon erratique et causeront possiblement des problèmes d allumage. Pour ajuster le volet d air: 1, Enlevez les grilles de cuisson, les plaques de brûleur et laissez le couvercle ouvert. Il sera peut-être nécessaire d ouvrir la porte ou retirer le tiroir du haut pour accéder (si équipé) à la vis du volet d air. Pour ajuster le volet d air du brûleur arrière, vous devez enlevez le couvercle arrière. 2, Desserrez la vis de verroullage du volet d air et ouvrez ou fermez le volet d air selon le cas. Les ajustements normaux sont: Brûleur tube principal Propane 3/16 (5mm) Brûleur tube arrière Propane 3/8 (10mm) Naturel 1/8 (3mm) Naturel 1/8 (3mm) *Les brûleurs infrarouges n ont pas de réglage de volet d air. 3, Allumez les brûleurs et positionnez-les à high. Inspectez visuellement les flammes. Lorsque les volets sont ajustés, éteignez les brûleurs, serrez la vis de verrouillage et replacez les pièces qui avaient été enlevées. Assurez-vous que les petits grillages contre les insectes sont installés. Pointe Jaune Bleu Pâle Brûleur Orifice du Brûleur 21 Bleu Foncé Environ 1/2 (13mm)

22 22 Brûleur Tube: Le brûleur est fait d acier inoxydable 304, mais en raison de la chaleur extrême et d un environnement corrosif, il se produira une corrosion de surface. Enlevez cette corrosion à l aide d une brosse en laiton. Nettoyez les orifices bouchées à l aide d un trombonne déplié. N agrandissez surtout pas les orifices du brûleur. ATTENTION! Aux Araignées Les araignées et les insectes sont attirés par l odeur du propane et du gaz naturel. Le brûleur est muni d un grillage contre les insectes qui protège le volet d air réduisant ainsi la possibilité que les insectes se construisent des nids dans le brûleur mais ceci n est pas efficace à 100 %. Le nid ou la toile d araignée fera que le brûleur produira une flamme jaune pâle ou orangée ou causera des ratés de feu au niveau des volets d air sous le panneau de contrôle. Pour nettoyer l intérieur du brûleur vous devez le détacher du gril. Retirez la vis qui fixe le brûleur à la paroi arrière du gril. Soulevez l arrière du brûleur vers le haut pour le retirer. Utilisez une brosse flexible de tube de venturi pour nettoyer l intérieur du brûleur. Faites sortir tous les débris qui se trouvent à l intérieur du brûleur en le brossant. En raison des débris de cuisson et de la corrosion, les orifices de brûleur peuvent se boucher avec le temps. Nettoyez les orifices bouchés à l aide de ce foret inséré dans une petite perceuse sans fil. Les orifices du brûleur peuvent être nettoyés si le brûleur est en place. Toutefois, le nettoyage sera plus facile si le brûleur est retiré du gril. Ne pliez pas le foret en nettoyant les orifices, car le foret casserait. Ce foret doit être utilisé pour les orifices de brûleur seulement. Ne l utilisez pas pour les orifices en laiton (jets) qui servent à régulariser le débit vers le brûleur. Assurez-vous que le grillage est propre, serré et libre de tous débris ou déchets. Vérifiez également que les orifices de la soupape sont propres. N agrandissez surtout pas les orifices. Réinstallez le brûleur. Assurez-vous que la soupape pénètre le brûleur lors de la réinstallation. Replacez le couvre-brûleur et la vis centrale afin de terminer l installation. AVERTISSEMENT! Lors de la réinstallation du brûleur après le nettoyage, il est très important que la soupape / l orifice entre dans le brûleur avant que vous allumiez votre gril à gaz. Si la soupape n est pas à l intérieur du brûleur, un feu ou une explosion pourrait survenir. AVERTISSEMENT! Boyau: Vérifiez l usure, coupures, craquelures ou s il est fondu. Si vous découvrez une de ces défectuosités, n utilisez pas votre gril. Faites remplacer la pièce par votre détaillant Ultra Chef ou par un installateur qualifié. Moulages En Aluminium: Nettoyez les moulages périodiquement à l aide d une solution d eau savonneuse chaude. L aluminium ne rouillera pas mais dû aux chaleurs élevées et aux effets climatiques, une oxydation se produira sur les surfaces d aluminium. Ceci apparaîtera comme des taches blanches sur les moulages. Pour réparer le fini des moulages, sablez-les à l aide d un papier émeri fin. Essuyez la surface et peinturez avec de la peinture à gril haute température. Protégez les alentours des vapeurs de peinture. Suivez les directives de séchage inscrites sur la bonbonne de peinture.
23 Guide De Dépannage 23 Problème Causes possibles Solutions Faible chaleur/petite flamme lorsque le bouton de contrôle est à high. Pour le propane - procédure d allumage incorrect. Assurez-vous que la procédure d allumage est suivie à la lettre. Tous les boutons de contrôle du gril doivent être fermés lorsque vous ouvrez la soupape de la bonbonne. Tournez la soupape de la bonbonne lentement pour assurer l équilibre de la pression. Voir les instructions d allumage. Poussées de flamme excessives/ chaleur inégale. Pour le gaz naturel - tuyau d alimentation trop petit. Pour les deux sortes de gaz - mauvais préchauffage. Plaques de brûleur mal installées. Mauvais préchauffage Accumulation excessive de graisse et de cendres sur les plaques de brûleur et dans le tiroir d égouttement. La grosseur du tuyau doit être conforme au code d installation. Préchauffez le gril en allumant les brûleurs de cuve à high pendant 5 à 10 minutes. Assurez-vous que les plaques sont installées avec les trous vers l avant et les fentes en dessous. Voir les instructions d assemblage. Préchauffez le gril en allumant les brûleurs de cuve à high pendant 5 à 10 minutes. Nettoyez les plaques de brûleur et le tiroir d égouttement régulièrement. Ne tapissez pas le tiroir d égouttement avec du papier d aluminium. Consultez les instructions de nettoyage. Les flammes produites par les brûleurs sont jaunes et vous détectez une odeur de gaz. Possibilité de toiles d araignée ou autres debris. Retirez le brûleur et nettoyez-le complètement. Consultez les instructions d entretien. Les flammes se détachent du brûleur, accompagnées d une odeur de gaz et possiblement une difficulté d allumage. Mauvais ajustement des volets d air. Fermez légèrement les volets d air. (ceci doit être effectué par un installateur de gaz qualifié) Le brûleur ne s allume pas avec l allumeur mais s allume avec une allumette. La pile est déchargée ou installée incorrectement. Mauvais contact des fils de l électrode et des terminaux. Le fil de l électrode est relâché. Mauvais écart du bout de l électrode. Remplacez la pile par une pile neuve. Vérifiez que les fils de l électrode sont solidement enfoncés sur le terminal du module d allumage. Vérifiez que les fils de raccordement du module au bouton d allumeur sont solidement enfoncés sur chacun de leur terminal respectif. (si équipé) Assurez-vous que le fil de l électrode soit poussé bien au fond et soit bien serré sur le terminal derrière l allumeur. Assurez-vous que le boîtier de l électrode est bien fixé et que la distance entre l électrode et le boîtier est entre 1/8 et 3/16. La distance peut être ajustée en rabattant le boîtier vers l extérieur ou vers l intérieur. Les flammes se séparent du brûleur. Fermez le volet d air légèrement - voir le problème précédent. La peinture semble peler à l intérieur du couvercle. Accumulation de graisse sur les surfaces internes. Ceci n est pas un défaut. Le fini du couvercle est en acier inoxydable et porcelainisé et ne pèlera pas. Le pelage est causé par la graisse qui durci et sèche comme des éclats de peinture qui pèlent. Un nettoyage régulier préviendra ce problème. Consultez les instructions de nettoyage.
24 24 Problème Causes possibles Solutions Les contrôles sont réglés à high mais la chaleur générée par les brûleurs est trop basse. Manque de gaz. Le tuyau d alimentation en gaz est pincé. Vérifiez le niveau de propane dans la bonbonne. Replacez le tuyau d alimentation convenablement. Le brûleur infrarouge (si équipé) produit des retours de flamme (pendant qu il fonctionne, le brûleur fait subitement un bruit qui s apparente à un whoosh, suivi d un bruit continuel semblable à une lampe à souder et qui diminue en intensité. La veilleuse ne s allume pas. (si équipé) L injecteur du brûleur est sale ou obstrué. Présence de toiles d araignée ou autres débris dans le tube du venturi. Le régulateur de propane est en situation de faible débit. Les tuiles de céramique sont surchargées de graisse de cuisson et d accumulations, les orifices sont obstrués. Le brûleur a surchauffé dû à une ventilation inadéquate (trop grande surface de cuisson recouverte par des plaques de cuisson ou des plateaux). Des tuiles de céramique sont fissurées. Le joint d étanchéité autour de la céramique n est plus étanche, ou une soudure dans le boîtier du brûleur est cassée. Manque de gaz. L injecteur de la veilleuse est obstrué. Le fil de l électrode est relâché ou débranché. L électrode de la veilleuse est sale. La veilleuse est déjà allumée. Nettoyez l injecteur du brûleur. Nettoyez le tube du venturi. Assurez-vous que la procédure d allumage est suivie à la lettre. Tous les boutons de contrôle du gril doivent être fermés lorsque vous ouvrez la soupape de la bonbonne. Tournez la soupape de la bonbonne lentement pour assurer l équilibre de la pression. Voir les instructions d allumage. Fermez le brûleur et laissez-le refroidir pendant au moins deux minutes. Réallumez le brûleur et réglez-le à high pendant au moins cinq minutes ou jusqu à ce que les tuiles deviennent uniformément incandescentes. Ne recouvrez pas plus que 75 % de la surface de cuisson avec des objets ou des accessoires. Fermez le brûleur et laissez-le refroidir pendant au moins deux minutes puis réallumez-le. Laissez le brûleur refroidir puis vérifiez de près pour des fissures. Si vous détectez des fissures, commandez un brûleur de rechange auprès de votre détaillant autorisé Ultra Chef. Contactez votre détaillant autorisé Ultra Chef pour obtenir des instructions sur l achat d un brûleur de rechange. Après avoir tourné le bouton de contrôle de la veilleuse à high, attendez environ secondes pour que l air puisse se purger de la ligne d alimentation en gaz tout en appuyant sur l allumeur. Remplissez la bonbonne de propane. Lors de l installation initiale ou après avoir rempli la bonbonne à nouveau, il est conseillé d allumer un des brûleurs de cuve avant d allumer la veilleuse. Ceci permettra au gaz de s acheminer plus rapidement vers les soupapes sur le collecteur. Nettoyez l injecteur. Réinstallez le fil. Nettoyez l électrode. La flamme de la veilleuse, spécialement sur les modèles au gaz naturel est très difficile à voir. Placez votre main à un pouce de la surface de cuisson, au-dessus de la veilleuse pour vérifier s il y a de la chaleur.
25 GARDEZ VOTRE REÇU COMME PREUVE D ACHAT POUR VALIDER VOTRE Commande De Pièces De Rechange Information Sur La Garantie 25 MODÈLE: DATE D ACHAT: NUMÉRO DE SÉRIE: (Inscrivez l information ici pour y avoir accès facilement.) Avant de contacter le département du service aux consommateurs, consultez le site Web de NAC pour obtenir plus d instructions sur le nettoyage, l entretien, le dépannage et le remplacement des pièces à. Contactez le fabricant directement pour obtenir des pièces de rechange et faire des réclamations au titre de la garantie. Le département du service aux consommateurs est à votre disposition entre 9 h et 17 h (heure normale de l Est) au ou par télécopieur au Pour qu une réclamation soit traitée, l information suivante est nécessaire : 1. Modèle et numéro de série de l appareil. 2. Numéro de la pièce et description. 3. Description concise du problème («brisé» n est pas suffisant). 4. Preuve d achat (copie de la facture). Dans certains cas, le département du service aux consommateurs peut demander de retourner la pièce pour des fins d inspection avant de fournir une pièce de rechange. Les pièces doivent être expédiées port payé à l attention du département du service aux consommateurs avec l information suivante : 1. Modèle et numéro de série de l appareil. 2. Description concise du problème («brisé» n est pas suffisant). 3. Preuve d achat (copie de la facture). 4. Numéro d autorisation de retour - fourni par le représentant du département du service aux con sommateurs. Avant de contacter le service aux consommateurs, veuillez prendre note que les items suivants ne sont pas couverts par la garantie : coûts de transport, de courtage et frais d exportation; coûts de main-d oeuvre pour l enlèvement et l installation de la pièce; coûts des appels de service pour diagnostiquer le problème; décoloration des pièces en acier inoxydable; bris des pièces causé par un manque d entretien et de nettoyage, ou par l utilisation de nettoyants inappropriés (nettoyant à fourneau).


26 26 CAUTION! During unpacking and assembly we recommended you wear work gloves and safety glasses for your protection. Although we make every effort to make the assembly process as problem free and safe as possible, it is characteristic of fabricated steel parts that the edges and corners might be sharp and could cause cuts if handled incorrectly. ATTENTION! Lors du déballage et de l assemblage, nous vous conseillons de porter des gants de travail et des lunettes de sécurité pour votre protection. Malgré tous nos efforts pour assurer que l assemblage soit aussi sécuritaire et sans problème que possible, il se peut que les bords et les coins des pièces usinées en acier soient coupants et qu ils causent des coupures si les pièces ne sont pas manipulées correctement. Getting Started 1. Remove all cart panels, hardware, and grill head from carton. Raise lid and remove any components packed inside. Use the parts list to ensure all necessary parts are included. 2. Do not destroy packaging until the grill has been fully assembled and operates to your satisfaction. 3. Assemble the grill where it is to be used, lay down cardboard or a towel to protect parts from being lost or damaged while assembling. 4. Most stainless steel parts are supplied with a protective plastic coating that must be removed prior to using grill. 5. Follow all instructions in the order that they are laid out in this manual. 6. Two people are required to lift the grill head onto the assembled cart. If you have any questions about assembly or grill operation, or if there are damaged or missing parts please call our Customer Care Department at between 9 AM and 5 PM (Eastern Standard Time). Pour Commencer 1. Retirez tous les panneaux, le matériel et le gril du carton d emballage. Soulevez le couvercle et enlevez les composants qui se trouvent à l intérieur. Servez-vous de la liste de pièces pour vous assurer que toutes les pièces nécessaires sont incluses. 2. Ne détruisez pas l emballage jusqu à ce que le gril ait été complètement assemblé et qu il fonctionne à votre satisfaction. 3. Assemblez le gril là où il sera utilisé et posez un carton ou une serviette afin d éviter de perdre ou d endommager les pièces lors de l assemblage. 4. La plupart des pièces en acier inoxydable possèdent un revêtement de plastique protecteur qui doit être enlevé avant d utiliser le gril. 5. Suivez toutes les instructions dans l ordre donné dans ce manuel. Deux personnes sont requises pour soulever la cuve de gril et la placer sur le chariot assemblé. Si vous avez des questions à propos de l assemblage ou du fonctionnement du gril, ou si des pièces sont manquantes ou endommagées, veuillez appeler notre département du Service aux Consommateurs au entre 9 h et 17 h (heure normale de l Est). TOOLS REQUIRED FOR ASSEMBLY (tools not included) OUTILS REQUIS POUR L ASSEMBLAGE (outils non inclus) 3/8 (10mm) Wrench, ratchet or driver Tournevis ou clé, cliquet de 3/8 (10mm) Flat and Philips screwdrivers Tournevis plat et phillips Pliers Pinces Hammer Marteau


27 Cart model only Modèle sur chariot seulement 27 8 X N (#14 x 2 ) 3/8 (10mm) Cart model only Modèle sur chariot seulement


 3/8")
28 28 Cart model only Modèle sur chariot seulement 8 x N (#14 x 1/2 ) 3/8 (10mm) Two people are required for this step. Deux personnnes son nécessaires pour cette étappe. Cart model only Modèle sur chariot seulement Propane Only Propane Seulement 4 x N (#14 x 1/2 ) 3/8 (10mm) 1 x N
")

29 Pedestal model only Modèle sur socle seulement 29 4 x N (#14 x 1/2 ) 3/8 (10mm) Propane Only Propane Seulement Pedestal model only Modèle sur socle seulement


30 30 Pedestal model only Modèle sur socle seulement If necessary the side panel can be tapped down with a rubber mallet. Si nécessaire, le panneau lateral peut être enfoncé avec un maillet en caoutchouc. Pedestal model only Modèle sur socle seulement 4 x N (#14 x 1/2 ) 3/8 (10mm)
 Propane Only")
 3/8 (10mm) Two people are required for")

31 Pedestal model only Modèle sur socle seulement 31 2 x N (#14 x 1/2 ) Propane Only Propane Seulement 3/8 (10mm) Pedestal model only Modèle sur socle seulement 4 x N (#14 x 1/2 ) 3/8 (10mm) Two people are required for this step. Deux personnnes son nécessaires pour cette étappe.


 2 x N570-0086 (#14 x 1/2 )")
32 32 Cart model only Modèle sur chariot seulement 2 x N (1/4-20 X 3/8 ) Push brackets to end of slots. Enfoncez les supports jusqu au fond des fetes. 3/8 (10mm) 2 x N (1/4-20 X 1 ) 2 x N (#14 x 1/2 ) Optional locking screw. Vis de verrouillage optionnelle.


33 Pedestal model only Modèle sur socle seulement 33 5 x N (#8 X1/2 ) Pedestal model only Modèle sur socle seulement 2 x N (#14 x 1/2 ) Optional locking screw. Vis de verrouillage optionnelle. Twist tab to lock in place. Tournez la patte pour verrouiller.


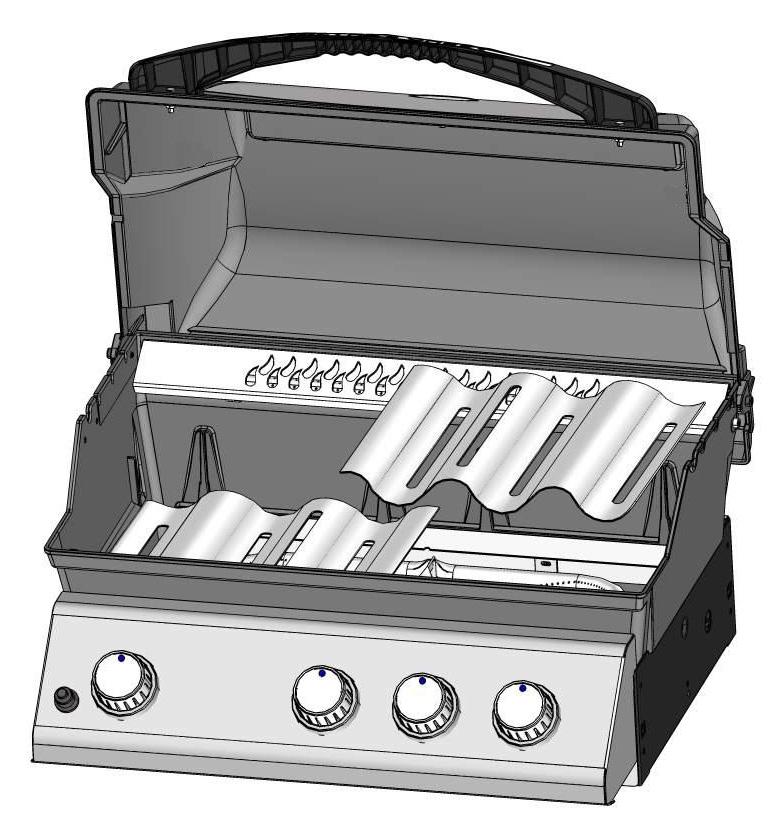
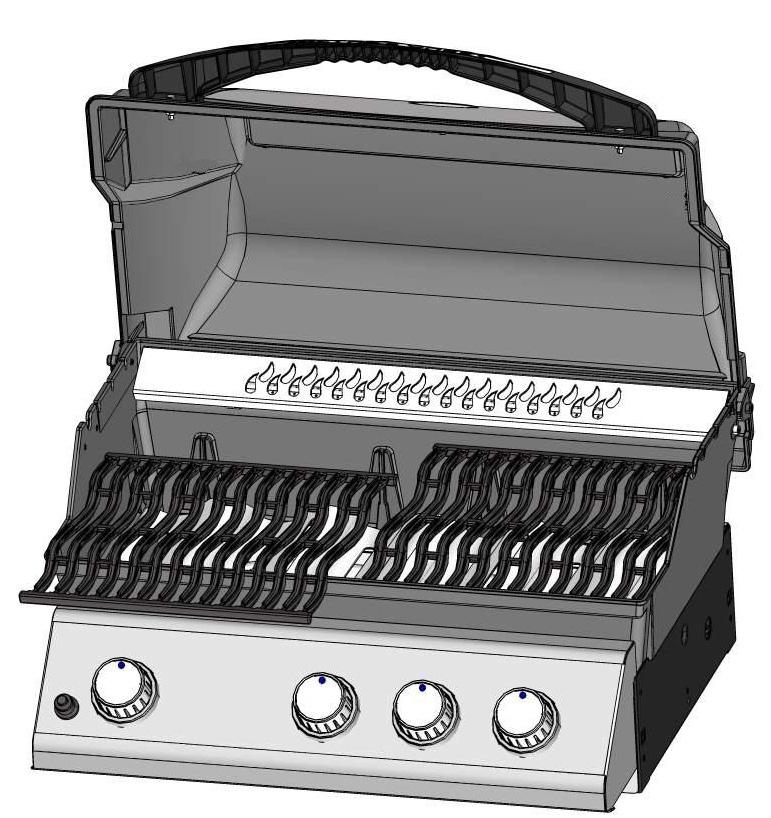
34 34 2 x N (10-24) 2 x N x N

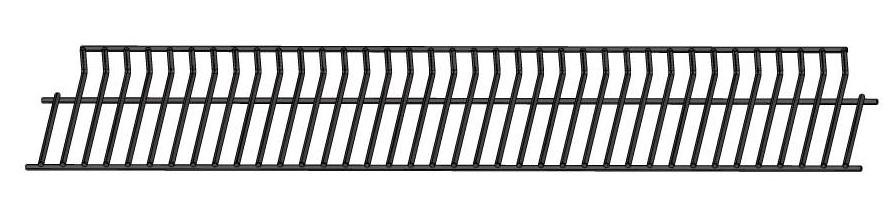

35 35 1 x N K 1 x N x N


36 36 2 x N Propane Only Proper Hose Connection Propane Seulement - Branchement Adéquat Du Boyau Pedestal model Modèle sur socle Cart model Modèle sur chariot Ensure bushing snaps into side panel as shown. Assurez-vous que la bague soit insérée dans le panneau latéral tel qu illustré. Ensure that the hose leading to the gas supply runs in front of the leg. Assurez-vous que le boyau de menant à l alimentation en gaz passe en avant de la patte. WARNING! Ensure the hose does not contact any high temperature surfaces, or it may melt and leak causing a fire. AVERTISSEMENT! Assurez-vous que le boyau ne touche à aucune surface à haute température sinon il risque de fondre, de provoquer une fuite et causer un feu. Natural Gas Only Proper Hose Connection Gaz Naturel Seulement - Branchement Adéquat Du Boyau WARNING! The installation must be performed by a licensed gas fitter, and all connections must be leak tested before operating the grill. AVERTISSEMENT! L installation doit être effectuée par un installateur certifié pour le gaz et tous les raccordements doivent être testés pour des fuites avant de faire fonctionner le gril. Pedestal model Modèle sur socle Cart model Modèle sur chariot Ensure that the hose leading to the gas supply runs in front of the leg. Assurez-vous que le boyau de menant à l alimentation en gaz passe en avant de la patte.

37 37 Propane Only Improper Hose Connection Propane Seulement Branchement Inadéquat Du Boyau WARNING FIRE HAZARD ATTENTION - RISQUE D INCENDIE WARNING! Do not route hose over top of front panel. AVERTISSEMENT! N acheminez pas le boyau par-dessus le panneau avant. WARNING! Ensure the hose does not contact any high temperature surfaces, or it may melt and leak causing a fire. AVERTISSEMENT! Assurez-vous que le boyau ne touche à aucune surface à haute température sinon il risque de fondre, de provoquer une fuite et causer un feu.


38 38 Natural Gas Only Improper Hose Connection Gaz Naturel Seulement - Branchement Inadéquat Du Boyau WARNING FIRE HAZARD ATTENTION - RISQUE D INCENDIE WARNING! Do not route hose over top of front panel. AVERTISSEMENT! N acheminez pas le boyau par-dessus le panneau avant. Pedestal model Modèle sur socle Cart model Modèle sur chariot WARNING! Do not route hose underneath drip pan. AVERTISSEMENT! Ne pas passer le tuyau d alimentation sous le tiroir d égouttement afin de garder. WARNING! Ensure the hose does not contact any high temperature surfaces, or it may melt and leak causing a fire. AVERTISSEMENT! Assurez-vous que le boyau ne touche à aucune surface à haute température sinon il risque de fondre, de provoquer une fuite et causer un feu.
39 39 Leak Testing Instructions WARNING! A leak test must be performed annually and each time a cylinder is hooked up or if a part of the gas system is replaced. WARNING! Never use an open flame to check for gas leaks. Be certain no sparks or open flames are in the area while you check for leaks. Sparks or open flames will result in a fire or explosion, damage to property, serious bodily injury, or death. Leak testing: This must be done before initial use, annually, and whenever any gas components are replaced or serviced. Do not smoke while performing this test, and remove all sources of ignition. See Leak Testing Diagram for areas to check. Turn all burner controls to the off position. Turn gas supply valve on. Brush a half-and-half solution of liquid soap and water onto all joints and connections of the regulator, hose, manifolds and valves. Bubbles will indicate a gas leak. Either tighten the loose joint or have the part replaced with one recommended by the Customer Care department and have the grill inspected by a certified gas installer. If the leak cannot be stopped, immediately shut off the gas supply, disconnect it, and have the grill inspected by a certified gas installer or dealer. Do not use the grill until the leak has been corrected.
40 40 Test De Détection De Fuites AVERTISSEMENT! Il doit être fait avant la première utilisation, annuellement et à chaque fois qu une pièce du système de gaz est remplacée ou réparée. AVERTISSEMENT! N utilisez pas une flamme nue pour vérifier pour des fuites de gaz. Assurez-vous qu il n y ait aucune étincelle ni flamme nue à proximité de l endroit à vérifier. Les étincelles ou les flammes nues provoqueront un feu ou une explosion, causant des dommages matériels, des blessures graves ou des pertes de vie. Test De Fuites: Il doit être fait avant la première utilisation, annuellement et à chaque fois qu une pièce du système de gaz est remplacée ou réparée. Ne fumez pas et enlevez toutes sources d allumage lorsque vous faites ce test. Consultez le schéma de test de fuites pour voir les endroits à tester. 1 - Fermez tous les boutons des brûleurs. Ouvrez la soupape de la bonbonne. 2 - Appliquez une solution de deux parts égales de savon liquide et d eau sur tous les joints du régulateur, le tuyau et ses raccords. 3 - Des bulles indiqueront une fuite de gaz. Resserrez le joint ou remplacez la pièce avec une autre recommandée par le détaillant. 4 - Si la fuite ne peut être réparée, fermez l alimentation de gaz à la bonbonne, enlevez-la et faites inspecter votre gril par votre fournisseur de gaz ou détaillant. N utilisez pas l appareil jusqu à ce que la fuite soit réparée. 5 - Fermez la soupape de la bonbonne.
41 Parts List / Liste Des Pièces 41 ITEM PART # DESCRIPTION U405 U405RB UP405RB 1 n p lid casting / moulage du couvercle x x x 2 n lid insert / couvercle x x x 3 n temperature gauge / jauge de température x x x 4 n uc lid handle / poignèe du couvercle x x x 5 n lid pivot screw / vis du pivot x x x 6 n electronic ignition / allumeur électronique x x x 7 n k warming rack / grille - réchaud x x x 8 n rear burner cover (infra red) / boîter du brûleur arrière (infra-rouge) x x 9 n rear burner / brûleur arrière x x 10 n p rear cover / boîter arrière x 11 n cooking grill / grille de cuisson x x x n cooking grill stainless steel / grille de cuisson acier inoxydable ac ac ac 12 n sear plate left and right / plaque de brûleur gauche et droite x x x 13 n main burner left and right / brûleur principal gauche et droite x x x 14 n main burner centre / brûleur principal centrale x x x n collector box - main burner / boîte du collecteur du brûleur principal x x x n main burner electrode / électrode du brûleur principal x x x 15 n p base casting / cuve x x x 16 n p base mounting brackets / supports de la cuve x x x 17 n p heatshield / pare chaleur x x x 18 n stainless steel side shelf, left / tablette latérale en acier inoxydable, gauche x 19 n luxidio side shelf end cap, left / embout en luxidio de le tablette latéral, gauche x 20 n #8 x 1/2 screw / #8 x 1/2 vis x 21 n stainless steel side shelf, right / tablette latérale en acier inoxydable, gauche x 22 n luxidio side shelf end cap, right / embout en luxidio de le tablette latéral, gauche x 23 n #8 x 1/2 screw / #8 x 1/2 vis x x x 24 n p top tank support / support supérieur de la bonbonne p p n thumbscrew 1/4-20 / vis 1/4-20 p p 25 n control panel / panneau de contrôle x n control panel / panneau de contrôle x x 26 n shoulder screw #14 x 1/2 / vis #14 x 1/2 x x x 27 n control knob bezel / monture de bouton de commande x x x 28 n k control knob / bouton de contrôle x x x 29a n manifold assembly / ensemble du collecteur p 29b n manifold assembly / ensemble du collecteur n 29c n manifold assembly / ensemble du collecteur p p 29d n manifold assembly / ensemble du collecteur n n 30 n grease tray holder / support du récipient à graisse x x x replacement grease trays / ensemble de 5 récipient à graisse ac ac ac 32 n p leg / patte x x 33 n #14 x 1/2 screw / #14 x 1/2 vis x x x 34 n lower tank support / support inférieur de la bonbonne p p 35 n wheel - each / roue (unité) x x x 36 n clevis pin / clavette en U x x 37 n cotter pin / clavette d arrêt x x 38 n front cart panel / panneau avant du chariot x x 39 n p bottom shelf / tablette du bas x x n #14 x 2 screw / #14 x 2 vis x x 40 n caster assembly - each / ensemble de roulettes (unité x x x 41 n axle / essieu x 42 n p tank support / support du bonbonne p 43 n axle cap / enjoliveur x 44 n p bottom shelf / tablette du bas x 45 n #14 x 1/2 screw / #14 x 1/2 vis x 46 n p pedestal, right side / socle droite x 47 n p pedestal, left side / socle gauche x 48 n pedestal, front / socle avant x 49 n Ultra Chef logo / logo Ultra Chef x x x 50 n p tank heatshield / écran de chaleur p 51 n hose clip / support de tuyau x
42 42 Parts List / Liste Des Pièces ITEM PART # DESCRIPTION U405 U405RB UP405RB 52 n Solido side shelf / tablette latérale en Solido x x 53 n p side shelf bracket - right / support de la tablette latérale - droite x x 54 n p side shelf bracket - left / support de la tablette latérale - gauche x x 55 n p towel bar / support du crochet x x 56 n /4-20 x 1 screw / 1/4-20 x 1 vis x x 57 n /4-20 x 3/8 screw / 1/4-20 x 3/8 vis x x 58 n burner grease shield/pare chaleur brûleur x x x 59 n bk1sg tank inhibitor shelf / réservoir tablette inhibiteur p p n rear burner supply tube / tuyau d alimenation brûleur arrière x x n outlet regulator / ensemble de tuyau de régulateur à 1 sortie p p n outlet regulator / tuyau de régulateur à 1 sortie p n side burner hose / tuyau brûleur latérale de 16 ac-p n ft n/g hose w/quick disconnect / tuyau de 10 pieds avec débranchement rapide n n n n side burner hose / tuyau brûleur latérale de 20 ac-n rotisserie kit / ensemble de la rôtissoire ac ac ac vinyl cover / housse en vinyle ac ac ac x - standard p - propane units only p - appareils propane seulement x - compris n - natural gas units only n - appareils gaz naturel seulement ac - accessory ac - accessoires
43 43
44 44 FAX TO: ACCESSORIES & PARTS ORDER FORM PLEASE PRINT CLEARLY CONTACT NAME: SHIP TO : TEL : FAX : VISA OR MASTERCARD # : EXPIRY DATE: SIGNATURE: QUANTITY PART NUMBER DESCRIPTION TAXES MAY APPLY SHIPPING EXTRA IF CONFIRMATION IS REQUIRED PLEASE INCLUDE A FAX NUMBER OR ADDRESS

45 45 TÉLÉCOPIEZ AU: BON DE COMMANDE POUR PIÈCES/ACCESSOIRES NOM DU CLIENT ADRESSE: TÉLÉPHONE : FAX : # VISA OU MASTERCARD : DATE D EXPIRATION : SIGNATURE: QUANTITÉ NUMÉRO DE PRODUIT DESCRIPTION LES TAXES PEUVENT S'APPLIQUER LES FRAIS D'EXPEDITION SUPPLÉMENTAIRE SI VOUS DÉSIREZ RECEVOIR UNE CONFIRMATION, VEUILLEZ INCLURE UN NUMÉRO DE TÉLÉCOPIEUR OU UNE ADRESSE COURRIEL
BULL. ASSEMBLY & OPERATING INSTRUCTIONS
 BULL. Dutdaar Products Inc. "., Ontario, California 91761 ASSEMBLY & OPERATING INSTRUCTIONS Model No. 18038 7-Burner High Grade Commercial Stainless Steel Longhorn, LP Model No. 18039 7- Burner High Grade
14 ROUND TABLETOP GAS GRILL. Product code: UPC code: Date of purchase: / /
 OWNER S MANUAL 14 ROUND TABLETOP GAS GRILL Product code: 0-03946564-6 UPC code: 0 45774 87562 1 Date of purchase: / / Safety Guidelines... Safety Instructions... 1 2-3 Assembly Instructions... 4-7 Lighting
GAS BARBECUE MODEL NO: BBQ4 USER GUIDE PART NO: /11
 GAS BARBECUE MODEL NO: BBQ4 PART NO: 6925305 USER GUIDE 2/11 INTRODUCTION Thank you for purchasing this CLARKE product Before attempting to use this product, please read this manual thoroughly and follow
STAINLESS STEEL GAS BARBECUE MODEL NO: SSBBQ4 USER GUIDE PART NO: /11
 STAINLESS STEEL GAS BARBECUE MODEL NO: SSBBQ4 PART NO: 6925310 USER GUIDE 2/11 INTRODUCTION Thank you for purchasing this CLARKE product. Before attempting to use this product, please read this manual
PRO285 DO NOT DISCARD FR PG.19 DANGER IF YOU SMELL GAS: WARNING
 This gas grill must be used only outdoors in a well-ventilated space and must not be used inside a building, garage, screened-in porch, gazebo or any other enclosed area. APPLY SERIAL NUMBER LABEL FROM
TQ285 DO NOT DISCARD FR PG.17 DANGER IF YOU SMELL GAS: WARNING
 This gas grill must be used only outdoors in a well-ventilated space and must not be used inside a building, garage, screened-in porch, gazebo or any other enclosed area. APPLY SERIAL NUMBER LABEL FROM
MARINE KETTLE 2 GAS GRILL OWNER S MANUAL
 OWNER S MANUAL MARINE KETTLE 2 GAS GRILL For questions regarding performance, assembly, operation, parts, or returns, contact the experts at MAGMA by calling (562) 627-0500 7:00 a.m. - 5:00 p.m. Pacific
Folding Grill Stand Manual
 O u t d o o r G r i l l i n g P r o d u c t s Folding Grill Stand Manual MODEL: CFGS-150 IMPORTANT SAFETY INSTRUCTIONS READ AND SAVE THESE SAFETY INSTRUCTION BEFORE USING THIS GRILL STAND m DANGER: m Failure
HORIZON BARBECUE ROASTING HOOD OWNERS MANUAL
 HORIZON BARBECUE ROASTING HOOD OWNERS MANUAL 0 IMPORTANT READ ALL INSTRUCTIONS BEFORE ASSEMBLY, INSTALLATION OR OPERATING ROASTING HOOD SAFETY PRECAUTIONS AND WARNINGS Tucker Horizon barbecues and roasting
for Assembly, Operating & Maintenance of THIS CHARCOAL GRILL IS DESIGNED FOR OUTDOOR USE ONLY.
 Owner s Manual for Assembly, Operating & Maintenance of Model M-15AB Charcoal Grill www.bigjohngrills.com YOU MUST READ THIS OWNER S MANUAL BEFORE OPERATING YOUR CHARCOAL GRILL. WARNING: Do not ignite
PRESTIGE 500 DANGER WARNING
 This gas grill must be used only outdoors in a well-ventilated space and must not be used inside a building, garage, screened-in porch, gazebo or any other enclosed area. EN APPLY SERIAL NUMBER LABEL FROM
OWNERS MANUAL. Installation, Operation & Maintenance Guide MODELS: SO30BQRRL/SO42BQRL
 OWNERS MANUAL Installation, Operation & Maintenance Guide MODELS: SO30BQRRL/SO42BQRL This Page Intentionally Left Blank For Your Safety... 3 Basic Safety Guidelines... 5 Installation... 6 Gas Connection
PRO 500 WARNING DANGER
 This gas grill must be used only outdoors in a well-ventilated space and must not be used inside a building, garage, screened-in porch, gazebo or any other enclosed area. EN APPLY SERIAL NUMBER LABEL FROM
USE AND CARE MANUAL FOR OUTDOOR USE ONLY
 S o n o m a PLATINUM EDITION Sonoma Platinum Edition Grill: 27 Model with Rear Infrared Burner TM USE AND CARE MANUAL FOR OUTDOOR USE ONLY General Safety Instructions IMPORTANT SAFETY INFORMATION - Read
PRO 500 DO NOT DISCARD FR PG.21 WARNING DANGER
 This gas grill must be used only outdoors in a well-ventilated space and must not be used inside a building, garage, screened-in porch, gazebo or any other enclosed area. EN APPLY SERIAL NUMBER LABEL FROM
" Table Top Charcoal Grill Model # SRYH1450 Instructions Manual
 259-0011 14" Table Top Charcoal Grill Model # SRYH1450 Instructions Manual WARNING FOR YOUR SAFETY 1. This grill is for outdoor use only, and shall not be used in a building, garage, or any other enclosed
485RSIB DANGER WARNING
 This gas grill must be used only outdoors in a well-ventilated space and must not be used inside a building, garage, screened-in porch, gazebo or any other enclosed area. APPLY SERIAL NUMBER LABEL FROM
SUMMIT 4 BURNER & 6 BURNER
 WEBER WEBER WEBER WEBER SUMMIT 4 BURNER & 6 BURNER NATURAL GAS COOKING MODULES Operating Guide Read before assembly WEBER WEBER W E B E R W E B E R Summit 6 Burner NG CANADIAN GAS ASSOCIATION R A P P R
OWNER S MANUAL. Cabo. Adventurer Series Gas Grill Model A10-703
 OWNER S MANUAL Cabo Adventurer Series Gas Grill Model A10-703 For questions regarding performance, assembly, operation, parts, or returns, contact the experts at MAGMA by calling (562) 627-0500 7:00 a.m.
17.75 In. Table Top Gas Grill
 17.75 In. Table Top Gas Grill Model #OCTG-1775 OUTDOOR USE ONLY! NEVER USE INDOORS! CARBON MONOXIDE HAZARD Burning propane inside may be fatal. It gives off carbon monoxide, which has no odor. NEVER burn
Assembly Instructions & User s Manual TRITON 6 BURNER GRIDDLE Model #: FSODBG1206
 Assembly Instructions & User s Manual TRITON 6 BURNER GRIDDLE Model #: FSODBG1206 Please keep this instruction manual for future reference Customer Service: (888) 922-2336, 7:00 am to 12:00 am daily CST
Contents. Fittings and parts checklist
 JLH2B5 Contents Parts List Exploded Diagram Assembly instructions Safety information Installation Using your barbecue Cooking Maintenance Fittings and parts checklist Ref Description Ref Description 1,
SAVE THESE INSTRUCTIONS FOR FUTURE REFERENCE. IF YOU ARE ASSEMBLING THIS UNIT FOR SOMEONE ELSE, GIVE THIS MANUAL TO HIM OR HER FOR FUTURE REFERENCE.
 JACKSON GRILLS INC. 106-2480 Mt. Lehman Road Abbotsford, BC V4X 2N3 TELEPHONE: (604)855-6756 FAX: (604)855-5373 EMAIL: info@jacksongrills.com SUPPORT: support@jacksongrills.com WEB SITE: www.jacksongrills.com
USE AND CARE MANUAL FOR OUTDOOR USE ONLY MADE IN THE U.S.A.
 S o n o m a PLATINUM EDITION Sonoma Platinum Edition Grill: 30 Model TM USE AND CARE MANUAL FOR OUTDOOR USE ONLY MADE IN THE U.S.A. General Safety Instructions IMPORTANT SAFETY INFORMATION - Read this
BILEX485 FR PG.27 WARNING! CABINET FRAME, CABINET AND COUNTER TOP MUST BE MADE FROM NON-COMBUSTIBLE MATERIAL. DANGER IF YOU SMELL GAS: WARNING
 1 This gas grill must be used only outdoors in a well-ventilated space and must not be used inside a building, garage, screened-in porch, gazebo or any other enclosed area. EN APPLY SERIAL NUMBER LABEL
Assembly & Operation Manual
 Deluxe Outdoor Tabletop Gas Grill Model TT250 Assembly & Operation Manual DANGER 1. Never operate this appliance unattended. 2. Never operate this appliance within 10 ft (3.0 m) of any structure, combustible
21.5 Inch Square Charcoal Grill
 21.5 Inch Square Charcoal Grill Model # OCFLA-2150 OUTDOOR USE ONLY! NEVER USE INDOORS! CARBON MONOXIDE HAZARD Burning charcoal inside may be fatal. It gives off carbon monoxide, which has no odor. NEVER
BakerBox multi-purpose pizza oven
 BakerBox multi-purpose pizza oven. ASSEMBLY & OPERATING INSTRUCTIONS Important: Read these instructions for use carefully so as to familiarize yourself with the appliance before putting it to your gas
WARNING. Assembly and Operating Instructions for Outback Omega Charcoal 100 and Omega Charcoal 200 Barbecues. Omega Charcoal 100 Omega Charcoal 200
 Assembly and Operating Instructions for Outback Omega Charcoal 100 and Omega Charcoal 200 Barbecues Omega Charcoal 100 Omega Charcoal 200 Photographs are not to scale. Specifications subject to change
495, 495SB WARNING DANGER
 This gas grill must be used only outdoors in a well-ventilated space and must not be used inside a building, garage, screened-in porch, gazebo or any other enclosed area. EN APPLY SERIAL NUMBER LABEL FROM
BILEX485 WARNING! CABINET FRAME, CABINET AND COUNTER TOP MUST BE MADE FROM NON-COMBUSTIBLE MATERIAL. WARNING DANGER DO NOT DISCARD
 This gas grill must be used only outdoors in a well-ventilated space and must not be used inside a building, garage, screened-in porch, gazebo or any other enclosed area. APPLY SERIAL NUMBER LABEL FROM
JUMBUCK RONDO MEDIUM CHARCOAL SPIT ROASTER (HS-FP002)
") JUMBUCK RONDO MEDIUM 3180887 CHARCOAL SPIT ROASTER (HS-FP002) SAFETY INSTRUCTIONS FOR OUTDOOR USE ONLY For outdoor use only. Improper installation, adjustment, alteration, service or maintenance can cause
JUMBUCK RONDO MEDIUM 3180887 CHARCOAL SPIT ROASTER (HS-FP002) SAFETY INSTRUCTIONS FOR OUTDOOR USE ONLY For outdoor use only. Improper installation, adjustment, alteration, service or maintenance can cause
SUMMITTM450 & 650. LP Gas Barbecues. Operating Guide. Read before assembly
 WEBER WEBER WEBER WEBER SUMMITTM450 & 650 LP Gas Barbecues Operating Guide Read before assembly DANGER If you smell gas: 1. Shut off gas to the appliance. 2. Extinguish any open flames. 3. Open lid. 4.
Introduction. No Hassle Guarantee
 Pro Grill MANUAL Introduction Thank you for selecting West Marine s Pro Grill. Your unit has been carefully inspected and tested. The Pro Grill is one of the finest barbecues manufactured for marine use.
ASSEMBLY & OPERATION INSTRUCTIONS FOR OUTDOOR GAS BARBECUES
 ASSEMBLY & OPERATION INSTRUCTIONS FOR OUTDOOR GAS BARBECUES FOR MODEL# BBQ / BBQW / BLKBBQW OUTDOOR BBQ GRILL SAFETY INSTRUCTIONS READ THE FOLLOWING INSTRUCTIONS CAREFULLY AND BE SURE YOUR BARBECUE IS
Tabletop Charcoal Grill Model # SRCG806 Instructions Manual
 259-0002 Tabletop Charcoal Grill Model # SRCG806 Instructions Manual WARNING FOR YOUR SAFETY 1. This grill is for outdoor use only, and shall not be used in a building, garage, or any other enclosed area.
Notice to Installer: Leave these instructions with the grill owner for future reference.
 This gas grill must be used only outdoors in a well-ventilated space and must not be used inside a building, garage, screened-in porch, gazebo or any other enclosed area. EN APPLY SERIAL NUMBER LABEL FROM
GRILLSTER PORTABLE GAS GRILL
 Gourmet Outdoor Grilling GRILLSTER PORTABLE GAS GRILL MODEL: CGG-059 ASSEMBLY AND OPERATING INSTRUCTIONS m WARNING: FOR OUTDOOR USE ONLY m This instruction manual contains important information necessary
LEX 730 DANGER WARNING
 This gas grill must be used only outdoors in a well-ventilated space and must not be used inside a building, garage, screened-in porch, gazebo or any other enclosed area. APPLY SERIAL NUMBER LABEL FROM
Tabletop Gas Grill VT280SS1
 Tabletop Gas Grill VT280SS1 Conforms to ANSI Std Z21.89-2013 Outdoor cooking specialty gas appliance DANGER Tools needed for assembly: Phillips screwdriver, Pliers or Adjustable Wrench DANGER If you smell
 #4187508 Attention! This grill will become very hot. Do not move it during operation. Caution! Do not use alcohol, gasoline or similar fluids for lighting or relighting. Warning! Keep children and pets
Portable Charcoal Grill
 Portable Charcoal Grill DANGER! WARNING DO NOT use charcoal briquettes for indoor cooking or heating. TOXIC carbon monoxide fumes can accumulate and cause asphyxiation. DO NOT USE on boats or recreational
for Assembly, Operating & Maintenance of THIS GAS GRILL IS DESIGNED FOR OUTDOOR USE ONLY.
 Owner s Manual for Assembly, Operating & Maintenance of Model A2P Portable Gas Grill www.bigjohngrills.com YOU MUST READ THIS OWNER S MANUAL BEFORE OPERATING YOUR GAS GRILL. IF YOU SMELL GAS: DANGER 1.
G2006-A FOR OUTDOOR USE ONLY - OPERATES ON LPG
 Ranger Barbecue Model No. G2006-A FOR OUTDOOR USE ONLY - OPERATES ON LPG 3716-06/13 General Information Gas Installation Codes Barbecues must be used in accordance with New Zealand Standard 5601 Gas Installations.
DUAL BLAZE PORTABLE GAS GRILL
 Outdoor Grilling Pro ducts DUAL BLAZE PORTABLE GAS GRILL MODEL: CGG-522 ASSEMBLY AND OPERATING INSTRUCTIONS m WARNING: FOR OUTDOOR USE ONLY m This instruction manual contains important information necessary
BILEX 485 DE PG.27 WARNING! CABINET FRAME, CABINET AND COUNTER TOP MUST BE MADE FROM NON-COMBUSTIBLE MATERIAL. WARNING DANGER DO NOT DISCARD
 This gas grill must be used only outdoors in a well-ventilated space and must not be used inside a building, garage, screened-in porch, gazebo or any other enclosed area. EN APPLY SERIAL NUMBER LABEL FROM
USE AND CARE MANUAL FOR OUTDOOR USE ONLY ALWAYS KEEP YOUR GRILL COVERED WHEN NOT IN USE
 Amana TM SS 4 Burner Gas Grill USE AND CARE MANUAL FOR OUTDOOR USE ONLY ALWAYS KEEP YOUR GRILL COVERED WHEN NOT IN USE BEFORE YOU BEGIN We ve included easy-to-follow, step-by-step instructions which have
INFRARED BURNER KIT INSTRUCTIONS
 3 INFRARED BURNER KIT INSTRUCTIONS (HOT SURFACE IGNITION) 5 1 4 NOTE: This unit has been retrofi tted with an infrared burner. Model # 3050 # 3060 Included parts 2 6* PARTS INCLUDED 1. Infrared burner
LEX 730 WARNING DANGER
 This gas grill must be used only outdoors in a well-ventilated space and must not be used inside a building, garage, screened-in porch, gazebo or any other enclosed area. EN APPLY SERIAL NUMBER LABEL FROM
LP (Liquefied Petroleum Gas) Installation Safety Precautions
 Installation Safety Precautions") Installation Safety Precautions Use grill, as purchased, only with LP (propane) gas and the regulator/valve assembly supplied. If your grill is Dual Fuel ready, a conversion kit must be purchased for use
Installation Safety Precautions Use grill, as purchased, only with LP (propane) gas and the regulator/valve assembly supplied. If your grill is Dual Fuel ready, a conversion kit must be purchased for use
Searin Sphere Portable Gas Grill
 Gourmet Outdoor Grilling Searin Sphere Portable Gas Grill MODEL: CGG-049 ASSEMBLY AND OPERATING INSTRUCTIONS m WARNING: FOR OUTDOOR USE ONLY m This instruction manual contains important information necessary
Adventurer Barbecue G2727
 Adventurer Barbecue G2727 FEATURES Compact portable unit with generous 460mm x 240mm cooking surface Use at home, picnics or camping Quick and easy set-up Folds down into a compact size - 440mm x 590mm
Platinum BBQ Series. 4 burner - BQ burner - BQ 1011
 Platinum BBQ Series 4 burner - BQ 1010 6 burner - BQ 1011 FEATURES Premium gas BBQ Double skinned stainless steel hood with temperature gauge Stainless steel BBQ body, fascia, cabinet and side shelves
BBQ Grill. Owner s Manual Save These Instructions - For Household Use Only For Sizes: 12 x 18 & 12 x 12
 BBQ Grill Owner s Manual Save These Instructions - For Household Use Only For Sizes: 12 x 18 & 12 x 12 Do not use the Copper Chef TM BBQ Grill until you have read this manual thoroughly. Warranty Information
Outdoor Charcoal Barbecue Grill
 OWNER S MANUAL Outdoor Charcoal Barbecue Grill Model No CBT1706W FOR YOUR SAFETY: 1 Do NOT store or use gasoline or other flammable liquids or vapors in the vicinity of this or any other appliance 2 When
57 Stainless Steel Gas Grill
 57 Stainless Steel Gas Grill 1 Welcome & Congratulations Congratulations on your purchase of a new grill! We at Electrolux Home Products are very proud of our product and we are completely committed to
Owner s Manual for JPG50
 Owner s Manual for JPG50 Important Notice Please read ALL safety notices on Pg. 1-2 before assembling or operating this grill. Version: MAY17 CERTIFICATION AND SAFETY!WARNING! If you smell gas: 1. Shut
Important: Retain these instructions for future use.
 CATERER 4 & 6 BURNER BBQ Model No. BQ1050 Model No. BQ1051 Ideal heavy duty BBQ for sporting and social clubs or anywhere large groups are entertained Solid 5mm thick steel hotplate Castors for easy moving
Liquid Propane Gas Grill Owner s Guide
 Liquid Propane Gas Grill Owner s Guide Vieluxe 44 Inch Vieluxe 56 Inch DANGER If you smell gas: 1. Shut off gas to the appliance. 2. Extinguish any open flames. 3. Open lid. 4. If odor continues, keep
GAS GRILL # Natural Gas Grill Owner s Guide
 GAS GRILL Natural Gas Grill Owner s Guide ESNA Guía del Propietario de la Barbacoa de Gas Natural - Pg. 7 Mode d emploi du Grill à gaz naturel - Pg. 7 670 #5606 YOU MUST READ THIS OWNER S GUIDE BEFORE
SBG2500-1, SBG and SBG Gas Grill Owner s Manual
 SBG2500-1, SBG2501-1 and SBG2801-1 Gas Grill Owner s Manual SBB00095-2-0407 Page 1 IMPORTANT This manual should be read thoroughly by the person installing the grill and all persons who will use and maintain
Specialist Built-in BBQ
 Specialist Built-in BBQ Model No. BQ8246-P Product Features: Vitreous enamel hood and body Sure-fire rotary ignition Viewing window in hood Timer AGA certified FOR OUTDOOR USE ONLY OPERATES ON LPG Gasmate
BUILT IN DELUXE SPIT BRAAI MODELS: 1200 & 1500
 BUILT IN DELUXE SPIT BRAAI MODELS: 1200 & 1500 INSTALLATION INSTRUCTIONS Actual product may differ slightly from the picture above Features (this unit includes a light fitting, brass knob, stainless steel
FOR OUTDOOR USE ONLY THIS IS YOUR ASSEMBLY, CARE & USE MANUAL WITH IMPORTANT WARNING & SAFETY INFORMATION. PLEASE SAVE THESE INSTRUCTIONS.
 Owner s Manual Tabletop Gas Grill 1-Burner Model VT280B1 FOR OUTDOOR USE ONLY THIS IS YOUR ASSEMBLY, CARE & USE MANUAL WITH IMPORTANT WARNING & SAFETY INFORMATION. PLEASE SAVE THESE INSTRUCTIONS. Manufactured
22 Kettle Charcoal Grill SAFE USE, CARE AND ASSEMBLY MANUAL
 22 Kettle Charcoal Grill SAFE USE, CARE AND ASSEMBLY MANUAL 85-1448-8 ST22022D Read and save this manual for future reference. If pre-assembled, leave this manual with unit for consumer s future reference.
ROGUE 525 DO NOT DISCARD FR PG.19 WARNING DANGER
 This gas grill must be used only outdoors in a well-ventilated space and must not be used inside a building, garage, screened-in porch, gazebo or any other enclosed area. EN APPLY SERIAL NUMBER LABEL FROM
ROGUE 425 DO NOT DISCARD FR PG.19 WARNING DANGER
 This gas grill must be used only outdoors in a well-ventilated space and must not be used inside a building, garage, screened-in porch, gazebo or any other enclosed area. EN APPLY SERIAL NUMBER LABEL FROM
WARNING. Assembly and Operating Instructions for Outback Kettle Charcoal 57cm Barbecue. EN (Europe)
") Assembly and Operating Instructions for Outback Kettle Charcoal 57cm Barbecue EN (Europe) Photographs are not to scale. Specifications subject to change without prior notice. WARNING For outdoor use only.
Assembly and Operating Instructions for Outback Kettle Charcoal 57cm Barbecue EN (Europe) Photographs are not to scale. Specifications subject to change without prior notice. WARNING For outdoor use only.
SBB Gas Grill With Surround Owner s Manual
 SBB2804-1 Gas Grill With Surround Owner s Manual GAS-FIRED Page 1 IMPORTANT This manual should be read thoroughly by the person installing the grill and all persons who will use and maintain the grill.
ASSEMBLY & OPERATING INSTRUCTIONS
 Rialto, California 92673 ASSEMBLY & OPERATING INSTRUCTIONS Model #54658 5 Burner Stainless Steel Built-In, L.P. (Propane) Gas Model #54659 5 Burner Stainless Steel, Built-In, Natural Gas TABLE OF CONTENTS
3-Burner LP Gas Grill
 ITEM # 41590 WARNING Improper installation, adjustment, alteration, service or maintenance can cause injury or property damage. Read the installation, operation and maintenance instructions thoroughly
ROGUE 425 DO NOT DISCARD FR PG.19 WARNING DANGER
 This gas grill must be used only outdoors in a well-ventilated space and must not be used inside a building, garage, screened-in porch, gazebo or any other enclosed area. EN APPLY SERIAL NUMBER LABEL FROM
GAS GRILL Natural Gas Grill Owner s Guide
 GAS GRILL Natural Gas Grill Owner s Guide ESNA Guía del Propietario de la Barbacoa de Gas Natural - Pg. 7 Mode d emploi du Grill à gaz naturel - Pg. 53 40 #56 You must read this Owner s Guide before operating
Manual Spark Ignition (MSI) Kit For Use only with Thermocouple Manual Safety (TMSI) UL Approved Fire Pit Pans with Burning Spur
 Kit For Use only with Thermocouple Manual Safety (TMSI) UL Approved Fire Pit Pans with Burning Spur") AAA Battery MODEL: MSI-BSTMSI Manual Spark Ignition (MSI) Kit For Use only with Manual Safety (TMSI) UL Approved Fire Pit Pans with Burning Spur Installation and Operating Instructions IF YOU CANNOT READ
AAA Battery MODEL: MSI-BSTMSI Manual Spark Ignition (MSI) Kit For Use only with Manual Safety (TMSI) UL Approved Fire Pit Pans with Burning Spur Installation and Operating Instructions IF YOU CANNOT READ
Kettle Charcoal BBQ. Assembly instructions. Please retain this manual for future reference
 Front.pdf 30/0/ ::5 Product size assembled: H88 x W5 X D6cm Ref No.: XZ08B Catalogue No.: 05-579 Tesco 0 Please retain this manual for future reference P.pdf 3/0/ 7:9:3 Assembly Instructions Warnings REMEMBER
NECO MODEL NECO MODEL AMENDMENT SHEETS FN38LP/NG. Amendment Pages (Use these pages in place of standard manual)
") NECO MODEL AMENDMENT SHEETS NECO MODEL FN38LP/NG Amendment Pages (Use these pages in place of standard manual) Grill Assembly Built-In Instructions 5-12 13-15 16-19 17 20 21-22 23 Welcome & Congratulations
NECO MODEL AMENDMENT SHEETS NECO MODEL FN38LP/NG Amendment Pages (Use these pages in place of standard manual) Grill Assembly Built-In Instructions 5-12 13-15 16-19 17 20 21-22 23 Welcome & Congratulations
OWNER S MANUAL. Stainless Steel Gas Grill
 OWNER S MANUAL Stainless Steel Gas Grill U.S. PATENTS 4,788,962 5,330,154 5,413,090 D 292,163 Other Patents and Design Patents Pending For questions regarding performance, assembly, operation, parts, or
INSTRUCTION MANUAL MODELS: RT-30, RT-36, RT-48, RT-60 & RT-72 REVISED APRIL, 2003 *PLEASE RETAIN FOR FUTURE REFERENCE
 INSTRUCTION MANUAL MODELS: RT-30, RT-36, RT-48, RT-60 & RT-72 REVISED APRIL, 2003 *PLEASE RETAIN FOR FUTURE REFERENCE THANK YOU for purchasing this quality product. Your Crown Verity Inc. rotisserie will
X4 50 Barbecue. Universal Innovations WARNING. Photograph is not to scale. Specification subject to change without prior notice.
 X4 50 Barbecue Photograph is not to scale. Specification subject to change without prior notice. WARNING For outdoor use only. Read instructions before using the appliance. Failure to follow instructions
3 Burner Cabinet Barbecue
 3 Burner Cabinet Barbecue Photograph is not to scale. Specification subject to change without prior notice WARNING For outdoor use only. Read instructions before using the appliance. Failure to follow
GAS GRILL # LP Gas Grill Owner s Guide
 GAS GRILL LP Gas Grill Owner s Guide ESNA Guía del Propietario del Asador de Gas Licuado de Propano - Pg. 9 Guide de L Utilisateur du Grill à Gaz PL - Pg. 57 60 #564 YOU MUST READ THIS OWNER S GUIDE BEFORE
BILEX 605 WARNING! CABINET FRAME, CABINET AND COUNTER TOP MUST BE MADE FROM NON-COMBUSTIBLE MATERIAL. WARNING DANGER
 This gas grill must be used only outdoors in a well-ventilated space and must not be used inside a building, garage, screened-in porch, gazebo or any other enclosed area. EN APPLY SERIAL NUMBER LABEL FROM
INSTRUCTION BOOK CARE & USE/INSTALLATION
 INSTRUCTION BOOK CARE & USE/INSTALLATION Model STL-32 LP/NG, Model STL-40 LP/NG, Model STL-2 LP/NG STL-1 LP/NG. DANGER - IF OU SMELL GAS: WARNING I - Shut off the gas supply to the appliance at its source.
Installation & Operation Instructions
 Manufactured by K & W Mfg. Co. Inc., Corona, California Installation & Operation Instructions For Gas Barbecues Models 5453 and 5457 A Note to You Thank you for buying a Flame-Broil barbecue grill. To
LOT: PO: 4098_GelCanInsert_JW_ Model # oz Gel Fuel Can Firebox Insert
 LOT: PO: 4098_GelCanInsert_JW_010213 f i r e p l a c e s Model # 4098 13oz Gel Fuel Can Firebox Insert - Gel Fuel is flammable. Failure to follow warnings can result in property damage or serious burns.
IMPORTANT: READ THESE INSTRUCTIONS CAREFULLY BEFORE STARTING INSTALLATION OR USE. WARNINGS AND SAFETY CODES
 FIREMASTER OUTDOOR COUNTERTOP CHARCOAL GRILL Models 3324 and 3329 INSTALLATION INSTRUCTIONS AND OWNER S MANUAL INSTALLER: Leave these instructions with consumer. CONSUMER: Retain for future reference.
Gas Grill Built-In LP Gas Grill Owner s Guide
 Gas Grill Built-In LP Gas Grill Owner s Guide S-460 - LP #4255 #00000 You must read this Owner s Guide before operating your gas grill. If you smell gas:. Shut off gas to the appliance. 2. Extinguish any
illuminating possibilities FEATURING i-glow BACKLIT TECHNOLOGY By Napoleon
 illuminating possibilities i-glow FEATURING BACKLIT TECHNOLOGY By Napoleon Performance, Quality & Design 0-1800 in 25 seconds flat cart models Model M485RB mirage gas grill features & benefits Unique,
BUILT IN ROTISSERIE BRAAI MODEL: 1000
 BUILT IN ROTISSERIE BRAAI MODEL: 1000 INSTALLATION INSTRUCTIONS & USER MANUAL Actual product may differ slightly from the picture above Megamaster products and factories comply with the Quality Management
Natural Gas Grill Owner s Guide
 Natural Gas Grill Owner s Guide DANGER If you smell gas: 1. Shut off gas to the appliance. 2. Extinguish any open flames. 3. Open lid. 4. If odor continues, keep away from the appliance and immediately
Amana SS 5 Burner Grill w/ Rear Burner USE AND CARE MANUAL FOR OUTDOOR USE ONLY ALWAYS KEEP YOUR GRILL COVERED WHEN NOT IN USE
 Amana SS 5 Burner Grill w/ Rear Burner USE AND CARE MANUAL FOR OUTDOOR USE ONLY ALWAYS KEEP YOUR GRILL COVERED WHEN NOT IN USE BEFORE YOU BEGIN We ve included easy-to-follow, step-by-step instructions
Installation & Parts Manual 2" & 3" High Capacity Strainers For Class 1, Petroleum Applications
 Installation & Parts Manual 2" & 3" High Capacity Strainers For Class 1, Petroleum Applications Installation: M200-20 www.lcmeter.com Table of Contents Description Page Number Introduction... 2 What LC
Owner's Manual: Stainless Steel Rotisserie Kit for Kenmore Elite & Kenmore Premium Grills
 Owner's Manual: Stainless Steel Rotisserie Kit for Kenmore Elite & Kenmore Premium Grills 141.158031 for 3/4 Burner Kenmore and Kenmore Elite Grills: 141.15804 for 5/6 Burner Kenmore and Kenmore Elite
GAS GRILL # LP Gas Grill Owner s Guide
 GAS GRILL LP Gas Grill Owner s Guide ESNA Guía del Propietario del Asador de Gas Licuado de Propano - Pg. 7 Guide de L Utilisateur du Grill à Gaz PL - Pg. 7 470 #56 YOU MUST READ THIS OWNER S GUIDE BEFORE
440 Sizzler Patio gas Braai
 440 Sizzler Patio gas Braai USER MANUAL & ASSEMBLY INSTRUCTIONS Important: Read these instructions and warnings carefully so as to familiarize yourself with the appliance before connecting it to its gas
Cover. Liquid Propane Gas Grill Model No.: Assembly Instructions/Use and Care Manual
 Cover Assembly Instructions/Use and Care Manual Liquid Propane Gas Grill Model No.: 122.16118 Parts Assembly Safety Rules Use and Care Troubleshooting Español! WARNING: Read this Owner s manual carefully
Gas Barbecue Use, Care & Assembly Manual
 Gas Barbecue Use, Care & Assembly Manual With Grill Lighting Instructions 8450 Series Model No. 9992-649 (Natural Gas) ASSEMBLER/INSTALLER: Leave these instructions with the consumer. CONSUMER/USER: Read
3-Burner LP Gas Grill
 ITEM # 41590 3-Burner LP Gas Grill WARNING Improper installation, adjustment, alteration, service or maintenance can cause injury or property damage. Read the installation, operation and maintenance instructions
ASSEMBLY & OPERATING INSTRUCTIONS
 ASSEMBLY & OPERATING INSTRUCTIONS MODEL #98110 BULLET 4 BURNER STAINLESS STEEL, BUILT-IN, L.P. (PROPANE) MODEL #98111 BULLET 4 BURNER STAINLESS STEEL, BUILT-IN, N.G. (NATURAL GAS) TABLE OF CONTENTS PAGE
Deluxe Caterer BBQ Series
 Deluxe Caterer BBQ Series GC22-4T DLX GC22-6T DLX FEATURES Ideal heavy duty BBQ for sporting and social clubs or anywhere large groups are entertained. Solid 5mm thick stainless steel hotplate Fold down