HEADS IN, HEARTS IN. Science Activities
|
|
|
- Felix McCoy
- 5 years ago
- Views:
Transcription
1 44H1749S HEADS IN, HEARTS IN Science Activities The Heads In, Hearts In family enrichment program encourages families to use their minds (putting their heads in ) as a tool to expand their knowledge around a variety of topic areas. By creating a shared educational experience, the family unit will work, grow and learn together, putting their hearts in to the process. This unit contains the following: A Drop of Blood Baking Soda Fizz Chromatography: What s That? Coin Drop Color-Changing Milk Colorful Rain Corn Plastic Creating Landforms Dancing Raisins Dissecting a Seed Drops on a Penny Fingerprint Fun Food Chain Stacking Fun With Sugar Cubes Garden in a Glove Germs! Germs! Germs! Let s Count Money Let s Race: Force and Friction Magnetic Bottle Measuring Dry Materials Measuring Liquids Money Match Penny Scrubber Plant Parts Root Beer Float Seed Scavenger Hunt Soap That Floats Soybean Seed Necklace States of Matter Sugar Surprise Touch and Feel Cloud Tubs of Butter Fun! What s This Made Of? MSU is an affirmative-action, equal-opportunity employer, committed to achieving excellence through a diverse workforce and inclusive culture that encourages all people to reach their full potential. Michigan State University Extension programs and materials are open to all without regard to race, color, national origin, gender, gender identity, religion, age, height, weight, disability, political beliefs, sexual orientation, marital status, family status or veteran status. Issued in furtherance of MSU Extension work, acts of May 8 and June 30, 1914, in cooperation with the U.S. Department of Agriculture. Jeffrey W. Dwyer, Director, MSU Extension, East Lansing, MI This information is for educational purposes only. Reference to commercial products or trade names does not imply endorsement by MSU Extension or bias against those not mentioned. Produced by ANR Creative for MSU Extension ( 08:2018-WEB PA/MR WCAG 2.0 Heads In, Hearts In Michigan 4-H Youth Development Michigan State University Extension
2 HEADS IN, HEARTS IN A Drop of Blood Instructions for Set-Up Supplies Guide for Families handout Clear plastic standup display (optional) Blood in an Artery handout Clear ½-gallon sealable container Corn syrup Red cinnamon candies Dry lima beans Lentils Display table Activity Preparation Purchase or locate items on supply list. Print one copy of the Guide for Families handout. Laminate or place in a clear plastic standup display to allow participants to see it more readily. Print one copy of Blood in an Artery handout in color. Laminate. Pour corn syrup, red cinnamon candies, lima beans and lentils into the clear ½-gallon sealable container. Set up the display table and arrange needed supplies. 4-H Heads, In Hearts In Michigan 4-H Youth Development Michigan State University Extension
3 HEADS IN, HEARTS IN A Drop of Blood Guide for Families Learning Objectives What you need to know: There are four parts of blood: Plasma Red blood cells White blood cells Platelets Blood is very important to our bodies. A child weighing 80 pounds has about 3/4 gallon of blood in his or her body. Each component of blood plays an important role. Plasma is the clear portion of the blood. Red blood cells deliver oxygen from the lungs to the tissues and organs in the body. White blood cells help defend the body against disease and infections. Platelets help blood to clot when there is a cut. What you will do and learn: In this activity, you will look at a model of a drop of blood and a picture that shows the parts of blood labeled. Using the picture, you will identify the four parts of blood in the model. Instructions 1. Look at the model of a drop of blood in the container and the picture of blood in an artery. What do you notice? What do you think our blood does? 2. Look at the four separate parts: plasma, red blood cells, white blood cells and platelets. 3. Looking in the container, which part do you think is the plasma? Red blood cells? White blood cells? Platelets? (See the answers below.) Answers: 1. Plasma (corn syrup) 2. Red blood cells (red cinnamon candies) 3. White blood cells (dry lima beans) 4. Platelets (lentils) This activity is adapted from Creekside Learning. (2011, February 24). More kitchen science: What s inside a drop of blood? Retrieved from


4 A Drop of Blood Blood in an Artery Handout Artery Platelet Plasma Illustration istock.com/mhaprang Red blood cell White blood cell
5 HEADS IN, HEARTS IN Baking Soda Fizz Instructions for Set-Up: Supplies Guide for Families handout Clear plastic standup display (optional) 3 small bowls 3 medium bowls Liquid food coloring of any color Baking soda 3 pipettes or medicine droppers Vinegar (1 quart) Lemon juice (1 quart) Lemon-lime pop (2 liters) 3 labels ( vinegar, lemon juice, lemon-lime pop ) Large bowl for disposal of waste Display table Activity Preparation Purchase or locate items on supply list. Print one copy of the Guide for Families handout. Laminate or place in a clear plastic standup display to allow participants to see it more readily. Put 3 to 4 drops of liquid food coloring in each small bowl. Pour a layer of baking soda into the bottom of each small bowl, thick enough to cover the bottom of the bowl and the food coloring. Fill one medium bowl with vinegar, one with lemon juice and one with lemon-lime pop. Label each bowl. Place the small bowls and medium bowls on the display table along with 3 pipettes or medicine droppers. Note: This activity is best done with a facilitator who will clean up after each experiment by dumping the waste into the large bowl.
6 HEADS IN, HEARTS IN Baking Soda Fizz Guide for Families Learning Objectives What you need to know: Sodium bicarbonate baking soda as we commonly know it is a chemical base. This base reacts with the acid of the vinegar, lemon juice and pop. This causes a chemical reaction called an acidbase reaction. This chemical reaction produces carbon dioxide gas when the carbon in the baking soda reacts with the oxygen in the vinegar, lemon juice or pop. What you will do and learn: You will gain an understanding of chemical reactions by mixing baking soda with three types of liquids. Instructions What do you think will happen when? 1. Take a pipette or medicine dropper with vinegar (from bowl labeled vinegar ) and drop by drop, add the vinegar to the baking soda (in one of the small bowls). What happens? The acetic acid (the part of vinegar that makes it sour) reacts with the sodium bicarbonate (baking soda) to form carbonic acid. Carbonic acid is unstable and immediately falls apart into carbon dioxide and water. The bubbles you see are from the reaction that come from the carbon dioxide escaping the solution that s left. 2. Next, take a pipette or medicine dropper with lemon juice (from bowl labeled lemon juice ) and drop by drop, add the lemon juice to the baking soda (in one of the small bowls). What happens? The same thing as when you mix baking soda and vinegar! An easier way to think about it: It s an acid-base reaction because it involves an acid (citric acid in the lemon juice) reacting with a base (sodium bicarbonate, also called baking soda). This is a chemical reaction. 3. Last, take a pipette or medicine dropper with lemon-lime pop (from bowl labeled lemon-lime pop ) and drop by drop, add the pop to the final bowl with baking soda. What happens? Again, the citric acid in lemon-lime soda reacts with the base (baking soda). 4. Discuss what you observed. 4-H Heads, In Hearts In Michigan 4-H Youth Development Michigan State University Extension
7 HEADS IN, HEARTS IN Chromatography: What s That? Instructions for Set-Up Supplies Guide for Families handout Clear plastic standup display (optional) Paper towels (one 2-inch by 4-inch strip per participant) Scissors 3-ounce paper cups (one per participant) 3 or 4 permanent markers Rubbing alcohol (about a tablespoon per participant) Display table Activity Preparation Purchase or locate items on the supply list. Print one copy of the Guide for Families handout. Laminate or place in a clear plastic standup display to allow participants to see it more readily. Cut the paper towels into strips approximately 2 inches wide by 4 inches long. Set up the display table with the supplies.
8 HEADS IN, HEARTS IN Chromatography: What s That? Guide for Families Learning Objectives What you need to know: Chromatography is a way to separate the parts of a mixture based on how much of each part is present. The parts might be separated based on size or weight. What you will do and learn: In this activity, you will discover that there may be many different colors combined to create the final marker color that we see. Instructions: What do you think will happen when? 1. Take a strip of paper towel. 2. Using the permanent marker, place a mediumsized dot approximately ½ inch from one end of the strip of paper towel. 3. Pour just enough rubbing alcohol into the bottom of the cup to cover the entire bottom. 4. Place the dotted end of the paper towel into the cup so the end touches the bottom of the cup. 5. The end of the paper towel should be submerged in rubbing alcohol. 6. Observe the paper towel soaking up the rubbing alcohol. Observe what happens to the dot. Talk about what you see. (Chromatography occurred when the chemical mixture [the spot made by the marker] was seperated by a liquid [rubbing alcohol] into parts. You saw those parts when the alcohol was absorbed and moved up the paper towel.) 7. Why do you think some colors moved farther than others from the dot? 4-H Heads, In Hearts In Michigan 4-H Youth Development Michigan State University Extension
9 HEADS IN, HEARTS IN Coin Drop Instructions for Set-Up Supplies Guide for Families handout Clear plastic standup display (optional) different types of coins (pennies, nickels, dimes and quarters) index cards, 3 inches by 5 inches Up to fifteen 9-ounce clear plastic cups Display table Activity Preparation Purchase or locate items on supply list. Print one copy of the Guide for Families handout. Laminate or place in a clear plastic standup display to allow participants to see it more readily. Set up display table with supplies.
10 HEADS IN, HEARTS IN Coin Drop Guide for Families Learning Objectives What you need to know: Sir Isaac Newton defined the three laws of motion. The first law of motion states that an object at rest will stay at rest unless an external force is applied to it, and an object in motion tends to stay in motion with the same direction and speed unless an external force is applied to it. Gravity is a force that pulls all objects towards the center of the earth. Friction is a force that holds back the movement of a sliding object. What you will do and learn: You will experiment with friction, gravity and the law of motion by using coins, an index card and a cup. Instructions 1. Select a variety of 3 to 4 coins. 2. Place an index card on top of the cup. 3. Place the coins on top of the index card. Center the coins in the middle of the card but do not place them on top of each other. 4. Do you think you can remove the card so the coin falls in the cup? 5. Using your fingers, flick or pull the index card away from the cup. What happens to the coins? Variations: Stack coins on top of each other. Use more or less fingers to flick the card. The first law of motion helps us to understand why the coins drop directly into the cup. In this experiment, the coins are at rest while they sit on top of the card and cup. When you flick or pull the card out from under the coins, you enable gravity to act upon the coins and pull them into the cup. When the coins drop, the bottom of the cup stops the coins. Why don t the coins stay with the card when the card goes flying? It s because of the lack of friction. There isn t enough friction between the coin and the card for the coin to stay with the card. 4-H Heads, In Hearts In Michigan 4-H Youth Development Michigan State University Extension
11 HEADS IN, HEARTS IN Color-Changing Milk Instructions for Set-Up Supplies Guide for Families handout Clear plastic standup display (optional) Whole milk (enough to fill each small dish 1/3 full) 2 small dishes Food coloring (3 colors minimum) 1 dropper per food coloring Cotton swabs such as Q-tips (one per participant) Dish soap (enough to cover each cotton swab tip) Large bin for disposal of milk solution Display table Activity Preparation Purchase or locate items on supply list. Print one copy of the Guide for Families handout. Laminate or place in a clear plastic standup display to allow participants to see it more readily. Set up the display table and arrange needed supplies.
12 HEADS IN, HEARTS IN Color-Changing Milk Guide for Families Learning Objectives What you need to know: Milk is mostly water but it also contains vitamins, minerals, proteins and tiny droplets of fat suspended in solution. Fats and proteins are sensitive to changes in the surrounding solution (the milk). What you will do and learn: You will learn how fats and proteins change after the addition of a second substance. You will also learn about molecules of fat in the milk we drink. Instructions 1. Pour a small amount of whole milk into the dish. 2. Choose 3 colors of food coloring and put one drop of each in the center of the milk. Keep the drops close together. 3. Grab one clean cotton swab. Predict: what do you think will happen if you touch the tip of the cotton swab to the center of the milk? 4. Place one end of the cotton swab in the center of the milk. What happens? 5. Using the other end of the cotton swab, dip it in dish soap. Predict: what do you think will happen when you touch the tip of the cotton to the center of the milk? 6. Place the soapy end of the cotton swab into the center of the milk. Hold it there for 10 to 15 seconds. What happens? The secret of the bursting colors is the chemistry of that tiny drop of soap. Dish soap, because of its bipolar characteristics (nonpolar on one end and polar on the other), weakens the chemical bonds that hold the proteins and fats in a solution. The soap s polar, or hydrophilic (water-loving), end dissolves in water, and its hydrophobic (water-fearing) end attaches to a fat globule in the milk. This is when the fun begins. The molecules of fat bend, roll, twist, and contort in all directions as the soap molecules race around to join up with the fat molecules. During all of this fat molecule gymnastics, the food coloring molecules are bumped and shoved everywhere. 4-H Heads, In Hearts In Michigan 4-H Youth Development Michigan State University Extension
13 HEADS IN, HEARTS IN Colorful Rain Instructions for Set-Up Supplies Guide for Families handout Clear plastic standup display (optional) Water Clear cups or jars Shaving cream Liquid food coloring Display table Activity Preparation Find or purchase items on supply list. Print one copy of the Guide for Families handout. Laminate or place in a clear plastic standup display to allow participants to see it more readily. Set up the display table with needed supplies.
14 HEADS IN, HEARTS IN Colorful Rain Guide for Families Learning Objectives What you need to know: Clouds are made of lots of tiny particles. Water or ice collect on the particles. When enough water or ice collect and become heavy enough, the particles fall to the earth as precipitation. Precipitation can be snow, rain, sleet, freezing rain or hail. What you will do and learn: You will discover how water collects in clouds and falls to the ground. Instructions 1. Fill a clear cup half full with water. 2. Squirt a small amount of shaving cream on top of the water, enough to cover the top of the water completely. This creates a cloud. 3. Add food coloring, drop by drop, on top of the shaving cream. How many drops do you think it will take to fall through the cloud of shaving cream? 4. Wait and see what the weight of the food coloring will do to the cloud. The water represents the air and the shaving cream represents a cloud. When the food coloring is added to the shaving cream, one drop at a time, it becomes heavy enough to fall through the saving cream. This is similar to when water droplets fall from a cloud. 4-H Heads, In Hearts In Michigan 4-H Youth Development Michigan State University Extension
15 HEADS IN, HEARTS IN Corn Plastic Instructions for Set-Up Supplies Guide for Families handout Clear plastic standup display (optional) Resealable plastic sandwich bags (1 per participant) Cornstarch (1 tablespoon per participant) Medium-sized bowl 2 small bowls Water (1½ tablespoons per participant) Corn oil (2 drops per participant) 2 tablespoon-sized measuring utensils One ½-tablespoon-sized measuring utensil Pipette or medicine dropper Liquid food coloring (2 drops per participant) Microwave Extension cord Display table Activity Preparation Purchase or locate items on supply list. Print one copy of the Guide for Families handout. Laminate or place in a clear plastic standup display to allow participants to see it more readily. Set up the display table with supplies as described in the following bullets: Place resealable plastic bags on the table. Place cornstarch in a medium-sized bowl for ease of participants scooping and measuring. Place one tablespoon-sized measuring utensil next to the bowl of cornstarch. Put water in one small bowl and corn oil in the other. Place one pipette or medicine dropper next to the bowl of corn oil. Place one tablespoon-sized measuring utensil and one ½-tablespoon-sized measuring utensil next to the bowl of water. Place bottle of food coloring on the table. Set up the microwave and plug in to a power supply using the extension cord. Make sure it works.
16 Learning Objectives What you need to know: Corn is biodegradable. That means that over time, it will break down without harming the earth. Corn is a renewable resource it can be reproduced or grown again and again. Cornstarch and corn oil are both by-products of corn, which means that they were made from corn. Other products made from corn are packing peanuts, trash bags, carpet, stuffing in pillows and filling in bed comforters. Most plastics are made from petroleum, which cannot be reproduced at the same rate it is consumed. Petroleum is considered a nonrenewable resource. Today you will make plastic from corn, a renewable resource. What you will do and learn: You will learn what biodegradable means and identify biodegradable materials when you make your own plastic from corn. HEADS IN, HEARTS IN Corn Plastic Guide for Families Instructions 1. Put 1 tablespoon of cornstarch in a plastic bag. 2. Add 2 drops of corn oil. 3. Add 1½ tablespoons of water. 4. Seal the plastic bag and mix the ingredients together, gently. 5. Open the bag and add 2 drops of food coloring. Seal the bag, and mix gently. 6. Give the bag to the volunteer or teacher. 7. He or she will unseal the plastic bag, and place it in the microwave for 20 to 25 seconds. 8. He or she will return the bag to you. Caution it may be hot! 9. Squish the ingredients together through the plastic bag and observe what happens. 10. Observe and discuss: What do you notice about your biodegradable plastic? Does it look and feel the same as other plastics you re familiar with such as plastic bottles, bouncy balls, plastic cups and other plastic things? What could you make with it if you let it harden? What does it smell like? Most plastics are made from petroleum, which is a nonrenewable resource or a resource that cannot be reproduced in a useful amount of time. Using renewable substitutes such as corn that can act like petroleum, we can recreate products that are not dependent on nonrenewable resources such as oil reserves. The corn acts as a polylactic acid plastic (PLA) and has similar properties to traditional petroleum-based products. 4-H Heads, In Hearts In Michigan 4-H Youth Development Michigan State University Extension
17 HEADS IN, HEARTS IN Creating Landforms Instructions for Set-Up Supplies Guide for Families handout 15 clear plastic standup displays (optional) Landforms handouts 13 disposable cookie sheets, 9-inch by 13-inch or larger 10-pound bag of sand Water to moisten sand Pieces of craft foam cut into various lengths, colors and sizes Display table Activity Preparation Purchase or locate items on supply list. Print one copy of the Guide for Families handout. Laminate or place in a clear plastic standup display to allow participants to see it more readily. Print one copy of each Landforms handout. Laminate or place each in a clear plastic standup tray. Cut pieces of craft foam to assist learners in creating their landforms. Set all materials on the table for easy access by participants.
18 HEADS IN, HEARTS IN Creating Landforms Guide for Families Learning Objectives What you need to know: A landform is a feature of the earth s surface. Landforms include hills, lakes, mountains, oceans, plains, plateaus, ponds, rivers, streams, valleys, islands, canyons and volcanos. Instructions 1. Select a tray. Explore each landform by looking at the photograph and reading the description. 2. Identify what characteristics your landform has. 3. Using the sand and craft foam, create your own version of the landform. 4. What characteristics are similar between landforms? What characteristics are different? What you will do and learn: You will recognize and name various landforms and correctly identify characteristics of landforms. You will recreate landforms using the materials given. 4-H Heads, In Hearts In Michigan 4-H Youth Development Michigan State University Extension

19 Creating Landforms Landforms Handout What is a landform? A landform is a feature of the earth s surface. Photograph istock.com/harvepino

20 Creating Landforms Landforms Handout Hill A hill is an area of high ground lower than a mountain. Photograph istock.com/iakovkalinin

21 Creating Landforms Landforms Handout Lake A lake is a body of water surrounded by land. Michigan has five large lakes called the Great Lakes: Lake Huron, Lake Ontario, Lake Michigan, Lake Erie and Lake Superior. Photograph istock.com/alexmak72427

22 Creating Landforms Landforms Handout Mountain A mountain is a high, steep surface feature of the earth that rises above the land around it. A mountain stands by itself or is a part of a group of mountains. Photograph istock.com/danielprudek

23 Creating Landforms Landforms Handout Ocean An ocean is a large body of salt water. Oceans cover most of the earth. Photograph istock.com/iakovkalinin

24 Creating Landforms Landforms Handout Plain A plain is a large, mostly flat land. Many different types of grasses grow there with few trees. Photograph istock.com/georgeburba

25 Creating Landforms Landforms Handout Plateau A plateau is a rise or hill with steep sides and a flat top. Photograph istock.com/mcdustelroy

26 Creating Landforms Landforms Handout Pond A pond is a small, shallow body of water surrounded on all sides by land. A pond is smaller and more shallow than a lake and usually has a lot of plants growing in it and around it. Photograph istock.com/givaga

27 Creating Landforms Landforms Handout River A river is a large stream of water that flows downhill. It causes slow changes in the earth s surface by moving earth materials and forming valleys. A river is a surface feature. Photograph istock.com/possum1961

28 Creating Landforms Landforms Handout Stream A stream is a small body of flowing water. Photograph istock.com/catalina-gabriela Molnar

29 Creating Landforms Landforms Handout Valley A valley is a low landform found between hills and mountains. Photograph istock.com/matthewleesdixon

30 Creating Landforms Landforms Handout Island An island is a piece of land surrounded by water on all sides. Photograph istock.com/yykkaa

31 Creating Landforms Landforms Handout Canyon A canyon is a narrow valley with very steep sides created from erosion over time. Photograph istock.com/sumikophoto

32 Creating Landforms Landforms Handout Volcano A volcano is a mountain with magma chambers, pipes and vents that release magma gases and steam from deep in the earth s surface. Photograph istock.com/solarseven
33 HEADS IN, HEARTS IN Dancing Raisins Instructions for Set-Up Supplies Guide for Families handout Clear plastic standup display (optional) Two to three 2-liter bottles of lemon-lime pop Approximately ten 10-ounce or 12-ounce clear cups 1 2 boxes of fresh raisins Display table Activity Preparation Purchase or locate items on supply list. Print one copy of the Guide for Families handout. Laminate or place in a clear plastic standup display to allow participants to see it more readily. Set up the display table and arrange needed supplies.
34 HEADS IN, HEARTS IN Dancing Raisins Guide for Families Learning Objective What you need to know: Making carbonated beverages involves dissolving carbon dioxide gas into a liquid under pressure. This process is called carbonation. When you open the beverage, you remove the pressure and the carbon dioxide begins to escape. What you will do and learn: You will watch raisins dance in lemon-lime soda and talk about why they do that. Instructions: What do you think will happen when? 1. Fill the clear cup approximately half full with lemon-lime pop. 2. Notice the bubbles in the pop. The bubbles are carbon dioxide gas released from the liquid. 3. Add a few raisins to the cup. What happens? 4. Be patient! 5. Discuss what happened to the raisins. When the raisin is dropped into the carbonated beverage it sinks to the bottom, where carbon bubbles attach to it and lift it to the top of the beverage. The raisin floats on the top until the bubbles break, releasing the gas and allowing the raisin to fall to the bottom again. The process continues until the carbonated beverage goes flat the carbon dioxide escapes. The carbonation bubbles attach to the surfaces of various items. The rougher the surface, the more locations there are for the bubbles to attach. 4-H Heads, In Hearts In Michigan 4-H Youth Development Michigan State University Extension
35 HEADS IN, HEARTS IN Dissecting a Seed Instructions for Set-Up Supplies Guide for Families handout Parts of the Seed handout 2 clear plastic standup displays (optional) 2 3 bags of lima beans Large bowl Water Several small magnifying glasses Display table Activity Preparation Purchase or locate items on supply list. Print one copy of the Guide for Families handout. Laminate or place in a clear plastic standup display to allow participants to see it more readily. Print out Parts of the Seed handout. Laminate or place in a clear plastic standup display to allow participants to see it more readily. Soak lima beans in a large bowl of water for 24 hours to soften. Set up the display table and arrange needed supplies.
36 HEADS IN, HEARTS IN Dissecting a Seed Guide for Families Learning Objectives What you need to know: Every seed has three parts: The seed coat helps protect what is inside. Seed coats can be thin or thick. The endosperm is the food for the seed so it can begin to grow. The embryo, or baby root, (roots, stem, leaves) is the part of the seed that will sprout into a new plant. Instructions 1. Pick out a lima bean. 2. Gently peel away the seed coat. 3. Gently split your lima bean into two halves. 4. See if you can find the parts of the seed. 5. Use the magnifying glass to get a closer look. 6. Try to identify the roots, stem and leaves. What you will do and learn: You will investigate the lima bean seed and identify the three parts. 4-H Heads, In Hearts In Michigan 4-H Youth Development Michigan State University Extension
37 Dissecting a Seed Parts of the Seed Handout Seed coat Helps protect what is inside. Embryo The part of the seed that will sprout into a new plant. Endosperm The food for the seed so it can begin to grow.
38 HEADS IN, HEARTS IN Drops on a Penny Instructions for Set-Up Supplies Guide for Families handout Clear plastic standup display (optional) 1 2 shallow pans Several pennies 5 10 eye droppers Small bowl with water Small bowl with soapy water Paper towels Display table Activity Preparation Purchase or locate items on supply list. Print one copy of the Guide for Families handout. Laminate or place in a clear plastic standup display to allow participants to see it more readily. Set up the display table with the supplies. Include paper towels for cleaning up spills. 4-H Heads, In Hearts In Michigan 4-H Youth Development Michigan State University Extension
39 HEADS IN, HEARTS IN Drops on a Penny Guide for Families Learning Objectives What you need to know: Surface tension is created by the force of attraction between water molecules. A molecule is formed when two or more atoms join together. Water is made up of atoms of hydrogen and oxygen. In water, each molecule is attracted to another molecule and they stick together. This only happens when the water molecule is next to them or below them (because there is no water above them). As they stick together, they create an invisible shield. (Think about an insect that can rest on top of a puddle.) What you will do and learn: You will explore surface tension by placing drops of water on a penny. Instructions 1. Choose a penny from the table and place it in a shallow pan. 2. Choose an eye dropper and one by one, add drops of water to the surface of the penny. 3. How many drops do you think a penny can hold? 4. Count how many drops of water you add before the water spills over the edge of the penny. 5. Use the same penny. Add drops of soapy water one by one to the surface of the penny. 6. Count how many drops of soapy water you add before the water spills over the edge. 7. Discuss: Was the penny able to hold more drops of plain water or more drops of soapy water? Why do you think that was the outcome? If we add too many drops of water on the surface of the penny, gravity breaks the force of attraction making the water spill off the coin. When you add soap to the water, you reduce the surface tension.
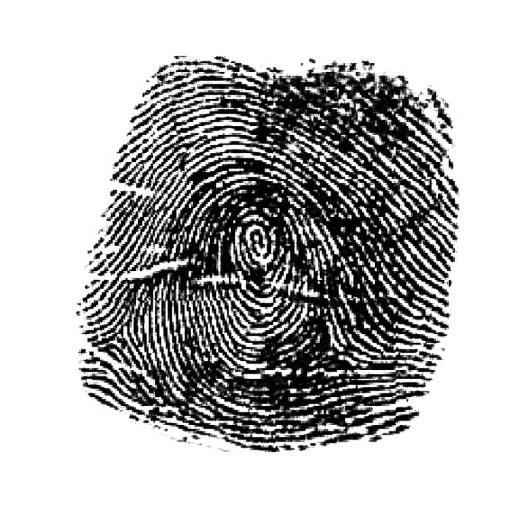
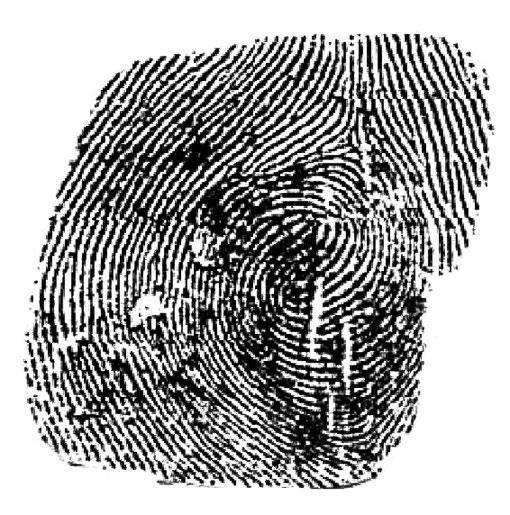
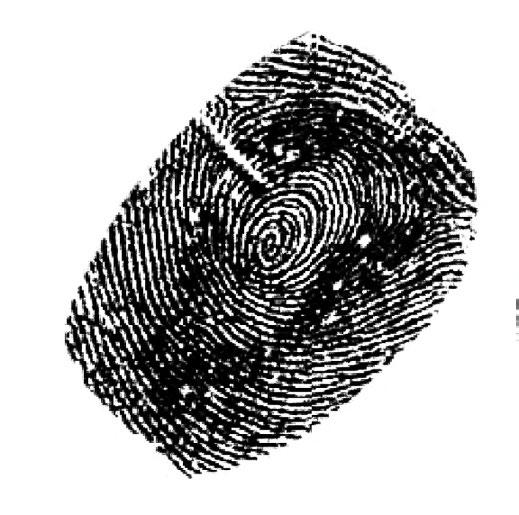
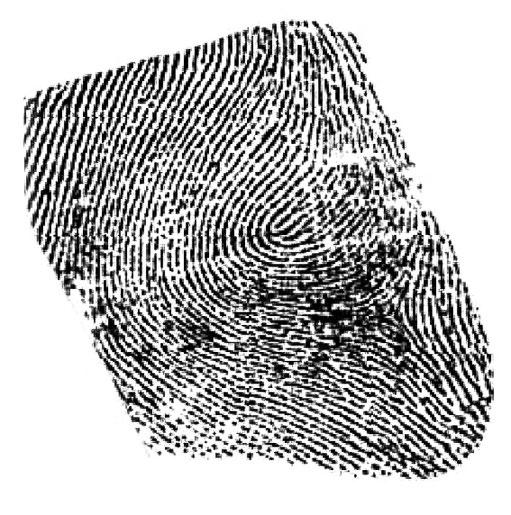
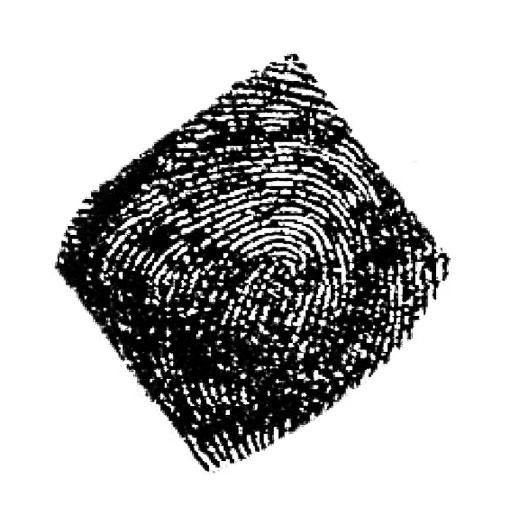
40 HEADS IN, HEARTS IN Fingerprint Fun Instructions for Set-Up Supplies Guide for Families handout Clear plastic standup display (optional) Fingerprint Examples handout (Letters) Fingerprint Examples handout (Numbers) 6 sheets of colored paper (3 of one color and 3 of another color) Scissors Scrap paper Ink pad Wet wipes Display table Activity Preparation Purchase or locate items on supply list. Print one copy of the Guide for Families handout. Laminate or place in a clear plastic standup display to allow participants to see it more readily. Print the letter fingerprints on one color of paper and the number fingerprints on another color of paper. Laminate them if possible. Cut them apart. (Note that A and 1 are the same image, just as B and 7 are, C and 9, and so on.) See the following table for correct fingerprint matches: Letter Number A 1 B 7 C 9 D 11 E 3 F 10 G 6 H 2 I 4 J 12 K 5 L 8 On the back side of each letter fingerprint and number fingerprint, write the corresponding letter or number as an answer key. Set up the display table and arrange needed supplies. Note that the fingerprints in this activity were used with permission of Frank Virzi. 4-H Heads, In Hearts In Michigan 4-H Youth Development Michigan State University Extension
41 HEADS IN, HEARTS IN Fingerprint Fun Guide for Families Learning Objectives What you need to know: The ridges on our fingers that create fingerprints are important because they help us grasp objects. We leave fingerprints when we touch solid surfaces because of the natural oils found in our skin. Fingerprints are unique to each person, even identical twins. No one else has the same fingerprints you do. The ridges on your fingers don t change as you grow or get older. Even when you burn, cut or scrape your finger, the original pattern of the fingerprint remains the same as the new skin grows. What you will do and learn: You will demonstrate an understanding of the purpose of fingerprints and you will be able to identify similarities between different fingertips while playing a matching game. You will also make your own fingerprint using ink. Instructions 1. Look at the fingerprints labeled with letters. Now look at the fingerprints labeled with numbers. 2. Try to match the fingerprints labeled with letters with the fingerprints labeled with numbers. Look on the back of the fingerprints to find the answers that match a letter fingerprint to a number fingerprint. Look for the similarities. 3. Look at your own fingerprint. Observe a friend s fingerprint. 4. Press your finger into the pad of ink. Press your finger firmly on to a piece of scrap paper. Observe your fingerprint. 5. Use the wet wipes to clean your hands. 6. What characteristics are similar between the fingerprints? What characteristics are different? 7. What did you find interesting about the fingerprints?

42 Fingerprint Fun Fingerprint Examples Handout (Letters) A B C D

43 Fingerprint Fun Fingerprint Examples Handout (Letters), continued E F G H

,")
44 Fingerprint Fun Fingerprint Examples Handout (Letters), continued I J K L
, continued 1 2 3 4")
45 Fingerprint Fun Fingerprint Examples Handout (Numbers), continued


46 Fingerprint Fun Fingerprint Examples Handout (Numbers), continued


47 Fingerprint Fun Fingerprint Examples Handout (Numbers), continued
48 HEADS IN, HEARTS IN Food Chain Stacking Instructions for Set-Up Supplies Guide for Families handout Clear plastic standup display (optional) Plants and Animals handout 6 boxes that stack inside of each other Scissors Wrapping paper or other decorative paper Clear, heavy-duty packaging tape. Display table Activity Preparation Purchase or locate items on supply list. Print one copy of the Guide for Families handout. Laminate or place in a clear plastic standup display to allow participants to see it more readily. Cover boxes with decorative paper. Print Plants and Animals handout. Cut out each plant and animal. Using clear, heavy-duty packaging tape, attach plant and animal pictures to each box in the order they would be found in the food chain. (The higher up the plant or animal is in the food chain, the bigger the box.) Set up the display table and arrange needed supplies. 4-H Heads, In Hearts In Michigan 4-H Youth Development Michigan State University Extension
49 HEADS IN, HEARTS IN Food Chain Stacking Guide for Families Learning Objectives What you need to know: Some animals eat plants. Some animals eat other animals. A food chain begins when a plant is eaten by an animal. Then that animal is eaten by another animal and so on. Every living thing needs energy in order to live. Energy is obtained through food. Plants use sunlight and carbon dioxide to make food. Animals get energy from the food they eat, which can be plants or animals. In the food chain, energy is transferred from plants to various species of animals as each animal eats another. Each plant or animal holds a special role: producer (plant) or consumer (animal). What you will do and learn: You will investigate the food chain. You will decide if each of the animals or plants pictured are producers or consumers. You will organize the food chain in its proper order. Instructions 1. Look at the pictures on the boxes. 2. Think about a food chain. Some animals eat plants, while some animals eat other animals. Start with the grass and think about which animals eat grass. 3. Stack the boxes in the order you think the food chain would go. 4. Continue to stack the boxes building the food chain. Which animal will be last? Think about it: Which of the animals or plants is a producer or a consumer? Can a producer also be a consumer? Can a consumer also be a producer?

50 Food Chain Stacking Plants and Animals Handout Grass Photograph istock.com/adarkov

51 Food Chain Stacking Plants and Animals Handout, continued Grasshopper Photograph istock.com/hurtled

52 Food Chain Stacking Plants and Animals Handout, continued Snake Photograph istock.com/rkhalil

53 Food Chain Stacking Plants and Animals Handout, continued Owl Photograph istock.com/martin-kubik

54 Food Chain Stacking Plants and Animals Handout, continued Mouse Photograph istock.com/creativenature_nl

55 Food Chain Stacking Plants and Animals Handout, continued Coyote Photograph istock.com/stevebyland
56 HEADS IN, HEARTS IN Fun With Sugar Cubes Instructions for Set-Up Supplies Guide for Families handout Clear plastic standup display (optional) 2 small bowls Two 1-gallon containers of water 2 different colors of liquid food coloring boxes of sugar cubes Aluminum foil, ripped in pieces approximately 2 inches by 2 inches (1 per participant) Display table Activity Preparation Purchase or locate items on supply list. Print one copy of the Guide for Families handout. Laminate or place in a clear plastic standup display to allow participants to see it more readily. Color the water in each of the gallon containers a different color using the liquid food coloring. Set up the display table and arrange needed supplies. 4-H Heads, In Hearts In Michigan 4-H Youth Development Michigan State University Extension
57 HEADS IN, HEARTS IN Fun With Sugar Cubes Guide for Families Learning Objectives What you need to know: Did you ever wonder why sugar dissolves in water? Sugar dissolves because water molecules are polar. A molecule happens when two or more atoms join together. Water is made up of atoms of hydrogen and oxygen. A water molecule can break the bonds that hold together sugar molecules. What you will do and learn: You will explore some unique characteristics of water. Instructions 1. To one small bowl, add some colored water and to the other small bowl, add some water of a different color. Add just enough to fill the bottom of the bowl. 2. Get 6 sugar cubes. Three for each bowl. 3. Don t do it yet, but in one bowl, you will stack three sugar cubes on top of each other. In the other bowl, you will also stack three sugar cubes on top of each other, but in this second bowl, you will put a small piece of foil in between the bottom cube and the two stacked on top of it. 4. Discuss and predict: When each stack is placed in the colored water, what you do think will happen? Will one dissolve faster than the other? Which one? Why? 5. Now do the experiment by following the instructions in point number Think about why the cubes dissolved differently. Water is absorbed by the sugar cubes and you can see the colored water rising through the sugar. When there is no barrier to prevent the water from being absorbed, the water weakens the sugar cube and the cubes fall. By placing the piece of foil in between the layers of sugar cubes, the water cannot go through and just weakens the bottom sugar cube. However, because the bottom sugar cube is weak, the entire stack of cubes will still fall.
58 HEADS IN, HEARTS IN Garden in a Glove Instructions for Set-Up Supplies Guide for Families handout Clear plastic standup display (optional) Clear, disposable, poly, food service glove (1 per learner) Yarn cut in approximately 4-inch sections Water Cotton balls (5 per learner) 5 different varieties of seeds such as basil, green beans, yellow beans, carrots, lettuce, oregano, parsley or spinach 6 small bowls 5 labels Permanent markers Display table Activity Preparation Purchase or locate items on supply list. Print one copy of the Guide for Families handout. Laminate or place in a clear plastic standup display to allow participants to see it more readily. Label five of the small bowls with the variety of seed that s in the bowl. Use the sixth bowl for water. Set up the display table and arrange needed supplies. 4-H Heads, In Hearts In Michigan 4-H Youth Development Michigan State University Extension
59 HEADS IN, HEARTS IN Garden in a Glove Guide for Families Learning Objectives What you need to know: You can grow plants in a glove! When conditions are right, seeds will grow into plants. Those conditions include: Air (inside the glove) Water (in the cotton ball) Warmth (present when the glove is placed in the sun) Sun (daylight) Soil (cotton ball) What you will do and learn: You will grow a garden in a glove and be introduced to the plant growing cycle. You will become familiar with the components plants need to grow: air, water, warmth, sun and soil. Instructions 1. Before you begin, think about these questions: Do you think you can grow a plant in a glove? What do plants need to grow? 2. Take one plastic glove 3. Using a permanent marker, label each finger of the glove with the variety of seed that you will put in that finger. For example, label one finger basil, another carrots, and so on. 4. Blow air into the glove gently to expand it slightly. 5. Dip 5 cotton balls into the water to moisten slightly. 6. Dip each moist cotton ball into a different seed bowl, picking up a few seeds with the cotton ball. 7. Place the cotton ball with seeds in the correct finger. For example, place the cotton ball with carrot seeds in the finger labeled carrots. 8. Blow more air into the glove, and tie it shut with a piece of yarn. 9. Bring it home and place in a sunny window. 10. Once the seeds grow into seedlings, transfer into a small pot, cup or container for continued growth.
60 HEADS IN, HEARTS IN Germs! Germs! Germs! Instructions for Set-Up Supplies Guide for Families handout Clear plastic standup display (optional) Germ lotion that glows under black light (available at Amazon. com or Portable black light Extra batteries (if portable black light takes batteries) Wet wipes Handwashing poster ( uploads/236/66667/jiffjump1- HandwashingPoster.pdf) Display table Activity Preparation Purchase or locate items on supply list. Print one copy of the Guide for Families handout. Laminate or place in a clear plastic standup display to allow participants to see it more readily. Print handwashing poster. Options: Print poster and laminate to display, or print copies of posters for families to display at home. Set up the display table and arrange needed supplies. 4-H Heads, In Hearts In Michigan 4-H Youth Development Michigan State University Extension
61 HEADS IN, HEARTS IN Germs! Germs! Germs! Guide for Families Learning Objectives What you need to know: Whether we like to believe it or not, we live in a world filled with germs, bacteria and viruses. It is hard to find out about germs when you can t see them, but what if you could see simulated germs on your hands and anything you touch? The germ lotion is an amazing way for you to understand the importance of proper hand-washing techniques and also to learn how easily germs can spread. What you will do and learn: You will identify how germs are spread. Using the germ lotion, you will discover places on your hands that are easily cleaned as well as places on your hands where germs may be hiding, such as in between fingers or around fingernails. Instructions 1. How do you think germs are spread? 2. Discuss how germs are spread: Coughing and sneezing Blowing our noses or going to the bathroom without washing our hands Touching things such as doorknobs, floors or animals without washing our hands 3. Place a small amount of germ lotion into your hands. The germ lotion represents germs that are on our hands. 4. Rub your hands together, making sure to get the backs, palms and fingernails. 5. Place both hands under the portable black light. 6. Discuss: What do you see? Does it look like a lot of germs or very few? How might you have gotten that many germs if they were real? What is one way that you can get rid of the germs? 7. Wash your hands using a wet wipe. (If a sink with soap and water is available, it s a better option than using wet wipes.) Try to get your hands as clean as you can with the wet wipe. 8. Place both hands under the portable black light. 9. Observe your hands. What is different about your hands now? Were you able to remove all the germ glow lotion? What parts of your hands no longer have germs? What parts of your hands still had germs where you see you ll need to wash better?
62 HEADS IN, HEARTS IN Let s Count Money Instructions for Set-Up Supplies Guide for Families handout 2 clear plastic standup displays (optional) Coin Denomination handout Money Cards handout Scissors Coins in various denominations (pennies, nickels, dimes and quarters) Bowl Display table Activity Preparation Purchase or locate items on supply list. Print one copy of the Guide for Families handout. Laminate or place in a clear plastic standup display to allow participants to see it more readily. Print one copy of the Coin Denomination handout. Laminate or place in a clear plastic standup display to allow participants to see it more readily. Print one copy of the Money Cards handout on durable paper and cut out the cards, or print, cut and laminate the cards. Put coins in the bowl. Set up the display table and arrange needed supplies. 4-H Heads, In Hearts In Michigan 4-H Youth Development Michigan State University Extension
63 HEADS IN, HEARTS IN Let s Count Money Guide for Families Learning Objectives What you need to know: A penny is equal to 1 cent. A nickel is equal to 5 cents. A dime is equal to 10 cents. A quarter is equal to 25 cents. What you will do and learn: You will become familiar with each coin and how much it is worth. You will practice counting coins. You will use addition to add up coins to reach the amount of money on the card. Instructions 1. Please do not take money with you! 2. Choose a money card. 3. Read the amount of money found on that card. For example, 30 cents. 4. Use the coins provided to make that amount of money in three different ways. For example, if the card says 30 cents, you might make that amount of money in these three ways: 1 quarter and 1 nickel 3 dimes 2 dimes, 1 nickel, and 5 pennies


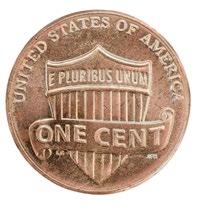
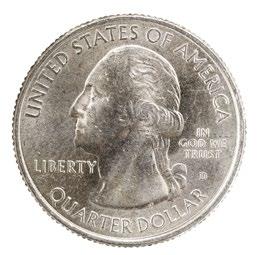

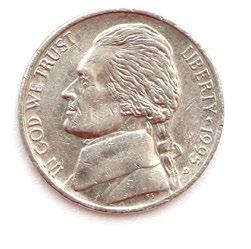
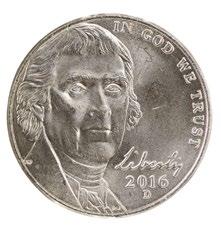

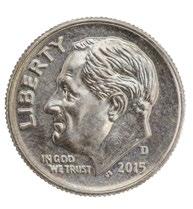

64 Let s Count Money Coin Denomination Handout Penny = 1 cent Nickel = 5 cents Dime = 10 cents Quarter = 25 cents Front Front variations Front Front Back variations Back Back Back variations Photos istock.com/choness; pamela_d_mcadams
65 Let s Count Money Money Cards Handout
66 HEADS IN, HEARTS IN Let s Race: Force and Friction Instructions for Set-Up Supplies Guide for Families handout Clear plastic standup display (optional) 5-inch binder Foam board or cardboard (cut approximately 18 inches by 25 inches) 3 different types of materials to be used to create roads (examples: aluminum foil, pipe cleaners, sand, plastic wrap or other) Stapler with staples or tape 3 toy cars for racing (all of the same size and weight) Display table. Activity Preparation Purchase or locate items on supply list. Print one copy of the Guide for Families handout. Laminate or place in a clear plastic standup display to allow participants to see it more readily. Staple or tape each of the three materials to the foam board or cardboard to create three different types of roads. Lean the foam board or cardboard against the 5-inch binder to create a ramp. Set up the display table and arrange needed supplies. 4-H Heads, In Hearts In Michigan 4-H Youth Development Michigan State University Extension
67 HEADS IN, HEARTS IN Let s Race: Force and Friction Guide for Families Learning Objectives What you need to know: Force is another word for pushing or pulling. Force is what we use to make things move. Sir Isaac Newton s first law states that an object in motion tends to stay in motion. Why do objects that we see moving every day stop moving? That s because of friction. Friction is a force that resists motion. What you will do and learn: You will apply the concept of force and friction. You will hypothesize, observe and evaluate the motion of the cars on each of the roads. You will have an opportunity to develop your observation, prediction and evaluation skills. Instructions 1. Look at the race track. Notice that there are three different types of roads. 2. Observe: What makes each road unique? How are they different? How are they similar? 3. Hypothesize or predict: What do you think will happen when you race the cars down each of the roads? Which car will go faster? Which car will go slowest? 4. Test your hypothesis! 5. Place the cars at the top of the ramp. Let them go at the same time. 6. Evaluate the results and analyze: Which car was fastest? Slowest? Why? In this experiment, you used force to make the cars move down the roads. Each road creates a different amount of friction. The car that is in motion is slowed by the friction (roughness) of the surface of the road. A rougher surface results in more friction. Which surface has the most friction? Which has the least?
68 HEADS IN, HEARTS IN Magnetic Bottle Instructions for Set-Up Supplies Guide for Families handout Clear plastic standup display (optional) Pipe cleaners or chenille stems 2-liter plastic pop bottle 2 feet of yarn Strong magnet with attached carabiner Display table Activity Preparation Purchase or locate items on supply list. Print one copy of the Guide for Families handout. Laminate or place in a clear plastic standup display to allow participants to see it more readily. Cut the pipe cleaners or chenille stems into 1½- to 2-inch sections. Remove and discard the cap of the 2-liter plastic pop bottle. Clean the bottle and allow to dry. Attach one end of the yarn to the carabiner on the strong magnet. Attach the other end of the yarn to the neck of the pop bottle, tying tightly. Set up the display table and arrange needed supplies. 4-H Heads, In Hearts In Michigan 4-H Youth Development Michigan State University Extension
69 HEADS IN, HEARTS IN Magnetic Bottle Guide for Families Learning Objectives What you need to know: Magnets are objects that produce magnetic fields and attract metals such as iron, nickel and cobalt. Pipe cleaners or chenille stems are made of several strands of metal twisted around threads of cotton. What you will do and learn: You will investigate magnetic properties. Instructions 1. Put several pieces of pipe cleaner into the plastic bottle. 2. What do you think will happen when you place the magnet to the side of the plastic bottle? 3. The magnet will attract the pipe cleaners. When this happens, move the magnet around the outside edges of the plastic bottle. 4. The pipe cleaners should move with the magnet. 5. Discuss: Why are the pipe cleaners moving with the magnet? What would happen if there were more pipe cleaners in the bottle? What would happen if there were fewer pipe cleaners in the bottle? What happens when you remove the magnet from the side of the pop bottle? Once the metal from the pipe cleaners get close enough to the magnet, they are attracted and will stick together. No matter where the magnet goes, the pipe cleaners will follow. Only when they are separated will the pipe cleaners fall back into the bottom of the plastic bottle.
70 HEADS IN, HEARTS IN Measuring Dry Materials Instructions for Set-Up Supplies Guide for Families handout Clear plastic standup display (optional) Dry Measurement Task Cards handout Scissors 5-7 butter knifes (plastic is preferred) 3 5 teaspoon dry measuring spoons 3 5 tablespoon dry measuring spoons Three to five ¼-cup dry measuring cups Three to five ½-cup dry measuring cups Three to five 1-cup dry measuring cups 5 7 dry materials such as marshmallows, oatmeal, salt, sugar, flour, cereal, baking soda, dry coffee grounds and others 5 7 large bowls 5 7 medium-sized bowls 1 small bowl Display table Note: This activity is best done in conjunction with the Measuring Liquids activity. Activity Preparation Purchase or locate items on supply list. Print one copy of the Guide for Families handout. Laminate or place in a clear plastic standup display to allow participants to see it more readily. Print Dry Measurement Task Cards handout on durable paper and cut out the cards, or print, cut and laminate the cards. Set up the display table and arrange needed supplies as follows. Fill each large bowl with a different dry material. Place empty medium-sized bowls out for learners to measure dry goods into. Place dry measurement tasks cards in small bowl. Arrange measuring tools on the table. 4-H Heads, In Hearts In Michigan 4-H Youth Development Michigan State University Extension

71 HEADS IN, HEARTS IN Measuring Dry Materials Guide for Families Learning Objectives What you need to know: The measuring tools that are used for dry materials are different from the tools that are used for measuring liquid materials. When baking and cooking, using the correct tools is important. Using the wrong tools could lead to your using too much or too little of an ingredient. When measuring dry materials, it s best to gently scoop the material, being sure not to pack it down. It s likely when you scoop that the dry material will be heaped on top. Use the flat end of a butter knife to scrape off the access material. What you will do and learn: You will be able to identify the correct measuring tool for the task on the card. You will practice measuring various dry goods using a different unit of measurement: teaspoons, tablespoons and cups. Be sure to gently scoop the dry material and use the flat end of the butter knife to scrape off any access material. Instructions 1. Choose a measurement task card and read the directions. 2. Complete the tasks of each card. 3. Repeat the activity several times by choosing different task cards. 4. Observe how when various dry goods are measured using the same measuring tool, they can look very different. For example, a tablespoon of marshmallows looks very different from a tablespoon of flour. Understanding this will help you understand how to estimate amounts correctly. Photograph istock.com/phasinphoto Dry measuring utensil. When measuring small units of dry materials such as teaspoons and tablespoons, be sure to scrape off excess materials with the flat side of a knife.
72 Measuring Dry Materials Dry Measurement Task Cards Handout Choose a dry material. Measure 1 cup of that material into the bowl using the 1-cup measuring cup. How many scoops do you need? Choose a dry material. Measure ¼ cup of that material into the bowl using the ¼-cup measuring cup. How many scoops do you need? Choose a dry material. Measure 5 tablespoons of that material into the bowl using the 1-tablespoon measuring spoon. How many scoops do you need? Choose a dry material. Measure 4 teaspoons of that material into the bowl using the 1-teaspoon measuring cup. How many scoops do you need? Choose a dry material. Measure 1 tablespoon of that material into the bowl using the 1-tablespoon measuring spoon. How many scoops do you need? Choose a dry material. Measure 1 teaspoon of that material into the bowl using the 1-teaspoon measuring spoon. How many scoops do you need? Choose a dry material. Measure 2½ cups of that material into the bowl using the ½-cup measuring cup. How many scoops do you need? Choose a dry material. Measure 1 cup of that material into the bowl using the ½-cup measuring cup? How many scoops do you need? Choose a dry material. Measure ½ cup of that material into the bowl using the ½-cup measuring cup. How many scoops do you need? Choose a dry material. Measure 2 cups of that material into the bowl using the 1-cup measuring cup. How many scoops do you need? Choose a dry material. Measure 2¼ cups of that material into the cup using the ¼-cup measuring cup. How many scoops do you need? Choose a dry material. Measure 2½ teaspoons of that dry material using the ¼-cup measuring spoon. How many scoops do you need?


73 HEADS IN, HEARTS IN Measuring Liquids Instructions for Set-Up Supplies Guide for Families handout Clear plastic standup display (optional) Liquid Measurement Task Cards handout 3 5 liquid measuring tools Three to five 16-ounce plastic bottles Liquid food coloring Water Permanent marker Scissors Display table Note: This activity is best done in conjunction with the Measuring Dry Materials activity. Activity Preparation Purchase or locate items on supply list. Print one copy of the Guide for Families handout. Laminate or place in a clear plastic standup display to allow participants to see it more readily. Fill each of the three to five 16-ounce bottles with water of differing amounts (for example, ½ cup, 1 tablespoon and so on). Using the liquid food coloring, color water in each bottle a different color. Using a permanent marker, write the correct amount of liquid on the bottom of the plastic bottle (for example, ½ cup, 1 tablespoon and so on). Print Liquid Measurement Task Cards handout on durable paper and cut out the cards, or print, cut and laminate the cards. Set up the display table and arrange needed supplies. Liquid measuring cup This cup can be used for measuring ½ cup to 2 cup measurements. Liquid measuring utensil This can be used to measure teaspoons, tablespoon and ounces.
74 HEADS IN, HEARTS IN Measuring Liquids Guide for Families Learning Objectives What you need to know: When measuring liquid substances, it is important to use measuring tools that have been created specifically for liquids. For instance, a liquid measuring cup is transparent (you can see through it) so the meniscus can easily be seen. When you look at liquid in a clear container, it appears to have a curved surface. That s the meniscus. When you re looking for the meniscus, be sure to look at the liquid from the side of the container, not the top. The meniscus occurs because the attractive force between the liquid and the container is greater than between the liquid molecules making the liquid cling to the sides of the container. When measuring liquids, use the bottom of the meniscus for the most accurate measurement. Instructions 1. Choose a measurement task card and read the directions. 2. Complete the tasks of each card. 3. Repeat the activity several times by choosing different task cards. What you will do and learn: You will be able to identify that liquid and solid measuring tools are different. When measuring each liquid, look for the meniscus. You will practice using liquid measuring cups to measure the water inside each bottle. 4-H Heads, In Hearts In Michigan 4-H Youth Development Michigan State University Extension
75 Measuring Liquids Liquid Measurement Task Cards Handout Find the bottle with yellow liquid. Which measuring tool will you use? Measure that liquid and see how much there is. Look on the bottom of the plastic bottle. Were you correct? Find the bottle with red liquid. Which measuring tool will you use? Measure that liquid and see how much there is. Look on the bottom of the plastic bottle. Were you correct? Find the bottle with green liquid. Which measuring tool will you use? Measure that liquid and see how much there is. Look on the bottom of the plastic bottle. Were you correct? Find the bottle with orange liquid. Which measuring tool will you use? Measure that liquid and see how much there is. Look on the bottom of the plastic bottle. Were you correct? Find the bottle with blue liquid. Which measuring tool will you use? Measure that liquid and see how much there is. Look on the bottom of the plastic bottle. Were you correct? Find the bottle with purple liquid. Which measuring tool will you use? Measure that liquid and see how much there is. Look on the bottom of the plastic bottle. Were you correct?
76 HEADS IN, HEARTS IN Money Match Instructions for Set-Up Supplies Guide for Families handout Clear plastic standup display (optional) Money Match Cards handout 10 sealable plastic bags Proper amount of coins (quarters, dimes, nickels and pennies) to correspond with the amounts on the Money Match cards Display table Coin Denomination handout from the Let s Count Money activity (optional) Activity Preparation Purchase or locate items on supply list. Print one copy of the Guide for Families handout. Laminate or place in a clear plastic standup display to allow participants to see it more readily. Print Money Match Cards handout on durable paper or print, cut and laminate cards. Review the money handout. Place the proper amount of money in each plastic bag that corresponds with each Money Match card and set up the display table. Refer to or display the Coin Denomination handout from the Let s Count Money activity (optional). 4-H Heads, In Hearts In Michigan 4-H Youth Development Michigan State University Extension
77 HEADS IN, HEARTS IN Money Match Guide for Families Learning Objectives What you need to know: A penny is equal to 1 cent. A nickel is equal to 5 cents. A dime is equal to 10 cents. A quarter is equal to 25 cents. What you will do and learn: You will play a matching game to: Become familiar with how much each coin is worth. Practice counting coins. Use addition to reach the amount of money on the card. Use critical thinking skills to match the amount of money in the plastic bag to the amount of money on the cards in written form. Instructions: 1. Please do not take money with you! 2. Please do not open the plastic bags! 3. To start playing the matching game, choose a plastic bag with money inside. 4. Count the amount of money. 5. See if you can find the card that matches that amount of money. 6. Try to match all plastic bags with money cards.
78 Money Match Money Match Cards Handout Match! Find $0.19 Match! Find $0.89 Match! Find $1.06 Match! Find $0.75 Match! Find $0.36 Match! Find $0.54 Match! Find $0.98 Match! Find $0.45 Match! Find $0.50 Match! Find $1.55
79 HEADS IN, HEARTS IN Penny Scrubber Instructions for Set-Up Supplies Guide for Families handout Clear plastic standup display (optional) 1 gallon vinegar Small bowl 1 container of salt Plastic spoon Pennies (the dirtier, the better) 1/2 teaspoon measuring spoon 3 4 Styrofoam plates Waste bin (to pour out vinegar and salt solution) Display table Activity Preparation Purchase or locate items on the supply list. Print one copy of the Guide for Families handout. Laminate or place in a clear plastic standup display to allow participants to see it more readily. Set up display table with appropriate supplies.
80 HEADS IN, HEARTS IN Penny Scrubber Guide for Families Learning Objectives What you need to know: Pennies are made of copper. As a penny gets older the copper reacts with oxygen in the air and this causes it to tarnish or dull. The reaction of copper and oxygen mixing creates a substance called oxide. What you will do and learn: You will observe an acidic reaction and describe what happened. Instructions 1. Choose a penny. 2. Observe: What does the penny look like? What colors do you see on the penny? Does the front of the penny look exactly like the back of the penny? What are the similarities? What are the differences? 3. Pour a small amount of vinegar into a bowl, just enough to cover the bottom of the bowl. 4. Add ½ teaspoon of salt to the bowl. 5. Mix with plastic spoon. 6. Add the penny to the bowl and use the plastic spoon to carefully stir the mixture, being sure that the penny is completely covered. 7. Remove the penny from the bowl using the plastic spoon, and place it on the Styrofoam plate. 8. Observe what happened. 9. Discuss: What does the penny look like? What colors do you see on the penny? Does the front of the penny look exactly like the back of the penny? What are the similarities? What are the differences? You have removed the oxide. The vinegar (acetic acid) and salt (sodium chloride) mixed to create hydrochloric acid. The hydrochloric acid ate or reacted with the oxide to leave you with a shiny penny that looks new again. 4-H Heads, In Hearts In Michigan 4-H Youth Development Michigan State University Extension
81 HEADS IN, HEARTS IN Plant Parts Instructions for Set-Up Supplies Guide for Families handout Clear plastic standup display (optional) Parts of a Plant handout Plants to match each part of the plant: Root: Carrots or radishes Stem: celery or asparagus Leaf: lettuce or spinach Flower: broccoli or cauliflower Fruit: Apple or tomato Seed : Pea pods or sunflower seeds Common house plant Flower such as a rose Display table Activity Preparation Purchase or locate items on the supply list. Print one copy of the Guide for Families handout. Laminate or place in a clear plastic standup display to allow participants to see it more readily. Print Parts of a Plant handout. Laminate. Set up the display table with plants.
82 HEADS IN, HEARTS IN Plant Parts Guide for Families Learning Objectives What you need to know: Plants have various parts (roots, stems, leaves, flowers and fruit) that serve specific functions. Root The part of the plan that provides support, anchoring the plant. It absorbs water and nutrients, and may store sugar. Stem The part of the plant that transports water and minerals taken in by roots to the leaves. It transports food produced in the leaves to other parts of the plant. Leaf The part of the plant that captures the sun s energy, takes in water and air, and by the process of photosynthesis, makes food. Flower The part of the plant that produces seeds. Fruit The reproductive product of the plant; the seed of plants, or the part that contains the seeds. Instructions 1. List the parts of the plant that you already know. 2. Look at the Parts of a Plant handout, and then look at each plant. 3. Identify each part of the plant (root, stem, leaf, flower, fruit). 4. Explore the differences between each plant part and answer: What did you observe? Did you see how each part is important to the plant? What senses can you use to learn about this plant? Can you smell it, taste it, feel it? How can using your senses help you to gain knowledge about plant parts? 5. Look at the house plant and the flower. Can you find each part of those plants? What you will do and learn: You will correctly identify the parts of a plant including roots, stem, leaves, flowers or fruits. 4-H Heads, In Hearts In Michigan 4-H Youth Development Michigan State University Extension


83 Plant Parts Handout Parts of a Plant Leaf The part of the plant that captures the sun s energy, takes in water and air, and by the process of photosynthesis, makes food. Fruit The reproductive product of the plant; the seed of plants, or the part that contains the seeds. Flower The part of the plant that produces seeds. Stem The part of the plant that transports water and minerals taken in by roots to the leaves. It transports food produced in the leaves to other parts of the plant. Root The part of the plan that provides support, anchoring the plant. It absorbs water and nutrients, and may store sugar. Tomato plant illustration istock.com/blueringmedia Tomato fruit illustration istock.com/mariaflaya
HEADS IN, HEARTS IN. Science Activities
 44H1749S HEADS IN, HEARTS IN Science Activities The Heads In, Hearts In family enrichment program encourages families to use their minds (putting their heads in ) as a tool to expand their knowledge around
Materials List: Varies depending on experiment. See list below for the required materials for each activity.
 Food Science Brief Description: Milk and milk products are rich in high quality protein and a great source of calcium. The provide three quarters of all the calcium in the diet. In addition, milk and milk
Water Works
 Water Works - - - - - - - - - - - - - - - - - - - - - - - - - - Water is all around us. It can be found in ponds, rivers, lakes and even in our bodies. It s also great for having fun! Transform your house
Colour Mixing. Tools: Extras: Food colouring; water Key Science Concept: Primary colours mix to make secondary colours. Learning Resources, Ltd.
 Colour Mixing Tools: Extras: Food colouring; water Key Science Concept: Primary colours mix to make secondary colours. Learning Resources, Ltd. 1 What to do: Fill the large test tube, almost to the top,
Crazy Cupcake Creation Center- decorate your own cupcake with crazy toppings. Worms in Dirt- traditional pudding, Oreos and gummy worms.
 Weird Wacky Science Required: It s weird wacky science day. Children love to explore! Set up hands-on activities and experiments for your little scientists to discover, play and learn. Snack Suggestions:
Experiential Activities Grades K-2
 Experiential Activities Grades K-2 Build Your Own Smoothie During the winter, you can still make delicious smoothies using frozen produce! On the image below, circle all the fruits and vegetables that
STUDENT NAME DATE. Science Grade 3. Read each question and choose the best answer. Be sure to mark all of your answers.
 FORMATIVE MINI ASSESSMENTS Third Grading Period 2010-11 March 21-24 STUDENT NAME DATE Science Grade 3 Read each question and choose the best answer. Be sure to mark all of your answers. 1 Which substance
FACILITATOR'S GUIDE THOSE MEAN NASTY DIRTY DOWNRIGHT DISGUSTING BUT INVISIBLE GERMS JUDITH ANNE RICE AND REED MERRILL
 HSW-PLS.720FG FACILITATOR'S GUIDE THOSE MEAN NASTY DIRTY DOWNRIGHT DISGUSTING BUT INVISIBLE GERMS JUDITH ANNE RICE AND REED MERRILL (Spanish edition available contact the NEP office) Grade Recommendation:
SUPER COOL. kids science kit. Playdough to Plato All rights reserved. Graphics by Nedti and StudioShine.
 SUPER COOL kids science kit Playdough to Plato 2015. All rights reserved. Graphics by Nedti and StudioShine. Thank you!! Thank you for your purchase! It is my hope that Playdough to Plato is a helpful
GirlTime! science VOLCANOES. Yummy Experiment MAKE YOUR OWN BLOB. What did the volcano say to her mother? What can run, but can t walk?
 GirlTime! Girl Scout Summer Fun by Mail Fun With science MAKE YOUR OWN BLOB VOLCANOES What can run, but can t walk? water! Yummy Experiment What did the volcano say to her mother? I lava you so much! Girl
SPLENDID SOIL (1 Hour) Addresses NGSS Level of Difficulty: 2 Grade Range: K-2
 Addresses NGSS Level of Difficulty: 2 Grade Range: K-2") (1 Hour) Addresses NGSS Level of Difficulty: 2 Grade Range: K-2 OVERVIEW In this activity, students will examine the physical characteristics of materials that make up soil. Then, they will observe the
(1 Hour) Addresses NGSS Level of Difficulty: 2 Grade Range: K-2 OVERVIEW In this activity, students will examine the physical characteristics of materials that make up soil. Then, they will observe the
Properties of Water TEACHER NOTES. Earth: The Water Planet Laboratory Investigation. Key Concept. Alternate Materials.
 TEACHER NOTES Properties of Water Key Concept The properties of water make it a unique substance on Earth. Skills Focus observing, inferring, predicting Time 60 minutes Materials (per group) plastic cup
How Do Leaves Breath?
 How Do Leaves Breath? A wonderful visual experiment that shows how leaves actually produce oxygen from photosynthesis. This experiment can be done in your home with materials that you may find in your
Mixtures. ingredients: the separate parts of a mixture
 Every day, we interact with many different kinds of matter. We look at it, feel it, taste it, and even breathe it. Sometimes different types of matter are combined. For example, a salad might have several
Properties of Water. reflect. look out! what do you think?
 reflect Water is found in many places on Earth. In fact, about 70% of Earth is covered in water. Think about places where you have seen water. Oceans, lakes, and rivers hold much of Earth s water. Some
Fruits. Food Preservation. Important fruit canning pointers. Equipment. Canning jars. Syrup solutions WP
 WP 375-09 wecan Fruits Food Preservation These processing recommendations are for West Virginia conditions (maximum altitude, 4,000 feet). For canning directions in other locations, consult your county
Station 1: Cohesion. Station 1: Cohesion
 Station 1: Cohesion Pennies Droppers Beaker of water Cohesion Description: Cohesion is a property of water that describes how water sticks to itself. Water molecules are attracted to each other by hydrogen
BEHAVIOR OF HOT AND COLD
 City Academy Science Kitchen Chemistry Winter STEAM Packet NAME: _ INTRODUCTION: In both science and STEAM class, students were introduced to the chemical and physical properties of matter during their
Coffee Filter Chromatography
 Here is a summary of what you will learn in this section: Solutions can be separated by filtration, paper chromatography, evaporation, or distillation. Mechanical mixtures can be separated by sorting,
Adapted By Kennda Lynch, Elizabeth Adsit and Kathy Zook July 26, Moooooogic!
 Moooooogic! Objective: Students will use the scientific method to test the difference between using whole milk and skim milk in this milk and food dye experiment. Students will explore ideas of density,
SPRING GRADE. Edible SCHOOL GARDEN. Program WORKBOOK ANSWER KEY VERSION: AUGUST 2016 JHU CAIH
 WORKBOOK ANSWER KEY 3 SPRING GRADE Edible SCHOOL GARDEN Program VERSION: AUGUST 2016 JHU CAIH The Champion Cheer! We drink WATER cause it s fun, feels good, and makes us strong! We enjoy FRUITS AND VEGGIES
O N E S YO U L L E AT! LESSON 2 & FRUITS ARE THE
 T H E B E S T V E G E TA B L E S & F R U I T S A R E T H E O N E S YO U L L E AT! LESSON 2 T H E B E S T V E G E TA B L E S & FRUITS ARE THE O N E S YO U L L E AT! Objectives for the lesson: 1. Explain
Curriculum Catalog
 2018-2019 Curriculum Catalog Science 300 2018 Glynlyon, Inc. Table of Contents UNIT 1: YOU GROW AND CHANGE... 1 UNIT 2: PLANTS... 2 UNIT 3: ANIMALS: GROWTH AND CHANGE... 3 UNIT 4: YOU ARE WHAT YOU EAT...
Seeds, Miraculous Seeds
 Grade Level: Primary Location: The Farm Standards: Common Core Connections Reading: Anchor Standards LITERACY.CCRA.R.1 LITERACY.CCRA.R.2 LITERACY.CCRA.R.4 Speaking and Listening: Anchor Standards LITERACY.CCRA.SL.1
Separating Mechanical Mixtures
 3.2 Separating Mechanical Mixtures Key Question: How can you separate mechanical mixtures? Remember from Chapter 1 that a mechanical mixture is a mixture with different parts that you can see. People work
UNIVERSITY OF CAMBRIDGE INTERNATIONAL EXAMINATIONS Cambridge Primary Checkpoint
 UNIVERSITY OF CAMBRIDGE INTERNATIONAL EXAMINATIONS Cambridge Primary Checkpoint SCIENCE 0846/01 Paper 1 Examination from 2012 SPECIMEN PAPER Candidates answer on the Question Paper. Additional Materials:
Enrichment Unit: Culinary. Learning Goals: National Event: Resources:
 Enrichment Unit: Culinary Learning Goals: Gain an appreciation for cooking Be exposed to a variety of culinary techniques Experience a variety of food Learn about the job of a chef Learn about kitchen
Properties of Water Lab: What Makes Water Special? An Investigation of the Liquid That Makes All Life Possible: Water!
 Properties of Water Lab: What Makes Water Special? An Investigation of the Liquid That Makes All Life Possible: Water! Background: Water has some peculiar properties, but because it is the most common
Lab 2. Drug Abuse. Solubility and Colligative Properties of Solutions: Coffee, Soda, and Ice Cream
 Lab 2. Drug Abuse. Solubility and Colligative Properties of Solutions: Coffee, Soda, and Ice Cream How do I make a stronger cup of coffee? How do I make ice cream? Prelab Spend 5 minutes doing the following
Marble-ous Roller Derby
 Archibald Frisby (GPN #115) Author: Michael Chesworth Publisher: Farrar, Straus & Giroux Program Description: In this episode, LeVar uses several strategies to learn about the roaring and rolling world
Safe Food Handling. Proper food handling and cooking are the best ways to keep us from becoming sick from bacteria in foods.
 University of Hawai i at Manoa, College of Tropical Agriculture & Human Resources, Department of Family & Consumer Sciences, Department of Human Nutrition, Food and Animal Science, Cooperative Extension
Fizz Boom Read! Activity Book 2014
 Fizz Boom Read! Activity Book 2014 Science is everything! Read a book to find the tools that help us understand why things work and how to make things happen. Take a look in this book to take the lead
Safe Food Handling. Proper food handling and cooking are the best ways to keep us from becoming sick from bacteria in foods.
 University of Hawai i at Manoa, College of Tropical Agriculture & Human Resources, Department of Family & Consumer Sciences, Department of Human Nutrition, Food and Animal Science Cooperative Extension
THE EGG-CITING EGG-SPERIMENT!
 1 of 5 11/1/2011 10:30 AM THE EGG-CITING EGG-SPERIMENT! Knight Foundation Summer Institute Arthurea Smith, Strawberry Mansion Middle School Liane D'Alessandro, Haverford College Introduction: Get ready
White Out. How To Make An Apple Pie And See The World (GPN #118) Author: Marjorie Priceman Publisher: Knopf
 Author: Marjorie Priceman Publisher: Knopf") How To Make An Apple Pie And See The World (GPN #118) Author: Marjorie Priceman Publisher: Knopf Program Description: The art and science of cooking are deliciously mixed in this episode as LeVar and chef
How To Make An Apple Pie And See The World (GPN #118) Author: Marjorie Priceman Publisher: Knopf Program Description: The art and science of cooking are deliciously mixed in this episode as LeVar and chef
Required Materials: LESSON PLAN. Total Time: minutes
 Objectives 1. Children will explain one reason broccoli is healthy for them. 2. Children will explain that broccoli comes from a plant that grows in the ground. 3. Children will experience broccoli using
SORTING SOLUTIONS. DESIGN CHALLENGE Design a multitiered chute that can sort different sizes and shapes of pasta into separate containers.
 SORTING SOLUTIONS Grades 3 5, 6 8, 9 12 30 60 minutes DESIGN CHALLENGE Design a multitiered chute that can sort different sizes and shapes of pasta into separate containers. MATERIALS Supplies and Equipment
Rock Candy Lab Name: D/H
 Rock Candy Lab Name: D/H What is sugar? 1 The white stuff we know as sugar is sucrose, a molecule composed of 12 atoms of carbon, 22 atoms of hydrogen, and 11 atoms of oxygen (C12H22O11). Like all compounds
Classifying the Edible Parts of Plants
 SUPPLEMENTARY LESSON: EXTENSION OF FRUIT OR NOT? Classifying the Edible Parts of Plants After completing the lesson Fruit or Not? (page 23) students will have been introduced to one of the six edible parts
Molecular Gastronomy: The Chemistry of Cooking
 Molecular Gastronomy: The Chemistry of Cooking We re surrounded by chemistry each and every day but some instances are more obvious than others. Most people recognize that their medicine is the product
1. Density Column Materials
 1. Density Column Materials Honey - golden corn syrup- clear liquid dishwashing soap- blue water (can be colored with food coloring) vegetable oil - yellow rubbing alcohol (can be colored with food coloring)
a WOW Lab Prep Instructions
 Classroom Science Investigation This section describes how to prepare the crime scene and each of the six evidence stations: Fibre Analysis, Fingerprint Analysis, Footprint Analysis, Dental Analysis, Cookie
Name: Period: Score: / Water Olympics
 Name: Period: Score: / Water Olympics Pre-lab: With your shoulder partner research these properties or characteristics of water that make it critical for life as we know it. Include an explanation for
2: Handwashing [ 19 ]
![2: Handwashing [ 19 ]](/thumbs/96/126836754.jpg "2: Handwashing [ 19 ]") [ 19 ] Activity A: Corn Germ Griddle Cakes Objectives: Participants will be able to: Identify 2 reasons it is important to wash their hands List the 6 steps of proper hand washing Materials: 3 The 6 Steps
[ 19 ] Activity A: Corn Germ Griddle Cakes Objectives: Participants will be able to: Identify 2 reasons it is important to wash their hands List the 6 steps of proper hand washing Materials: 3 The 6 Steps
Ag in the Classroom Going Local
 Ag in the Classroom Going Local Post Office Box 27766 Raleigh, NC 27611 (919) 719-7282 February 2015 Book of the Month Seed, Soil, Sun: Earth s Recipe for Food By: Chris Peterson Seed, soil and sun - with
October Ideas What s inside my pumpkin?
 October Ideas 2014 It s pumpkin time again! It is hard not to include pumpkin ideas this time of the year. We are all surrounded by them. The fall colors of oranges, reds, yellows and browns are amazing.
Lab 2. Drug Abuse. Solubility and Colligative Properties of Solutions: Coffee, Soda, and Ice Cream
 Lab 2. Drug Abuse. Solubility and Colligative Properties of Solutions: Coffee, Soda, and Ice Cream How do I make a stronger cup of coffee? How do I make ice cream? Prelab Spend 5 minutes doing the following
Scream For Ice Cream. Joyce S. White INTRODUCTION TIME NEEDED
 3.12 Scream For Ice Cream Joyce S. White INTRODUCTION Matter can change from one form or state into another. For example, you can drink liquid water, skate on solid water, and see steam water in gas form.
Please be sure to save a copy of this activity to your computer!
 Thank you for your purchase Please be sure to save a copy of this activity to your computer! This activity is copyrighted by AIMS Education Foundation. All rights reserved. No part of this work may be
LESSON 5 & DARK GREEN
 P U R P L E, R E D, & D A R K G R E E N V E G E TA B L E S & F R U I T S LESSON 5 P U R P L E, R E D, & DARK GREEN V E G E TA B L E S & F R U I T S Objectives for the lesson: 1. Explain the unique benefits
Big Green Lessons Germination: Kindergarten-2 nd Grade
 Big Green Lessons Germination: Kindergarten-2 nd Grade Lesson Outcomes In this lesson, students will identify that seeds germinate and grow into plants. A seed is made up of different parts (cotyledon,
Germination Kindergarten through 2nd Grade
 LESSON OUTCOMES STANDARDS ALIGNTMENT In this lesson, students will identify that seeds germinate and grow into plants. A seed is made up of different parts (cotyledon, seed coat, embryo) Seeds sprout into
3rd Grade Changes Assessment
 Name Date 1. Yong bought a can of soda at the pool and left the soda in the Sun while he swam. When Yong came back, the soda can was warm. What raised the temperature of his soda? A. the sound of people's
Silly Science. Bouncy Ball 3 clear cups (5 ounce plastic cups work well) water Borax White liquid glue (PVA) Food coloring 2 spoons
 water Borax White liquid glue (PVA) Food coloring 2 spoons") Silly Science Most of these do not take much time they were part of a challenge run over two hours during which time participants had to complete as many experiments as they could. Bouncy Ball 3 clear
Silly Science Most of these do not take much time they were part of a challenge run over two hours during which time participants had to complete as many experiments as they could. Bouncy Ball 3 clear
Breathless Balloon. Tools:
 Breathless Balloon Tools: Extras: Baking soda; 12" Round balloon; Vinegar Key Science Concept: Acids and bases react to make a gas called carbon dioxide. Caution: Perform this experiment only under adult
Head Start STREAM Kit Activities
 Head Start STREAM Kit Activities 1 Engineering Cycle Questions for Activities: What would happen if Tell me about What does this remind you of How does it make you feel? What is different? What is the
Vegetables Compare Prices- Expanded Nutrition & Family Programs Michigan State University Cooperative Extension Service January pages
 MSU Extension Publication Archive Archive copy of publication, do not use for current recommendations. Up-to-date information about many topics can be obtained from your local Extension office. Vegetables
FOR PERSONAL USE. Capacity BROWARD COUNTY ELEMENTARY SCIENCE BENCHMARK PLAN ACTIVITY ASSESSMENT OPPORTUNITIES. Grade 3 Quarter 1 Activity 2
 activity 2 Capacity BROWARD COUNTY ELEMENTARY SCIENCE BENCHMARK PLAN Grade 3 Quarter 1 Activity 2 SC.A.1.2.1 The student determines that the properties of materials (e.g., density and volume) can be compared
Strawberry DNA. Getting Started. Vocabulary. Strawberry DNA
 Deoxyribonucleic Acid or DNA contains the genetic materials that are the building blocks of living organisms. These building blocks contain the code that can determine the shape, size, color, and pretty
Microwave Cooking Teacher s Guide
 Microwave Cooking Teacher s Guide Objectives: To provide information on how a microwave oven works, tips for successful microwaving of food and appropriate microwave utensils. Sample statement: "Microwave
Activity Sheet Chapter 5, Lesson 5 Using Dissolving to Identify an Unknown
 Activity Sheet Chapter 5, Lesson 5 Using Dissolving to Identify an Unknown Name Date DEMONSTRATION 1. Your teacher did a demonstration comparing the amount of salt and sugar that dissolved in a small amount
Surface Tension and Adhesion
 Surface Tension and Adhesion 1. Obtain a medicine dropper and a small graduated cylinder. Make sure the dropper is clean. 2. Drop water into the graduated cylinder with the dropper, counting each drop.
Anaerobic Cell Respiration by Yeast
 25 Marks (I) Anaerobic Cell Respiration by Yeast BACKGROUND: Yeast are tiny single-celled (unicellular) fungi. The organisms in the Kingdom Fungi are not capable of making their own food. Fungi, like any
MSU Extension Publication Archive. Scroll down to view the publication.
 MSU Extension Publication Archive Archive copy of publication, do not use for current recommendations. Up-to-date information about many topics can be obtained from your local Extension office. - Expanded
Herbalicious Poetry, Match-up, Butter & Tea Grade 5/6 Facilitator Notes
 , Match-up, Butter & Tea Grade 5/6 Facilitator Notes Objective: Students will connect their individual sense of taste with a fun, group literacy activity. Recipe Category: Plants & Gardening Cooking Time:
Cub Chef Badge Activity Pack Sodexo 1560
 Cub Chef Pack Welcome to the Cub Scout Chef pack; your leader will help you get started Your Pack includes: Hand-washing Poster Hand-washing Game Fridge Storage Foods to be cut out for fridge storage activity
Make & Taste DAIRY. Lesson Activity. Butter (Grades 3-5) LESSON OVERVIEW: LESSON OBJECTIVES: LESSON MATERIALS NEEDED: ACADEMIC INTEGRATION
 LESSON OVERVIEW: LESSON OBJECTIVES: LESSON MATERIALS NEEDED: ACADEMIC INTEGRATION") Lesson Activity LESSON OVERVIEW: During this lesson, students will be introduced to both the history and science behind the process of turning heavy whipping cream (which comes from milk) into butter.
Lesson Activity LESSON OVERVIEW: During this lesson, students will be introduced to both the history and science behind the process of turning heavy whipping cream (which comes from milk) into butter.
Materials at a Glance
 TEACHER S MANUAL Materials at a Glance 1 3 4 5 6 or pen 2 clear plastic cups, 15 or more spoon for mixing liquid soap marking pen food items (approx. 60 ml (¼ c.) each: milk juice vegetable oil melted
Squid Dissection: From Pen to Ink
 Squid Dissection: From Pen to Ink Through squid dissection, students will examine some of the unique features which have allowed squid to adapt and thrive in Southern California waters and throughout the
5th Grade Q2 Practice Quiz. Created by Shanbarger, Andrew D. (CCPS)
") 5th Grade Q2 Practice Quiz reated by Shanbarger, ndrew. (PS) ollection: Private Q1: Four students were conducting an experiment in class. They each heated a cup of water for different amounts of time,
5th Grade Q2 Practice Quiz reated by Shanbarger, ndrew. (PS) ollection: Private Q1: Four students were conducting an experiment in class. They each heated a cup of water for different amounts of time,
Black Bean AND Veggie Tostada Olé
 2 Cooking Demonstration: Black Bean AND Veggie Tostada Olé Introduction Nutrients play an important role in the lives of all living organisms. Nutrients that we obtain from food provide our bodies with
Life on the Farm 4-H Family Pack
 Life on the Farm 4-H Family Pack #5 4-H After School Program University of California Cooperative Extension Life on the Farm Educational Note: Flour provides the structure and framework for yeast breads.
Separations. Objective. Background. Date Lab Time Name
 Objective Separations Techniques of separating mixtures will be illustrated using chromatographic methods. The natural pigments found in spinach leaves, β-carotene and chlorophyll, will be separated using
All in One Bakeshop. Sugar Art Training. Panorama Eggs. Supplies. Instructions
 Panorama Eggs Supplies Glass or plastic bowl Small cake board, paper plate or styrofoam plate Royal Icing flowers (made in advance) Small fillers (commercially made or figure piped rabbits, ducks, baby
Teacher s Manual. Rebecca W. Keller, PhD
 Teacher s Manual Rebecca W. Keller, PhD Cover design: David Keller Opening page: David Keller, Rebecca W. Keller, PhD Illustrations: Rebecca W. Keller, PhD Copyright 2013 Gravitas Publications, Inc. All
This lesson is part of a larger, comprehensive school garden guide called Minnesota School Gardens: A Guide to Gardening and Plant Science developed
 This lesson is part of a larger, comprehensive school garden guide called Minnesota School Gardens: A Guide to Gardening and Plant Science developed by Minnesota Agriculture in the Classroom in 2013. The
Exploring MyPlate with Professor Popcorn
 Exploring MyPlate with Professor Popcorn Grade 2: Enjoying Food Grade 2: Lesson 1 (2:1) MyPlate Objectives Upon completion of Lesson 1, youth will: 1. State that we need healthy foods and physical activity
Family Literacy. 25 More. Recipes for Fun!
 Family Literacy 25 More Recipes for Fun! Introduction The recipes in this document are all tried and true recipes that families, childcare centres and family resource centres have tested. Enjoy family
Assignment #3: Lava Lite!!
 Assignment #3: Lava Lite!! This activity entails making a lava lamp. PROCEDURE: GOALS: 1) Fill a glass cup with three inches of water. 2) Put about _ of an inch of oil in the water. Notice what the oil
Unit Test: Nature of Science
 Unit Test: Nature of Science Some questions (c) 2015 by TEKS Resource System. Some questions (c) 2015 by Region 10 Educational Service enter. Page 2 1 Students who participated in a frog dissection investigation
Grapes of Class. Investigative Question: What changes take place in plant material (fruit, leaf, seed) when the water inside changes state?
 when the water inside changes state?") Grapes of Class 1 Investigative Question: What changes take place in plant material (fruit, leaf, seed) when the water inside changes state? Goal: Students will investigate the differences between frozen,
Grapes of Class 1 Investigative Question: What changes take place in plant material (fruit, leaf, seed) when the water inside changes state? Goal: Students will investigate the differences between frozen,
Station 1. Polarity of Water
 Station 1 Polarity of Water As we learned last week, water is a polar molecule meaning it has one end with a slight positive charge and another end with a slight negative charge. Molecules without slight
concepts and vocabulary
 Cooking Demonstration: 1fresh fall salad Introduction The food that we eat supplies us with nutrients we need to grow and stay healthy. People in different countries eat different foods, but with the same
SPRING GRADE. Edible SCHOOL GARDEN. Program WORKBOOK STUDENT: VERSION: AUGUST 2016 JHU CAIH
 4 SPRING GRADE Edible SCHOOL GARDEN Program WORKBOOK STUDENT: VERSION: AUGUST 2016 JHU CAIH The Champion Cheer! We drink WATER cause it s fun, feels good, and makes us strong! We enjoy FRUITS AND VEGGIES
Making Play dough. Ingredients, 2 cups of plain flour 1 cup of salt, 2 cups of water 2 tbsp. oil, 4 tsp. cream of tartar Food Colouring
 Making Play dough Ingredients, 2 cups of plain flour 1 cup of salt, 2 cups of water 2 tbsp. oil, 4 tsp. cream of tartar Food Colouring 1 Mix Together ingredients in a bowl 2 Cook in microwave for 5 minutes
Experimental Procedure
 1 of 8 9/14/2018, 8:37 AM https://www.sciencebuddies.org/science-fair-projects/project-ideas/chem_p105/chemistry/bath-bomb-science (http://www.sciencebuddies.org/science-fair-projects/projectideas/chem_p105/chemistry/bath-bomb-science)
Bay Area Scientists in Schools Presentation Plan
 Bay Area Scientists in Schools Presentation Plan Lesson Name Plant Life Cycle Presenter(s) Aaron Sluis, Adam Steinbrenner, Elias Cornejo-Warner, Megan Casey, Claire Bendix Grade Level 2 Standards Connection(s)
Freezing Fruits and Vegetables
 Freezing Fruits and Vegetables Module- 13 Lec- 13 Dr. ShishirSinha Dept. of Chemical Engineering IIT Roorkee Freezing Fruits and Vegetables Advantages of Freezing Many foods can be frozen. Good natural
Moving Molecules The Kinetic Molecular Theory of Heat
 Moving Molecules The Kinetic Molecular Theory of Heat Purpose: The purpose of this lab is for students to determine the relationship between temperature and speed of molecules in a liquid. Key Science
Learning to Learn; Mastering Physical Skills; Self-Understanding; Social Interaction;
 Theme Life Skills Area(s) Objectives Project areas Gifts from the Heart Learning to Learn; Mastering Physical Skills; Self-Understanding; Social Interaction; Practice measuring dry ingredients; Create
Planning Guide for Liquids and Solids
 Planning Guide for Teaching Plans What Is a Liquid? What Is a Solid? Students investigate various objects in order to identify them as either liquids or solids. 1.0 IWB Activity 1 Science Card 1 BLM Examples
Permission Slip. My child,, does not have allergic reactions to the ingredients.
 Permission Slip Dear Parents or Guardians, Our upcoming world language and science module is about matter. At the end of the module, we will make ice cream. Please let us know if this activity is agreeable
Freezing Fruits and Vegetables
 Freezing Fruits and Vegetables Module- 13 Lec- 13 Dr. Shishir Sinha Dept. of Chemical Engineering IIT Roorkee Freezing Fruits and Vegetables Advantages of Freezing Many foods can be frozen. Good natural
What s So Great About Gardening?
 What s So Great About Gardening? What s So Great About Gardening? 1. Understanding MyPlate 2. Not All Vegetables Are Created Equal 1 What s So Great About Gardening? What s So Great About Gardening? Unit
Intro To Water Bath Canning Applesauce
 Intro To Water Bath Canning Applesauce One of the easiest canning projects to start with is applesauce. It s easy to make, and unlike jams or jellies very little can go wrong with the recipe itself. It
2013 Horace Mann Science Project Idea Packet. Will chilling an onion before cutting it keep you from crying?
 IDEAS about food Will chilling an onion before cutting it keep you from crying? What plastic wrap best prevents oxidation (prevent the browning of peeled bananas, apples, or avocadoes)? Do bananas brown
Active Science with Water
 Gr. 4-8 ETLC10145 Teaching & Learning Company Active Science with Water By Edward Shevick lecturer teacher author Hands-On Science Activities Ready for Student Use Active Science with Water Written by
Required Materials: Total Time: minutes
 Objectives 1. Children will explain one reason asparagus is healthy for them. 2. Children will explain that asparagus comes from a plant that grows in the ground. 3. Children will experience asparagus
Solubility Lab Packet
 Solubility Lab Packet **This packet was created using information gathered from the American Chemical Society s Investigation #4: Dissolving Solids, Liquids, and Gases (2007). It is intended to be used
O R E G O N S T A T E U N I V E R S I T Y E x t e n s i o n S e r v i c e P r e s e r v i n g F o o d s :
 O R E G O N S T A T E U N I V E R S I T Y E x t e n s i o n S e r v i c e P r e s e r v i n g F o o d s : SP 50-920, Revised February 2015 Canning Tomatoes may be canned by themselves (crushed; whole or