KLM1601 Intelligent Fresh Ground Coffee Machine Service Manual. English
|
|
|
- Blake Henderson
- 5 years ago
- Views:
Transcription


1
2 KLM60 Intelligent Fresh Ground Coffee Machine Service Manual English
3 . Introduction 4 General warnings Symbol description 2. Structure 2. Overview 2.2 Description of internal components 2.3 Water circuit 2.3. Overview of water circuit Water circuit for making coffee Water circuit for making steam Water circuit for making hot water 2.4 Schematic circuit diagram 2.5 Technical data Troubleshooting 3. Troubleshooting check list 3.2 Check list for minor failure Repair 4. Tools preparation 4.2 General disassembly 4.2. Disassemble exterior parts Disassemble power cord Disassemble brew unit Disassemble valve support group Disassemble flowmeter Disassemble solenoid valve group Disassemble grinder group Disassemble control panel group Disassemble dispenser valve group Disassemble drainage valve group 4.2. Disassemble pump group Disassemble PCBA Disassemble dispenser valve 2W Disassemble dispenser valve 3W group
4 4.2.5 Disassemble thermoblock group Disassemble ground coffee container lid switch group 4.3 Precautions for maintenance and installation 4.3. Brew unit group Dispenser valve 6W Grinder group Control panel group Precautions for assembling 5. Function test and maintenance 5. Function test and test standards 5.2 Coffee machine maintenance 5.2. Coffee machine decalcifying Rinse the brew unit Rinse the foam milk unit Wipe the coffee machine 6. Explosive view
5 The manufacturer reserves the right to make product improvements. We guarantee that this manual respects the technological status at the time the machine is supplied. We are open to any suggestions from technicians which may improve the product and the manual. General warnings Once the packaging has been removed make sure the appliance is in good condition; if you have any doubts, check the fault and contact the retailer or manufacturer directly. Packaging must not be left where children can reach it as it is a potential hazard source. The appliance must be installed in compliance with the safety standards in force in the country of use. This appliance is completely safe only when it is connected to an effective earthing system that complies with the safety standards. Make sure that the mains power is sufficient for the energy required for the machine. It is unadvisable to use extension leads or electrical adaptors for multiple sockets. If it is essential to use them, use only single adaptors or leads that comply with the current safety standards. Never exceed the capacity indicated on the adaptor or leads, or the maximum power indicated on the adaptor. This appliance should only be used for what it has been designed. Any other use is considered improper and consequently dangerous. The manufacturer cannot be held responsible for any damages caused due to an erroneous or irrational use. The technician must remind the user about the safety standards to ensure correct operation of the appliance. The use of an electrical appliance is subject to the safety standards. If the customer decides not going to use the appliance for a long time, the power cable must be disconnected from the mains and empty the water container. To guarantee that the coffee-maker works properly and efficiently, it is essential to follow the manufacturer s instructions, and carrying out periodical maintenance and check of all the safety devices. Always make sure that hands, or other parts of the body, never come within the range of the coffee dispensing spouts or those of steam and hot water so as not to be scalded. The maintenance technician must inform the retailer or manufacturer promptly of any problems when installing or using the appliance. The coffee machine must be used at the temperature between 5 and 40.
6 Symbol description Non-compliance with the operation, may cause electric shock, and threat to life. Non-compliance with the operation may cause coffee machine damaged, or personal injury. Non-compliance with the operation, may cause scalded or burned. This symbol, if prompted, please carefully read information with it. This symbol, if prompted, represents recycle.

7 Overview Bean container lid 0 Front cover right 2 Top cover Touch screen 3 Water tank cover 2 Rotary 4 Water tank ornament cover 3 Clean button 5 Water tank 4 Decorative plate 6 Support elect 5 Handle 7 Power button 6 Drip tray decoration cover 8 Front cover left 7 Drip tray cover 9 Cup support 8 Drip tray


8 20 9 Bean container 9 20 Grinder adjustment knob 2 2 Ground coffee container lid 22 Hot water export Coffee export Milk connector Foam rubber Light for coffee Milk and foam export 28 Back cover Logo Right side section Left side section 32 Powder line 32


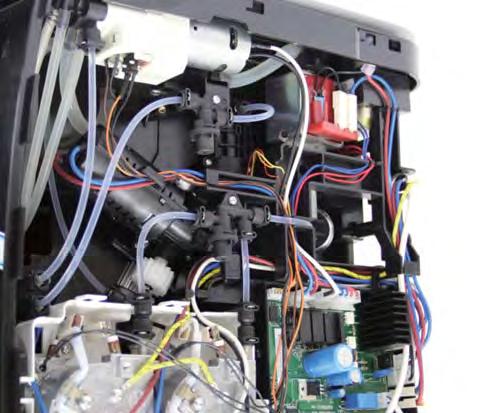
9 Structure 2.2 Description of internal components 7 Thermoblock Dispenser valve 3W Geared motor 2 4 Dispenser valve 2W Dispenser valve Condensator Support 5 8 PCBA Pump Drainage valve Line pencil connector 2 Transformer 3 Base 4 4 Brew unit 5 Solenoid valve 5 6 Drip tray microswitch 7 Reed sensor 6 8 Flowmeter Valve support Control panel Grinder group KLM60 Intelligent Fresh Ground Coffee Machine Service Manual
10 2.3 Water circuit 2.3. Overview of water circuit Water tank 9 Coffee thermoblock 2 Sieve 0 Dispenser valve 2W 3 Flowmeter Drainage valve 4 Condensator 2 Brew unit 5 Pump 3 Beverage export 6 Pressure maintaining valve 4 Reversing valve 7 Steam thermoblock 5 Solenoid valve 8 Dispenser valve 3W

11 2.3.2 Water circuit for making coffee Valve support 6 Coffee thermoblock 2 Flowmeter 7 Dispenser valve 2W 3 Condensator 8 Drainage valve 4 Pump 9 Brew unit 5 Dispenser valve 3W 0 Export

12 2.3.3 Water circuit for making steam Valve support 6 Steam thermoblock 2 Flowmeter 7 Dispenser valve 3 Condensator 8 Solenoid valve 4 Pump 9 Foam rubber 5 Dispenser valve 3W

13 2.3.4 Water circuit for making hot water Valve support 5 Dispenser valve 3W 2 Flowmeter 6 Coffee thermoblock 3 Condensator 7 Dispenser valve 4 Pump 8 Export
14 Schematic circuit diagram Power switch 4 Coffee fused-cord 2 OLED screen 5 Steam fused-cord 3 HMI 6 Pump 4 Rotary PCB 7 Grinder motor 5 NTC 8 Terminal 6 Feedback device 9 LED 2 7 Microswitch 20 Valve 8 Stepper motor 2 Reed sensor 9 Motor for dispenser valve 22 Drip tray microswitch 0 Geared motor 23 Flowmeter Transformer 24 Line pencil connector( contains 0A fuse) 2 Steam fused-cord 25 Power line 3 Coffee fused-cord 26 Power filter
15 Structure 2.5 Technical data Total voltage/power China Europe North America 220V/50HZ 200W 230V/50HZ 400W 20V/60HZ 400W Approvals CCC,CB,GS,CE,ETL,C-ETL Power ratings Thermoblock Pump Grinder motor Drive motor Dispenser valve motor Solenoid valve 20V 400W 20V/60HZ 48W ULKA EP4 DC 20V DC 24V DC 24V DC 24V Capacities Water tank Coffee grounds container Coffee bean container Coffee powder volume for brew unit.8l 5 Pieces 250g MIN 5g; MAX 4g Various data Dimensions(length width height) Cable Length Net weight mm approx.5 m approx 2.6kg 4 KLM60 Intelligent Fresh Ground Coffee Machine Service Manual
16 3. Troubleshooting check list Probability Item Confirmation No. Problem No. Cause Remedy Remarks Examine external damage of coffee machine External parts are broken or damaged Power cord damaged YES - If necessary - replace the external parts NO - continue to 3..2 YES - replace powder cord Disassemble the external parts according to 4.2. Disassemble the powder cord according to Much coffee powder left on the base YES - take out the drip tray, observe if there are lots of coffee powder on the base, clean the rest coffee powder NO - continue to Brew unit doesnot reset YES -. Take away the coffee ground container 2. Insert the drip tray into the coffee machine 3. Press ON/OFF 4. Take out the drip tray after the coffee machine reset and the screen appears ""HEATING"" 5. Put the coffee groud container on the drip tray and insert them into the coffee machine again NO - continue to Examine the external moving parts Drip tray group components damaged Export blocked the drip tray YES - replace the components YES - move the export up NO - continue to Replace or repair the damaged components according to the drip tray explosive view Drip tray can not be taken out Brew unit does not reset, abnormal power off YES - take the drip tray out when the machine in READY state NO - continue to Restart more times if once is not enough The following should be repaired by disassembling the machine Coffee grounds blocked the brew unit YES -. Power on and power off for more than 2 times. 2. If tray can not be take out disassemble and clean the coffee grounds inside the brew unit Disassemble the brew unit group and clean the coffee grounds according to The following should be repaired by disassembling the machine Coffee export fall off Sliding panel of the export is damaged Replace the sliding panel of the coffee export, item: Disassemble control panel according to Disassemble control panel components according to Replace or repair the damaged components according to the control and explosive view
17 Probability Item Confirmation No. Problem No. Cause Remedy Remarks Foam rubber can not be installed Wrong installation for foam rubber group Foam rubber is damaged YES - confirm if the rubber foam installed correct NO - continue to YES - replace or Replace or repair damaged parts according to foam rubber explosive view Examine the external movable parts Water leakage from the bottom when taking out water tank or filling in water tank Valve body is stucked, can not be reset The following should be repaired or replaced water tank group Components damaged YES - move valve body in order to make it reset NO - continue to YES - replace components Replace or repair damaged components according to water tank explosive view Powder container cover can not be covered tightly Lots of coffee powder left below the powder container cover The following should be repaired or replaced powder container cover Powder container cover deformed YES - clean the left coffee powder NO - continue to YES - replace powder container cover Replace or repair damaged components according to bean container explosive view Improper voltage for the machine YES - use proper voltage for the machine NO - continue to Press On/Off to AUTO CHECKIN G and then to READY 3.3. Machine can not be powered on Confirm if the powder cord connected correct YES - replug the powder cord to the powder socket NO - continue to The following should be repaired by dismatling the machine Powder cord damaged YES - replacepowder cord NO - continue to Disassemble and replace components according to Powder switch damaged YES - replace microswitch NO - continue to Disassemble control panel according to 4.2.8; 2. Disassemble microswitch and replace according to 4.3.4
18 Probability Item Confirmation No. Problem No. Cause Remedy Remarks The connector between PCB and powder switch does not work YES - connect or repair power switch connector NO - continue to Disassemble control panel according to 4.2.8; 2. Disassemble control panel,repair connection line according to Machine can not be power on Transformer connector fell off or damaged YES - connct or repair the transformer connector NO - continue to Disassemble right side section according to Fuse inside the line pencil connetor is damaged YES - replace the fuse inside the line pencil connector NO - continue to Disassemble back cover according to PCBA damaged YES - replace or repair PCBA, item: Disassemble PCBA, replace and repair according to Press On/Off to AUTO CHECKIN G and then to READY No water in the water tank The water tank does not install in place YES - fill in the water tank NO - continue to YES - place the water tank again NO - continue to The ball inside the water tank is sticked YES - clean water tank, knock the place near the ball in order to make the ball move inside water tank NO - continue to The following should be replaced or repaired the water tank group FILL WATER TANK on screen The ball is fell off Ball damaged YES - replace water tank group, item: NO - continue to YES - replace water tank group, item: NO - continue to The following should be repaired by dismatling the machine Reed sensor damaged YES - replace reed sensor, item: NO - continue to Connector damaged YES - connect or repair power switch connector NO - continue to
19 Probability Item Confirmation No. Problem No. Cause Remedy Remarks FILL WATER TANK on screen PCBA damaged YES - replace or repair PCBA, item: Disassemble PCBA, replace and repair according to Lots of coffee powder left on the base YES - clean rest coffee powder NO - continue to Brew unit does not reset YES - take out coffee grounds container, reinstall drip tray NO - continue to The following should be repaired by disassembling or changing proper parts INSTALL TRAY on screen Coffee grounds container frame damaged YES - replace coffee grounds container frame item: NO - continue to Replace or repair damaged components according to drip tray explosive view Drip tray microswitch damaged YES - replace microswitch, item: (X3C306N2LB) NO - continue to Press On/Off to AUTO CHECKIN G and then to READY Drip tray microswitch connector does not work PCBA damaged YES - connect or repair microswitch connector, item: NO - continue to YES - replace or repair PCBA, item: Disassemble PCBA, replace and repair according to Drip tray terminal is wet YES - clean up the terminal NO - continue to EMPTY TRAY on screen Base terminal is wet YES - clean up the terminal NO - continue to Disassemble back cover according to 4.2. The following should be repaired by dismatling the machine PCBA damaged YES - replace or repair PCBA, item: Disassemble PCBA, replace and repair according to No water comes from coffee export when CLEANING Stepper motor in drainage valve does not reset( stepper motor still in the drainage position when making coffee) YES - power off the machine, restart (drainage will be reset when power on the machine) NO - continue to The following should be repaired by dismatling the machine
20 Probability Item Confirmation No. Problem No. Cause Remedy Remarks Inside pipe connector damaged- water leakage(lots of water on the table) YES - repair damaged pipe or connector NO - continue to Drainage valve group damaged YES - replace drainage valve group NO - continue to Disassemble drainage valve group according to 4.2.0; 2. Replace or repair damaged components according to drainage valve group explosive view No water comes from coffee export when CLEANING Contropistone seal damaged YES - replace contropistone seal, item: NO - continue to Dismantle brew unit according to 4.2.3; 2. Replace or repair damaged components according to brew unit explosive view Press On/Off to AUTO CHECKIN G and then to READY Brew unit piston seal damaged Brew unit waterseal damaged YES - replace brew unit coffee brewing unit,item: NO - continue to YES - replace brew unit seal, item: Disassemble brew unit according to 4.2.3; 2. Replace or repair damaged components according to brew unit explosive view Disassemble brew unit according to 4.2.3; 2. Replace or repair damaged components according to drainage valve group explosive view Brew unit filter screen clogged YES - enter menu-maintaince-clean NO - continue to After cleaning,when drainage starts,if the noise is very loud, it means brew unit filter screen get clogged A little water drops from coffee export when CLEANING ( normal volume should be more than 35ml) The following should be repaired by dismatling the machine Inside pipe connector damaged-water leakage(lots of water on the table) Drainage valve group damaged YES - repair damaged pipe or connector NO - continue to YES - replace drainage valve group NO - continue to Disassemble drainage valve group according to 4.2.0; 2. Replace or repair damaged components according to drainage valve group explosive view
21 Probability Item Confirmation No. Problem No. Cause Remedy Remarks Press On/Off to AUTO CHECKIN G and then to READY Little water drops from coffee export when CLEANING ( normal volume should be more than 35ml) Contropistone seal damaged Brew unit piston seal damaged Brew unit seal damaged YES - replace brew unit seal, item: NO - continue to YES - replace coffee brewing group, item: NO - continue to YES - replace brew unit seal, item Disassemble brew unit according to 4.2.3; 2. Replace or repair damaged components according to brew unit explosive view Disassemble brew unit according to 4.2.3; 2. Replace or repair damaged components according to brew unit explosive view Disassemble drainage valve group according to 4.2.0; 2. Replace or repair damaged components according to drainage valve group explosive view Touch screen with glove or touch screen is dirty YES - clean the touch screen NO - continue to The following should be repaired or replaced by dismatling the machine READY Touch screen becomes invalid ITO damaged YES - replace ITO, item: NO - continue to Disassemble control panel according to 4.2.8; 2. Disassemble control panel components according to 4.3.4; 3. Replace or repair damaged components according to control panel explosive view HMI damaged YES - replace and repair HMI, item: NO - continue to Refer to The connector between HMI and PCBA is damaged or dropped YES - conncect or replace connector, item: NO - continue to Refer to PCBA damaged YES - replace or repair PCBA, item: Disassemble PCBA, replace and repair according to 4.2.2
22 Probability Item Confirmation No. Problem No. Cause Remedy Remarks Rotary is stucked so it can not be moved or pressed YES - replace rotary, item: NO - continue to Disassemble control panel according to 4.2.8; 2. Disassemble control panel components according to 4.3.4; 3. Replace or repair damaged components according to control panel explosive view Rotary becomes invalid Rotary PCB damaged YES - replace rotary PCB, item: NO - continue to Refer to The connector between rotary PCB and HMI damaged YES - replace line pencil, item: NO - continue to Refer to HMI damaged YES - replace HMI, item: NO - continue to Refer to PCBA damaged YES - replace or repair PCBA, item: Disassemble PCBA, replace and repair according to The following should be repaired by dismatling the machine Clean button is stucked or demaged YES - make the clean button can be pressed or replace damaged button, item: NO - continue to Disassemble control panel according to 4.2.8; 2. Disassemble control panel components according to 4.3.4; 3. Replace or repair damaged components according to control panel explosive view Rinse button becomes invalid Press button on HMI damaged YES - replace HMI, item: NO - continue to Refer to HMI damaged YES - replace HMI, item: NO - continue to Refer to Connection line between HMI and PCBA damaged or dropped YES - connect or replace connection line, item: NO - continue to Refer to PCBA damaged YES - replace or repair PCBA, item: Disassemble PCBA, replace and repair according to Conduct the following confirmation after reset
23 Probability Item Confirmation No. Problem No. Cause Remedy Remarks The following should be repaired by dismatling the machine The grinder unit does not work( the screen shows working but no sounds from the grinder unit) Grinder group motor teminal or connection line damaged or dropped Grinder motor fuse damaged on PCBA Grinder motor damaged YES - connect or replace connection line, item: NO - continue to YES - replace grinder motor fuse on PCBA NO - continue to YES - replace grinder motor, item: NO - continue to Disassemble grinder group according to 4.2.7; 2. Disassemble grinder group according to Disassemble grinder group according to 4.2.7; 2. Disassemble grinder group according to PCBA grinder motor control circuit or components damaged YES - replace or repair PCBA, item: Disassemble PCBA, replace and repair according to Coffee beans are too oil and sticked to the entrance of the grinder YES - stir coffee beans inside the bean container NO - continue to Use coffee beans to make coffee Use over roasted coffee beans YES - replace to the finest level by adjusting coffee powder adjustment, continue to make 2 cups of coffee, the 3rd cup will be normal NO - continue to Use wet coffee beans YES - choose normal dry coffee beans NO - continue to EMPTY BEAN displays on the screen after grinding (grinder unit works Coffee powder channel is clogged YES - use provided coffee powder spoon to unclog NO - continue to The following should be repaired by dismatling the machine Grinder entrance is sticked YES - take out bean container, and clean grinder entrance NO - continue to Take out bean container according to 4.2. Screw pin worm drive is loose, the gap between conical burr and upper burr YES - take out bean container, lock screw pin worm drive, item: NO - continue to Refer to The gap between conical burr and upper burr lessens or no gap Water into grinder group YES - lock conical burr fastener,if support lower grinder damaged-replace it, item: NO - continue to YES - take out grinder group, clean or replace conical burr and upper burr, item: and NO - continue to Take out grinder group according to 4.2.7; 2. Disassemble grinder group according to According to grinder group explosive view , replace or repair damaged components
24 Probability Item Confirmation No. Problem No. Cause Remedy Remarks EMPTY BEAN displays on the screen after grinding (grinder unit works Grinder group is stucked Gear group or gear box damaged YES - take out foreign object from grinder group NO - continue to YES - replace parts in grinder group If conical burr and upper burr is stucked by foreign object, there will be different regular noise when the conical buur and upper burr does not work. Disassemble grinder group according to 4.2.7; 2. Disassemble grinder group according to According to grinder group explosive view , replace or repair damaged components Drainage valve stepper motor does not reset( stepper is still in drainage position when making coffee) YES - power off the machine, restart (drainage will be reset when power on the machine) NO - continue to The following should be repaired by dismatling the machine Use coffee beans to make coffee No coffee comes out from coffee export Inside pipe connector damaged or dropped-water leakage(lots of water on the table ) Inside pipe connector damaged or dropped-coffee leakage(lots of coffee on the table) Drainage valve group damaged, no water comes to brew unit; water drops to drip tray directly from drainage valve YES - repair damaged water pipes or pipe connector in drainage valve group NO - continue to YES - repair pipes or pipe connector at the back of brew unit continue to YES - replace drainage valve group NO - continue to Disassemble drainage valve group according to 4.2.0; 2. Replace or repair damaged components according to drainage valve group explosive view Contropistone seal damaged, coffee comes out from the gap between coffee brewing box and contropistone YES - replace contropistone seal, item: NO - continue to Disassemble brew unit according to 4.2.3; 2. Replace or repair damaged components according to brew unit explosive view Brew unit piston seal damaged YES - replace coffee brewing group, item: NO - continue to Refer to Seal in brew unit damaged YES - replace seal, item: NO - continue to Disassemble drainage valve group according to 4.2.0; 2. Replace or repair damaged components according to drainage valve group explosive view
25 Probability Item Confirmation No. Problem No. Cause Remedy Remarks No coffee comes out from coffee export Brew unit parts damaged; when making coffee,coffee brewing box can not be closed exactly YES - replace damaged parts in brew unit. Disassemble brew unit according to 4.2.3; 2. Replace or repair damaged components according to brew unit explosive view The temperature of the cup is too low YES - preheat coffee cup or increase the temperature of environment No - continue to Coffee temperatur e is too low( below 70 C) The temperature of the water is too low The temperature is low, or standby time is too long; brew unit and water circuit is cold YES - use the pure water that around 25 C NO - continue to YES - the temperature from the 3rd cup will meet the standard NO - continue to Coffee machine needs descale (deposit decreased the efficiency of the thermoblock) YES - descale Descale according to Use coffee beans to make coffee Coffee temperatur e is too high( more than 89 C) NTC loose or unfixed NTC thermistor damaged Program or PCBA damaged YES - fix NTC NO - continue to YES - replace NTC thermistor, item: NO - continue to YES - replace or repair PCBA, item: Replace or repair damaged components according to thermoblock group explosive view Disassemble PCBA,replace and repair according to Coffee machine needs descale (deposit makes pipes inside the machine nearly clogged) YES - descale NO - continue to Descale according to Coffee volume is too little (the volume of Espresso is less than 25ml) Drainage valve stepper motor does not reset (when making coffee, stepper motor is still in drainage position YES - power off coffee machine, restart drainage valve will be reset automaticly when restart NO - continue to The following should be repaired by dismatling the machine Inside pipe connector damaged or dropped-water leakage (water on the table) YES - repair damaged pipe or connector in front of the drainage valve group NO - continue to Inside pipe connector damaged or dropped leads to coffee leakage (lots of coffee on the table) YES - repair pipe or connector at the back of brew unit NO - continue to
26 Probability Item Confirmation No. Problem No. Cause Remedy Remarks Drainage valve group damaged, no water comes to brew unit, dropped to drip tray from drainage valve directly YES - replace drainage valve group NO - continue to Disassemble drainage valve group according to 4.2.0; 2. Replace or repair damaged components according to drainage valve group explosive view Coffee volume is too little (the volume of Espresso is less than 25ml) Contropistone seal damaged,coffee sprays from the gap between coffee brewing box and contropistone Brew unit piston seal damaged YES - replace contropistone seal, item: NO - continue to YES - replace coffee brewing group,item: NO - continue to Disassemble brew unit according to 4.2.3; 2. Replace or repair damaged components according to brew unit explosive view Refer to Seal in brew unit damaged YES - replace water seal, item: NO - continue to Refer to Use coffee beans to make coffee Brew unit parts damaged; when making coffee, coffee brewing box can not be closed exactly YES - replace damaged parts in brew unit Refer to Too much coffee( the volume of Espresso is more than 00ml) Flowmeter damaged, magnet inside the flowmeter does not work Program or PCBA damaged YES - replace flowmeter, item: NO - continue to YES - replace or repair PCBA, item: Disassemble flowmeter and replace according to Disassemble PCBA, replace and repair according to Improper coffee beans or coffee powder YES - use proper, fresh coffee beans or coffee powder NO - continue to Coffee powder is too rough YES - adjust the grinder adjustment rotate to the finest state, continue to make 2 cups of coffee, the 3rd cup will meet the standard NO - continue to Coffee is to soft, no creama on the top The following should be repaired by dismatling the machine Grinder group damaged or end of life YES - replace grinder group parts. Disassemble PCBA, replace and repair according to 4.2.2; 2. Disassemble grinder group according to 4.2.7; 3. Disassemble grinder group according to according to grinder group explosive view Replace or repair damaged components
27 Probability Item Confirmation No. Problem No. Cause Remedy Remarks LACK OF POWDER displays on the screen Not enough coffee powder Coffee powder channel is clogged YES - use Kalerm provided coffee spoon, fill one full spoon of coffee powder NO - continue to YES - open powder container cover, clear coffee powder channel No coffee comes out from coffee export Refer to Use coffee powder to make coffee Coffee temperatur e is too low( below 75 C) Coffee temperatur e is too high( more than 75 C) Refer to Refer to Coffee volume is too little (the volume of Espresso is less than 25ml) Refer to Coffee volume is too much (the volume of Espresso is more than 00ml) Refer to Coffee is too soft, no crema on the top Refer to Coffee machine needs descale(deposit makes pipes inside the machine nearly clogged ) YES - descale NO - continue to Descale according to The following should be repaired by dismatling the machine The process to make hot water No water comes out from water export Dispenser valve 2W damaged and does not work (water dropped to drip tray YES - repair or replace dispenser valve 2W, item: NO - continue to Disassemble dispenser valve 2W according to Inside pipe connector damaged or dropped (water leaks to the table YES - connect or replace leakage position NO - continue to
28 Probability Item Confirmation No. Problem No. Cause Remedy Remarks No water comes out from water export Drainage damaged YES - replace damaged drainage valve. Disassemble dispenser valve according to 4.2.9; 2. Disassemble dispenser valve according to 4.3.2; 3. Replace or repair damaged components according to dispenser valve explosive view Coffee machine needs descale (deposit makes pipes inside the machine nearly clogged ) YES - descale NO - continue to The process to make hot water The volume of hot water is too little The following should be repaired by dismatling the machine Dispenser valve 2W damaged and does not work (water dropped to drip tray YES - repair or replace dispenser valve 2W, item: NO - continue to Disassemble dispenser valve 2W according to Inside pipe connector damaged or dropped (water leaks to the table YES - connect or replace leakage position NO - continue to The volume of hot water is too much Flowmeter damaged,magne nt does not work Program or PCBA damaged YES - replace flowmeter NO - continue to YES - replace or repair PCBA, item: Disassemble flow meter and replace according to Disassemble PCBA,replace and repair according to Hot water temperatur e is too low Refer to Milk can not be sucked up Refer to 3.0. The process to make cappucci no It is milk lastead of cream during cappuccin o process Problems occur during coffee process when making Cappuccino Refer to3..2 Refer to3. 5 The procee to make Latte All the problems refer to 3.8 The process to make hot milk Milk can not be sucked up YES - confirm if the milk is fresh Improper milk whole milk NO - continue to No steam,steam nozzle clogged YES - clear or replace steam (there is pumping nozzle, item: water noise inside NO - continue to the machine-pump works According to foam rubber explosive view
29 Probability Item Confirmation No. Problem No. Cause Remedy Remarks Milk pipe clogged YES - clear or replace milk pipe NO - continue to Foam rubber clogged YES - clear or replace foam rubber, item: NO - continue to According to foam rubber explosive view Air pipe loose or damaged YES - connect or replace air pipe, item: NO - continue to Disassemble valve according to 4.2.6; 2. Replace or repair damaged components according to valve group explosive view Milk can not be sucked up Steam seal damaged YES - replace steam seal, item: NO - continue to Disassemble control panel according to 4.2.8; 2. Disassemble control panel components according to 4.3.4; 3. Replace or repair damaged components according to control panel explosive view The process to make hot milk The following should be repaired by dismatling the machine Steam sprays from internal coffee machine YES - repair or replace water pipe connector NO - continue to Dispenser valve damaged YES - replace damaged dispenser valve parts. Disassemble dispenser valve according to 4.2.9; 2. Disassemble dispenser valve according to 4.3.2; 3. Replace or repair damaged components according to dispenser valve explosive view The cream sprayed out Improper milk Foam rubber is dirty YES - confirm if the milk is fresh whole milk NO - continue to YES - take out foam rubber and clean it Milk temperatur e is too low Improper milk Foam rubber is dirty YES - use milk with the temperature over 0 NO - continue to YES - take out foam rubber and clean it Milk can not be sucked up Refer to 3.0. The process to make cream It is milk instead of cream inside the cup Foam rubber air hole is clogged Inlet port is clogged YES - clean foam rubber NO - continue to YES - replace valve air inlet, item: NO - continue to Disassemble valve according to 4.2.6; 2. Replace or repair damaged components according to valve group explosive view
30 Probability Item Confirmation No. Problem No. Cause Remedy Remarks Valve damaged YES - replace valve, item: NO - continue to Refer to The process to make cream It is milk instead of cream inside the cup Air pipe clogged YES - replace air pipe, item: NO - continue to Refer to PCBA damaged YES - replace or repair PCBA, item: Disassemble PCBA, replace and repair according to Water leakage between water inlet valve and water tank YES - replace or repair water inlet valve seal NO - continue to Disassemble water inlet valve group according to Replace or repair damaged components according to water inlet valve group explosive view Water sensor in front of drip tray is dirty YES - clean water sensor NO - continue to Water sensor inside the drip tray has fell off YES - insert water sensor, item: NO - continue to According to drip tray group explosive view Leakage checking Lots of water on the table Water sensor deformed YES - replace water sensor, item: NO - continue to According to frame explosive view Line pencil does not work YES - repair connector, item: NO - continue to Disassemble appearance components according to 4.2. PCBA damaged YES - replace or repair PCBA, item: NO - continue to Disassemble PCBA, replace and repair according to Connector or pipe damaged- water leakage YES - replace connector or pipe Problem after press ON/OFF to CLEANING till power off Problems refer to 3.3 Decalcifyi ng Descale according to 5.2. cleaning Clean coffee machine according to 5.2.2
31 Probability Item Confirmation No. Problem No. Cause Remedy Remarks System testing Malfunction YES - Restart the machine NO - continue to Coffee thermoblock connection line fell off or damaged YES - repair or replace coffee thermoblock connection line; item: and NO - continue to According to explosive view ERROR no power in thermoblock or the thermoblock temperature fuse damaged Coffee thermoblock does not work Coffee thermoblock connection line fell off or damaged YES - replace coffee thermoblock, item: NO - continue to YES - repair or replace steam thermoblock connection line, item: and NO - continue to Disassemble thermoblock group according to Replace damaged components according to thermoblock group explosive view According to explosive view ERROR ~7Coffee machine needs to be repaired when there is ERROR on the screen ERROR 2 NTC damaged Steam thermoblock does not work System testing Malfunction Coffee thermoblock NTC damaged YES - replace steam thermoblock, item: YES - Restart the machine NO - continue to YES - replace NTC, item: NO - continue to Disassemble thermoblock group according to Replace damaged components according to thermoblock group explosive view Replace damaged components according to explosive view Steam thermoblock NTC damaged YES - replace NTC, item: NO - continue to Refer to NTC connection line does not work YES - connect or replace connection line, item: Refer to ERROR 6 press 5 times FILL UNIT, and it still can not be solved by pressing the rotarywater circuit is clogged Pump and flowmeter connection line dropped or damaged Pump damaged Flowmeter clogged or damaged YES - repair or replace pump and flowmeter connection line, item: and NO - continue to YES - repair or replace pump, item: NO - continue to YES - repair or replace flowmeter, item: NO - continue to Disassemble appearance according to Disassemble pump group according to 4.2.; 2. Replace or repair damaged components according to pump group explosive view Disassemble flowmeter according to 4.2.5
32 Probability Item Confirmation No. Problem No. Cause Remedy Remarks ERROR ~7Coffee machine needs to be repaired when there is ERROR on the screen ERROR 6 press 5 times FILL UNIT, and it still can not be solved by pressing the rotarywater circuit is clogged ERROR 7 communic ation mistakes between PCBA and HMI Dispenser valve internal structure damaged Water circuit clogged Pipe damaged Connection line bewteen HMI and PCBA loose HMI damaged YES - replace damaged parts NO - continue to YES - repair or clear water circuit NO - continue to YES - replace damaged pipe YES - connect or replace connection line bewteen HMI and PCBA, item: NO - continue to YES - repair or replace HMI, item: NO - continue to Refer to Disassemble control panel according to 4.2.8; 2. Disassemble control panel components according to 4.3.4; 3. Replace or repair damaged components according to control panel explosive view Refer to PCBA damaged YES - replace or repair PCBA, item: Disassemble PCBA, replace and repair according to FILL UNIT Water circuit lack of water YES - press rotary to fill unit Press rotary till FILL UNIT accomplished PRESSURE HIGH (protective program during making coffee Use deep roasted coffee beans or use over fine coffee powder Filter screen of brew unit clogged YES - use suitable coffee bean or coffee powder NO - continue to YES - clean brew unit NO - continue to The following should be repaired by maintainers Clean coffee machine according to Coffee powder clogged filter screen completely YES - take out drip tray,clean filter screen Clean coffee machine according to Information reminding TEMPERATUR E HIGH System testing Malfunction YES - half an hour after restart the machine System testing Malfunction YES - restart the machine NO - continue to The following should be repaired by maintainers Error3 (VALVE RESET RESTART PCBA damaged Dispenser valve microswitch damaged YES - replace or repair PCBA, item: NO - continue to YES - replace microswitch NO - continue to Disassemble PCBA, replace and repair according to Disassemble dispenser valve according to 4.2.9; 2. Disassemble dispenser valve according to Dispenser valve microswitch line pencil fell off YES - replace or repair dispenser valve line pencil, item: NO - continue to Refer to
33 Probability Item Confirmation No. Problem No. Cause Remedy Remarks Error3 (VALVE RESET RESTART YES - replace motor, Dispenser valve item: motor for damaged NO - continue to Dispenser valve internal structure damaged YES - replace damaged parts Refer to Refer to System testing Malfunction YES - restart the machine NO - continue to Information reminding Brew unit is dirty,lots of coffee powder in contropistone YES - clean and maintain brew unit NO - continue to The following should be repaired by maintainers Clean coffee machine according to BREW UNIT RESET RESTART MACHINE PCBA damaged Feedback device damaged YES - replace or repair PCBA, item: NO - continue to YES - repair or replace coder circuit board, item: NO - continue to Disassemble PCBA, replace and repair according to Replace or repair damaged components according to feedback device explosive view Brew unit parts damaged YES - replace or repair brew unit parts NO - continue to Disassemble brew unit according to 4.2.3; 2. Replace or repair damaged components according to brew unit explosive view Transmission group parts damaged YES - replace or repair transmission group parts. Disassemble geared motor group according to Replace or repair damaged components according to geared motor group explosive view


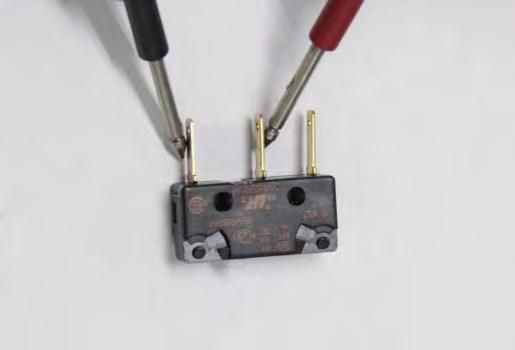
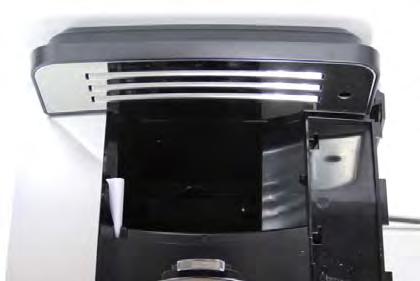
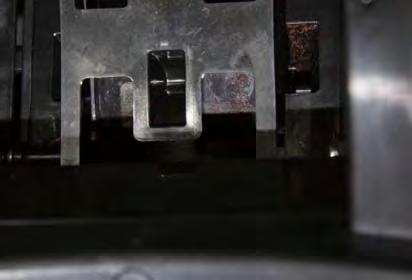
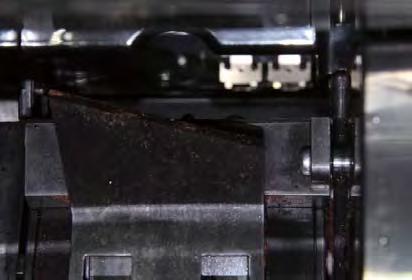
34 3.2 Check list for minor failure 3.2. Function Reed sensor function Drip tray microswitch function Drip tray terminal function


35 Press button Circuit Check fuse inside line pencil connector Check grinder motor fuse of PCBA Check driving motor fuse of PCBA Check all the connection lines
36
37


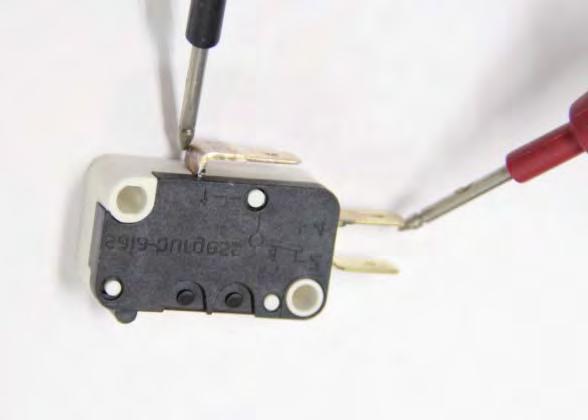
 Multimeter")

38 4. Tools preparation Torx screwdriver T6,T0,T5,T20,T25 Slotted type screwdriver (3mm series) Multimeter Needle-nose pliers Electronic scale Temperature tester


39 4.2 Disassemble process for components 4.2. Disassemble exterior parts Take out movable parts 2. Take out drip tray 2. Take out bean container lid group 3 3. Take out water tank group Disassemble back cover 2. Rotate the Logo support according to the direction of the arrow 2. Dismantle 2 screws from the bottom of the Logo support


40 3 3. Take out back cover according to the arrow direction Disassemble front cover right and front cover left 2. Disassemble the 2 screws from the bottom 2. Take out front cover right and front cover left separately according to the direction of the arrow Disassemble right cover. Take out right side section according to the direction of the arrow


41 Disassemble coffee bean container group. Disassemble 4 screws from the coffee bean container, and take the coffee bean container out Disassemble top cover 2. Disassemble 2 screws from the left side of the top cover 2. Loose top cover and hook of the frame 3 3. Take out top cover according to the direction of the arrow


42 Disassemble left cover. Disassemble left side section according to the direction of the arrow Disassemble power cord. Refer to Disassemble the exterior parts of the machine Disassemble 2 screws from the cable rack 3. Disassemble screw from support, loose 3 screws inside the line pencil connector and take out the power cord


43 4.2.3 Disassemble brew unit. Refer to Disassemble exterior parts of the machine Disassemble 3 screws, and take out frame support 3. Pull out silicon pipe from brew unit Disassemble 3 screws from brew unit Pull the brewing unit outward and rotate the gear clockwise to the position as the picture shows 6. Disassemble screw from backside and take out brew unit


44 4.2.4 Disassemble valve support group. Refer to 4.2.-disassemble exterior parts 2 2. Take out valve support according to the direction of the arrow and pull out silicon pipe Note There are 4 hooks between valve support and base Disassemble flowmeter. Refer to Disassemble exterior parts Pull out the flowmeter terminal, and pull out the flowmeter according to the arrow direction 3. Pull out the silicone pipe at two sides of the flowmeter, and take out flowmeter


45 4.2.6 Disassemble solenoid valve group. Refer to 4.2.-disassemble exterior parts Disassemble hooks from support 3. Pull out terminal and silicon pipe and take out solenoid valve group Disassemble grinder group. Refer to disassemble top cover Disassemble 3 screws 3. Pull out grinder motor terminal from PCBA and take out grinder group


46 4.2.8 Disassemble control panel group. Refer to 4.2.-disassemble exterior parts Pull out two silicon pipes from the dispenser valve on the right side of the machine 3. Pull out two silicon pipes from the left side of the machine Disassemble 5 cable racks 5. Pull out terminal on PCBA which connected to control panel Disassemble 2 screws from the support 7. Disassemble left and right hooks on the support and take out control panel group


47 4.2.9 Disassemble dispenser valve group. Refer to disassemble right side section Disassemble screw from dispenser valve 3W so that the wire can be taken out from the cable rack 3. Pull out dispenser valve terminal on PCBA, and take it out from the cable rack 4 4. Move the dispenser valve group to the right side according to the direction of the arrow 5 5. Pull out 5 pipes from dispenser valve, and take out dispenser valve group


48 4.2.0 Disassemble drainage valve group. Refer to4.2.-disassemble exterior parts 2. Refer to4.2.3-disassemble brew unit group Disassemble screw from dispenser valve 3W, so that the wire can be taken out from the cable rack 4. Pull out terminal from stepper motor on PCBA Pull out Teflon pipe between dispenser valve 2W and drainage valve 6. Disassemble 4 screws from support and take out drainage valve group


49 4.2. Disassemble pump group. Refer to disassemble right side section Disassemble screw from dispenser valve 3W so that the wiring cable can be taken out from the cable rack. 3. Pull out Teflon pipe on dispenser valve 3W that connected to pump Take out all of line pencil from cable rack, disassemble 3 screws from cable rack and take out cable rack 6 5. Pull out silicon pipe on condensator that connected to pump 7 Pull out the flowmeter and pull out the silicone pip Pull out pump clamp from the support and take out pump group


50 4.2.2 Disassemble PCBA. Refer to disassemble right side section Pull out all the terminals on PCBA 3. Disassemble 4 screws on PCBA, and take out PCBA Disassemble dispenser valve 2W. Refer to disassemble right side section Disassemble screw 3. Pull out Teflon pipe on dispenser valve 2W that connected to pump, and take out dispenser valve 2W


51 4.2.4 Disassemble dispenser valve 3W group. Refer to disassemble right side section Disassemble screw from dispenser valve 3W Disassemble thermoblock group. Disassemble top cover according to Pull out 3 Teflon pipes which connected to dispenser valve 3W, and take out dispenser valve 3W Loose screw on the line pencil connector 3. Loose the screw near the ground wire on the line pencil connector Disassemble screw from dispenser valve 3W 5. Pull out Teflon pipe which connected thermoblock group and dispenser valve 3W and dispenser valve 2W


52 Move dispenser valve group and pull out Teflon pipe which connected thermoblock 6. Move dispenser valve group and pull out Teflon pipe which connected thermoblock Disassemble hooks from support, and take out thermoblock group 8. Disassemble hooks from the support and take out thermoblock Disassemble ground coffee container lid switch group Disassemble screw from dispenser valve 3W so that the wiring can be taken out from the cable rack 3. Pull out motor group terminal from PCBA and separate with cable rack

53 4 4. Disassemble 2 screws from support and take out geared motor group


54 4.3 Precautions for maintenance and installation 4.3. Brew unit group 2. Disassemble the spool gear group according to the arrow direction 2. Disassemble the wiper, notice the hooks showed by the arrow Disassemble the 4 screws from the left and right cover 4 4. Disassemble 4 hooks from the top cover of the brew unit take out top cover of brew unit Note: deeper slot side should be installed to the front position of the brew unit. It should match the wiper


55 Disassemble five hooks at the back of the left and right cover and take out the left and right cover 6. Take out connect part and reset base Take out left and right pull plate and pull plate sleeve 8. Rotate the gear Take out the contropistone 0. Take out the connector, pay attention to the direction of the spring.


56 . Deform brew unit frame with strength according to the arrow direction, and take out coffee brewing group Disassemble release link and take out piston Note: The bigger opening of the piston should face to the release link Disassemble the screw from contropistone, and take out filter screen 4. Disassemble seal from contropistone


57 4.3.2 Dispenser valve 6W 2. Take out 2 screws from dispenser valve 2. Loose the hook and separate gear box for dispenser valve from the water dispenser box 3 3. Disassemble the 2 screws from the dispenser valve 4 4. Take out water distributor and get out ceramic plate sheet gasket


58 5 5. Take out the top cover of the dispenser valve 6 6. Separate dispenser valve from sheave permanent seat, take out sheave and disassemble microswitch. Note: when installing, the microswith with two lines should be in the upside and the microswitch with three lines should be in the downside; the black side of the upside microswitch should face down, the black side of the downside microswitch should face up. The slot on the sheave should face to the connector of the microswitch Take out the sheave and disassemble the microswitch Note Take out the sheave drive part according to the arrow direction


59 Disassemble the hook on gear box lid, and take out gear box lid 9. Take out dispenser valve gear A and dispenser valve gear B 0 0. Disassemble 2 screws inside the gear box, and take out the motor for dispenser valve Grinder group 2. Disassemble the 3 hooks from the grinder adjustment sector and take out the grinder adjustment sector 2. Rotate the upper burr group anticlockwise


60 Disassemble the three hooks from the motor support for grinder, and take out the grinder adjustment ring 4. Disassemble middle screw Take out the line pencil and conical burr group 6. Take out screw from the coffee powder hopper Disassemble 3 screws from grinder support, and take out grinder support 8. Take out 3 screws from the gear box


61 Take out the 3 hooks from the gearbox, and then take out the coffee powder container 0. Disassemble steel ball support and 34 pcs steel ball 2. Take out the epicyclic gear group B 2. Take out filler piece and the epicyclic gear group A 3 3. Disassemble the 2 screws inside the gearbox, and take out the grinder motor


62 4.3.4 Control panel group 2. Take out foam rubber group 2. Pull out the rotary according to the arrow direction Disassemble 4 screws from the backside of control panel 4. Pull out 4 screws from the backside of the control panel, and pull out the terminal, then take out the decorative plate group Pull out 2 terminals on HMI and the terminal on the power switch and take out the touch screen group


63 Disassemble 4 screws from the export group, and take out the sliding group 8. Take out the LED Separate coffee export sliding panel and coffee export support, and take out magnet sliding panel and shell fragment magnet 0. Disassemble screw inside the coffee export base, and take out the coffee export group 2. Pull out all the silicon pipes 2. Disassemble the connector and seal


64 Disassemble 2 screws from the handle, and take out the handle 4. Disassemble 2 screws from the backside of the touch screen decorative cover; take out decorative plate and smokebell Disassemble 2 screws from the rotary, and take out the bottom terminal, and then take out the rotary PCB 6. Take out terminal from the bottom of rotary PCB, and take out the rotary PCB Take out 2 screws from the switch support, pull out the terminal from the HMI, and take out the switch group 8. Take out the spring and the power button, and disassemble power button decorative cover


65 Disassemble the 2 screws at both sides of the switch support, and then take out 2 microswitch 20. Disassemble 5 screws from the HMI, pull out two terminals, and take out HMI Take out silica gel, clean buttons and smokebell, and clean the power button decorative cover 22. Take out touch screen Disassemble 2 screws from display screen, and take out the OLED screen 24. Take out ITO which sticked to touch screen


66 Precautions for assembling Drainage valve group 2. Assemble the drain valve support, pin, pin sleeve, pin reset spring, pin seal together as the picture shows. Pay attention to the direction of the pin seal. 2. Assemble the drainage export and pin seal together Assemble the pin seal, pin and drainage valve pipe into the drainage valve. Pay attention to the direction of the pin seal as the picture shows. 4. Put the stepper motor and drainage valve support lock together. Pay attention to the direction of the stepper motor Assemble them into drainage valve, and install the seal, Teflon pipe and clamps. 6. Rotate the tail of the stepper motor to make the axis of the stepper motor stand up to the drain valve support until it cannot stand up any more.


67 Dispenser valve group 2 2. Press the gear pin into the hole of the gearbox, and put the dispenser valve motor to gearbox. The screws need a few loctite. 2. Install dispenser valve gear A and dispenser valve gear B into dispenser valve gearbox after coat oil(mi-setral-6b) Install the gear box lid and sheave drive part, pay attention to the position of the sheave drive part. 4. Install 2 screws inside the sheave permanent seat Install microswitch line pencil switches to sheave permanent seat and dispenser valve separately. Pay attention to the position and the direction of the sheave and microswitch. 6. Assemble the sheave permanent seat and dispenser valve together.


. 9 0 9.")


68 Install the ceramic plate A into the dispenser valve. The upper side should be the side of slot, and it should be covered with oil(syn-setral-al/c 2-FD). 8. Install the ceramic plate B into the dispenser valve. Both sides should be covered with oil((syn-setral-al/c 2-FD) Install the seal on the dispenser valve top cover. 0. Assemble dispenser valve top cover and water distributor together. 2. Put the dispenser valve silicon plate into the slot of the water distributor. 2. Assemble the ceramic plate C on dispenser valve silicon plate, the smooth side should be covered with oil(syn-setral-al/c 2-FD).


69 Assemble the water distributor to the dispenser valve, and lock the screws on both sides uniformly, the head of the screws need loctite. 4. Assemble the water dispenser box and the gear box together, and then lock the screw. Valve support group. When installing the support seal, the downside should be with bigger diameter. Brew unit. Install the piston and release link into the coffee brewing unit, oil(mi-setral-6b) coating position should be as the picture shows.


 and install to the")


70 2 2. Install the coffee brewing unit into the brew unit frame, and install reset base and connect part Assemble the pin seal and pin together to drainage valve connection. Note: the direction of the pin seal. 4. Coating the contropistone seal with lubricating oil(syn-setral-al/c 2-FD) and install to the contropistone, and then lock the filter screen Assemble the connector, ball and spring into contropistone. Pay attention to the arrow direction. 6. Assemble the already installed contropistone into the brew unit frame. Note: The direction of the contropistone should be the same as the picture showed.

 coating position for left and")

71 Install the left and right pull plate and left and right cover on brew unit frame, oil (MI-setral-6B) coating position for left and right pull plate should be as the picture shows. 9 Note: Pay attention to the direction of the brew unit top cover, the deeper groove should be in front.


72 Lock the left side and right side cover screws.. Install wiper and spool gear group. Control panel group 2. When installing microswitch and power microswitch support, please pay attention to the connection position between microswitch and connector. 2. When installing silicon pipe, please note the position of every silicon pipe inside the hole of the coffee export.


.")

73 Thermoblock. When install the NTC on the thermoblock, cover NTC with silicone grease and fasten it. Grinder group. Assemble the grinder motor and gearbox together, and screw them tightly. The screw should be covered with loctite. The teeth of the gearbox should be coated with oil(mi-setral-6b). The red mark place should correspond to one hole of the gearbox Install 3 epicyclic gear A and 3 epicyclic gear pin A into epicyclic gear support A, and coat with oil(mi-setral-6b). 3. Install 3 epicyclic gear B and 3 epicyclic gear pin A into epicyclic gear support B, and coat with oil(mi-setral-6b).


74 Put the already installed epicyclic gear frame A into the gearbox, put filler piece onto epicyclic gear frame A. 5. Put the already installed epicyclic gear frame B into gearbox Put the steel ball support and 34 roll steel ball into gearbox. 7. Install 3 grinder antivibration pads and 3 antivibration bushes into coffee powder container. Note: The installation direction for the grinder antivibration pads and 3 antivibration bushes Install the line pencil into the grinder motor, red line correspond to the red mark.


75 0 0. Insert the already installed grinder motor in the grinder support, and lock screws.. Install the coffee powder hopper on the coffee powder container, and lock the screw Install 3 spring sleeves into the hole of the support lower grinder. 3. Install the screw pin worm drive and conical burr to support lower grindor Put 3 conical burr protective steel balls and spring into support lower grinder. 5. Put the felt ring into the already installed coffee powder container.


76 Put the already installed support lower grinder into the coffee powder container and lock the screw. 7. Install the grinding adjustment spring and steel ball into the coffee powder container pillar Install the grinder adjustment ring in the motor support for grinder. 9. Assemble upper burr, upper grinder support, upper grinder cover and support seal together Insert the already installed upper burr into motor support for grinder, and adjust the gap between the conical burr and upper burr. 2. Install the grinder adjustment sensor to grinder adjustment ring. The position should be as the picture shows. 22. The already installed grinder group should be tested when the whole machine is installed. The thickness of the powder should be adjusted properly.

77 5. Function test and test standards Test Temperature Volume Time espresso 75~83 40~60ml 0~5s long coffee 75~85 80~0ml 23~30s cappuccino latte High: 80~90 High: 90~0ml hot water Normal: 70~80 Normal: 90~0ml Low: 60~70 Low: 90~0ml hot milk 4~50 75~0ml 5s hot cream 50~58 60~90ml 5s 5.2 Coffee machine maintenance 5.2. Coffee machine decalcifying Use Kalerm decalcifier only. It may damage machine if use other decalcifier. The whole process costs about 25 minutes. 2. Empty tray 2. Dissolve decalcifier in the clean water, and pour into the water tank- the water inside the water tank should be half of the water tank.


78 2 3. Press rotary for 3 seconds to enter in the program menu, rotate the rotary to MAINTAINCE. 4. Enter in DECALCIFYING program and operation as the screen displays put a container which is over than L under the coffee export. 5. After the first cleaning, take out water tank and pour the rest water and clean water tank. Add fresh pure water again and install the water tank After the second cleaning, coffee machine starts preheating. Water line 7. After preheating, the third cleaning starts. 8. The screen shows READY decalcifying finishes. Coffee can be made now. 4 Daily descale comparison table Water hardless level Descale cycle around2~4weeks around4~6weeks around once per 2 months around once per 3 months


79 cleaning agent Use Kalerm cleaning agent only. It may damage machine if use other cleaning agent. The whole process costs about 0 minutes. 4.When machine in READY state, press rotary for 3 seconds to enter in the program menu, rotate the rotary to MAINTAINCE. 2. Press the rotaryl to enter the coffee machine maintenance menu, jog shuttle dial to " clean brew unit " page. 3. Press the rinse button to confirm wash into " clean brew unit ". 4. Follow screen prompts to clean brew unit, cleaning brew unit process, it needs to open the power cover, add cleaning tablets. 5. After cleaning, coffee machine enter the Ready state. The whole process costs about 2 minutes. 4.When machine in READY state, press rotary for 3 seconds to enter in the program menu, rotate the rotary to MAINTAINCE. 2. Press the rotaryl to enter the coffee machine maintenance menu, jog shuttle dial to " rinse milk unit " page. 3. Press the rinse button to confirm wash into " rinse milk unit ". 4. Follow the screen prompts to put the milk tube into the hole, press the button to start cleaning the milk unit. 5. After cleaning, coffee machine enter the Ready state.


80 5.2.4 Wipe the coffee machine Power off and pull out plug before clean the inside machine. Do not put the machine in the water to avoid electric shock Do not use metal object to clean the machine. Do not clean any components by dish-washing machine.. Clean drip tray Dry the 2 terminals and the end of the drip tray Clean water tank Clean water tank by flowing water.


81 3 3. Clean coffee bean container and the hopper Use dry rag or tissue clean rest oil inside bean container. Do not use water to wash bean container Clean hopper Use dry rag clean the channel of hopper. Do not use water to wash hopper channel Clear foam rubber Clear all the holes of the foam rubber and clean them by water. Clean all the parts by water

 and contropistone(")
 7 7.")

82 6 6. Clean the internal machine Clean base 2 3 Clean brew unit-coffee brewing box( position ) and contropistone( position 3 and position 2 is the back side) 7 7. Clean coffee machine. Use dry and soft rag to clean the appearance of the coffee machine.
Fully Automatic Coffee Machine OPERATION MANUAL
 Fully Automatic Coffee Machine OPERATION MANUAL Instructions of coffee machine parts 7 8 1 9 2 10 12 13 14 15 3 16 11 4 5 6 1 Bean container cover 9 Bean container 2 Water tank lid 10 Coffee spout 3 Water
Brew Group removal instructions for Jura C, E, and F series:
 Brew Group removal instructions for Jura C, E, and F series: Suitable for the following Jura Impressa models JURA all IMPRESSA E, F, and C: E-Line: E10 * E25 * E30 * E40 * E45 * E5 * E50 * E55 * E60 *
Hotpoint H/A - Ariston automatic, built-in coffee machine MCX 103 X - MCK 103 X/HA
 Hotpoint H/A - Ariston automatic, built-in coffee machine MCX 103 X - MCK 103 X/HA Automatic, built-in coffee machine Contents 1) Technical Specifications 2) Accessibility 3) Wiring diagram 4) Water circuit
1. IMPORTANT SAFEGUARDS When using electrical appliances, basic safety precautions should always be followed to reduce the risk of fire, electric
 1. IMPORTANT SAFEGUARDS When using electrical appliances, basic safety precautions should always be followed to reduce the risk of fire, electric shock, and/pr injury to persons including the following:
INSTALLATION AND WARRANTY CERTIFICATE. Machine model Serial Number # Rating and optional. Installation Company: Technician ID: Date: / /
 INSTALLATION AND WARRANTY CERTIFICATE Machine model Serial Number # Rating and optional Installation Company: Technician ID: Date: / / Water-Line Pressure: NOTE: over 5bar/70psi, a pressure regulator must
MODELS 1315 & 1315-S La Pavoni CLUB COMBO
 IMPORTANT WARNINGS MODELS 1315 & 1315-S La Pavoni CLUB COMBO DUET Never operate your espresso machine without water in the tank. This may cause premature pump failure. Do not allow the power cord to come
Jura S Series Grinder Replacing
 Lansdale, PA 19446 Phone: 215-361-7000 Fax: 215-361-7434 Jura S Series Grinder Replacing Please read before using this guide: This guide is for users who have know the use of fully automatic machines,
AS450, AS600, G1, SG630
 Grill Range Operating Manual Grill Range AS450, AS600, G, SG60 Product Range Also Includes: Induction Hobs / Combination Ovens / Pizza Ovens / Mixers Salamander Grills / Contact Grills / Pie Warmers /
SERVICE MANUAL EM Artista Espresso Machine ISSUE: DATE: 11 February EM5900 Artista Espresso Machine Issue: A Page 1 of 23
 SERVICE MANUAL EM59 5900 Artista Espresso Machine ISSUE: A DATE: 11 February 2008 EM5900 Artista Espresso Machine Issue: A Page 1 of 23 SPARE PARTS LIST Note: Not all parts are available as spare parts.
EP3559, EP3558 EP3551, EP3550
 Super automatic espresso machine 3100 series EP3559, EP3558 EP3551, EP3550 EN USER MANUAL DE BENUTZERHANDBUCH ES MANUAL DEL USUARIO FR MODE D EMPLOI IT MANUALE UTENTE NL GEBRUIKSAANWIJZING 1 EP3558, EP3550
COFFEE MAKER INSTRUCTION MANUAL CM4682-V
 COFFEE MAKER INSTRUCTION MANUAL CM4682-V IMPORTANT SAFEGUARDS Before using the electrical appliance, the following basic precautions should always be followed including the following: 1. Read all instructions.
TEA CATER USER MANUAL. UM_EN Part No.:
 USER MANUAL UM_EN Part No.: 1730080-02 CONTENT CONTENT... 2 GENERAL... 4 Introduction...4 Warnings...4 Precautions...4 Intended use...4 Facts & weight...5 General functional description...5 OVERVIEW OF
instructions COFFEE GRINDER KG 79/89
 instructions COFFEE GRINDER KG 79/89 DESCRIPTION OF APPLIANCE The following terms are used throughout the instruction manual Coffee-bean hopper lid Removable upper burr Coffee-bean hopper ON/OFF switch
Automatic Coffee Machine Instruction Manual
 Instruction Manual Page 1 of 17 8212-0 Automatic Coffee Machine Instruction Manual Instruction Manual Page 2 of 17 IMPORTANT INFORMATION For safety purposes please read these instructions carefully before
CHOCOLINO CAFÉLINO USER MANUAL UM_EN. Part No.: _01
 CHOCOLINO CAFÉLINO USER MANUAL UM_EN Part No.: 1764133_01 CONTENT CONTENT...2 GENERAL...4 Introduction...4 Warnings...4 Precautions...4 Intended use...4 Facts & weight...5 OVERVIEW OF COMPONENTS...6 CHOCOLINO/CAFÉLINO...6
SAFETY INSTRUCTIONS FOR USE
 INTRODUCTION Thank you for choosing this De Longhi Coffee machine. We hope you enjoy your new appliance. Please take a few minutes to read these instructions. This is the only way to ensure optimum results
User Manual. Stainless Steel Coffee Urns. Models: 177CU55ETL, 177CU110ETL 10/2016. Please read and keep these instructions. Indoor use only.
 Intertek Stainless Steel Coffee Urns Models: 177CU55ETL, 177CU110ETL 10/2016 Please read and keep these instructions. Indoor use only. www.avantcoequipment.com 1 NOTE: Save these instructions for future
IMPORTANT SAFEGUARDS. 3. To protect against fire, electric shock and injury to persons do not immerse cord, plug or unit in water or other liquid.
 IMPORTANT SAFEGUARDS When using electrical appliances, basic precautions should always be followed, including the following: 1. Read all instructions. 2. Make sure that your outlet voltage corresponds
Burr Grinder. Automatic burr grinder with 17-position grind selector. Instruction Booklet EM0430
 Burr Grinder Automatic burr grinder with 17-position grind selector Instruction Booklet EM0430 Please read these instructions carefully and retain for future reference. Contents Sunbeam s Safety Precautions
Get Started. Better Everyday ECAM23260
 Better Everyday Get Started This short guide is not intended to explain all the functions of the appliance. Please read all the owner s instruction booklet before use. Video available on www.youtube.com/delonghiusa
For Jura parts, repairs & tech support, contact: Services Unlimited, Inc./ Parts Guru
 For Jura parts, repairs & tech support, contact: Services Unlimited, Inc./ Parts Guru 209 Walnut street, Lansdale, PA 19446 Phone: 215-362-7000 Fax: 215-361-7434 email: sales@partsguru.com Online store
INSTALLATION & OPERATING GUIDE
 SURE TAMP STEAM INSTALLATION & OPERATING GUIDE BUNN-O-MATIC CORPORATION POST OFFICE BOX 3227 SPRINGFIELD, ILLINOIS 6278-3227 PHONE: (217) 529-661 FAX: (217) 529-6644 http://www.bunn.com/espresso/index.html
CafeRomatica NICR7.. Fully automatic coffee centre Operating Instructions and Useful Tips. A passion for coffee.
 CafeRomatica Fully automatic coffee centre Operating Instructions and Useful Tips NICR7.. GB A passion for coffee. 1 G F A M J / K A B C D E Display screen Left rotary knob Right rotary knob Bean symbol
User Manual. Stainless Steel Coffee Urn. Models: 177CU30 11/2018. Please read and keep these instructions. Indoor use only.
 Stainless Steel Coffee Urn Models: 177CU30 11/2018 Please read and keep these instructions. Indoor use only. www.avantcoequipment.com 1 NOTE: Save these instructions for future reference. Index Important
TECHNICAL INFORMATION CVA615 Coffee System
 TECHNICAL INFORMATION CVA615 Coffee System 2004 Miele - Table of Contents 1.0 CONSTRUCTION & DESIGN 1.1 Appliance Overview 1 1.1.1 Front View 1 1.1.2 Controls 1 1.1.3 Interior (Front of Appliance Open)
MANUAL FOR USE AND MAINTENANCE. Vivaldi LSC 008 REV. 01
 MANUAL FOR USE AND MAINTENANCE Vivaldi LSC 008 REV. 01 2 LSC 008 REV. 01 MANUAL FOR USE AND MAINTENANCE INDEX Chap. 1 GENERAL NOTES... page 4 1.1 PLATES... 4 1.2 GENERAL WARNINGS... 4 1.3 MACHINE OUTFIT...
User Manual. Stainless Steel Coffee Urns. Models: 177CU30, 177CU55, 177CU110 04/2018. Please read and keep these instructions. Indoor use only.
 Stainless Steel Coffee Urns Models: 177CU30, 177CU55, 177CU110 04/2018 Please read and keep these instructions. Indoor use only. www.avantcoequipment.com 1 NOTE: Save these instructions for future reference.
SAVE THESE INSTRUCTIONS THIS PRODUCT IS FOR HOUSEHOLD USE ONLY
 IMPORTANT SAFEGUARDS When using electrical appliances, basic safety precautions should always be followed, including the following: Read all instructions. Do not touch hot surfaces. Use handles and knobs.
2007 Miele USA. TECHNICAL INFORMATION CVA615 Coffee System
 2007 Miele USA TECHNICAL INFORMATION CVA615 Coffee System CVA615 Coffee System Table of Contents 1.0 Construction and Design...9 1.1 Appliance Overview...9 1.1.1 Front View...9 1.1.2 Controls...10 1.1.3
15-Bar Pump Espresso Maker Instruction Manual
 15-Bar Pump Espresso Maker Instruction Manual Styled for Life Designed & Engineered in New York City SZ-314289_CRUX006_15 bar Espresso maker_im_r3.indd 1 Thank you for Purchasing this Product You may already
EP5961, EP5960, EP5365 EP5364, EP5363, EP5361 EP5360
 Super automatic espresso machine 5000 series EP5961, EP5960, EP5365 EP5364, EP5363, EP5361 EP5360 EN USER MANUAL DA BRUGERVEJLEDNING DE BENUTZERHANDBUCH ES MANUAL DEL USUARIO FR MODE D EMPLOI IT MANUALE
USER MANUAL TECHNICAL DATA
 USER MANUAL TECHNICAL DATA Model: Easy Touch Operating Voltage: 240V AC Frequency: 50 Hz Power con, MAX : 1500W Water tank cap.: 700ml (0.7L) Weight: 5.0 kg Size: L 350 * W 155 * H 245 mm This appliance
DE MANUAL BENUTZERHANDBUCH SM7683, SM7680 SM6080/SM6081/SM7080/SM7081 USER MANUAL BENUTZERHANDBUCH BENUTZERHANDBUCH
 SM7686, USER MANUAL SM7685, SM7684 SM7683, SM7680 SM6080/SM6081/SM7080/SM7081 BENUTZERHANDBUCH USER MANUAL MANUAL IT MANUALE DEL USUARIO UTENTE DE MANUAL BENUTZERHANDBUCH DEL USUARIO MODE NL GEBRUIKSAANWIJZING
Instruction Manual Coffee Grinder. Kaffeemühle / Coffee grinder CM 70 Serie
 Instruction Manual Coffee Grinder Kaffeemühle / Coffee grinder CM 70 Serie Table of content Safety Instructions... 3 Before the first use... 4 Unpacking... 5 Requirements for the installation location...
Get Started. Better Everyday ECAM26455
 Better Everyday Get Started This short guide is not intended to explain all the functions of the appliance. Please read all the owner s instruction booklet before use. ECAM26455 WELCOME Introducing the
Scishare Coffee Machine
 User's Manual Scishare Coffee Machine Before using the product, read the user's manual carefully and keep it properly Scishare Congratulations! Meet your capsule coffee machine! 1 - Power button/coffee
PICOBARISTO HD8924 EN DE ES FR IT NL USER MANUAL BENUTZERHANDBUCH MANUAL DEL USUARIO MODE D EMPLOI MANUALE UTENTE GEBRUIKSAANWIJZING
 PICOBARISTO HD8924 EN DE ES FR IT NL USER MANUAL BENUTZERHANDBUCH MANUAL DEL USUARIO MODE D EMPLOI MANUALE UTENTE GEBRUIKSAANWIJZING 4219.460.3607.1 HD8924 SAECO_PICOBARISTO AMF_WE_COVER_A5_FC.indd 1 01-09-16
Type HD8753 USER MANUAL
 Register your product and get support at www.philips.com/welcome 02 English Type HD8753 USER MANUAL 02 EN PLEASE READ THIS USER MANUAL CAREFULLY BEFORE USING THE MACHINE. IMPORTANT SAFEGUARDS When using
EP5934, EP5930, EP5346 EP5345, EP5340, EP5335 EP5334, EP5333, EP5331 EP5330, EP5045, EP5040 EP5035, EP5034, EP5030
 Super automatic espresso machine 5000 series EP5934, EP5930, EP5346 EP5345, EP5340, EP5335 EP5334, EP5333, EP5331 EP5330, EP5045, EP5040 EP5035, EP5034, EP5030 EN USER MANUAL DA BRUGERVEJLEDNING DE BENUTZERHANDBUCH
IMPORTANT INSTRUCTIONS MODE D EMPLOI IMPORTANT INSTRUCIONES IMPORTANTES ISTRUZIONI IMPORTANTI
 MOKA 22-04-2003 10:10 Pagina 1 IMPORTANT INSTRUCTIONS SAVE THESE INSTRUCTIONS MODE D EMPLOI IMPORTANT CONSERVEZ LES PRESENTES INSTRUCTIONS INSTRUCIONES IMPORTANTES GUARDE ESTAS INSTRUCCIONES ISTRUZIONI
Sleeve Down: Frothing. Sleeve Up: Steaming
 Sleeve Down: Frothing Sleeve Up: Steaming 3 SPECIAL CORD SET INSTRUCTIONS Regarding your Cord Set: A. A short power-supply cord (or detachable power-supply cord) is to be provided to reduce risks resulting
PARTS DIAGRAMS ESI stocks a complete line of Franke parts. For parts order and inquiries, please contact the ESI parts department at
 PARTS DIAGRAMS ESI stocks a complete line of Franke parts. For parts order and inquiries, please contact the ESI parts department at 800-367-0235. BREW UNIT Position Description Part number 40 O-Ring Silicon
HD8847 HD8848 USER MANUAL. Super automatic espresso coffee machine 4000 series. Read carefully before using the machine.
 Super automatic espresso coffee machine 4000 series 02 USER MANUAL Read carefully before using the machine. HD8847 HD8848 02 English EN Register your product and get support at www.philips.com/welcome
ORIGINAL LINE A USER MANUAL
 USER MANUAL Machines with automatic water filling UM_EN Part No.: 1764024_01 CONTENT CONTENT... 2 GENERAL... 4 Introduction...4 Warnings...4 Precautions...4 Intended use...4 Facts & weight...5 General
Programmable Espresso Machine
 Programmable Espresso Machine 1.0 INFORMATION Description: Colour: Programmable Espresso maker with power save mode, integrated conical burr grinder with bean hopper (auto sealing to securely hold beans
EXPOBAR OFFICE MACHINES
 EXPOBAR OFFICE MACHINES Supplemental Instructions Includes brewing guide, frothing techniques and recipes. These are supplemental instructions for the Expobar Office Control, Pulser and Lever. They are
EP5315, EP5314 EP5313, EP5311 EP5310
 Super automatic espresso machine 5000 series EP5315, EP5314 EP5313, EP5311 EP5310 EN USER MANUAL DA BRUGERVEJLEDNING DE BENUTZERHANDBUCH ES MANUAL DEL USUARIO FR MODE D EMPLOI IT MANUALE UTENTE NL GEBRUIKSAANWIJZING
Type HD8754 USER MANUAL
 Register your product and get support at www.philips.com/welcome 02 English Type HD8754 USER MANUAL 02 EN PLEASE READ THIS USER MANUAL CAREFULLY BEFORE USING THE MACHINE. IMPORTANT SAFEGUARDS When using
User Guide TEA CATER. Your Dealer. U / EN Rev
 User Guide TEA CATER Your Dealer U / EN Rev 101115 1. Contents Tea Cater 1. Contents page 2 2. General 3 3. Function description 3 4. Start-up 3 5. Component overview 4 5. Function button overview 5-6
Coffee System Troubleshooting and Repair
 Coffee System Troubleshooting and Repair Page 30 CM24-1 Operation Sequence POWER ON/OFF When turning on the coffee system the brewer motor cycles once and the display reads Please Wait Heating, Once heating
This appliance can be used by children aged from 8 years and above and persons with
 IMPORTANT SAFEGUARDS Symbols used in these instructions Important warnings are identified by these symbols. It is vital to respect these warnings. Failure to observe the warning could result in life threatening
AUTOMATIC BEAN TO CUP COFFEE MACHINE
 AUTOMATIC BEAN TO CUP COFFEE MACHINE EB60 model USER GUIDE NZ AU GB IE CONTENTS Appliance parts 2 Safety and warnings 4 First use 9 Menu settings 13 Making coffee 17 Making cappuccinos and milk-based
Fully Automatic Coffee Machine OPERATION MANUAL. Item No
 Fully Automatic Coffee Machine OPERATION MANUAL Item No. 981010001 Italian fashion designs Once more excellent explanation of minimalist, abandon any worthless elements. With brief outlines, shows the
G F I M J K L B C D E S O T H Q P U N R D 4
 1 2 3 4 G F I A M J K L 5 6 7 B C D E 8 9 10 S O T H Q P U N R 11 12 D 4 Equipment GB A B C D E Text display (main menu) Rotary control knob Button > Button exit Height-adjustable coffee spout CafeRomatica
Nothing less - just the best!
 Nothing less - just the best! Key features Design Design-concept specially designed by one of the best Italian designer - Nicola Zanetti. Simple control Simple control panel allows you to prepare quickly
CMC DUO. Standard version. Table of contens
 CMC DUO Standard version O P E R A T I N G M A N U A L Table of contens 1 Terminal assignment and diagram... 2 2 Earthen... 4 3 Keyboards... 4 4 Maintenance... 5 5 Commissioning... 5 6 Machine specific
USER MANUAL. Fully-automatic Coffee Machine
 KGN IMPORTANT SAFEGUARDS When using electrical appliances, basic safety precautions should always be followed, including the following: 1. Read all Instructions.. Do not touch hot surfaces. Use handles
MODEL: POD BREWER AURORA SAF 68 HOMEMAKER ESPRESSO MAKER WITH COFFEE POD
 INSTRUCTION MANUAL Please read this Instruction Manual and the safety instructions before operating the appliance! MODEL: POD BREWER AURORA SAF 68 HOMEMAKER ESPRESSO MAKER WITH COFFEE POD Congratulation
 Register your product and get support at www.saeco.com/welcome 02 English Type HD8642 / HD8643 USER MANUAL 02 EN PLEASE READ THIS USER MANUAL CAREFULLY BEFORE USING THE MACHINE. IMPORTANT SAFEGUARDS When
USER MANUAL JOLLY PRESTIGE - COFFEE MACHINE
 SV JOLLY.pdf 1 17/10/2014 11:25 am USER MANUAL JOLLY PRESTIGE - COFFEE MACHINE SV JOLLY.pdf 1 20/10/2014 1:30 pm Contents Introduction... 02 Important safety precautions... 03 Description of external components...
OPERATING INSTRUCTIONS FOR YOUR SAFETY CAREFULLY READ THE OPERATING INSTRUCTIONS. FOR HOUSEHOLD USE ONLY
 OPERATING INSTRUCTIONS FOR YOUR SAFETY CAREFULLY READ THE OPERATING INSTRUCTIONS. FOR HOUSEHOLD USE ONLY 2 Opening Congratulations on choosing this high quality espresso machine and thank you for your
GIGA X7. Technical data. JURA standards. Variable brewing unit, from 5 g to 16 g. Intelligent Pre-Brew Aroma System (I.P.B.A.S. )
") JURA standards Variable brewing unit, from 5 g to 16 g Intelligent Pre-Brew Aroma System (I.P.B.A.S. ) Intelligent preheating Active bean monitoring Energy Save Mode (E.S.M. ) High-performance pump, 15
JURA standards Variable brewing unit, from 5 g to 16 g Intelligent Pre-Brew Aroma System (I.P.B.A.S. ) Intelligent preheating Active bean monitoring Energy Save Mode (E.S.M. ) High-performance pump, 15
Coffee Maker EC330 Please retain these instructions for future reference
 instructions Coffee Maker EC330 Please retain these instructions for future reference Coffee Maker 2 Thank you for choosing this coffee machine. To get the very best out of your new coffee machine it is
User manual COFFEE QUEEN. Tower 10 litre for wall mounting. Your retail dealer. U / GB Rev
 User manual COFFEE QUEEN Tower 10 litre for wall mounting Your retail dealer...... U / GB Rev 080522 1. Table of contents Tower wall mounting 1. Table of contents page 2 2. General 3 3. Function description,
HD8828 HD8834 USER MANUAL. Super automatic espresso coffee machine 3100 series. Read carefully before using the machine.
 Super automatic espresso coffee machine 3100 series 02 USER MANUAL Read carefully before using the machine. HD8828 HD8834 English 02 EN Register your product and get support at www.philips.com/welcome
AUTOMATIC BEAN TO CUP COFFEE MACHINE
 AUTOMATIC BEAN TO CUP COFFEE MACHINE EB60 model USER GUIDE NZ AU GB IE CONTENTS Appliance parts 2 Safety and warnings 4 First use 9 Menu settings 13 Making coffee 17 Making cappuccinos and milk-based
Matic / THa. Operating instructions COFFEE BREWER. Mode d emploi MACHINE À CAFÉ. Gebrauchsanleitung KAFFEEBRÜHMASCHINE
 Operating instructions COFFEE BREWER Mode d emploi MACHINE À CAFÉ Gebrauchsanleitung KAFFEEBRÜHMASCHINE Gebruiksaanwijzing KOFFIEZETAPPARAAT Bruksanvisning KAFFEBRYGGARE Bruksanvisning KAFFEMASKIN GB FR
Type HD8852 USER MANUAL
 Register your product and get support at www.philips.com/welcome 02 English Type HD8852 USER MANUAL 02 EN PLEASE READ THIS USER MANUAL CAREFULLY BEFORE USING THE MACHINE. IMPORTANT SAFEGUARDS When using
Instruction Manual Coffee grinder. CM 90 Serie
 Instruction Manual Coffee grinder CM 90 Serie Table of content Safety Instructions... 3 Before first use... 4 Unpacking... 4 Requirements for the installation location... 5 Operating and speed settings...
PLEASE READ THIS MANUAL BEFORE USE. SAVE FOR FUTURE REFERENCE.
 8-CUP STAINLESS STEEL CARAFE Coffee Brewer Model: BV1900TS HOUSEHOLD USE ONLY Customer Service Line: 1-855-664-1252 2-year limited warranty bonavitaworld.com Simple to operate Optional pre-infusion cycle
AUTOMATIC BEAN TO CUP COFFEE MACHINE
 AUTOMATIC BEAN TO CUP COFFEE MACHINE EB24 model USER GUIDE US CA CONTENTS Appliance parts 2 Safety and warnings 4 First use 7 Menu settings 11 Making coffee 15 Making cappuccinos and milk-based coffees
SAVE THESE INSTRUCTIONS
 22 IMPORTANT SAFEGUARDS When using electrical appliances, basic safety precautions should always be followed to reduce the risk of fire, electric shock, and/or injury to persons, including the following:
De Longhi Appliances via Seitz, Treviso Italia
 De Longhi Appliances via Seitz, 47 31100 Treviso Italia www.delonghi.com 5713222711/01.14 ECAM44.62X BEAN TO CUP ESPRESSO AND CAPPUCCINO MACHINE Instruction for use EN page 6 B B12 B11 B10 B9 B8 B1 B2
USER MANUAL USER MANUAL
 USER MANUAL USER MANUAL NESCAFÉ Version 0.6 GOLDBLEND BARISTA TPM9636 07.02.2018 Recommended with NESCAFÉ GOLDBLEND Eco&System packs. Experience the full range today.* Refillable products that can be used
Service Service. Gaggia Unica. Revision 00 June Coffee Machine RI Table of contents
 Coffee Machine RI 9933 Service Service Service Gaggia Unica Service Manual Table of contents Page 1. Introduction 1.1. Documentation required 1 1.2. Tools and equipment required 1 1.3. Material 1 1.4.
5KEK1322 W A_v08.indd 1 5/13/16 2:25 PM
 5KEK1322 W10878653A_v08.indd 1 PARTS AND FEATURES PARTS AND ACCESSORIES Tea steeper lid (center section of lid with handle) Kettle lid (outer section) Stainless steel lime scale filter Removable stainless
Built in Electric Fan Oven
 Built in Electric Fan Oven LAM3400 LAM3402 LAM3403 User & Installation Guide LAMONA The user manual will help you use your product quickly and safely. Index 01 - Before using the oven 05 07 - Cooking and
Type HD8851 USER MANUAL
 Register your product and get support at www.philips.com/welcome 02 English Type HD8851 USER MANUAL 02 EN PLEASE READ THIS USER MANUAL CAREFULLY BEFORE USING THE MACHINE. IMPORTANT SAFEGUARDS When using
A3 A4 A5 A10 A18 A19 A14 A13 A12 A15 A20 A7 A6 A21 A22 A23 A11 B7 B4 B5 B2
 5713216061/03.11 2 A A7 A6 A8 FR A3 A4 A5 A10 A18 A19 A2 A1 A14 A13 A12 A15 A16 A20 A17 A21 A23 A22 A9 A11 B B10 B11 B12 B6 B1 B7 B4 B5 B2 B8 B9 B3 3 2 1 1 2 3 4 5 6 7 8 9 10 11 12 13 14 15 16 4 FR 17
Operating Instructions
 Model KFA 903 KFR 903 KFA 1003 KFR 1003 KFA 103 KFR 103 KFA 1403 KFR 1403 Voltage / Serial No. Your service center............... 6440 A 99/03 page 1-15 Contents page 1 General 1.1 Warranty information
Triple Brew. Model #352. Coffee & Tea Maker. Instructions Warranty
 Triple Brew Coffee & Tea Maker Model #352 Instructions Warranty IMPORTANT SAFEGUARDS When using electrical appliances, basic safety precautions should always be followed, including: 1. Read all instructions.
Always here to help you
 Always here to help you Register your product and get support at www.saeco.com/welcome HD8758/57 HD8758-57_4219_460_3151_1_COVER_BOOKLET_A5_bl.indd 1 14/10/15 10:07 English 5 ESPRESSO 1 5 2 6 3 7 8 4
F G H
 HD7850 2 3 F G H 1 E D C B A I J K L 28 27 26 2 3 4 5 25 6 7 18 19 20 24 21 22 1 8 23 17 16 9 10 15 11 12 13 14 4 HD7850 English 6 6 English Introduction Congratulations on your purchase and welcome to
Lusso / Espresso Si' Models:PL-16 PAB-16. Made In Italy
 Lusso / Espresso Si' Models:PL-16 PAB-16 Made In Italy la pavoni - PL-16 & PAB-16 We recommend using freshly roasted espresso beans ground medium to fine. Fresh coffee will produce better tasting espresso.
A4 A5 A6 A7 A21 A20 A9 A10 A19 A11 A18 A12 A13 A17 A14 A16 A23 A15 B2 B3B4 B5B6 B8 B9 B12 B13 B14 B15 B10 B11
 5713212551/06.09 2 A3 A4 A5 A6 A7 A2 A1 A8 A21 A20 A19 A9 A10 A11 A18 A17 A12 A13 A14 A16 A23 A15 B2 B3B4 B5B6 B1 B7 B8 B9 B11 B12 B13 B14 B15 B10 3 1 2 3 4 5 6 7 8 9 10 11 12 13 14 15 4 16 17 18 19 20
Register your product and get support at HD8759/ _460_3143_1_DFU-Simple_A5_v2.indd 1 13/10/15 10:57
 Register your product and get support at www.saeco.com/welcome HD8759/47 4219_460_3143_1_DFU-Simple_A5_v2.indd 1 13/10/15 10:57 English 5 ESPRESSO 1 5 2 6 3 7 8 4 9 10 11 12 13 MILK FROTH 19 14 ESPRESSO
INDEX 1. INTRODUCTION. Dear client:
 INDEX 1. Introduction 2. Important Safeguards 3. Preparation 4. Making Espresso 5. Preparing Cappuccino 6. Making Tea 7. Cleaning the Machine 8. BRIEL Technology (The AQUASTOP System) 9. Troubleshooting
Built-in Coffee Machine Use and Care Manual
 CM02X Built-in Coffee Machine Use and Care Manual Nov 07 Contents DESCRIPTION OF THE MACHINE P. 3 Controls P. 3 Safety instructions and warnings P. 4 Use P. 5 DESCRIPTION AND OPERATION P.6 INST ALLA TION
Micro Casa Semiautomatica
 Micro Casa Semiautomatica Training Manual Contents Overview 1 Models 1 Specifications 1 Features 1 Available accessories 1 Package contents 2 Semiautomatic parts 3 Assembly 4 Operating instructions 4 Starting
What's in the box 2 ENGLISH
 Congratulations on your purchase, and welcome to Philips! To fully benefit from the support that Philips offers, register your product at www.philips.com/welcome. Read this user manual carefully before
Recommended with NESCAFÉ GOLD. Experience the full range today.*
 US E R M AN UAL Recommended with NESCAFÉ GOLD. Experience the full range today.* NESCAFÉ GOLD BLEND A premium blend of Arabica beans that are golden roasted to perfection. Delivers a smooth cup with juicy
INDEX INTRODUCTION...7. SAFETY...7 Fundamental safety warnings...7 Designated use...8 Instructions...8
 INDEX INTRODUCTION...7 Symbols used in these instructions...7 Letters in brackets...7 Troubleshooting and repairs...7 SAFETY...7 Fundamental safety warnings...7 Designated use...8 Instructions...8 DESCRIPTION...8
Getting to Know Your Bananza
 User Guide Thank you for purchasing Bananza from JML. To get the best results from this frozen dessert maker, please read these instructions in full and retain for future reference. Contents Safety Warnings
PARTS CATALOG ESPRESSO EP SYSTEM
 PARTS CATALOG ESPRESSO_EP_Parts_Catalog_USA_V1.0 - p1-4 1 Contents DIMENSIONS 3 SPECIFICATIONS 4 ESPRESSO TAP 5 ESPRESSO MODULE 9 ESPRESSO_EP_Parts_Catalog_USA_V1.0 - p1-4 2 137 mm 5.4 in. 414 mm 16.3
Instructions. CONTENTS INTRODUCTION...7 Symbols used in these instructions...7 Letters in brackets...7 Troubleshooting and repairs...
 Instructions COFFEE AND CAPPUCCINO MAKER FR Français DE Deutsch PT Português IL English NL Nederlands GR Ελληνικά Italiano ES Espãnol RU Русский CONTENTS INTRODUCTION...7 Symbols used in these instructions...7
Type HD8953 / HD8954 USER MANUAL
 Register your product and get support at www.philips.com/welcome 02 English Type HD8953 / HD8954 MANUAL 02 EN PLEASE READ THIS MANUAL CAREFULLY BEFORE USING THE MACHINE. IMPORTANT SAFEGUARDS When using
Coffee Burr Grinder. Model #559. Instructions. Warranty
 Coffee Burr Grinder Model #559 Instructions Warranty IMPORTANT SAFEGUARDS When using electrical appliances, basic safety precautions should always be followed, including the following: 1. Read all instructions.
Operating and Installation Instructions
 Operating and Installation Instructions Coffee System CVA 4062 CVA 4068 To prevent accidents en - US, CA and appliance damage read these instructions before installation or use. M.-Nr. 07 816 880 Contents
Operating Instructions
 MAHLKÖNIG GmbH & Co. KG Operating Instructions K30 ES, K30 Vario, K30 Competition Manual Dear customer / service personnel The Single Espresso Grinder K30ES ", is a fully automatic espresso coffee grinder
IMPRESSA XJ5 Professional Instructions for Use. Original instructions for use Before using the machine read the instructions for use.
 IMPRESSA XJ5 Professional Instructions for Use KE Original instructions for use Before using the machine read the instructions for use. JURA Type 684 Table of contents Your IMPRESSA XJ5 Professional Control